15 Small Kitchen Storage Ideas for Renters (October 2026)
If you rent a kitchen with no pantry, four feet of counter and a lease that says do not drill, these 15 small kitchen storage ideas for renters are built around one test: does it come back out at move-out without a hole, a paint chip or an adhesive stain. Every idea below is tension-mounted, hook-over, adhesive, or freestanding, and every one of them works in a kitchen with no upper cabinets, which is where most rental kitchens run out of room first.
Renter-friendly storage is any organizer that adds capacity to a small kitchen without permanent hardware. In practice that means four mounting methods: tension, where a spring-loaded rod presses between two surfaces, adhesive, where a strip carries the weight, hook-over, where the product hangs on the edge of a door or cabinet, and freestanding, where it stands on the floor and needs the wall for nothing at all. The first and last are the safest. Adhesive is useful but fussy, and I cover the removal details further down.
Contents
Updated for 2026. Costs are US ranges and they vary by region, so treat them as a guide rather than a quote.
15 Small Kitchen Storage Ideas for Renters at a Glance
| Idea | Adds space where | Cost | Difficulty | Time |
|---|---|---|---|---|
| 1. Under-cabinet tension shelf | Dead space under wall cabinets | Low | Easy DIY | 20 minutes |
| 2. Magnetic utensil strip | Blank backsplash or cabinet side | Low | Easy DIY | 15 minutes |
| 3. Adjustable shelf risers | Vertical space inside cabinets | Low | Easy DIY | 10 minutes |
| 4. Over-the-door organizer | The back of a cabinet door | Mid | Easy DIY | 20 minutes |
| 5. Non-slip shelf liners | Grip and cleanability on shelves | Low | Easy DIY | 10 minutes |
| 6. Countertop organizer | Daily-use items off the work surface | Mid | Easy DIY | 15 minutes |
| 7. Narrow rolling cart | Gap beside the fridge | Mid | Easy DIY | 10 minutes |
| 8. Pull-out pantry baskets | Lower cabinet dead zone | Low | Easy DIY | 30 minutes |
| 9. Above-the-fridge zone | Ignored space over the appliance | Mid | Easy DIY | 30 minutes |
| 10. Peel-and-stick backsplash | Wall protection plus a hook surface | Mid | Easy DIY | 1 hour |
| 11. Vertical pot-lid storage | Crowded cookware cabinet | Low | Easy DIY | 15 minutes |
| 12. Over-sink drying rack | Drying space with no counter used | Mid | Easy DIY | 30 minutes |
| 13. Sink-side caddy | Soap and sponges off the counter | Low | Easy DIY | 15 minutes |
| 14. Clear labeled bins | Pantry-less cabinet shelves | Low | Easy DIY | 1 weekend |
| 15. Freestanding shelf unit | Display and cookbook storage | High | Easy DIY | 45 minutes |
What the cost and difficulty ratings mean
Low usually means pocket change, the sort of thing you add to a cart while buying dish soap. Mid is a real purchase but well within a month’s grocery budget. High means you are buying a piece of furniture, and it is the only category here that will not fit in a moving box.
Easy DIY means no tools beyond your hands. Moderate DIY, if you see it in a plan below, means a screwdriver or a step ladder. You will not see Hire a pro on this list, and that is deliberate: none of these jobs touch plumbing, gas, wiring or structure.
The four mounting methods, and what each one costs you at move-out
- Tension-mount: a spring or screw rod presses between two surfaces. Nothing is touched. It can mark paint if you overtighten a screw model, so turn by hand and stop when firm.
- Freestanding: the product stands on the floor or the counter. Zero risk to the wall, and it is the only method that works in a kitchen with no cabinets at all.
- Hook-over: the product hangs on a door edge or cabinet lip. Safe as long as you check the door swing and the clearance above it.
- Adhesive: a strip carries the load. Fast and tidy, but it is the one method that can leave residue or lift paint if you hang something heavy or pull it off cold.
1. Install No-Drill Under-Cabinet Storage
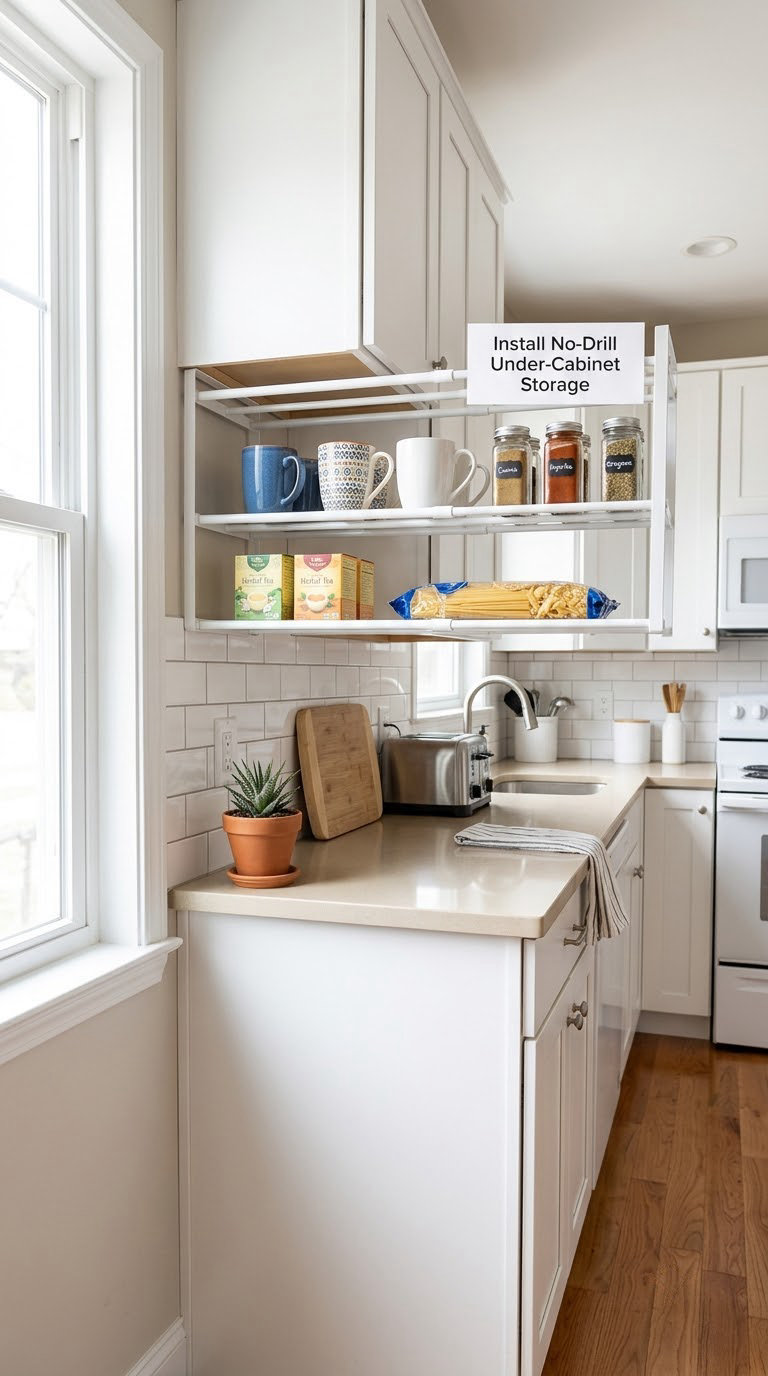
That 4 inch strip of wall between the top of your wall cabinets and the counter is the most wasted square footage in most rental kitchens. A tension rod with a small shelf, or a set of adhesive under-cabinet hooks, turns it into a second shelf for mugs, glasses, spice jars and foil.
How to do it:
- Measure the gap between the cabinet bottom and the counter, and buy for the gap minus half an inch if the model expands.
- Wipe the cabinet bottom with a damp cloth and let it dry fully. Adhesive hooks will not hold on a dusty or greasy surface.
- For a tension shelf, push the rod in and twist to shorten it until firm, then load lightly for a day before adding anything heavy.
- Keep the load under 15 pounds on adhesive hooks and under 25 on a steel tension shelf. Mugs and jars, not the stand mixer.
Cost: Low, roughly ten to twenty-five dollars. Difficulty: Easy DIY. Time: 20 minutes.
Good to know: Renters on r/Apartmentliving warn about the same failure: a heavy item on one adhesive hook drags three more off the wall. Test the weakest hook with a full mug for 24 hours before you trust it.
2. Use Magnetic Strips for Everyday Utensils
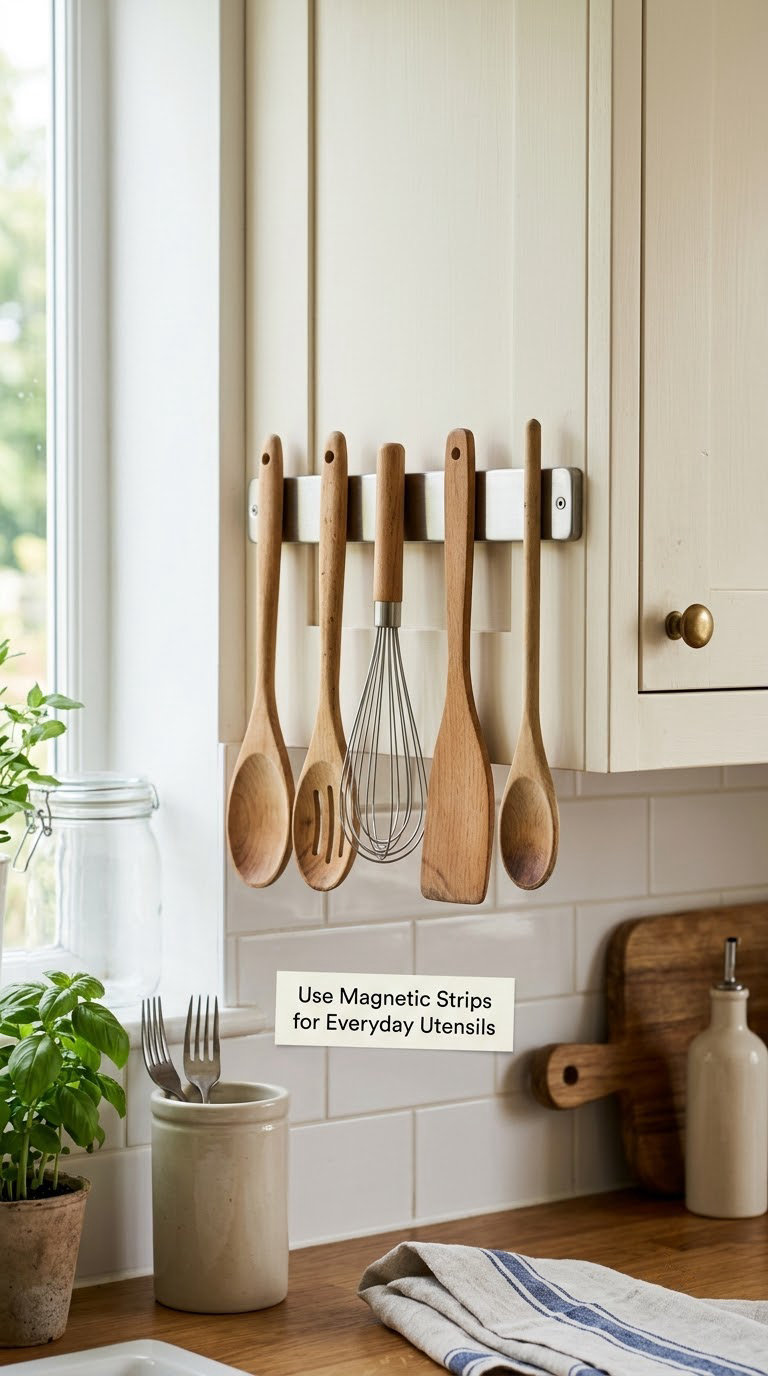
A magnetic strip on the side of a cabinet or the 2 inch of wall beside the fridge turns the tools you reach for daily into visible storage instead of a drawer you have to dig through. It also clears the one utensil drawer most kitchens have.
How to do it:
- Pick a strip at least as long as your longest utensil, usually 12 to 18 inches, and choose neodymium if you plan to hang metal tongs.
- Stick or screw it to a cabinet side, never to a backsplash panel you might replace later.
- Space tools 1 inch apart so handles do not clatter together.
- Hang only tools with solid metal in them. Wooden spoons and plastic-handled spatulas drop straight to the floor.
Cost: Low, ten to thirty dollars. Difficulty: Easy DIY. Time: 15 minutes.
Good to know: Magnetic strips are safer on the fridge side than on drywall because the metal gives the adhesive a solid back. If you have a stainless fridge, this becomes the single easiest win on the list.
3. Add Removable Shelf Risers for Vertical Storage
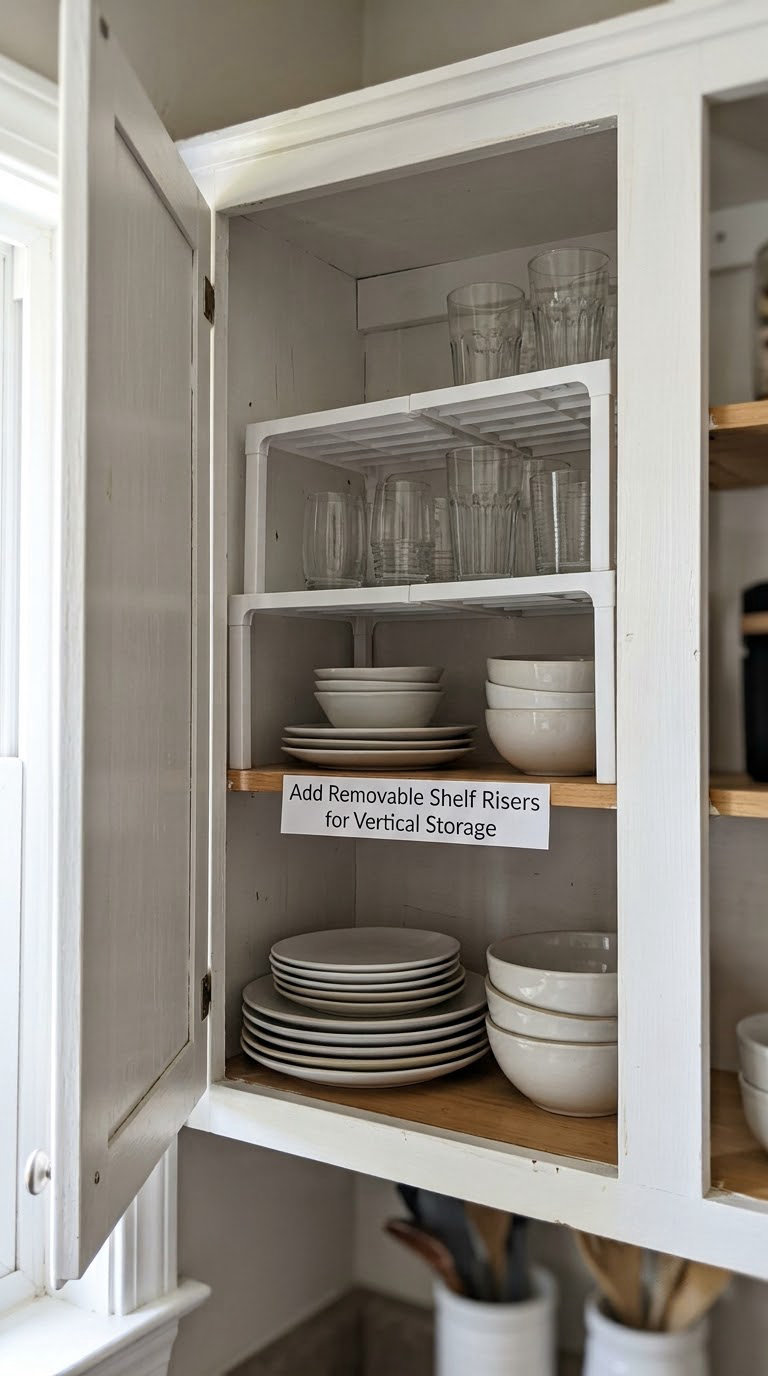
Most kitchen cabinets are built around a standard shelf height, which means the bottom third of every cabinet sits empty. A shelf riser lifts the existing shelf and creates a second level, and it is the cheapest way to add real capacity to a kitchen with no pantry.
How to do it:
- Measure the interior height of your tallest cabinet and the depth front to back, not the outside of the box.
- Choose risers at least as deep as the shelf above so nothing overhangs into the door.
- Set them on the cabinet floor, level front to back, then rest the original shelf on top and check that the door still closes without forcing.
- Put tall and flat items below, everyday mugs and glasses above, where you can see them.
Cost: Low, twelve to thirty dollars for a set. Difficulty: Easy DIY. Time: 10 minutes.
Good to know: If your cabinet already has a shelf with a lip or a light fixture underneath, skip that cabinet. The riser will not fit and you will force the door closed every day.
4. Hang a Cabinet-Door Organizer Without Drilling
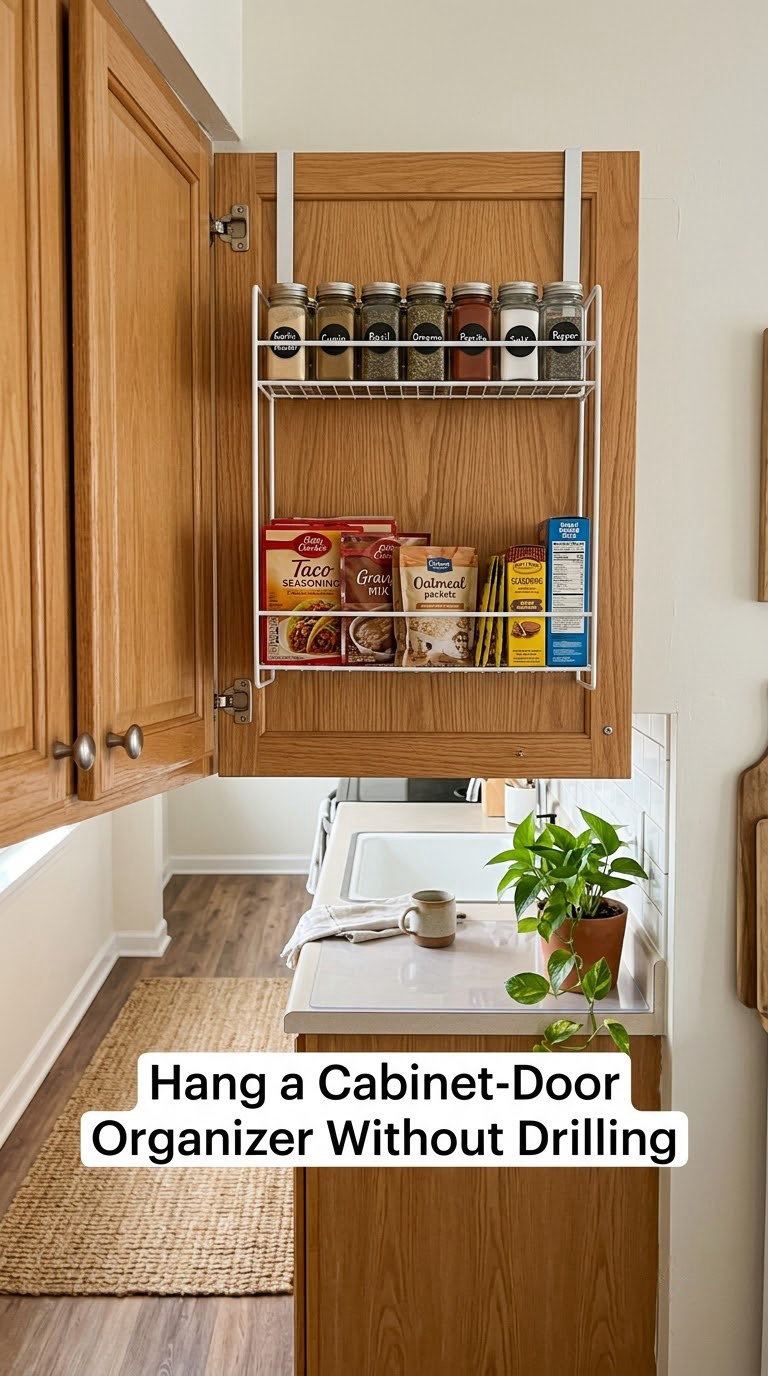
The inside face of a cabinet door is flat, unused and rarely tall enough for anything on its own. An over-the-door organizer turns it into narrow vertical storage for spice jars, wraps, mix packets or a small cleaning kit, and it comes out at move-out with the door.
How to do it:
- Open the door fully and check what is above it inside the cabinet. Anything hanging past the top shelf will hit the organizer.
- Measure door thickness, usually 1.5 to 1.75 inches, and pick an organizer whose pocket depth clears the shelf lip.
- Hang it so the lowest pocket sits above the top shelf edge.
- Walk past the kitchen a few times to confirm the door still opens past the handle of the fridge or a nearby wall.
Cost: Mid, twenty to forty dollars. Difficulty: Easy DIY. Time: 20 minutes.
Good to know: If your cabinet doors swing into the walkway, this is the wrong tool. In a galley kitchen with a four-foot aisle, an over-door bin is the fastest way to make the space feel smaller.
5. Replace Cabinet Shelf Liners with Non-Slip Inserts
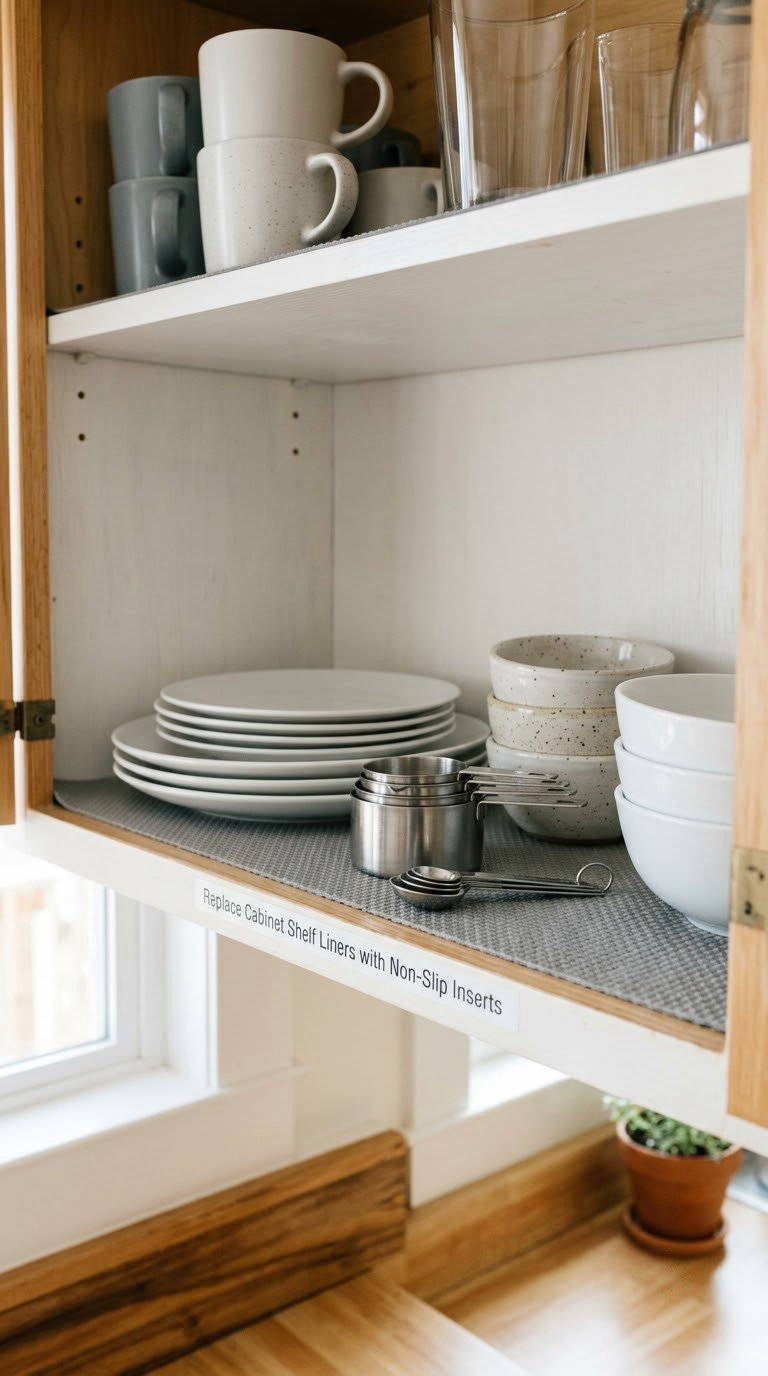
This one adds zero new space and fixes the reason space feels unusable. Glassware slides, a plate stack collapses forward, and every shelf needs a scrub to get anything out from underneath. A removable liner grips items and lifts out for cleaning.
How to do it:
- Measure each shelf separately and cut to fit, leaving a quarter inch of slack at the back so the door clears.
- Choose a cushioned or textured liner rather than a flat plastic sheet if you store glassware.
- Set heavier items toward the back of the shelf so a sliding door cannot tip them.
- Pull the liner out, rinse it, and lay it flat to dry. A damp liner under heavy pots grows mold.
Cost: Low, eight to twenty-five dollars. Difficulty: Easy DIY. Time: 10 minutes.
Good to know: Skip the adhesive-backed liners on cabinet interiors. They bond to the shelf, then tear the clear finish when they age. Lay a plain liner in instead and it comes out cleanly.
6. Add a Freestanding Countertop Organizer
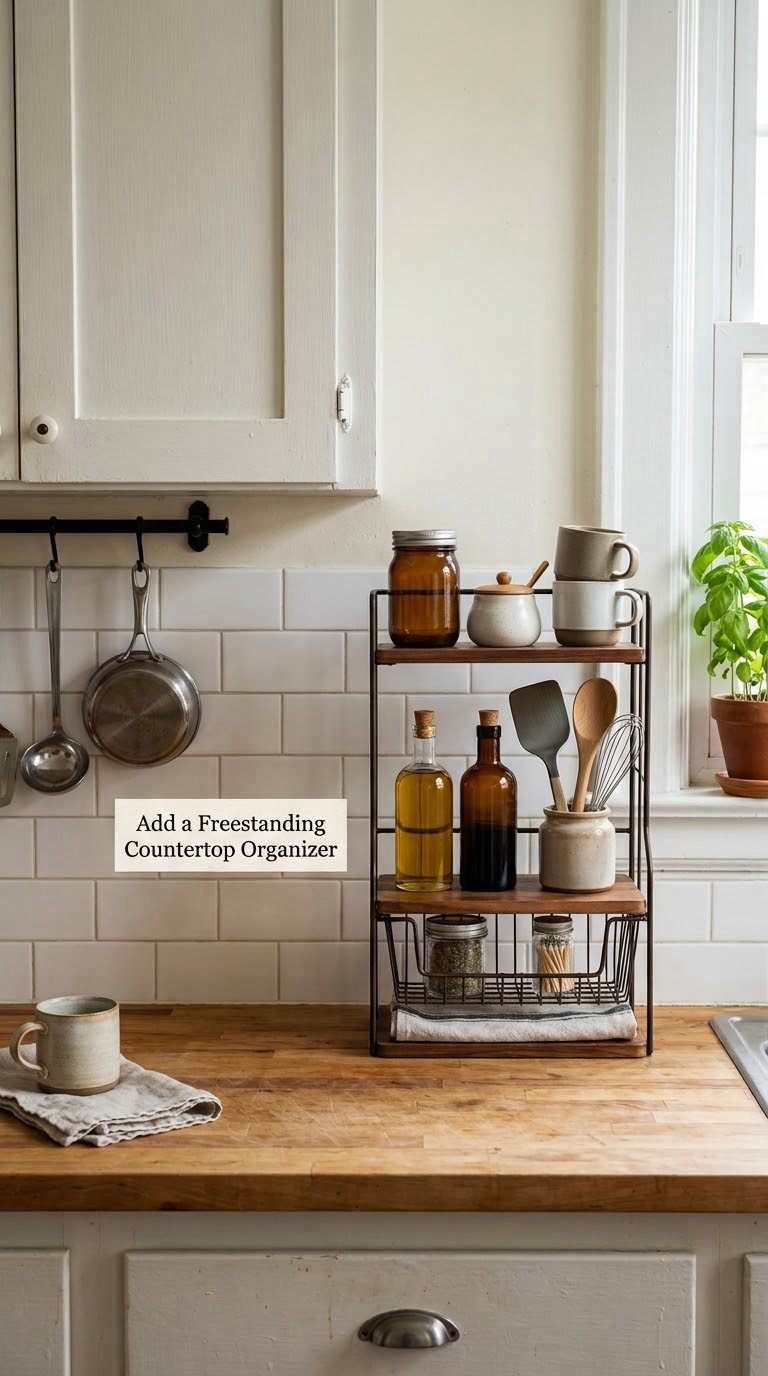
Counter space in a rental kitchen is often four feet by two feet, and half of that is sink. A narrow countertop organizer moves the daily clutter to a defined footprint so you can clear the surface in one sweep instead of putting things away one at a time.
How to do it:
- Measure the longest clear run of counter between the sink and the stove.
- Pick an organizer no deeper than 8 inches so it never blocks a faucet or a burner edge.
- Group by task: coffee and mugs on one end, oils and vinegar on the other, knives in a block if they do not fit on a wall.
- Set it against the backsplash so the back row is reachable from the side.
Cost: Mid, twenty to fifty dollars. Difficulty: Easy DIY. Time: 15 minutes.
Good to know: Two-tier models hold twice the items in the same footprint, but check the upper tier clears your cabinet underside. Most kitchen cabinets sit about 18 inches above the counter.
7. Use a Rolling Cart for Flexible Storage
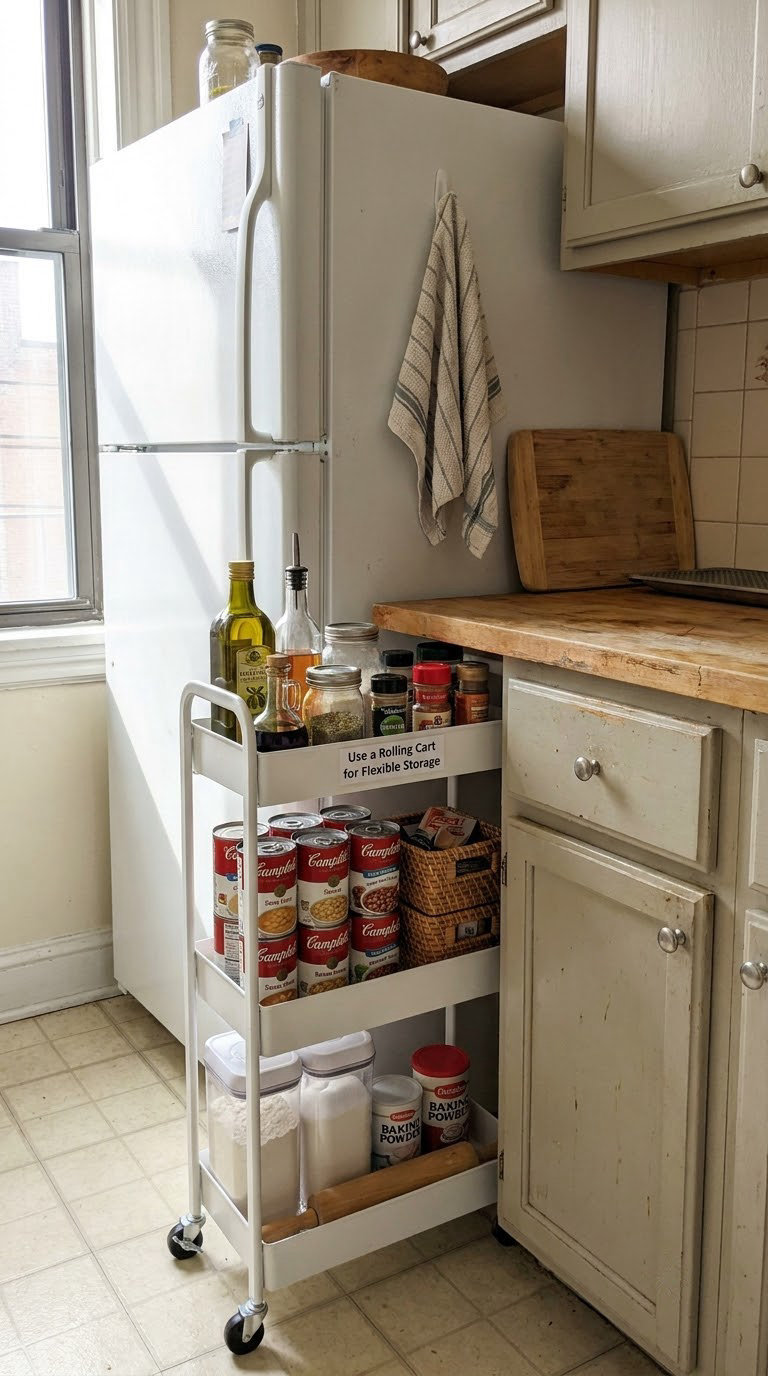
A slim rolling cart is the most flexible renter upgrade there is. It works in the gap beside the fridge, beside the range, or parked under a folding table, and it moves with you when you rearrange instead of being screwed to a wall.
How to do it:
- Measure the gap between the fridge and the wall or cabinet, and subtract an inch for the handle.
- Choose a cart no wider than that gap and check the casters, rubber wheels roll quieter on hard floors than plastic.
- Load heavy cans on the bottom tier and light baking supplies on top.
- Keep the total under the cart’s rated load, and never park it where it narrows a walkway below about 30 inches.
Cost: Mid, thirty to seventy dollars. Difficulty: Easy DIY. Time: 10 minutes.
Good to know: People on r/organization point out that a cart is only useful if you are willing to roll it back. A cart parked permanently in the walkway is just a shelf with worse manners.
8. Create a Pull-Out Pantry with Removable Baskets
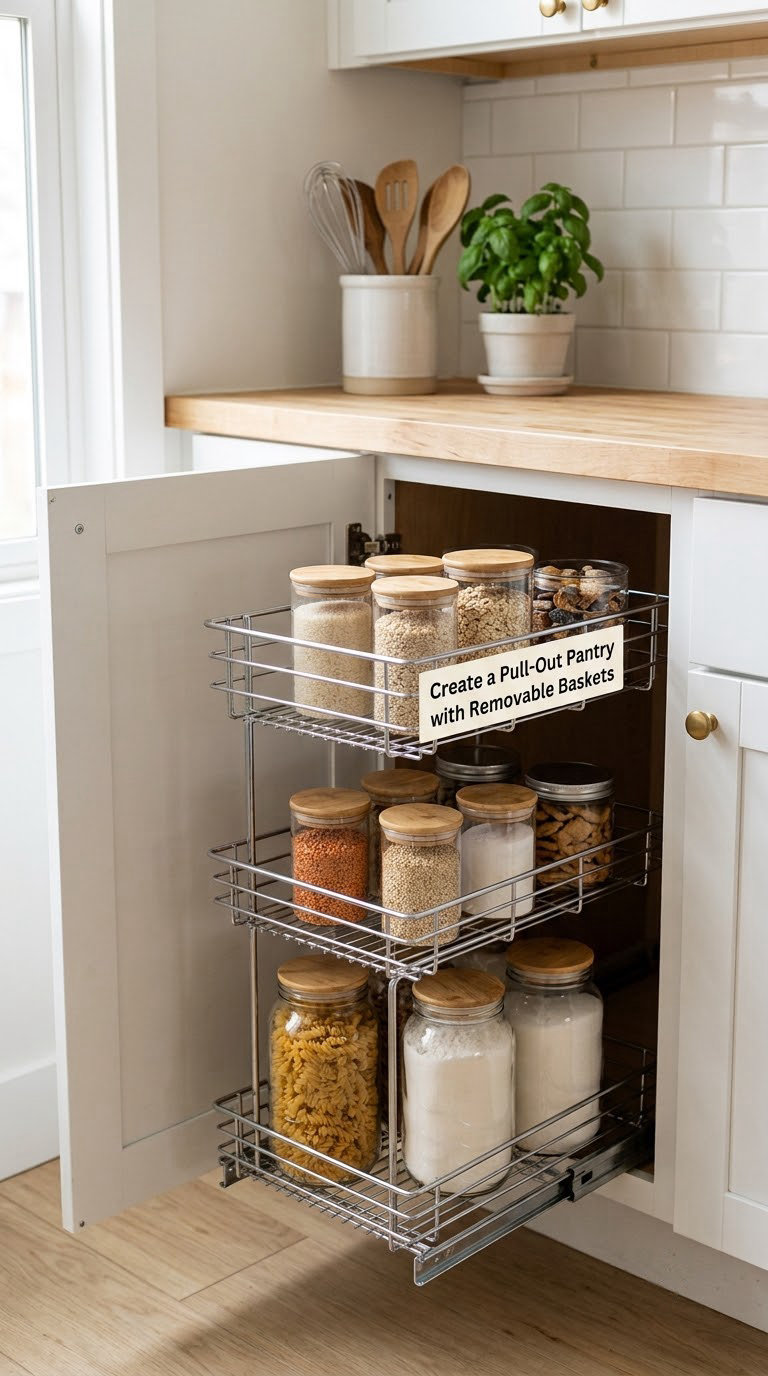
Back-of-cabinet floor space is the deepest storage in a rental kitchen, and almost nobody uses it. Two slide-out baskets turn the back third of a lower cabinet into a pull-out pantry for dry goods, snacks and baking supplies, with no hardware removed and nothing drilled.
How to do it:
- Measure the cabinet interior depth and subtract 4 inches, since the baskets need pull-out clearance.
- Choose stackable or single-level baskets sized under 12 inches wide so you can slide them past the cabinet face.
- Load the heaviest jars low and toward the back, and put daily-use snacks at eye level.
- Slide each basket all the way out before you unload a cabinet, so the back row does not become a junk drawer.
Cost: Low, fifteen to forty dollars a basket. Difficulty: Easy DIY. Time: 30 minutes.
Good to know: Check the pipes and the cabinet hinge before you commit. In older rental kitchens the drain trap sits dead center at the back, and a basket that hits it will not slide.
9. Maximize the Space Above the Refrigerator
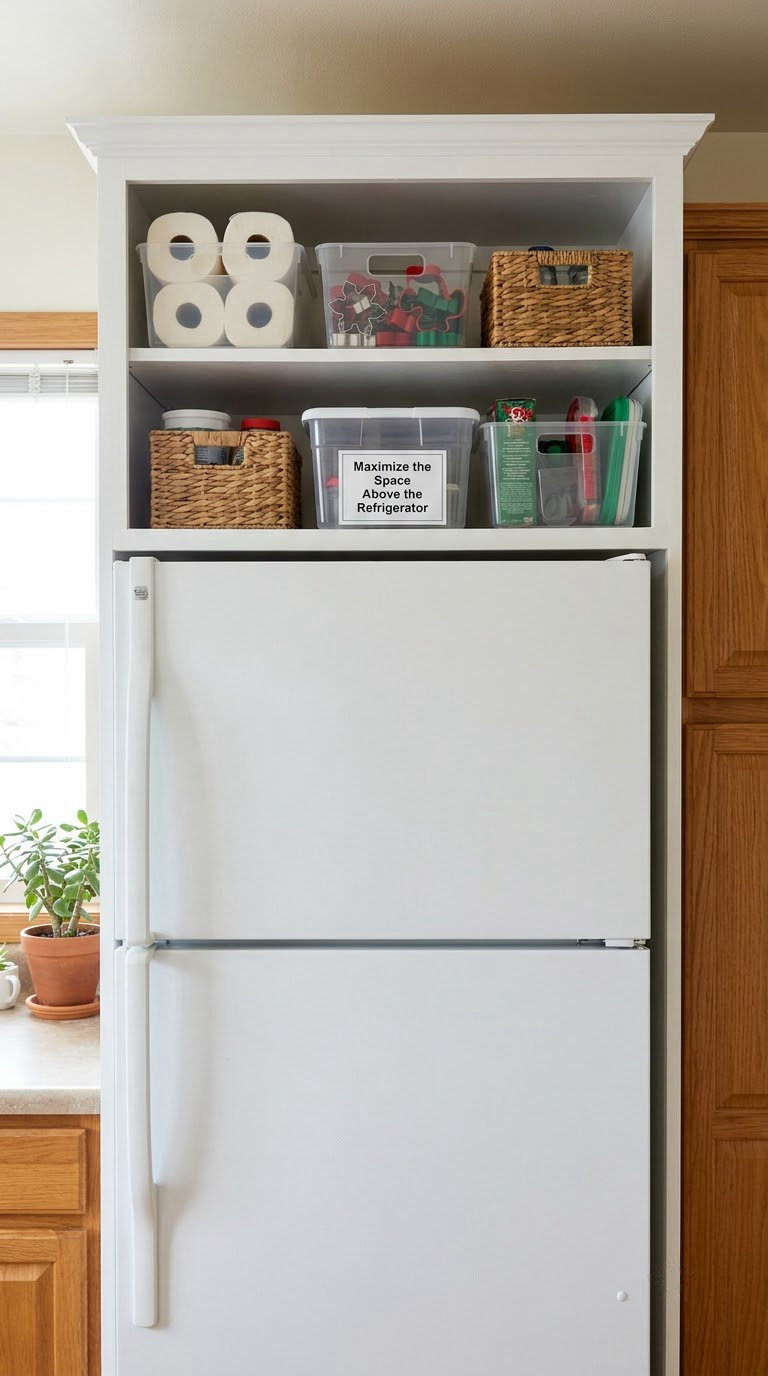
Nobody wants the top of the fridge, which is exactly why it works. With a 10 to 14 inch gap above a standard-height appliance, a riser cabinet or two slim shelves create storage for the bulky, rarely used things that currently squat in a lower cabinet.
How to do it:
- Measure the height between the fridge top and the wall or cabinet above, and buy a riser that leaves an inch of ventilation at the back.
- Check that the fridge can still open fully, and that the hinge does not catch the shelf.
- Keep the load light. Holiday storage containers and spare bowls, not a case of water bottles.
- Push items to the back of the top shelf, away from the front edge, and label bins so you can see what is there without climbing.
Cost: Mid, thirty to sixty dollars. Difficulty: Easy DIY. Time: 30 minutes.
Good to know: Nothing goes on a fridge that vibrates. A compressor running under a shelf of glass jars is a bad afternoon, and the residue never fully comes off the finish.
10. Install a Peel-and-Stick Tile-Style Backsplash
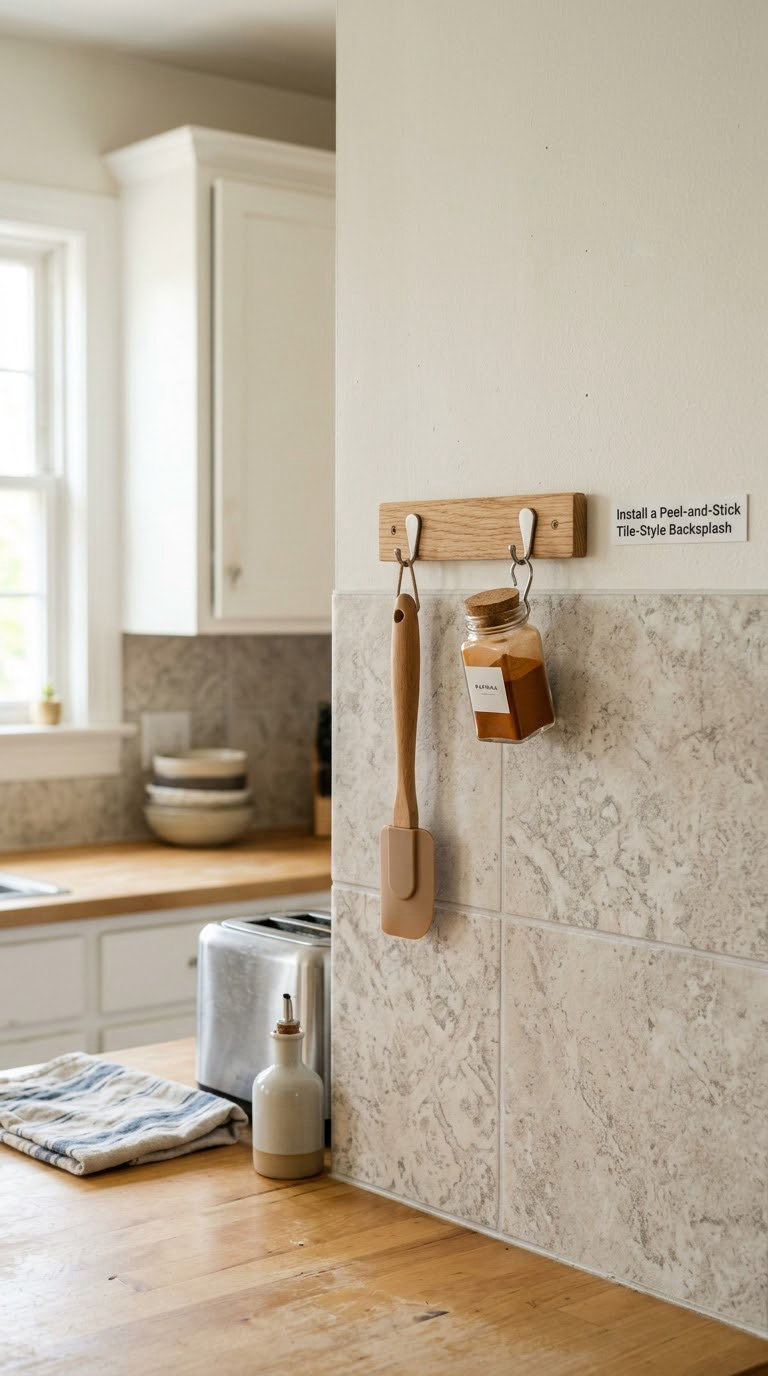
A peel-and-stick backsplash sheet does two jobs at once. It protects the wall behind the stove, and it gives adhesive hooks a smooth, clean, flat surface to grip, which bare painted drywall never gives you.
How to do it:
- Clean the wall with a degreaser and let it dry overnight. Adhesive fails on grease and moisture.
- Tape the sheet layout before you peel anything, and start from the lowest visible edge so cuts are at the bottom.
- Apply at room temperature, roughly 68 to 75 degrees Fahrenheit, and press each panel flat with a plastic card.
- Wait 72 hours before mounting anything on top of it, and keep hooks under 5 pounds.
Cost: Mid, twenty to fifty dollars for a typical wall run. Difficulty: Easy DIY. Time: 1 hour.
Good to know: Test a corner square for 24 hours before you commit to a full wall. Older paint that has already started to flake will take the sheet and a layer of paint with it, and that is a landlord conversation you do not want.
11. Add Removable Pot-Lid Storage Inside Cabinets
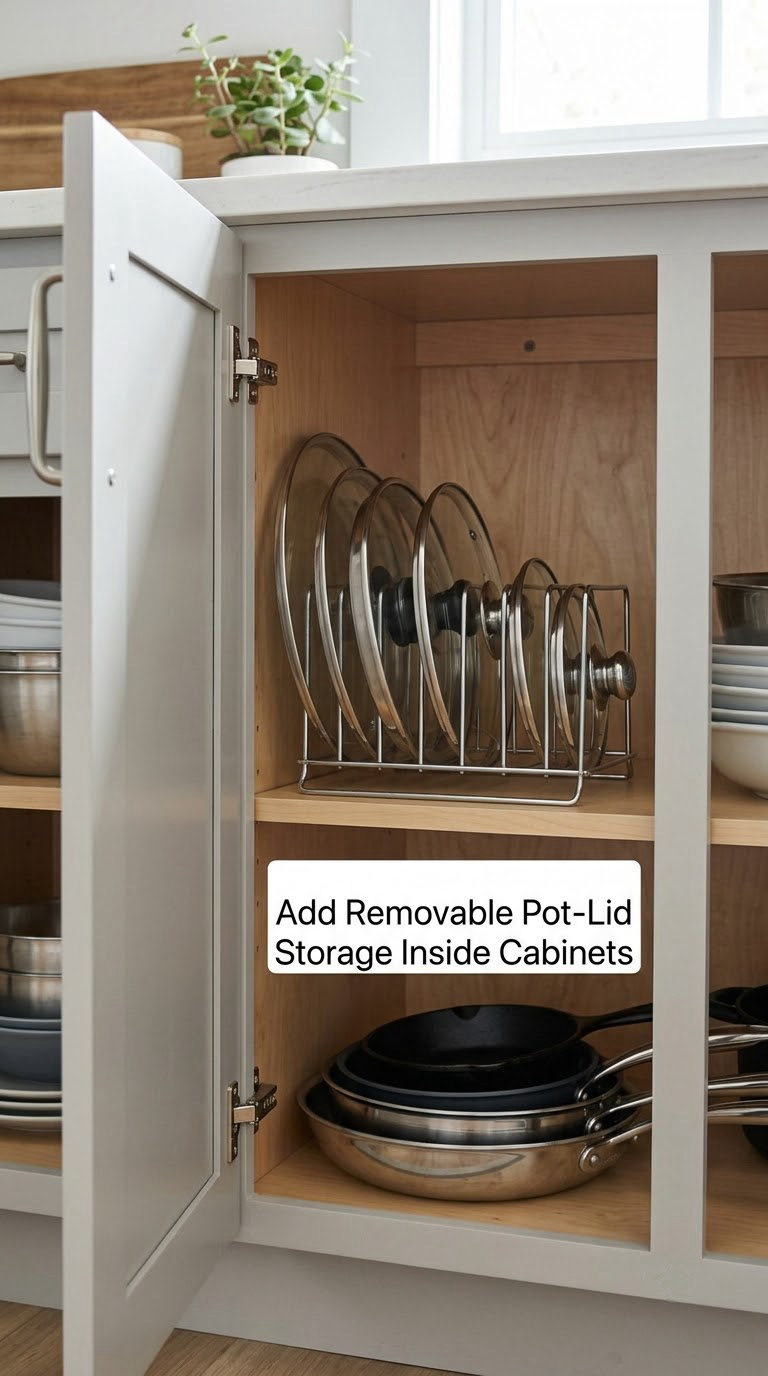
A cookware cabinet fails because lids have no home. They lean, they slide, and they turn a stack of eight pans into a dig. A door-mounted rack, a tension bar, or vertical dividers put every lid upright where you can see it.
How to do it:
- Measure the cabinet door interior width and the space between the door and the shelves.
- Choose a tension bar or divider model that clears the door hinge when the door swings.
- Slot lids in largest to smallest, handle ends all facing the same way so they read as a set.
- Stack pans flat below, biggest at the bottom, and check the door closes without pressing on the lid rims.
Cost: Low, ten to thirty dollars. Difficulty: Easy DIY. Time: 15 minutes.
Good to know: Skip glass lids in any rack that sits near the heat of the range. Vertical storage is fine, but not in a cabinet the oven door opens against.
12. Use a Wall-Mounted or Over-Sink Drying Rack
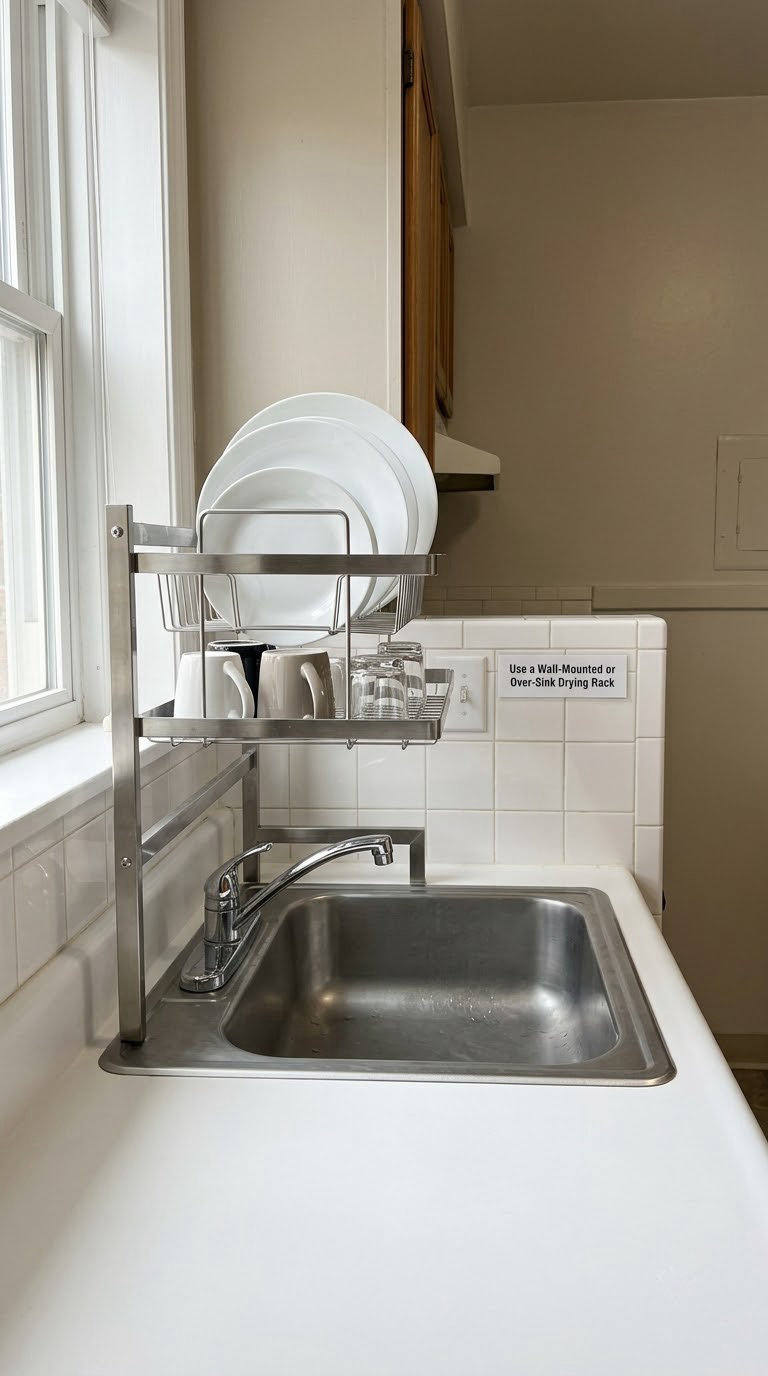
Drying space is one of the first things to vanish in a small kitchen, and it comes back the moment you stop dedicating half a counter to it. An over-sink rack or a suction-mounted wall rack puts clean dishes exactly where they dry best, without using a single inch of counter.
How to do it:
- Measure your sink across the rim and the cabinet height above it. Most over-sink racks need 7 to 10 inches of clearance under an upper cabinet.
- Check the sink is empty before you assemble anything that spans it, and never leave a loaded rack hanging over a sink full of water.
- For a suction wall rack, set it on smooth tile or glass. Suction does not hold on textured or painted drywall.
- Stay under 20 pounds on an over-sink rack and check that it clears the faucet swing.
Cost: Mid, twenty to sixty dollars. Difficulty: Easy DIY. Time: 30 minutes.
Good to know: If your landlord or lease restricts anything on the walls, the over-sink style is the safe pick. It also travels with you and stores flat against a cabinet door.
13. Add a Narrow Cart or Bin Beside the Sink
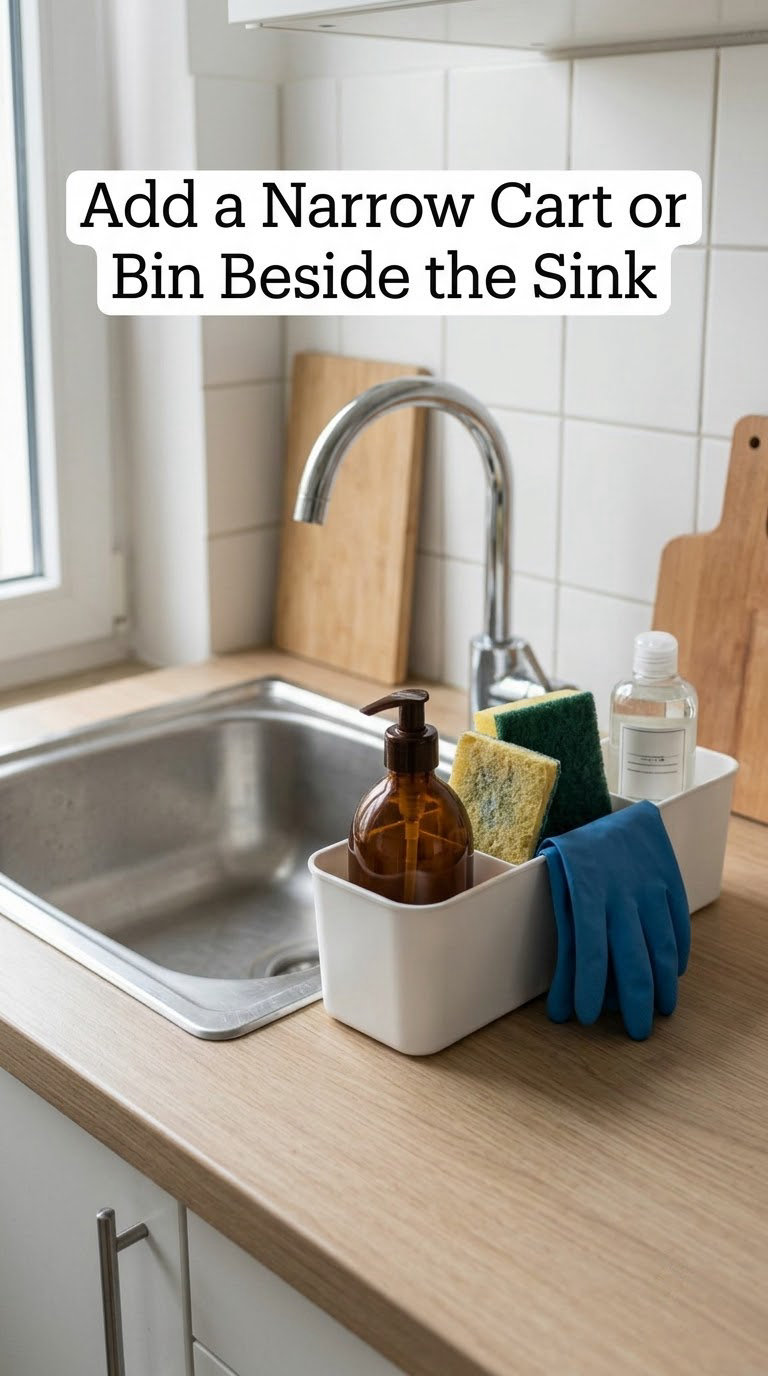
The 6 inch of counter next to the sink is where soap, sponges and gloves multiply until they take a quarter of your work surface. A slim caddy, a hangable bin, or a small freestanding tray groups that clutter into one object you can move in a single motion.
How to do it:
- Measure the clear counter beside the sink, not including the sink rim.
- Pick a caddy under 5 inches wide if the counter is narrow, and check that it does not block the faucet handle.
- Add a small hook on the cabinet side for gloves and a washcloth so wet items drain instead of sitting.
- Empty and dry the caddy weekly. Standing water in a closed bin is how sponges start to smell.
Cost: Low, ten to thirty dollars. Difficulty: Easy DIY. Time: 15 minutes.
Good to know: With one usable outlet, anything that needs power has to stay on the counter. A caddy that holds only manual items is how you claw that inch back.
14. Use Clear Labeled Bins for Pantry Storage
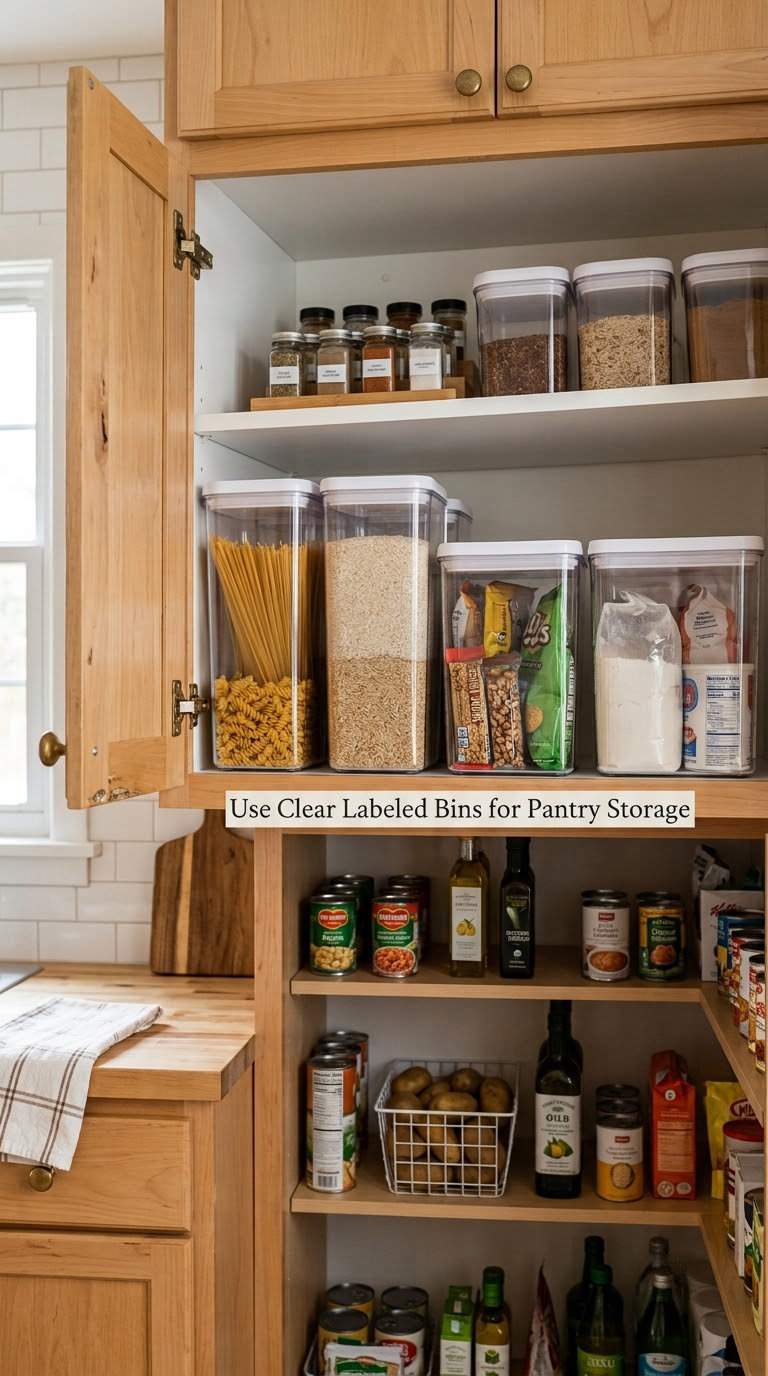
Rental kitchens are usually a pantry-less zone: one shallow closet or a couple of cabinets doing the job of six. Uniform clear bins are what turn that into storage you can actually manage, because a stack of mismatched bags and half-open boxes is why things get bought twice.
How to do it:
- Pick bins in one shape and one material. Mixed sizes defeat the point and look worse than no bins.
- Choose straight-sided clear bins rather than tapered ones, so they stack full and slide.
- Label the front of each bin with a plain word, not a code, and put the label at eye level.
- Group by category: grains, pasta, baking, snacks, sauces. Restocking goes twice as fast once everything has a home.
Cost: Low, twenty to fifty dollars for a starter set. Difficulty: Easy DIY. Time: one weekend.
Good to know: Buy one extra size above what you need today. If they do not stack neatly now, they will not once the cabinet is full.
15. Create a Temporary Open-Shelf Kitchen Display
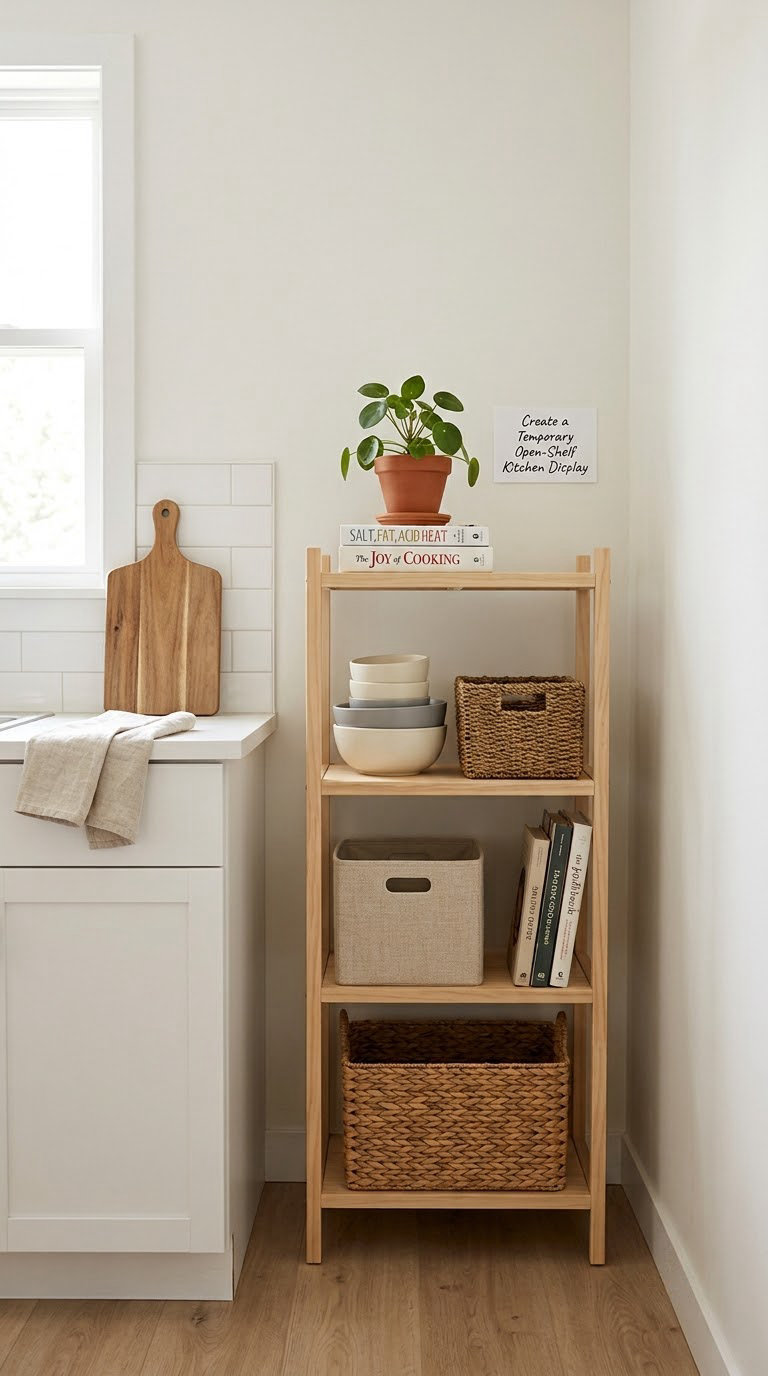
A freestanding etagere is the answer when a rental kitchen has no usable wall at all, which happens more often than the stock photos suggest. It gives you cookbooks, a plant and a place to park the mixer, and it moves to the next apartment with you.
How to do it:
- Find a level corner away from the stove heat and away from the fridge door swing, usually 12 inches of clearance is enough.
- Choose a narrow unit, 11 to 15 inches wide, so it reads as a shelf and not as a second fridge.
- Anchor nothing to the wall. If the unit has a top-strap fitting, use it only if your lease allows, and match the strap to a stud.
- Put heavy items on the lowest tier and the plant somewhere it gets light.
Cost: High, sixty to one hundred fifty dollars. Difficulty: Easy DIY. Time: 45 minutes.
Good to know: This is the one item here that gets heavy in a tip-over, which is how you scratch a rental floor. If you have young children, pick a unit with a back panel and anchor it as your lease allows.
Planning Tips
- Measure before you buy, then measure twice. Write down cabinet interior height, cabinet depth, the gap beside the fridge, and the cabinet-to-counter clearance. Four numbers cover most of this list.
- Start with the messiest zone. Most rental kitchens have one problem cabinet and three fine ones. Fixing the crowded one first gives you more visible change for less money than spreading effort across everything.
- Keep 10 to 15 percent of your planned spend in reserve. You will measure one cabinet wrong, and the money covers the second trip to the store instead of the compromise.
- Follow the load ratings. Adhesive hooks top out around 5 pounds, standard adhesive strips around 10, tension shelves around 25. Exceeding them is how walls get damaged in the first place.
- Decide what travels before you buy. Anything that needs screws, anchors or a stud does not belong in a rental. If it will not fit in your car, it is not your storage solution.
- Protect the floor and the paint. Felt pads under every cart leg and every freestanding foot. It costs almost nothing and it is the difference between a full deposit and a partial one.
Which small kitchen storage ideas suit your layout
Galley kitchen, two cabinets opposite each other: ideas 1, 3, 5 and 11. Anything that hangs or swings across the aisle is a mistake, so leave the over-door organizers alone.
L-shaped kitchen with decent counter: ideas 1, 6, 12 and 14. You have room for a countertop organizer and a drying rack, so spend your effort on the corner that is doing nothing.
No upper cabinets, the most common rental layout: ideas 2, 7, 10, 13 and 15. Without wall cabinets you have no under-cabinet space at all, so shift the weight to the fridge side, the floor and the sink rim.
Sink-only kitchen with one outlet: ideas 3, 5, 8, 11 and 14. No wall, no counter, no power. Everything here is inside a cabinet or in a hand-carrying basket.
No pantry at all: ideas 7, 8, 9 and 14. You are building pantry capacity from a cart, a back-of-cabinet basket and the space over the fridge.
Frequently Asked Questions
What storage solutions are safest for a rental kitchen?
Tension-mounted and freestanding solutions are the safest. A spring rod presses between two surfaces and a shelving unit stands on the floor, so neither touches paint, drywall or cabinets. Hook-over organizers are nearly as safe as long as you check the door swing and the clearance above the door. Adhesive-mounted products work, but they are the only option here that can leave residue or lift paint if you overload them or pull them off cold.
How do I add kitchen storage without drilling?
Mount on the surfaces that are already there. Under-cabinet tension shelves use the gap between cabinets and counter. Over-the-door organizers hang on a cabinet lip. A tension bar spans the inside of a cabinet. Over-sink drying racks rest on the sink rim, and rolling carts or etageres stand on the floor. All six add capacity with no holes and no anchors, and every one of them comes out in under a minute at move-out.
Can renters use adhesive hooks and removable shelf liners?
Yes, with two limits. Stay under the weight rating on the packaging, which is usually 5 pounds for small hooks and 10 for heavy-duty strips, and wait 24 to 72 hours after mounting before you load them. Peel with a slow steady pull at a low angle, warm the strip with a hair dryer for 30 seconds, and never pull straight down. Skip adhesive-backed liners on cabinet shelves entirely, because they bond to the finish and tear it when they age.
How do I keep a small kitchen from feeling crowded?
Contain first, then add. Clear labeled bins, a sink-side caddy and one rolling cart take about half the visual noise out of a small kitchen because every loose item gets a defined home. After that, move things vertically with shelf risers and above-the-fridge storage, and push appliances to a cart or a counter organizer so the center of the counter stays clear for prep.
What should I measure before buying kitchen organizers?
Write down five numbers: cabinet interior height, cabinet interior depth, the gap between the top of the wall cabinets and the counter, the width of the space beside the fridge, and the clearance from counter to upper cabinet, usually about 18 inches. Measure the inside of the cabinet, not the outside of the box, and open the door fully to check the swing before buying anything hook-over.
Do I need landlord approval for temporary kitchen storage?
Most leases permit freestanding and tension-mounted items without asking, because nothing permanent is attached. Adhesive products, and anything that needs a nail or an anchor, are worth a quick written message to your landlord, and most will say yes to removable adhesive as long as you remove it and patch any marks. Keep the message. It protects your deposit at move-out.
Conclusion
Measure first, then buy the one upgrade that fixes your worst zone. For most rental kitchens that is a shelf riser set or a narrow rolling cart, because both add real capacity, both cost little, and both leave the walls exactly as they were. Pair vertical storage with contained storage, put felt pads under every leg and every caster, and the deposit stays where it belongs, in your pocket.
Once the boxes are sorted, the finish is the next thing that sells a small rental kitchen. Our kitchen countertop decor ideas cover the styling side, and if you like the warm, lived-in look, the Nancy Meyers kitchen ideas are a good follow-up. If the same building handed you a tiny bathroom too, start with our small bathroom interior ideas.