How to Fix a Running Toilet Yourself: 5 Easy Steps 2026
A running toilet is almost always one of three things: a flapper that no longer seals, a fill valve that will not shut off, or a water level set too high for the overflow tube. That is good news. Knowing how to fix a running toilet yourself is a half-hour job with an adjustable pliers, a flashlight and about fifteen dollars in parts.
A tank that keeps refilling can waste up to 200 gallons a day, roughly 6,000 gallons a year, and that water shows up on your bill whether you flushed or not. More to the point, the sound at 2 a.m. is the part that finally gets people off the couch.
Contents
Time: 30 to 60 minutes for most repairs · Parts: usually under fifteen dollars · Difficulty: beginner DIY · Skill level: none needed beyond holding a wrench
Tools and Materials
Gather this before you touch the tank. Costs vary by region and by the finish you already have in the room, so treat the ranges as typical US prices rather than quotes.
Tools
- Adjustable pliers or channel-lock pliers, one pair, for the fill valve locknut
- Adjustable wrench, 6 to 8 inch, in case the locknut is too tight for pliers
- Flashlight or headlamp, since tank interiors are genuinely dark
- Bucket, 2 gallon or larger, placed under the tank drain hole
- Clean towels, two or three, for the floor and your hands
- Old toothbrush or a soft brush for mineral scale on the flush valve seat
- Rags or a newspaper sheet for dry storage of removed parts
Likely parts
- A rubber flapper or a tower-style flush valve that matches your toilet
- A fill valve with float cup, matched to your tank height and thread size
- A braided water supply line if yours is older than about ten years
- A toilet-specific flapper and fill valve repair kit if you want both at once
Find the brand and model before you order. The brand is stamped inside the tank on the front wall or printed on the flush handle base, and the model number sits on a label inside the tank or on the underside of the bowl. Two-piece toilets use separate components, while one-piece toilets have the tank and bowl molded as a single ceramic piece with a flush valve built in, which changes what you can replace.
Before You Start
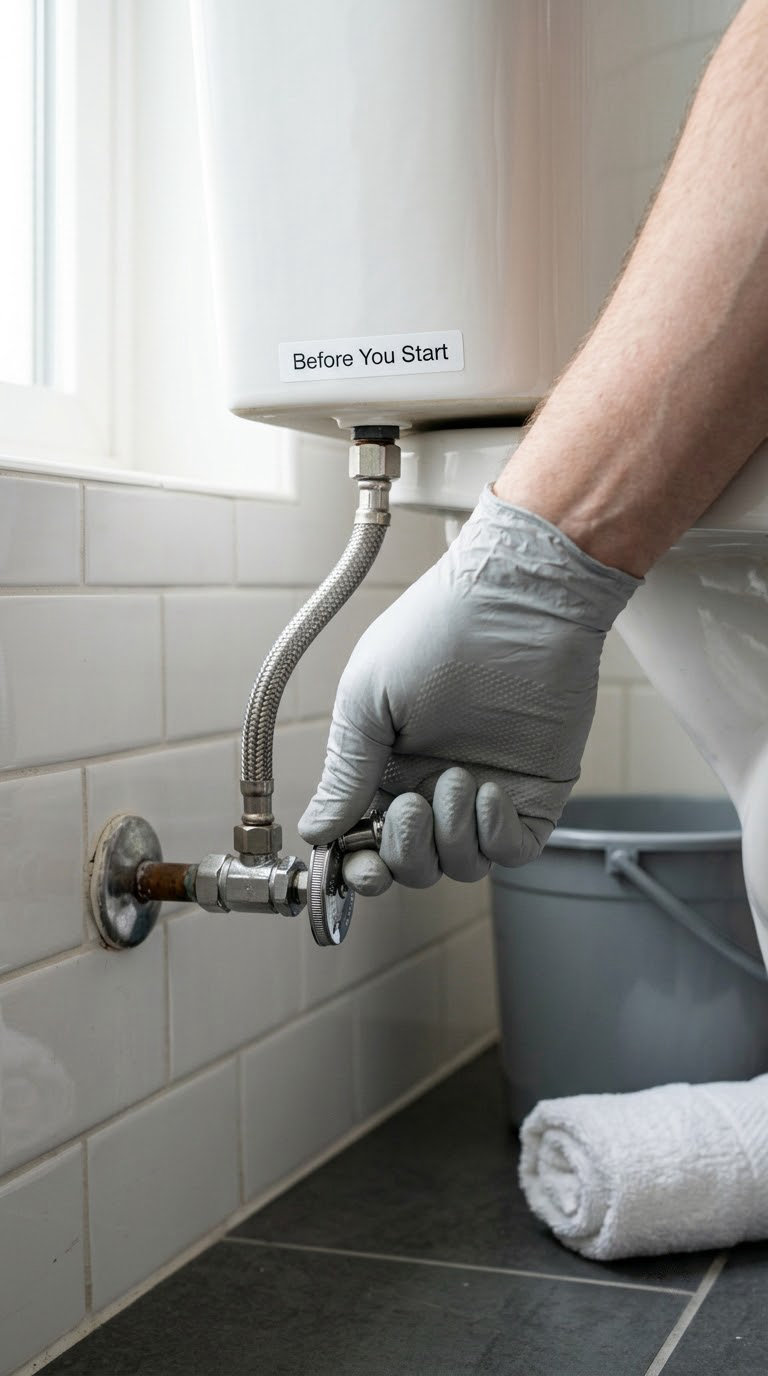
Confirm the problem before you start. Listen to the tank after it has fully stopped. If you hear water entering the bowl with nobody in the room, the fault is inside the tank, not in the supply line. If the toilet rocks, seeps at the base or sweats constantly, that is a different repair and the tank is not your problem today.
Put on eye protection and gloves. Set the bucket and towels under the tank, clear the area so you can see the floor, and lay out a dry rag to lay removed parts on. Screws and clips go on the towel, not the floor.
Shut the water off at the angle stop behind and below the tank. Turn the chrome handle clockwise until it stops, then open the tank lid and confirm the handle is really closed by flushing and watching the level drop. If water still runs, the shut-off valve is not sealing and you should stop there rather than work on a live tank.
Flush with the lid off to drain as much as possible, then pull the flapper or plug and sponge out what is left. With the tank empty you can see cracks, warps and scale that were invisible under water.
Know when to walk away. Corroded, seized or badly damaged hardware, or a toilet that continues to leak after the shut-off, means this job has moved past a first-time fix.
How to Fix a Running Toilet Yourself: Step-by-Step Instructions
Work through these in order. Each step ends with a check, so if the fix did not work you stop at the last step that passed rather than replacing parts at random.
Step 1: Diagnose Whether a Running Toilet Runs Constantly or Intermittently
A constantly running toilet means the fill valve never shuts off, or water is escaping so fast the level never stabilizes. An intermittent one, the kind that refills every 10 to 20 minutes with nobody in the house, is almost always a small leak past the flapper. The tank loses a little water, the float drops, the fill valve kicks on, and the cycle repeats.
That pattern matters because it tells you where to put your hands. Constant running points at the fill valve or the water level. Intermittent refill points at the flapper or chain. Either way, the cause sits inside the tank, so no amount of supply-line work will fix it.
Step 2: Inspect the Flapper, Chain, Fill Valve, and Overflow Tube
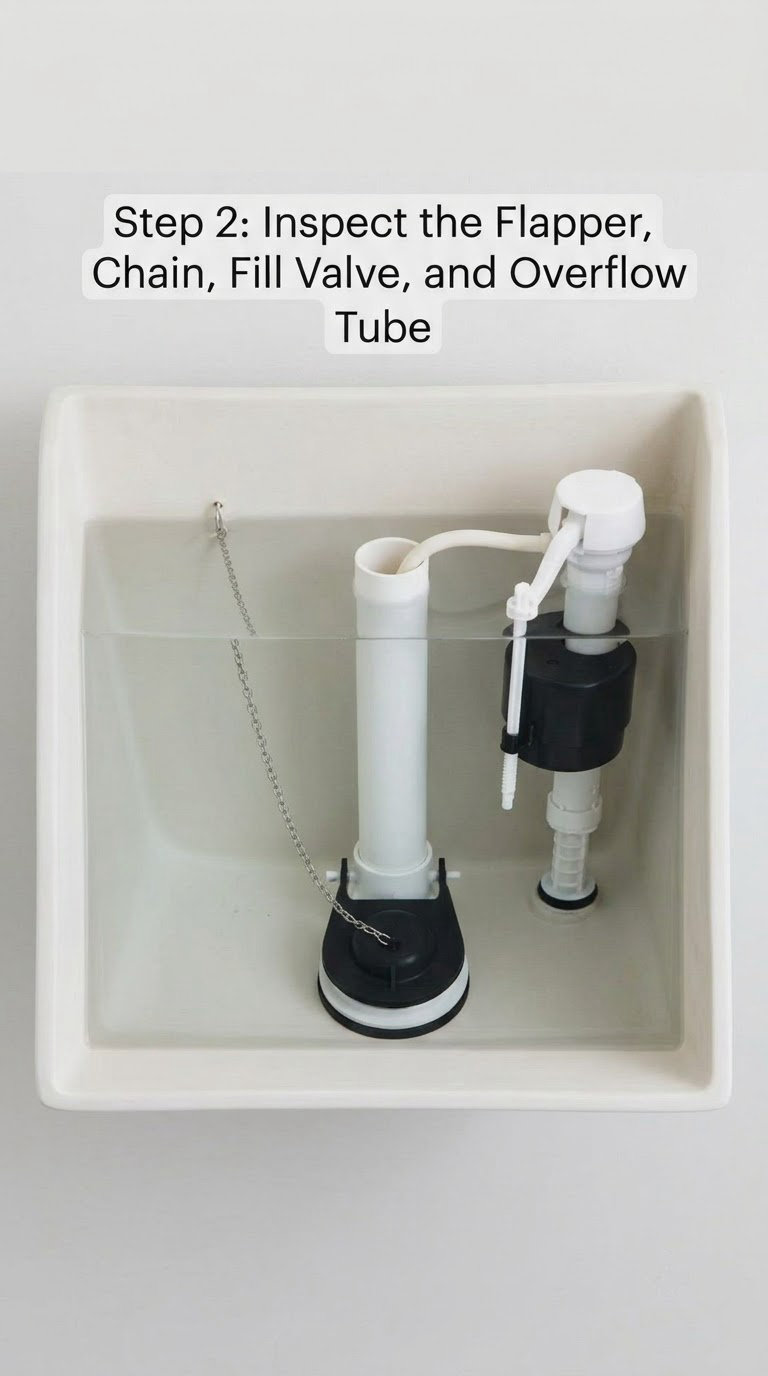
Look at the flapper first. A healthy flapper sits flat and centered on the flush valve seat. If it hangs at an angle, floats above the seat when you lift the handle, or has a warped, cupped or shrunken rubber surface, water is passing under it. That warped-and-cupped shape is the most common failure on older toilets, and no amount of chain adjusting brings it back.
Then check the chain. Too loose and the flapper never lifts far enough to flush. Too tight and the handle holds the flapper a hair off its seat, so it drips constantly. A chain that can slip through the flush lever arm holes is worth replacing while you are in there.
Next, look at the fill valve and the overflow tube together. The tube is the vertical pipe that sends excess tank water to the bowl instead of onto the floor, and your water should stop 1/2 to 1 inch below its top. If the water sits at the tube or spills into it, the level is set too high. Loose fill valve nuts let water dribble past the shank, and a cracked overflow tube sends water straight down the drain whether or not the flapper works.
Clean scale off the flush valve seat before you decide anything. If the rubber is still sound after a scrub, cleaning was the whole repair. If it is torn, cracked or flattened, replace it.
Step 3: Adjust the Chain or Float for a Quick Fix
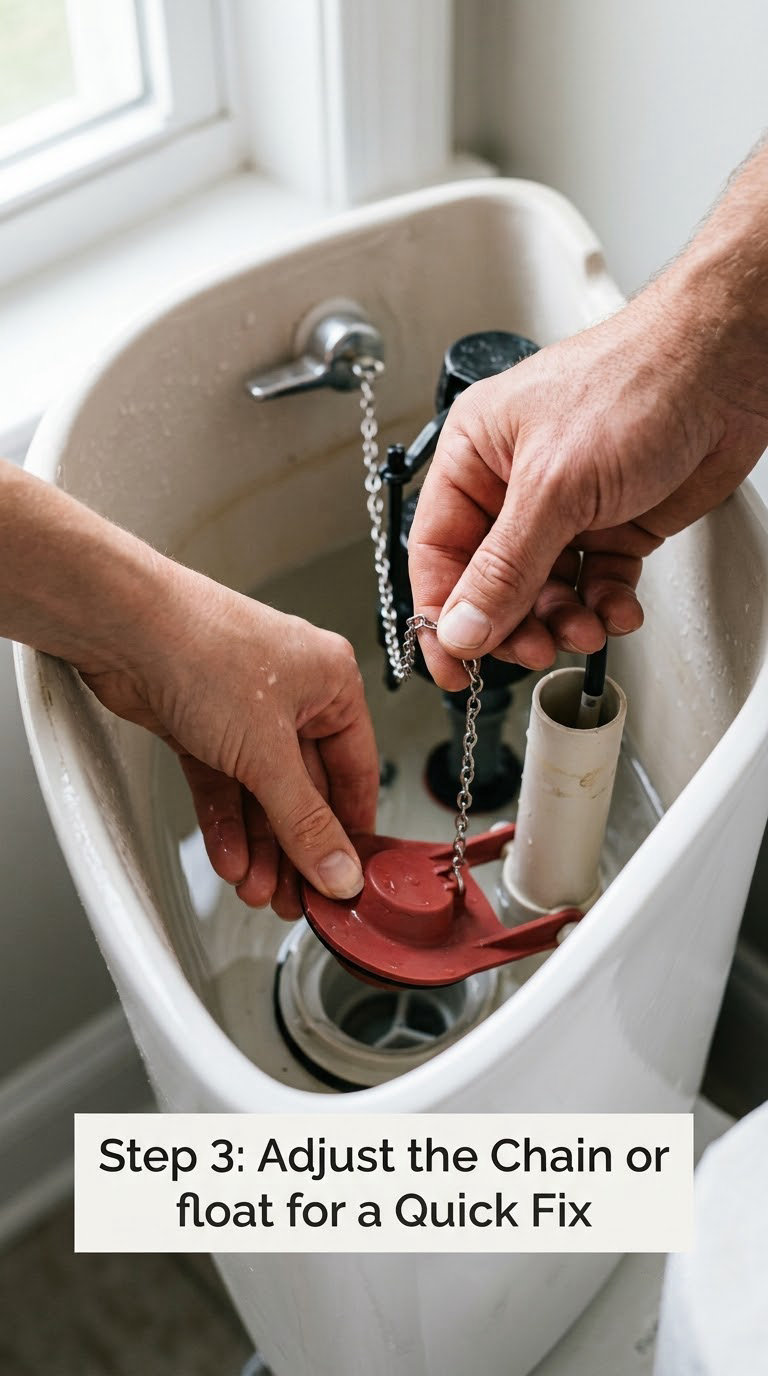
Lift the flapper by hand, then lower it gently and attach the chain so you have about 1/8 inch of slack when the flapper is seated. That amount lets the flapper lift high enough to flush and still land flat. Test by pulling the handle: the flush should be one clean push, not two or three, and the flapper should return to the seat without help.
To set the float, find the water-level adjustment screw or clip on the float cup. Lowering the float turns the shut-off point down, so the fill valve stops before the water reaches the overflow tube. A screw usually moves the float a quarter inch per turn, so two or three gentle turns are usually plenty.
Turn the water back on and wait for one full fill. The repair works when the fill valve shuts off by itself and no water is entering the bowl. If it still runs, adjustment is not your fix, and a cracked or badly warped part needs replacing.
Step 4: Replace the Failed Flapper, Fill Valve, or Float
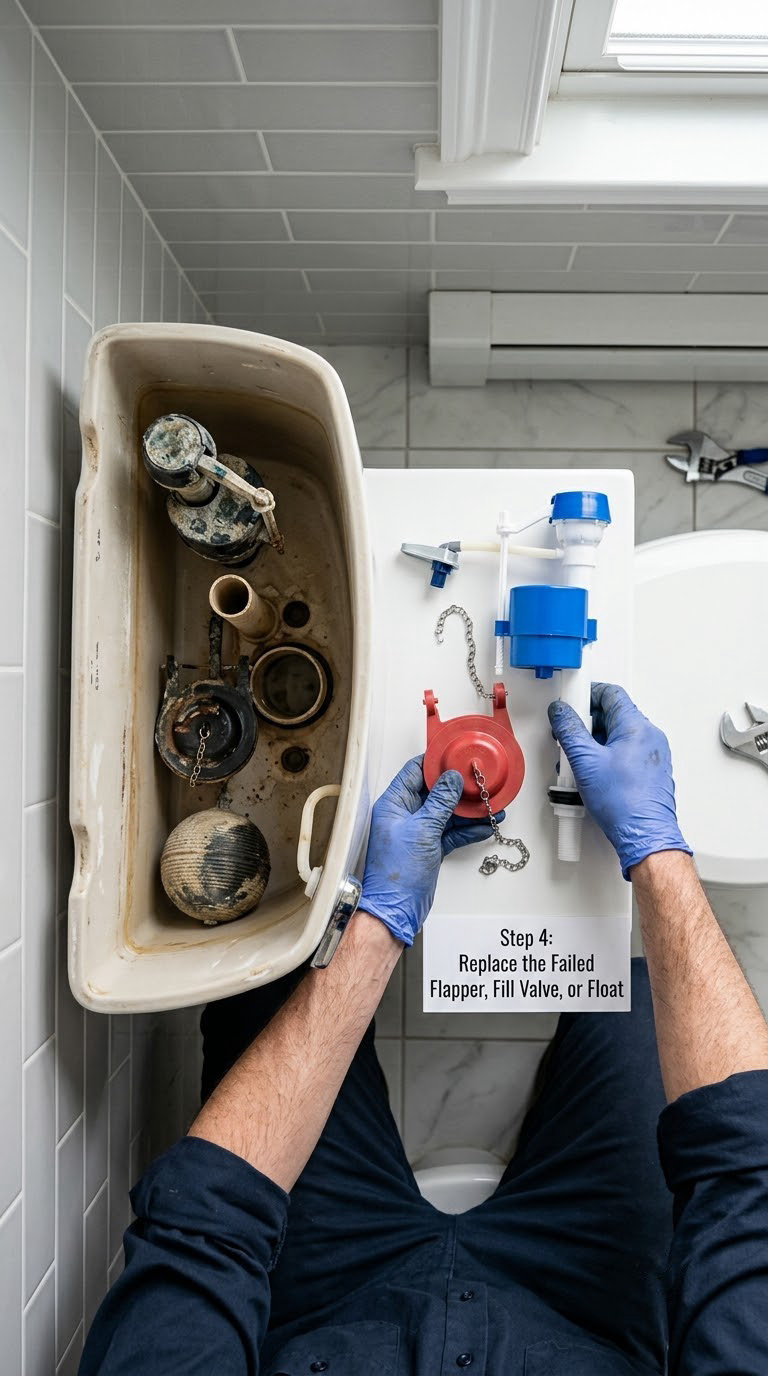
For the flapper, pull the old one off the flush valve ears and unclip the chain. If it will not budge, soak it with penetrating oil for fifteen minutes, grip it with channel locks and twist, or slide a hacksaw blade under the ears and cut the ears off the valve. Do not pry hard on ceramic. Set the new flapper on the seat, hook the chain through the lever arm with the same 1/8 inch of slack, and hand-tighten the nuts with your fingertips plus a quarter turn of pliers.
For the fill valve, match the thread size, commonly 2 inches, and the tank height. Loosen the locknut under the tank, lift the old valve out, and swap in the new one. Match the new valve’s critical level mark to the overflow tube before you commit. Follow the manufacturer’s shank, nut and height instructions, and hand-tighten plastic nuts. Overtightening cracks them, and a cracked shank leaks no matter how tight it feels.
Clamp the refill tube to the fill valve and run it down the overflow tube so the bowl refills on every flush. Confirm the new float or float cup travels freely without touching the flapper or the tank wall. If a part cannot move through its full range, it will stick and re-create the problem.
Step 5: Refill and Test the Repair for Leaks
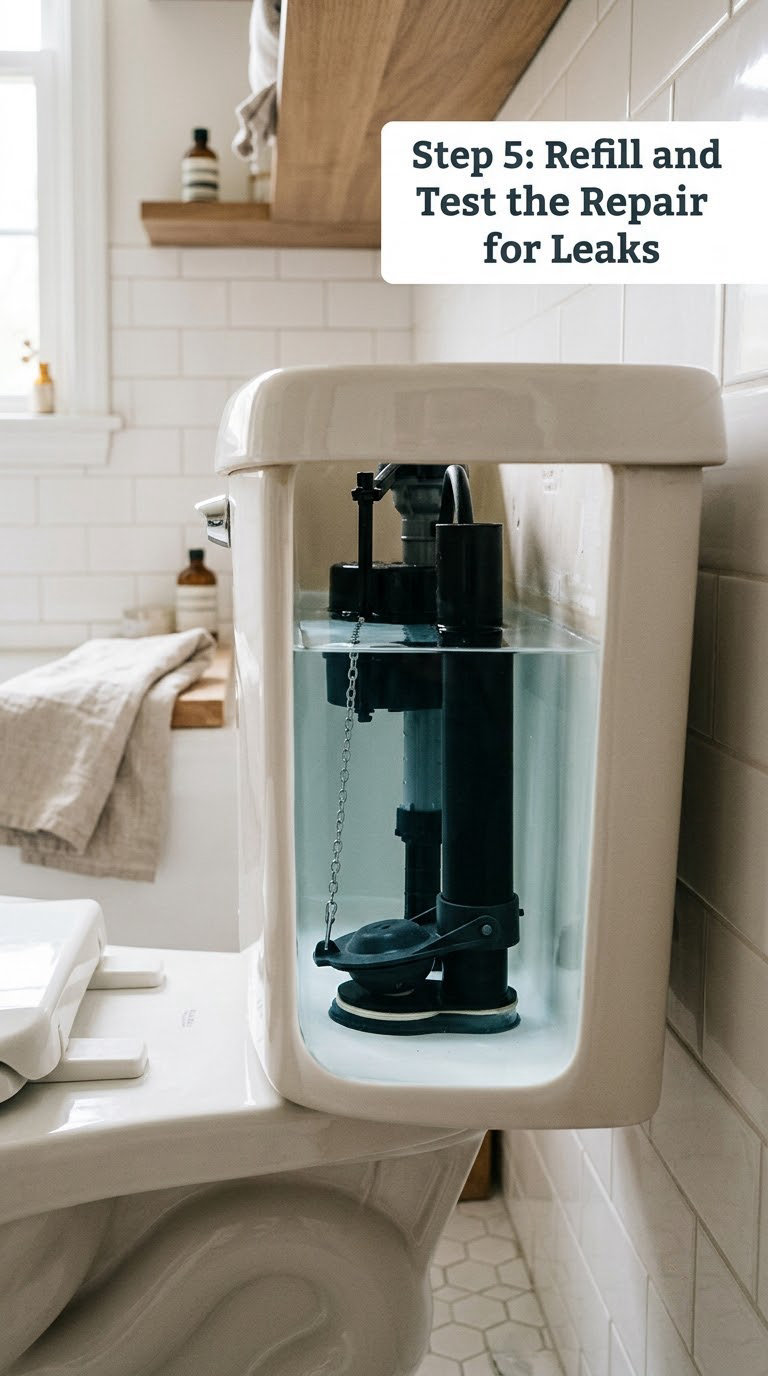
Open the supply valve slowly and let the tank fill fully. Watch the fill valve stop on its own, then confirm the flapper stays closed with the tank sitting still below the overflow tube. If the fill valve never shuts off, you have a water level problem or a new valve set too high.
Flush several times in a row. Each cycle should fill the bowl fully and stop. Then dry the outside of the tank, the tank-to-bowl connection and the floor around the base with a towel, wait ten minutes, and check again. A damp towel anywhere means the seal there, not the flapper, is the leak.
The repair is successful when the fill valve stops, the flapper stays closed and no water keeps entering the bowl after the tank finishes filling.
Common Mistakes to Avoid
- Overtightening or cross-threading plastic nuts. Hand-tighten, then a quarter turn. If it drips after tightening, back it off rather than adding force.
- Chain too short. The flapper will not lift far enough to flush and waste pushes water over the overflow tube.
- Chain too long. The handle holds the flapper slightly off its seat, which reads as a flapper leak that is really a chain problem.
- Floating above the overflow mark. Set the water 1/2 to 1 inch below the top of the overflow tube so a failed flapper can never flood the floor.
- Cleaning a physically damaged flapper. Scale comes off; warps, cracks and flattened rubber do not. Replace it.
- Forcing a seized flush valve. If the valve will not turn or the ears snap off, the casting is damaged and needs a plumber.
- Skipping the leak test. Without a dry-and-wait check at the bowl and base, you cannot tell a fixed tank from a hidden leak.
When to Call a Pro
Stop and call a plumber if water still sits in the tank after the shut-off valve is fully closed, if you cannot find the leak, or if the flush valve or supply connection is seized. Corroded internal components, a tank or bowl that is cracked, or a toilet that rocks when you sit on it all point beyond the tank to a job that needs a licensed tradesperson.
Concealed leaks behind the bowl, work on the supply line itself, and anything code-sensitive may need a permit depending on where you live. If a tank-to-bowl gasket or wax ring is the culprit, that is a different repair with a higher chance of a leak if it is done twice.
If you want the fast version for tonight only, how to stop a toilet from running covers the temporary fixes that buy you time until the part arrives.
Maintenance
Check the flapper and chain every six months. Push a little food coloring into the tank and flush; if color reaches the bowl without a flush, the flapper is passing water before it fails completely.
Keep the tank interior free of cleaning product residue, and skip in-tank tablets, which can leave residue that hardens on seals. Inspect the supply line annually and replace a braided line that looks bulged, stiff or corroded. A spare flapper and fill valve in a drawer saves the Sunday evening trip to the store. On hard water, expect rubber parts to stiffen sooner and address buildup early rather than letting a flapper warp in place.
If your flush is button or push-button rather than a side lever, the internal parts differ and the button flush troubleshooting steps cover that setup. For smaller-diameter flappers, see what to look for in a 2 inch toilet flapper before buying.
Frequently Asked Questions
Can a running toilet waste a lot of water?
Yes. A toilet with a bad flapper can waste close to 200 gallons a day, which adds up to roughly 6,000 gallons in a year. That water runs whether or not anyone flushes, and it shows up on your bill as wastewater charges too. Fixing it is usually faster than a plumber visit and costs only a part.
Why does my toilet flapper keep running after I adjust it?
Two usual reasons. The chain is too tight, so the handle holds the flapper a hair off its seat, or the flapper itself is warped, cupped or shrunken and can no longer lie flat. Adjustment fixes the first problem. Once the rubber has lost its shape, the only fix is a replacement flapper or a new flush valve.
Is the flapper or fill valve usually the problem?
The flapper, more often than not. If your toilet refills every 10 to 20 minutes with nobody in the room, water is leaking past the flapper and the float keeps dropping. If the tank runs continuously and the fill valve never shuts off even after the flapper is closed, suspect the fill valve or a water level set too high.
How do I stop a toilet from overflowing immediately?
Turn the shut-off valve behind the tank clockwise until it stops, then lift the tank lid and lift the float or float cup by hand. That stops the incoming water while you drain the tank. Once the level is down you can identify the cause without water rising behind you.
Why is my toilet leaking even though the tank water level looks normal?
Because the leak is probably not in the tank. A normal tank level with damp flooring means water is escaping below the water line, at the tank-to-bowl gasket, the fill valve shank, the bowl base or the supply connection. Dry the outside with a towel, wait ten minutes, and look for the wet spot to find which seal is failing.
Conclusion
Shut the water off if it is still leaking, then work out whether the tank runs constantly or refills every 10 to 20 minutes. That tells you whether to look at the fill valve and water level or at the flapper and chain. Adjust before you replace, replace only what is actually damaged, and finish with a full flush and a dry-and-wait leak test.
Knowing how to fix a running toilet yourself starts with the diagnosis, not with tearing out the fill valve. Most repairs land inside a single part and a single hour.