How to Install Laminate Flooring Over Concrete: Easy Guide (2026)
Yes, you can install laminate flooring directly over concrete. No plywood subfloor is needed. Clean and level the slab, roll out a 6-mil polyethylene vapor barrier, add underlayment, then click the floating planks together, leaving a 3/16 to 1/2 inch expansion gap around the entire perimeter.
Concrete is a good substrate for a floating laminate floor as long as three things are true: the slab is clean, it is level within 1/8 inch over 6 feet, and it passes a moisture test. Get those right and the rest is just careful carpentry.
Contents
The most common failure I see is not the click-lock. It is a slab that was swept but never vacuumed, a moisture barrier that was skipped because the pad sounded like it already had one, or a first row jammed tight against the wall with no spacers. Those three mistakes account for nearly every buckled floor I get asked about.
Time: 1 to 3 days for a 300 sq ft room, plus drying time for any leveling compound · Cost: planks, vapor barrier, underlayment, trim and spacers, plus leveling compound if the slab needs it · Difficulty: Moderate DIY · Skill level: Comfortable with a tape measure, a saw and patience.
Tools and Materials
Buy the flooring and the underlayment before you touch the slab, because the underlayment type dictates whether you roll out a separate vapor barrier. If you pick a 2-in-1 pad with an integrated moisture membrane, you skip the poly. Mixing systems is how people end up with no barrier at all.
Materials
- Laminate planks — buy 10 percent more than your square footage for cuts, angled corners and mistakes. Cartons are usually 20 to 25 sq ft, so a 300 sq ft room needs about 15 cartons.
- 6-mil polyethylene sheeting — if your underlayment is not rated as a vapor barrier itself. Buy 10 percent extra so overlaps and repairs are covered.
- Underlayment — 2-in-1 foam, felt or cork. See our picks for flooring underlayment for laminate and hardwood if you want a comparison before you buy.
- 3/16 inch or 1/4 inch spacers — enough for the whole perimeter, about 2 per foot.
- Transition molding — T-molding at equal-height changes, reducer strips where the laminate meets a lower surface such as tile or vinyl.
- Baseboard or 2 inch quarter round — to cover the expansion gap along the walls.
- 100 percent silicone sealant — for wet rooms. Do not substitute latex.
- Concrete patch, skim-coat mortar or self-leveling compound — only as much as the slab actually needs.
Tools
- 4 foot level or a 6 to 8 foot straight edge for checking flatness.
- 25 to 50 foot tape measure and a pencil.
- Chalk line and chalk reel for snapping a straight reference line across the room.
- Laminate cutter or a fine-tooth jigsaw with a wood blade. A laminate cutter is faster and cleaner on a plank; a jigsaw handles odd cuts. Both are covered in our guide to laminate flooring cutters.
- Tapping block and pull bar — the plastic tools that come with most laminate kits. Never strike a plank directly with a hammer or your palm.
- Utility knife and a straightedge for trimming underlayment and cutting plastic.
- Shop vac with a soft brush attachment and a broom.
- Moisture meter if you want a spot check; a formal in-situ relative humidity test is still the standard for a slab you are unsure about.
- Knee pads, safety glasses, dust mask and ear protection. Grinding concrete throws real grit.
Before You Start: Check the Concrete and Plan the Layout
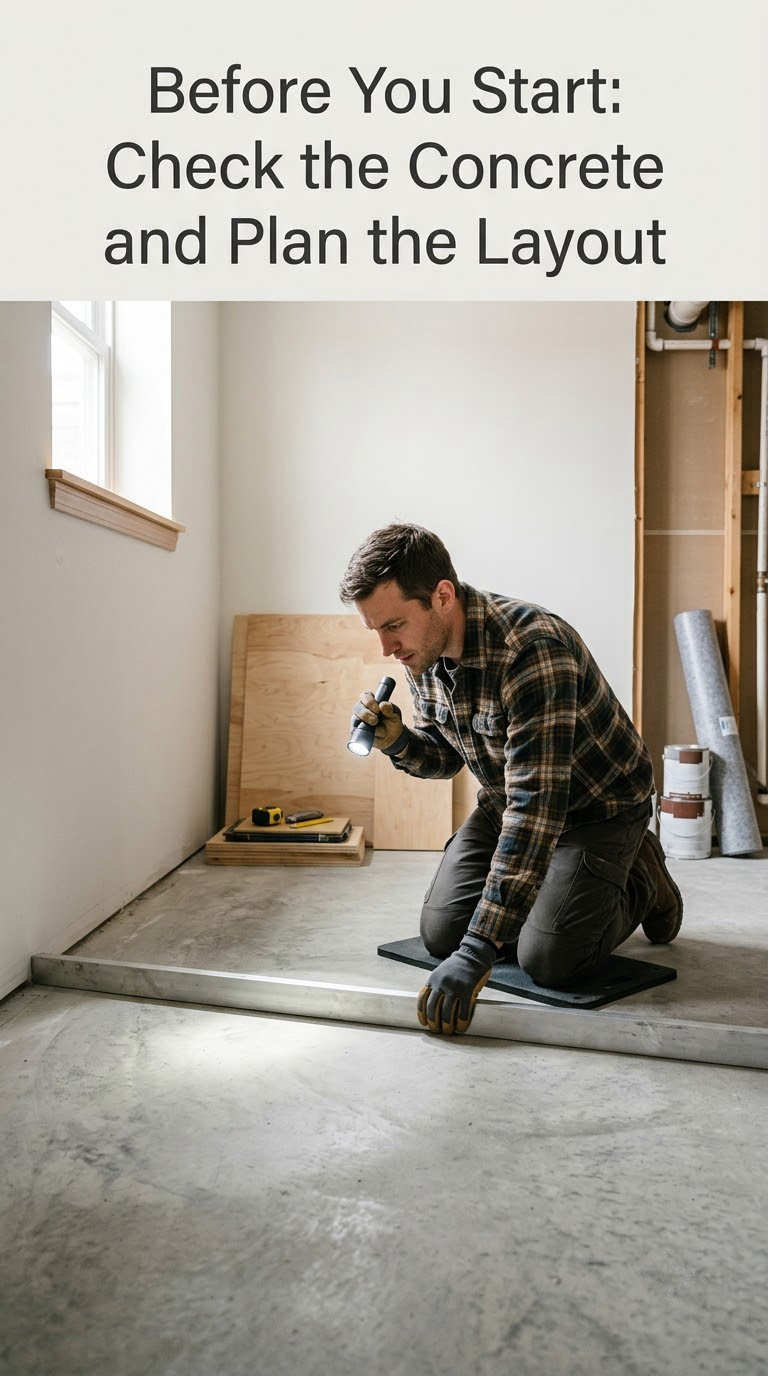
Start by finding out how old the slab is. New construction concrete needs 60 to 90 days of cure time before any flooring goes down, and plenty of manufacturers void the warranty if you install earlier. Older slabs are usually fine, but check for evidence of a leak or a wet basement season first.
Walk the room with a flashlight held low to the floor. Side lighting throws a shadow under every crack, dip and high spot, and you will see things a ceiling light hides completely. Look for three things: cracks that go through the slab, places where the floor feels spongy underfoot, and damp or musty odor.
Set a 6 foot straight edge or a 4 foot level on the floor in several spots, including diagonal directions. The standard flatness tolerance is 1/8 inch over 6 feet. You are looking for anything that fails that, because a floating floor bridges low spots and rocks over high ones.
Some slabs have a floor drain or a sump pump. If yours does, a floating floor can trap water around that drain area and you need a moisture barrier rated for that situation, plus careful sealing. If the slab has an active leak, stop there and fix the water first.
Finally, check the doors. Open each interior door and note whether the slab clears the bottom of the door leaf and whether the casing sits high enough to notch. You will undercut casings later, and it is far easier to do it before the floor is in.
Step 1: Repair, Clean, and Level the Concrete
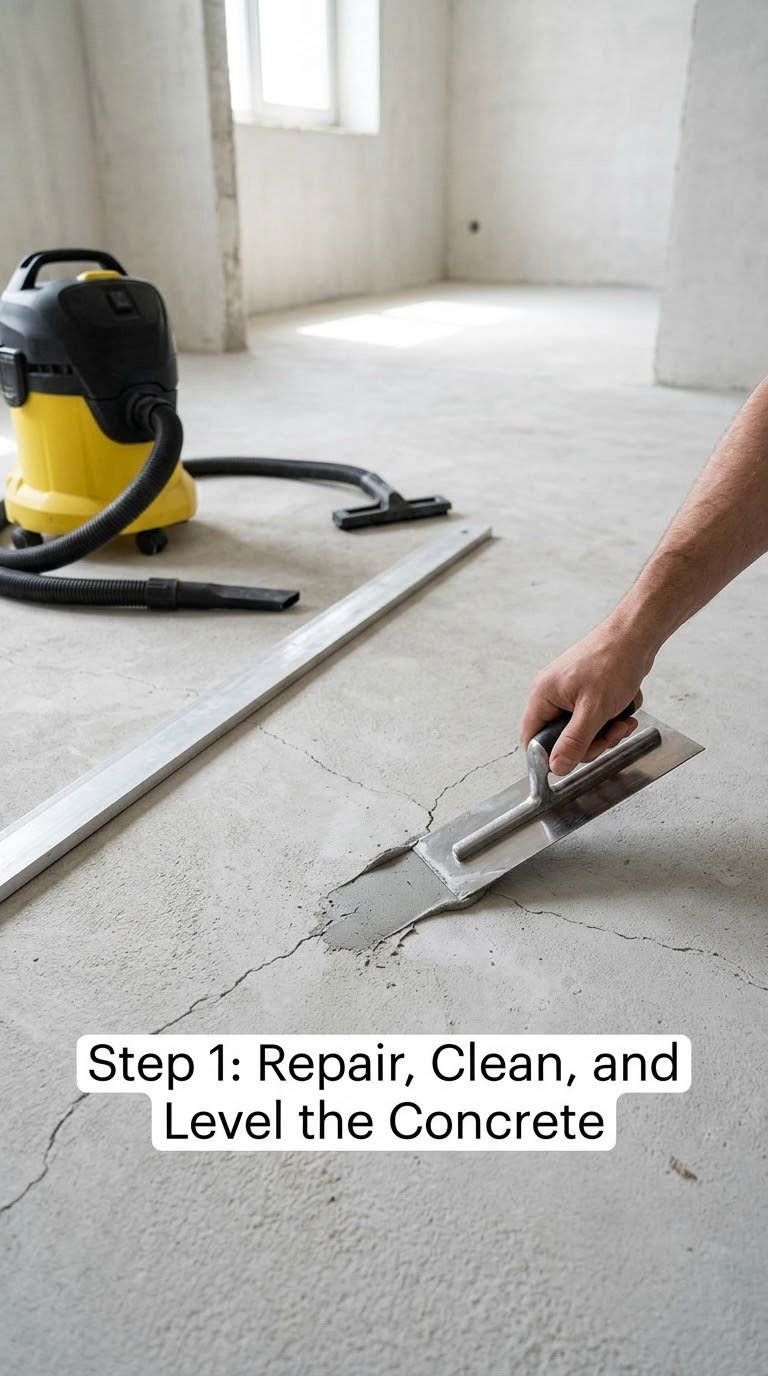
Everything here depends on how bad the slab is, so choose the smallest fix that works.
Grinding handles high spots. Rent an angle grinder with a diamond cup wheel and knock down every peak, ridge and paint drip until the straight edge sits flush. Peaks are the most damaging feature on any floating floor, because the planks rock on them and the locking system takes the load.
Patching and skimming handles hairline cracks, small holes and shallow dips. Rake out loose concrete, dampen the area lightly, trowel on concrete patch or a floor-grade patch compound, and feather the edges. Let it cure fully, usually 24 to 48 hours, and check that it is hard and not rubbery under your thumb.
A self-leveling pour is for slabs that are wavy across a wide area, not for a single dip. It is the most expensive option, it needs a primer, and it must be mixed and spread fast. Two buckets of product will not level a 300 sq ft room. If the numbers are large, this is the point where people get a quote.
On a garage slab, sweep out the sawdust and oil residue first and check for a slope. Water needs somewhere to go, and if the slab drains to the door you are choosing the flooring, not fixing drainage. Seal the expansion joints that run across the floor, and keep the room between 50 and 85 F for a day or two before you start. Laminate rated for garages is a different product with a different wear layer, so read the box.
After the repairs cure, sweep, then vacuum the entire slab with a shop vac. Dust left behind is the single most common reason a floating floor sounds hollow and feels noisy. Wipe any oil or grease spots with a degreaser, especially in a garage, and let the slab dry fully.
Check flatness one more time. Put the straight edge down, slide it slowly, and look for light under the middle. Any gap wider than 1/8 inch over the length of the edge is out of spec.
Step 2: Test Concrete Moisture Before You Install Laminate Flooring Over Concrete
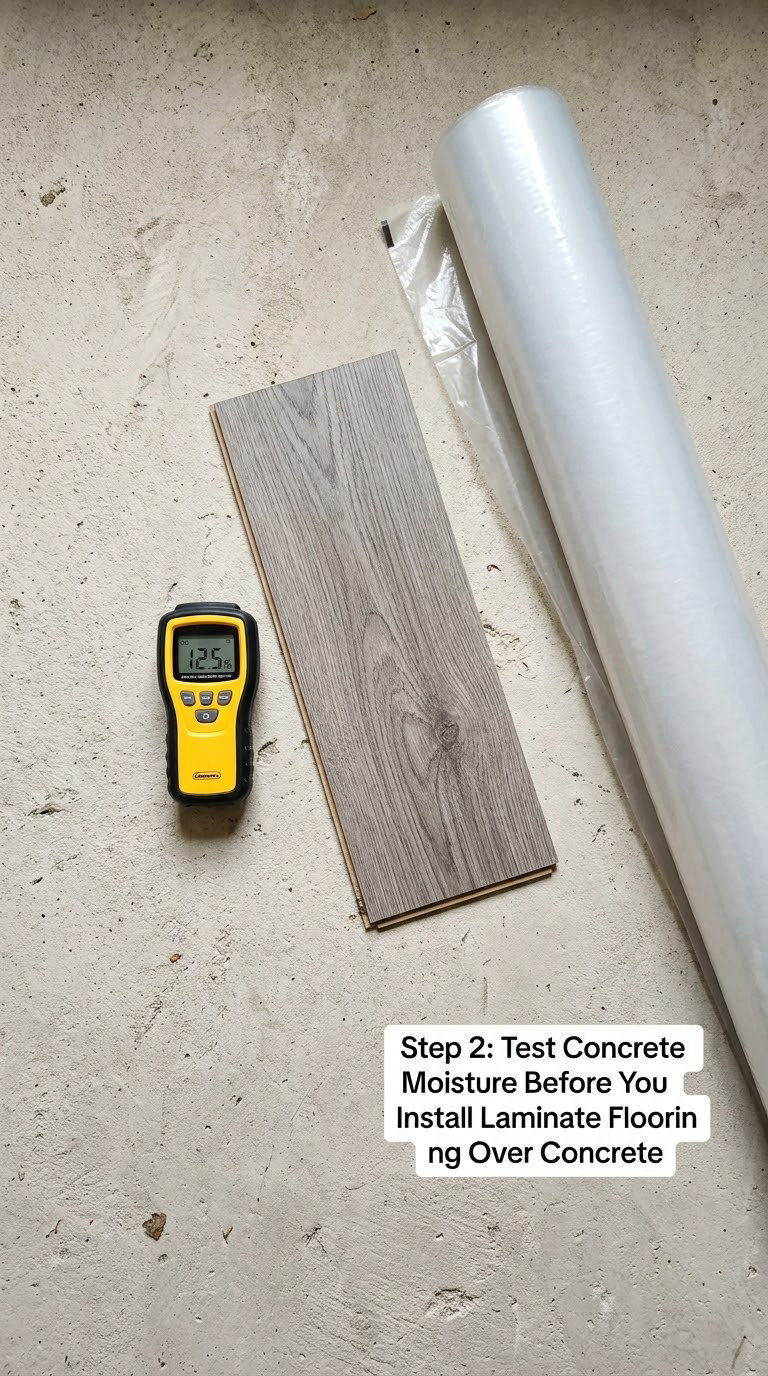
Concrete is porous. It is always releasing moisture vapor from the ground beneath it, even when the surface feels dry to the touch. That vapor is what causes efflorescence, musty smell and swollen plank edges, so this test decides whether the floor survives.
For a formal test, use an in-situ relative humidity probe. The number that matters is 75 percent. At or below that, most manufacturers consider the slab suitable for laminate with a vapor barrier in place. Above it, stop.
A calcium chloride test is the other accepted method. You tape a plastic sheet over the slab, weigh it, leave it for 60 to 72 hours, then weigh it again. The weight gain gives a moisture emission rate in pounds per 1,000 square feet per 24 hours. Your flooring manufacturer publishes the limit. Check the number, do not guess.
A pinless moisture meter is a spot check, not a substitute. Take ten readings across the room, including near walls, in a corner and next to any exterior wall, and write down the highest one. That single number tells you a lot about the rest of the slab.
Readings vary with the season and with indoor humidity, so test in the conditions the floor will live in. If you are seeing white powdery bloom on the surface, you have active moisture movement, and a vapor barrier plus a drier building is the only real answer.
Step 3: Install the Moisture Barrier or Underlayment
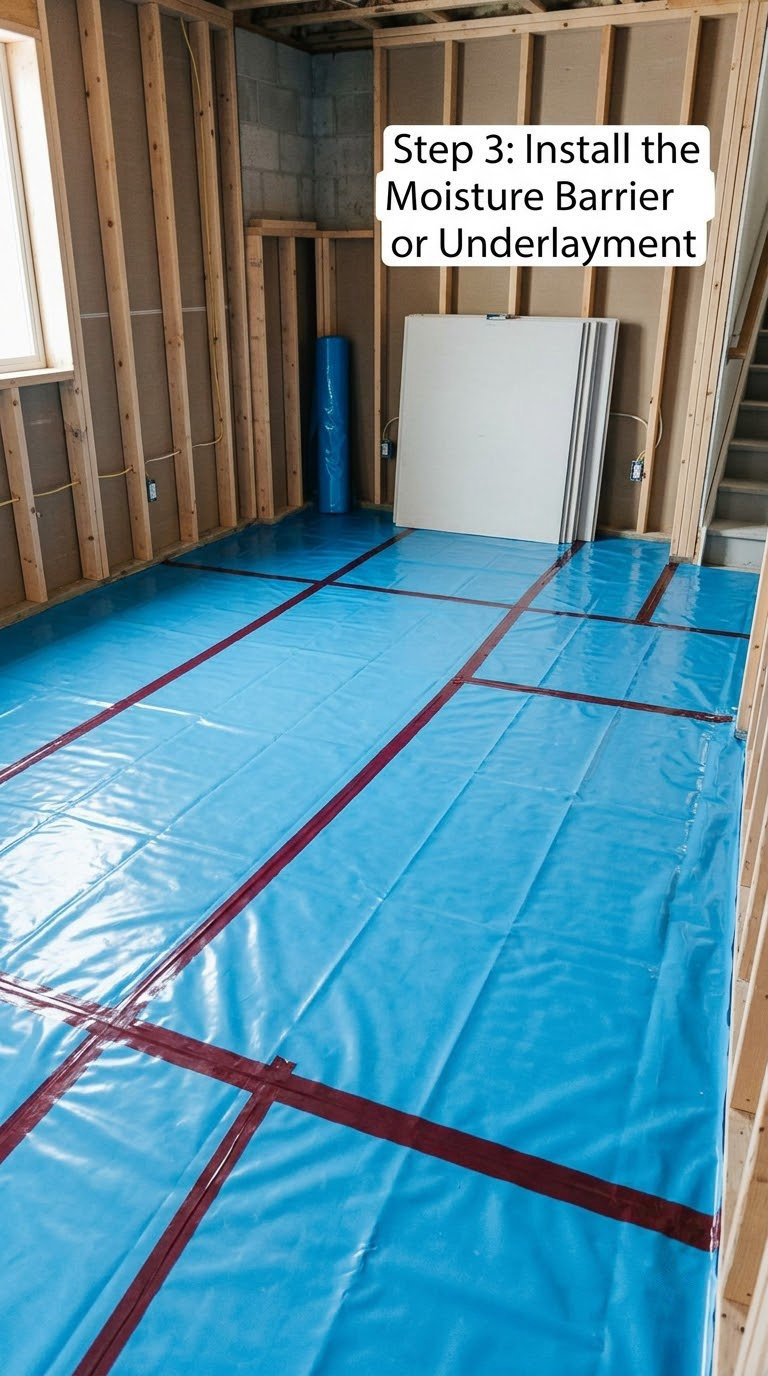
This is where people get it wrong, so pick one of two routes and stay in it.
Route one, two separate layers. Roll out 6-mil polyethylene sheeting across the entire slab, wall to wall. Overlap every seam by 8 inches, run tape along the full length of the seam, and tape up the perimeter a few inches. Pull the plastic tight as you go and smooth out every wrinkle. A wrinkle under a floating floor becomes a hollow spot that never goes away.
Route two, one combined product. Use a 2-in-1 underlayment that has a moisture membrane built into it. Then skip the poly entirely. This is faster and it is what many DIYers end up doing. Read the label, though. Some pads are sound and cushioning only, with no membrane at all.
On top of the barrier, roll out your underlayment in the same direction as the plank layout. Butt the seams tightly, do not overlap them, and tape every seam. Cut the underlayment with a utility knife and a straightedge rather than tearing it, and leave it flat against the slab with no bubbles.
Do not tape the underlayment up the base of the walls. Let it run to the wall and stay flat against it. What matters is that the surface is continuous, seam-free in feel, and fully covered. Run your hand along every seam before you start clicking planks, because you cannot reach it later.
Step 4: Plan the Plank Layout and Begin the First Row
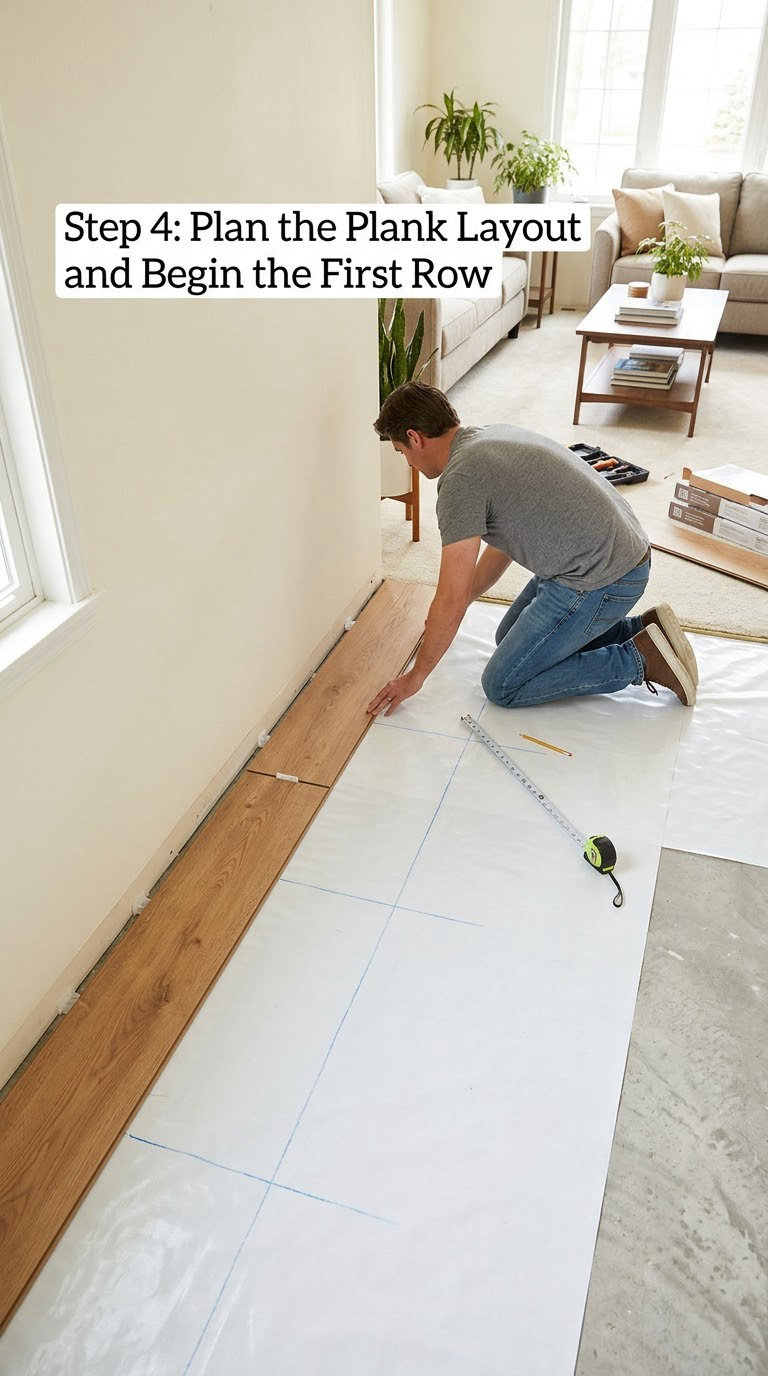
Planks look best running parallel to the longest wall or in line with the main source of daylight. Pick one before you cut anything, because changing direction halfway through a room is a headache. Lay a few planks loose in the room first and look at them from the doorway.
Find the straightest wall in the room. Measure it at both ends and at the middle. If the walls are off square, which most older rooms are, you will need to scribe the first row rather than force it.
Measure the room width at several points, subtract the width of a plank, and divide by two. That gives you the width of the first and last rows, and if one of them comes out narrower than 2 inches, adjust the layout so you are not installing a sliver at the end. A 1/2 inch strip of laminate along a wall is the one thing that makes a careful install look careless.
Snap a chalk line for your first row, offset from the wall by the plank width plus the expansion gap. Set spacers along the wall every 12 inches or so.
Now set the expansion gap, and this is not negotiable. Use 3/16 inch spacers as a minimum and 1/4 inch if the room is long, spans a temperature swing, or sits over a slab that gets cold. A floating floor moves. Laminate expands and contracts roughly 1/16 inch per 6 feet for every 1 degree Fahrenheit of temperature change, and a year-round room in 2026 will see the full range twice.
Set the first plank, press it down, and place a spacer against the wall on its short end as well as the long side. Do not skip the end spacers. They are what keeps the row from creeping lengthwise while you work.
Step 5: Click, Cut, and Fit the Laminate Planks
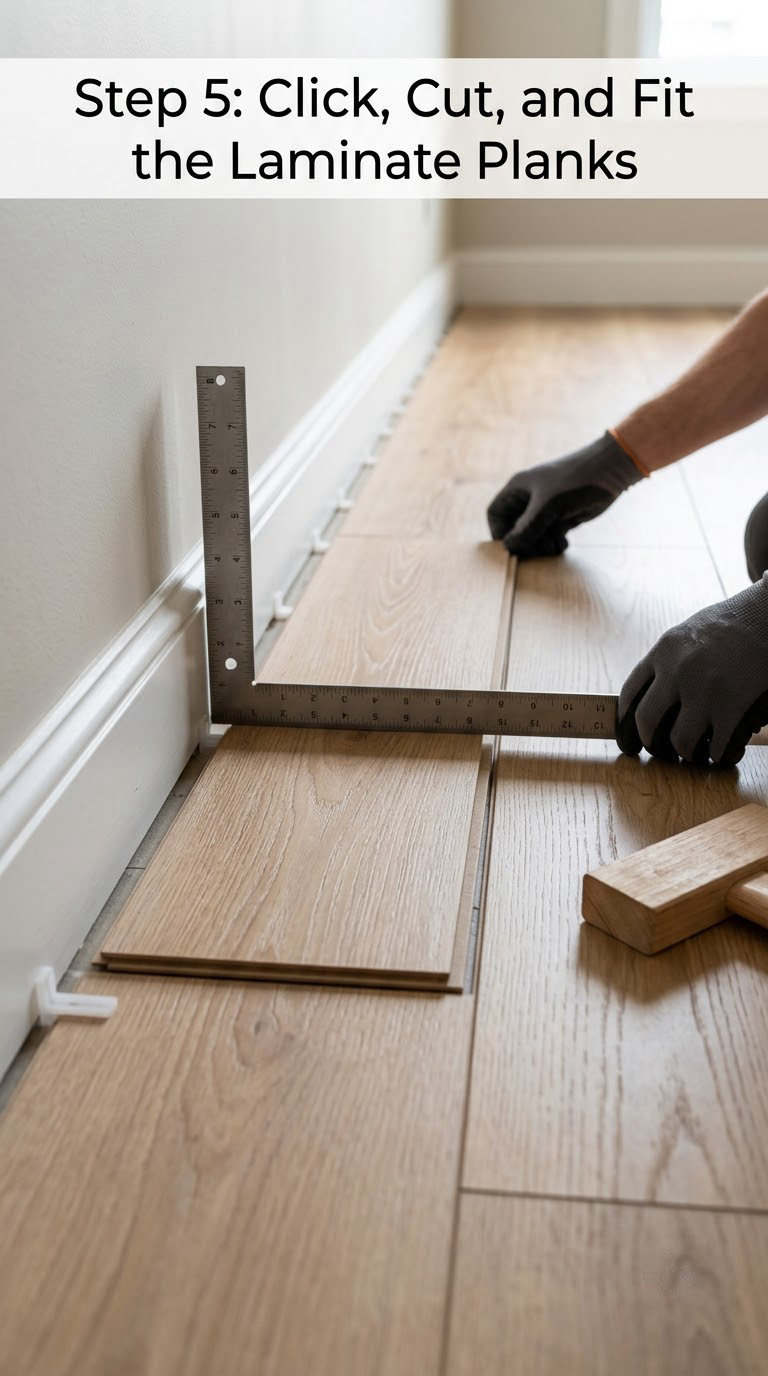
Open four or five cartons at once and pull planks from each box as you go. Every carton has its own shade variation, and using one box at a time produces visible stripes across the floor.
Stagger the end joints by at least 8 inches between adjacent rows. Offsetting every other row by half a plank is faster and looks fine in a plain room. The goal is that no two end joints line up across the width of the floor.
To connect two planks, hold the second plank at a shallow angle, engage the tongue into the groove at the short end, and lower it flat. The click should be quiet and even. Then angle the long edge of the next plank down onto the exposed tongue of the row. Work across the room, not back and forth.
Close the joint with a tapping block. Set it on the tongue side, not on the face of the plank, and strike it with a rubber mallet. Use a pull bar for the last plank of a row when you cannot swing the tapping block, and again, never hit a plank directly.
For cuts, score and snap with a laminate cutter for straight crosscuts. Keep the mark at the plank face rather than the decorative side so the cut edge is hidden at the wall. For anything not square, use a jigsaw with a fine-tooth wood blade, cutting from the back side upward to avoid chipping the wear layer.
At an uneven wall, scribe the plank. Take a short offcut of plank, hold it against the wall, and mark the high spots along the edge. Cut just inside those marks. Adjust the spacer gap as you go if the wall wanders more than 1/4 inch.
For supply pipes, measure from the finished edge of the adjacent plank to the center of the pipe, then transfer that to the new plank and drill a hole slightly larger than the pipe. You want room for a little movement and for a trim ring to cover the gap.
Step 6: Finish the Floor and Install Transitions
Measure the last row at three points rather than one. Cut each plank to fit, keeping the expansion gap the same width as the rest of the perimeter, and use the pull bar to draw that row into place. A crooked last row is almost always a mis-measurement, not a bad plank.
Walk the entire floor and check every joint with your hand or the straight edge. A joint that rocks or clicks is not fully engaged. Lift the plank gently and re-seat it before you remove any spacers.
Pull the spacers out. This happens over several days, so do not plan to move furniture back the same afternoon.
In a bathroom, kitchen or laundry room, run 100 percent silicone along the entire perimeter gap and caulk around every pipe penetration before installing trim. The expansion gap has to stay open; silicone fills it without bonding the floor to the wall, which is exactly what you need.
Install baseboard back over the gap, or use 2 inch quarter round where the wall is not straight enough for baseboard. Tack the trim to the wall only, never into the flooring. Then set transition molding at every doorway, with the leg on the laminate side and the nails into the threshold or the adjacent surface.
Wait 24 to 72 hours before walking on the floor heavily, depending on the product, and give heavy furniture a week. Laminate needs time to settle into its final position, and moving a sofa across it too early is how joints get damaged.
Common Mistakes to Avoid
Almost every complaint about a laminate floor over concrete traces back to one of these.
- Skipping the moisture test. Fix: test before you buy, not after the floor buckles. A vapor barrier is a warranty condition, not a suggestion.
- Installing over carpet and pad. Fix: remove carpet, pad and tack strip. The pad compresses under foot, the floor sinks, and the lock works loose. The same goes for VCT, glued-down wood and an existing floating floor.
- Leaving dust on the slab. Fix: sweep, then vacuum. A shop vac on a hard floor is fast and it is the fix for hollow spots that never get better.
- Bridging a wavy slab with plywood. Fix: level it. Grinding high spots and filling lows is cheaper than plywood and it solves the problem instead of hiding it.
- No expansion gap, or one that is too small. Fix: 3/16 inch minimum, 1/4 inch preferred. Buckling and lifted boards months later come from this.
- Striking planks directly with a hammer or your palm. Fix: tapping block on the tongue, pull bar on the last row. Cracked tongues are the top beginner complaint and they are entirely self-inflicted.
- Skipping the end spacers. Fix: two per foot on all four sides of the first row.
- Notching the casing too short. Fix: undercut enough that the door clears the finished floor, and take a scrap off the jamb while you are at it.
- Skipping acclimation. Fix: lay the cartons flat in the room at 60 to 85 F and 35 to 65 percent humidity for 48 to 72 hours. Skipping it voids the warranty when the floor later expands.
- Using one carton at a time. Fix: pull from four or five boxes so the shade mix stays even.
When to Call a Pro
There are four situations where this stops being a weekend project.
Structural cracks. A crack that runs the length of a wall, that is wider than about 1/8 inch, that is offset from one side to the other, or that has been sealed and reopened is a slab or foundation question, not a flooring question. A structural engineer should look at it before anyone covers it with a floor.
Active or rising moisture. Standing water in a basement, a failed sump pump, a slab that stays damp through a dry spell, or white powdery efflorescence that returns after you wipe it means the water is still moving. Fix the drainage and the vapor barrier problem before spending money on planks.
Severe leveling needs. If the straight edge shows dips deeper than 1/4 inch over several feet, or the slab slopes enough that furniture already rolls downhill, a self-leveling pour is a commercial job with commercial equipment. Many installers will quote a crew for this part and let you do the plank work yourself, which is a sensible split.
Stairs, and anything with a code angle. Stair treads, step-downs, radiant heat systems and any work in a bathroom where a permit or inspection is required locally belong to a licensed trade. Check what your city requires before you start.
Maintenance for Laminate Flooring Over Concrete
A floating floor is mostly about protecting the locking system. A damp mop and a vacuum will keep it for decades. None of this is expensive, and none of it needs a product made specifically for laminate.
Vacuum or sweep on a schedule. Grit is the enemy here, because particles work their way into the locking edges and cause the click to weaken. A vacuum with a soft brush head and a hard floor setting is the right tool; our guide to the best vacuum for laminate floors covers the settings that matter. If you already own one, our picks for wet dry vacuums for laminate floors are worth a look — use a wet-dry vac for spills only, never for routine passes.
For mopping, damp mop only. Wring the mop until it barely drips, and never flood the floor. Standing water is what seeps down to the slab. If you use any cleaner, make sure it is a pH-neutral wood or laminate formula, because a harsh cleaner can dull the wear layer and leave a film.
Put felt pads under every furniture leg before it goes back down. Use pads on the bare slab side too if you ever lift the floor. A cast-iron base without pads can press a divot into the wear layer that never comes out.
Clean spills quickly, especially water. Wipe standing water within an hour and you are fine. Let water sit for a day and the seam can swell enough that two planks will not close again.
Once a year, walk the perimeter with a flashlight and look at the expansion gap. If the floor no longer sits inside the baseboard line, or if you can see daylight along one wall, something moved. That is the moment to find out why, not six months later when a plank cracks.
Frequently Asked Questions
Can you install laminate flooring directly on concrete?
Yes, if the slab is clean, level within 1/8 inch over 6 feet, dry enough to pass a moisture test, and covered with a 6-mil vapor barrier plus underlayment. No plywood subfloor is needed. The planks float on the underlayment and are never glued or nailed to the concrete. Most manufacturer warranties require the barrier and a passing moisture reading, so skipping either can void coverage.
What do you put under laminate flooring on concrete?
Two layers in most cases. First a 6-mil polyethylene vapor barrier rolled wall to wall with 8 inch seam overlaps taped and run up the perimeter, then your underlayment with butted, taped seams. Alternatively, use a 2-in-1 underlayment with an integrated moisture membrane and skip the poly entirely. Check the label, because many standard pads are sound and cushioning only with no membrane at all.
Do you need underlay for laminate flooring on concrete?
Yes. Underlayment does three jobs at once: it gives the locking system a smooth, stable surface over porous concrete, it cushions the floor so it does not sound hollow, and it limits the small daily movement that wears the joints out. Skipping it is the most common reason planks develop gaps within months. If your pad includes an integrated vapor membrane, it can also serve as your moisture barrier, but only if the manufacturer says so on the label.
How much expansion gap does laminate flooring need?
At least 3/16 inch around the entire perimeter, and 1/4 inch is better in a long room, a cold garage, or a space that swings hard between summer and winter temperatures. Hold the gap with spacers against every wall, including the short ends of the first row, and do not remove them until the floor is finished. Cover the gap with baseboard, quarter round or a matching trim, and silicone it in wet rooms rather than caulking it solid.
How do I level a concrete floor before installing laminate?
Match the fix to the defect. Grind down high spots, ridges and paint drips with a diamond cup wheel. Fill hairline cracks, holes and shallow dips with concrete patch or a floor-grade skim compound, and let it cure 24 to 48 hours. Use a self-leveling pour only when the whole slab is wavy over a wide area. Then verify with a 6 foot straight edge: no more than 1/8 inch of gap under the middle.
Why is there moisture under my laminate flooring?
Almost always a missing or failed vapor barrier, or a slab with active water movement underneath it. Look for white powdery bloom on the slab, a musty smell, or darkened plank edges, and pull back a corner of the floor to see the surface. Concrete gives off moisture vapor constantly, so the barrier is what keeps it from reaching the planks. If water is standing or returning after you mop it, fix the drainage first.
Where to Start This Weekend
Buy the flooring and decide on your underlayment first, because that choice tells you whether you need a roll of 6-mil poly. Then spend your Saturday on the slab: sweep, vacuum, grind the high spots, fill the cracks, and check flatness with a straight edge. Everything after that is faster than the prep, and the prep is the part that decides whether the floor is still flat in five years.