
How to Build a Closet Shelf from Plywood: Easy DIY Plan 2026
Learning how to build a closet shelf from plywood takes one sheet of panel, a few sticks of trim and an afternoon. The panel is the easy part; the holds come from narrow cleats screwed into the wall on three sides, so the shelf carries weight instead of bowing in the middle. Use 3/4 inch (19 mm) cabinet grade birch or maple plywood for anything spanning more than about 24 inches (61 cm), and support it on the back wall and both side walls.
I have built these in linen closets, pantries and utility closets over the years, and the failures I saw were never cutting failures. They were support failures: a shelf screwed into drywall only, a 1/2 inch panel asked to bridge a 30 inch gap, or one face sealed and three edges left raw. Get those three things right and the shelf is genuinely boring in the best way.
Contents
Time: 3 to 5 hours including finishing and drying · Cost: one sheet of plywood, trim, adhesive and fasteners covers most closets in a single trip to the hardware store · Difficulty: moderate DIY · Skill level: comfortable with a circular saw, a drill and a tape measure
Tools and Materials
You need a tape measure, a straightedge and a set of cleats. Everything else on this list is a convenience, and only one of the saws is a real requirement.
Materials
- 1 sheet of 3/4 inch (19 mm) cabinet grade plywood, 4 by 8 feet (122 by 244 cm), birch or maple for a smooth face that takes paint well
- 2 to 3 lengths of 1×2 (38 by 89 mm) pine or poplar for the back and side cleats
- 1 length of 1×3 (38 by 140 mm) trim for the front nosing that stiffens the shelf and hides the plies
- Construction adhesive, roughly one tube
- 1 1/4 inch (32 mm) screws for cleats, plus 1 1/2 to 2 inch (38 to 51 mm) finish nails or screws for pinning the shelf
- 6 to 8 drywall anchors, toggle or heavy duty hollow wall type, for cleat ends that miss a stud
- 120, 180 and 220 grit sandpaper, plus wood filler or stainable spackle
- Stain blocking primer and cabinet paint, or stain and a water based sealer
- Optional: iron-on edge banding, 3/4 inch (19 mm) wide, and a small can of semi-gloss paint in the trim colour
Tools
- 25 or 30 foot (7.6 or 9 m) tape measure, a speed square, a pencil and a marker
- 4 foot (1.2 m) level
- Stud finder, plus a 3/16 inch (5 mm) drill bit for confirming a stud location
- Circular saw with a fine finish blade, a straightedge and clamps. If you want the cleanest rip cuts, our picks for plunge track saws for breaking down plywood are worth a look before a full sheet reaches your driveway
- Alternatives to a circular saw: a panel saw, a miter saw with a fine blade, or a backsaw for small shelves
- Drill or driver, a brad point bit for pilot holes and a countersink bit
- Two sawhorses or a pair of padded supports, plus a hammer or a nail gun
- Sanding block, tack cloth, painter’s tape and a drop cloth
- Safety gear: eye protection, hearing protection, a dust mask or respirator, and gloves for handling sheets and finish
How far can plywood span without support? These are working limits for a loaded shelf in a room temperature closet, not structural ratings. Treat them as the point where you add support rather than the point where the panel snaps.
| Plywood thickness | Comfortable unsupported span | What to load it with | Best for |
|---|---|---|---|
| 1/2 inch (13 mm) | up to 18 inches (46 cm) | Folded shirts, towels, socks | Short runs and light items only |
| 5/8 inch (16 mm) | up to 24 inches (61 cm) | Folded clothes, a few light boxes | Medium spans, budget builds |
| 3/4 inch (19 mm) | up to 28 inches (71 cm), or 36 inches (91 cm) with a front nosing | Towels, jeans, baskets, storage bins | Almost every residential closet |
One more rule of thumb: if the load sits on the middle third of the panel, drop one step down the table. A shelf stacked at one end is far stronger than the same shelf loaded across its whole surface.
Before You Start
Check the opening, the wall behind it and the floor under it before anything else. Fifteen minutes here saves a panel cut to the wrong size and a shelf that sits on an uneven floor.
Measure the opening twice, at four points. Measure the width at the top and bottom of the opening, and again at the back and front. Old closets are rarely square, so use the smallest of the four numbers for your shelf width. If the gap between the two is more than 1/4 inch (6 mm), scribe the back edge of the panel to the wall later instead of forcing a rectangle into a trapezoid.
Choose the depth. Most closets measure 24 to 30 inches (61 to 76 cm) deep. Cut the panel 1/4 to 1/2 inch (6 to 13 mm) shallower than the wall depth, or it will hit the casing, the doors or the light housing. If the doors slide past the opening, keep 1 inch (25 mm) of extra clearance.
Leave room for the clothes.
- Long hanging garments need 42 to 48 inches (107 to 122 cm) of drop below the rod
- Shelving over a rod on a double hang needs 36 to 40 inches (91 to 102 cm) of clearance
- A shelf landing 10 to 14 inches (25 to 36 cm) above the floor suits shoes and sweaters
- Between shelves for folded clothes, 12 to 16 inches (30 to 41 cm) is comfortable; pantries holding cans want 18 inches (46 cm)
Find the studs and mark them. Slide the stud finder across the back wall and both side walls, mark each location with a pencil, then confirm by knocking and by drilling a small test hole. Most closets have studs somewhere behind the back wall because the framing usually lands there, but the side walls of a wide closet are frequently hollow.
Protect the space. Lay a drop cloth over the carpet or floor, and tape the baseboard. If you are removing builder-grade wire shelves, pull the shelf supports out with a pry bar, then patch the holes with spackle once the new cleats are in.
Set up safely. Wear eye and hearing protection for every cut, keep a dust mask on for sanding, and saw outdoors or open a window and run a fan. Ventilate properly when you spray primer or polyurethane, and never cut plywood on a table saw without a clean rip blade and a proper blade guard.
How to Build a Closet Shelf from Plywood Step by Step
The build runs in six steps, in this order: measure, cut, hang the supports, fit the panel, fasten it, then seal it. Do the dry fit before you paint anything.
Step 1: Measure the Closet and Mark the Shelf Position
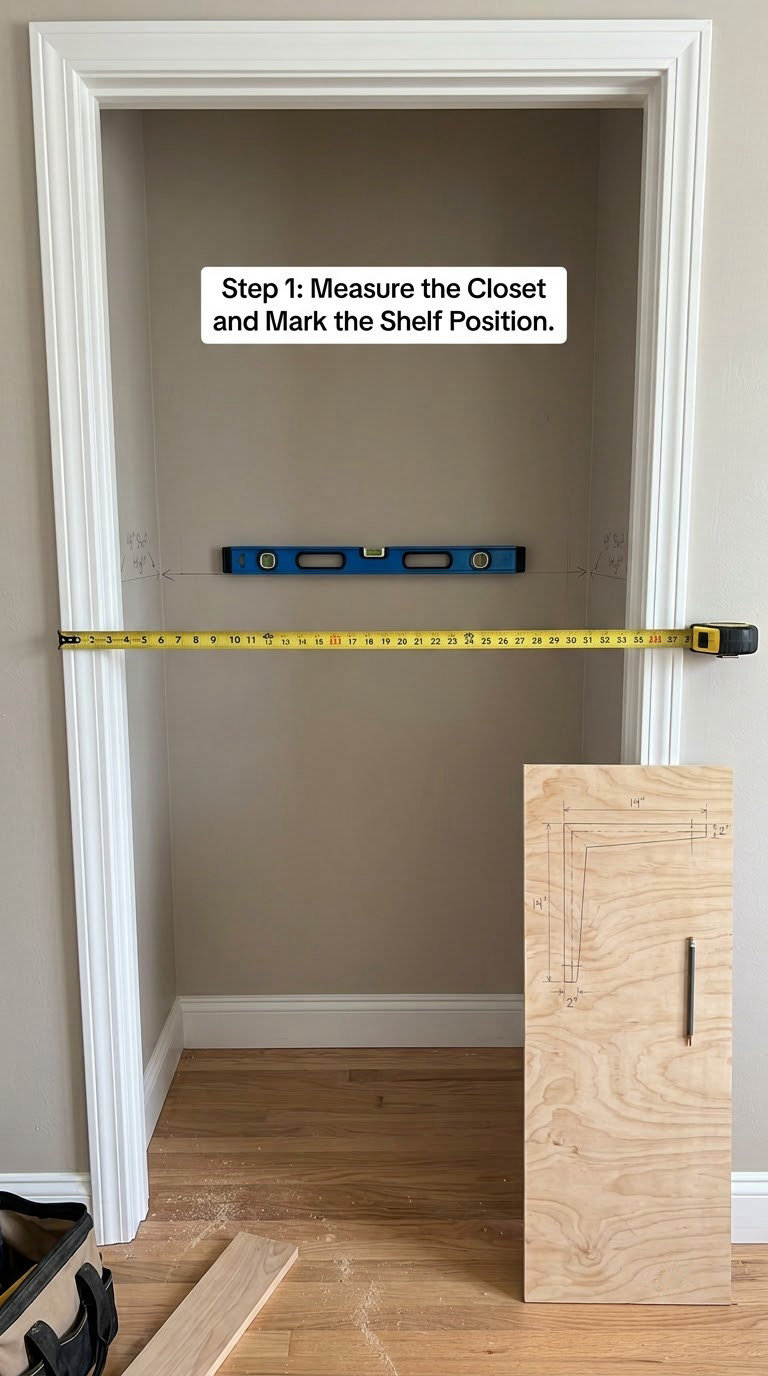
Mark the shelf line on all three walls at once, then check it before you commit. Snap a pencil line across the back wall at your chosen height, then carry that height onto both side walls with the level held against the back wall.
Hang a clothes rod or a length of string along the line and step back. A level line that looks right from one angle often dips toward the door. Set the line so the lowest point still leaves full clearance for whatever hangs below it, and mark that lower point as your true shelf underside.
Transfer the final numbers to the plywood: the width of the opening at its tightest point minus 1/8 inch (3 mm) for a slip fit, and the depth you settled on minus 1/4 inch (6 mm). Label the panel and the wall with matching pencil marks before anything gets cut.
Step 2: Cut the Plywood Shelf and Supports
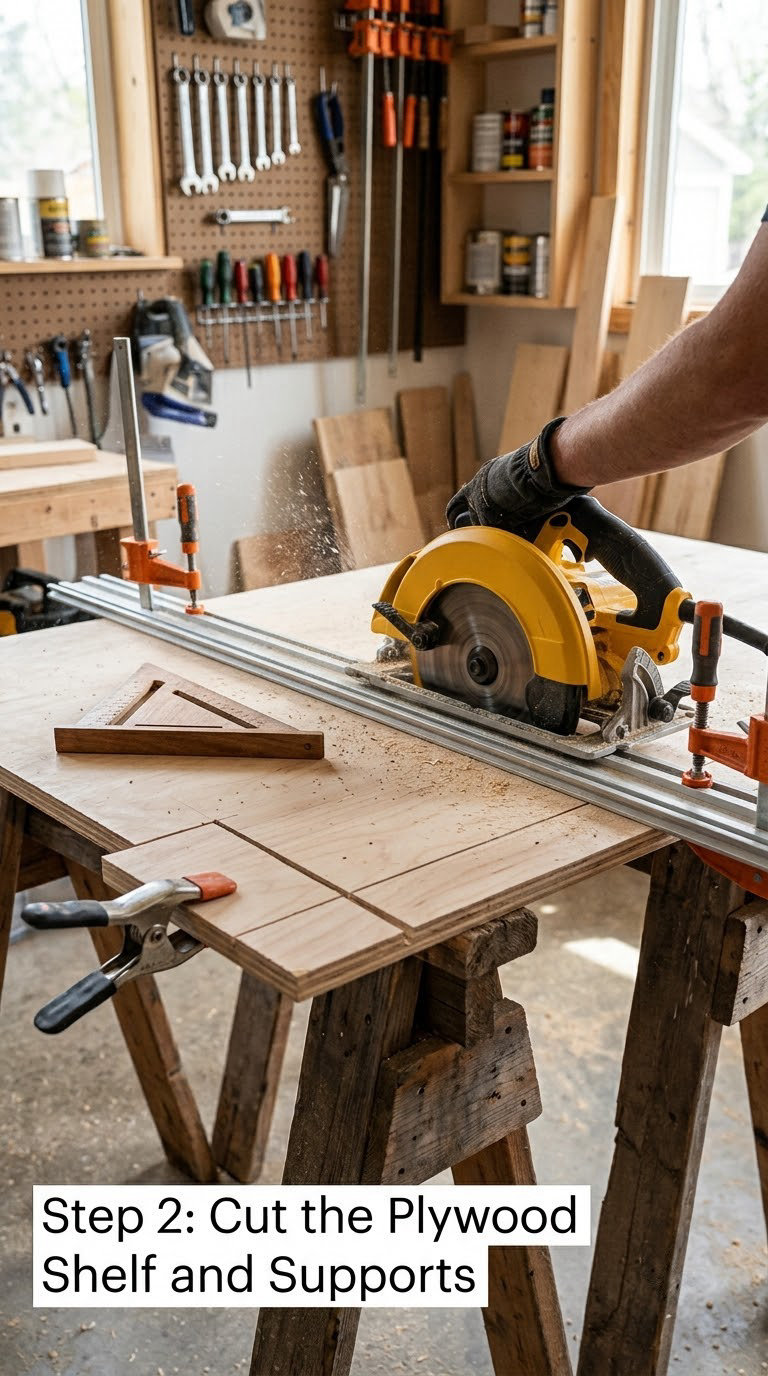
Break the sheet down on sawhorses, never on the ground. Clamp a straightedge across the sheet, set the saw base flat on the panel, and keep the straightedge a couple of inches from the cut line so the shoe can ride it. Cut with the panel supported on both sides of the line and let the offcut fall away, so the blade does not pinch the kerf at the end.
Score the face of the panel first with a utility knife along your pencil line, then cut on the waste side of that line. That keeps splintering on the offcut instead of along your shelf edge. If you are using a track saw or a circular saw with a guide, drive the cut in one continuous pass without stopping, and let the saw run free at the end of the line.
Cut the 1×2 cleats and the 1×3 front trim last, after the panel is a perfect fit. Cut every cleat for a given shelf at the same length in one go, and cut the pair of side cleats one inch (25 mm) longer than the back cleat so the ends can be butted tightly into the corner.
Check every cut with the speed square against a straight edge of the panel before moving on. A racked panel twists when it goes up the wall, and it is much easier to re-cut now than in a closet corner.
Step 3: Install the Cleats or Support Pieces
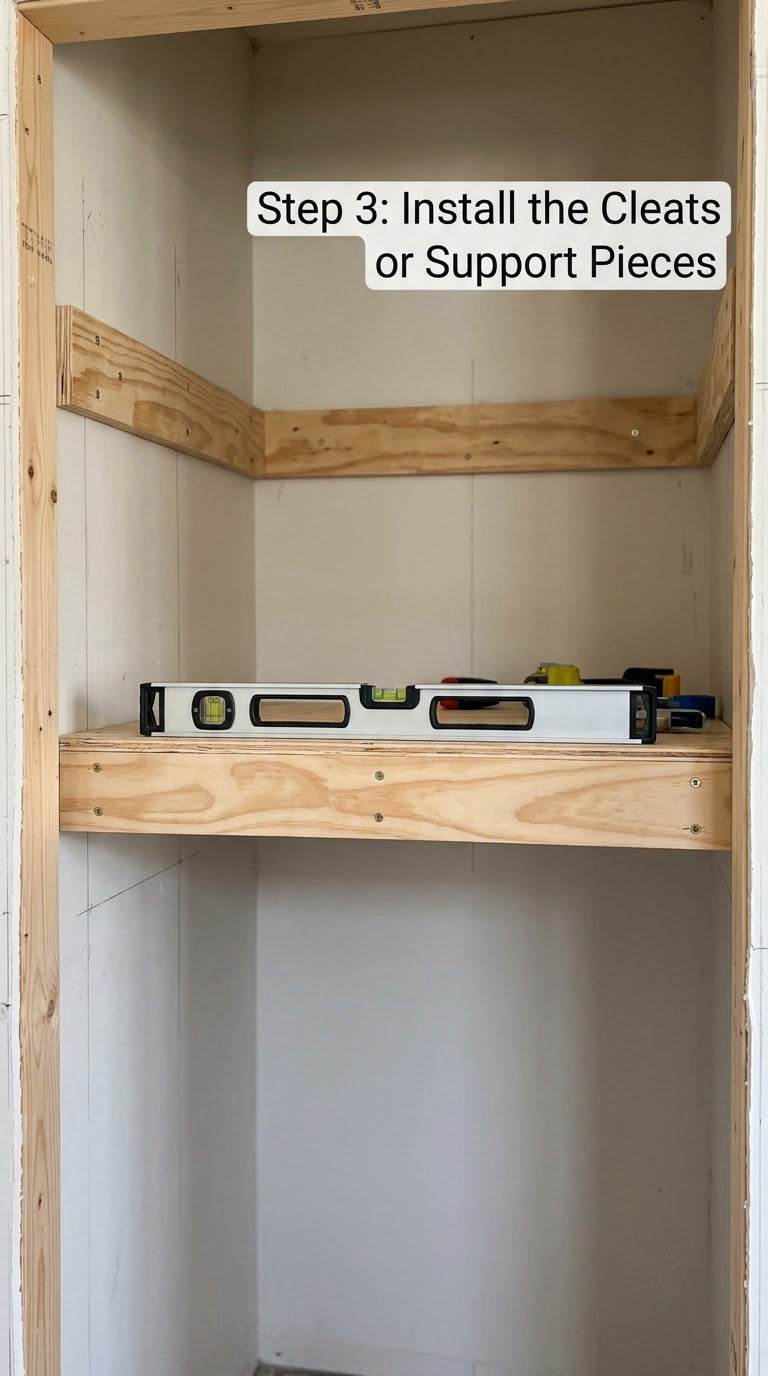
Cleats are narrow boards screwed flat to the wall; the panel then sits on top of them. Install the back cleat and the two side cleats at the same height, keeping them as a matched set, and drive at least two screws into every stud you can reach.
Where a cleat end lands between studs, use a drywall anchor. The cleanest method is to screw the anchor in place with a screw standing proud of the cleat, slide the cleat onto the protruding screw, then drive the rest of the screws. You get the hole in the right place without guessing with a pencil mark.
Run a bead of construction adhesive along the back of each cleat before you press it into place, then screw or nail through it. Let the adhesive cure for the full time printed on the tube before the panel goes on.
Put the level on the back cleat and check that both side cleats match it, then press down hard on the middle of each one. If a cleat flexes or rotates, it is not yet attached to enough framing. Add another anchor or move the cleat to catch a stud.
Set the front trim aside until the panel is fitted. Glued on last, it acts as a nosing that stiffens the shelf against sag and covers the ply layers on the most visible edge.
Step 4: Fit the Plywood Shelf
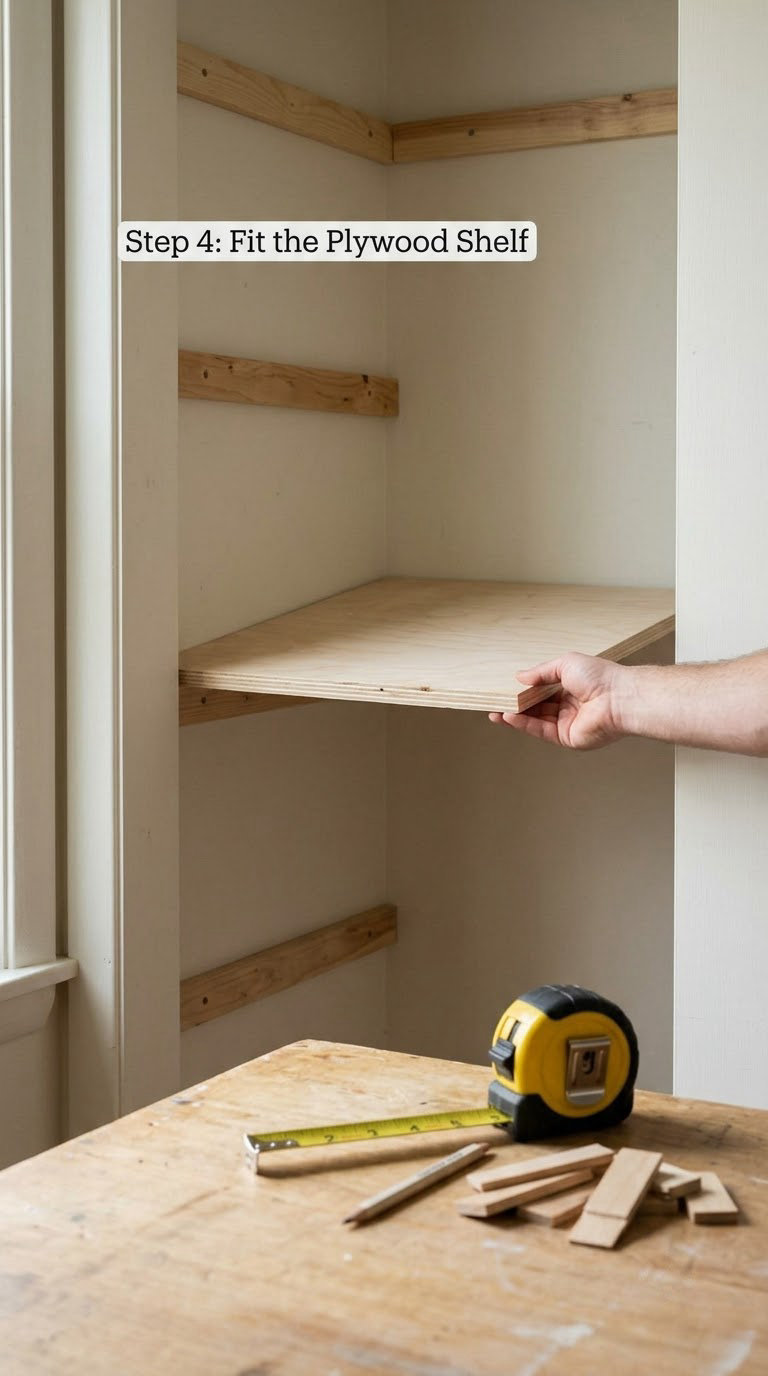
Slide the panel into the closet resting on the cleats and check it for movement. Push one end and watch the other. A well fitted shelf sits flat with a faint 1/8 inch (3 mm) gap at each end and no daylight under the middle.
If the panel rocks, do not shim the shelf itself. Slide a hardwood shim or a stack of washers under the low point of the cleat, re-level, and test again. Shimming the cleat is the fix that stays hidden.
If the back edge will not sit flat, hold the panel tight against the wall and run the speed square along the back edge. The gap between the square and the panel shows you the taper. Mark the high side, take the panel out, and sand or plane that edge down by small amounts until it fits. A scribed back edge looks intentional; a forced one shows a gap you can put a finger through.
Now check that the panel will clear the doors or the casing every time it opens. Sit in a chair in the middle of the room and swing the door fully open with the panel in place.
Step 5: Secure the Shelf with Screws
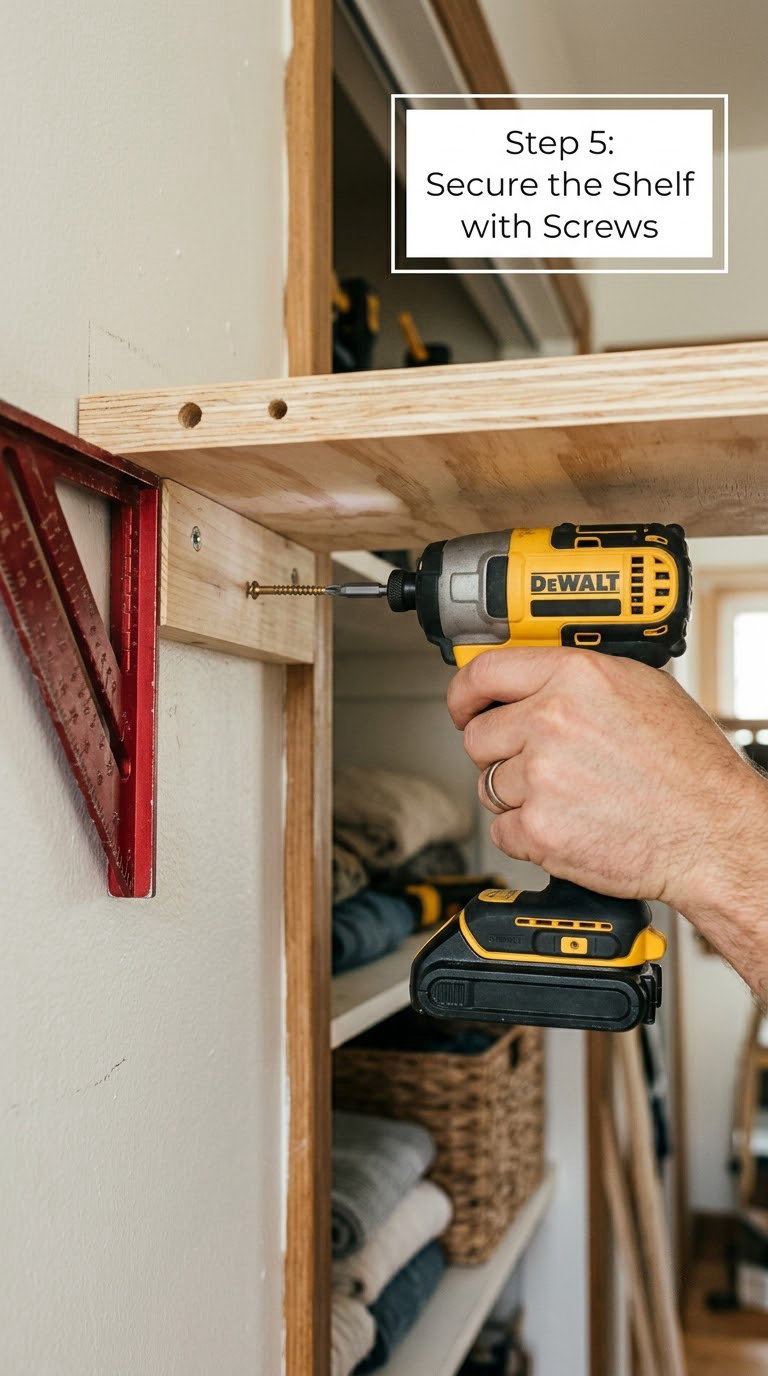
Drill pilot holes with a bit slightly smaller than the screw shank, so the screw pulls the panel down tight without splitting the ply. Sink the heads just below the surface, or countersink them if you plan to nail the front trim on top.
Use two fasteners per cleat, set back from the panel ends by about 2 inches (50 mm) so you do not hit a splitting edge. Where the shelf is hidden from view, fasten from underneath into the cleat and leave the top face clean. Where you must drive from above, use a countersink bit and fill the hole later.
Run every screw home by hand first, then finish with the driver. A quarter turn past snug is plenty. Over-tightening crushes the plywood and pulls the head through in a year, which is one of the most common complaints from people who built their own shelves.
Glue the 1×3 front trim to the front edge with construction adhesive, clamping it along its length. This strip is what stops the panel drooping in the middle across a long span. Wipe the squeezed-out glue off with a damp rag before it skins over.
Step 6: Sand, Seal, and Finish the Shelf
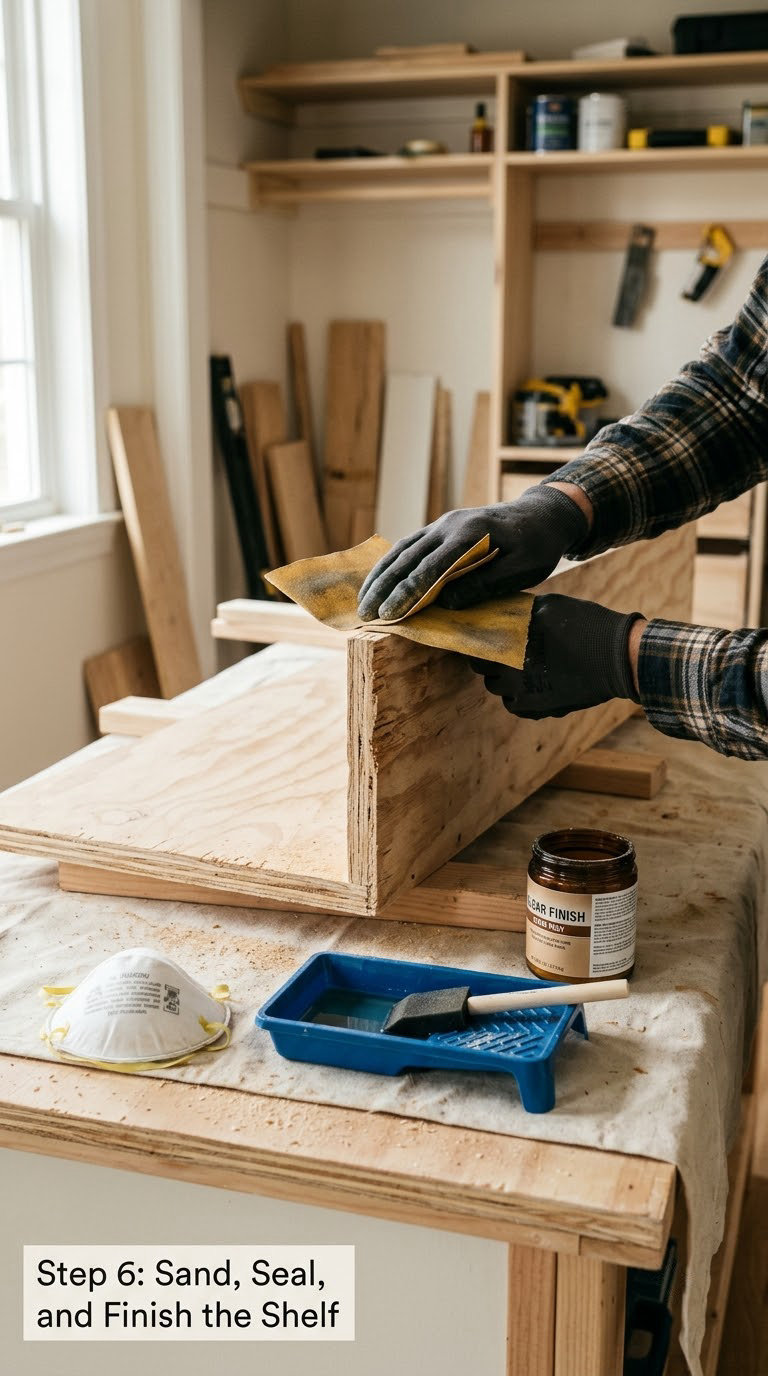
Sand the whole surface and all exposed edges: 120 grit to knock down the cut marks, 180 grit for the surface, then 220 grit on the front edge where hands and fabric will rub. Break the sharp arris on the front trim with a sanding block, or iron on matching edge banding while the adhesive is still warm. Fill any gaps at the wall with wood filler and sand it flush.
Dust with a tack cloth, then seal everything: face, back, and all four edges. Bare ply edges absorb finish unevenly and go fuzzy, and those are the same edges that wick up moisture. If you want a grain-filled look, apply a second coat of filler and sand again before the primer.
Use primer first, and let it dry to the touch, usually one to two hours, then sand lightly and apply two coats of cabinet paint. Let the final coat cure about 24 hours before loading the shelf. Wall paint is not the right choice here; the hard cheap finish in it stays tacky and books, baskets and fabric stick to it. Cabinet paint or a hardened finish cures harder and wipes clean.
If you prefer wood to paint, stain the faces first, then seal with two or three coats of a water based polyurethane or wipe-on sealer, allowing 2 to 4 hours between coats. Seal the edges inside and out. The colours and sheens you pick are worth thinking about before you start, and the guide on shelf styling the way designers do it covers how to arrange what goes on top.
Common Mistakes to Avoid
Almost every sagging shelf I have been asked about came down to one of these. Each has a straightforward fix.
- Measuring once. Take four measurements and use the smallest. The fix is to remeasure at three heights, mark the tightest, and size the panel to that.
- Using 1/2 inch (13 mm) ply across a 30 inch (76 cm) gap. It bows under folded clothes within a season. Use 3/4 inch (19 mm), add the front nosing, or drop in a middle cleat.
- Supporting the panel on one wall only. A back cleat alone lets the front edge droop. Add the two side cleats, and add vertical dividers on wide runs.
- Fastening into drywall with no anchor. The cleat pulls loose under load. Use toggle or heavy duty hollow wall anchors wherever you miss a stud, or shift the cleat to find framing.
- Over-tightening the screws. Crushing the face layer causes heads to sink and show. Snug plus a quarter turn is enough.
- Sealing only the top face. Water gets in through the raw edges and the panel darkens and swells. Seal every face, both sides, and all four edges.
- Cutting without a straightedge. A freehand rip is never square, and the panel will twist on the wall. Clamp a straightedge and use a finish blade.
- Skipping the primer or using wall paint. Objects stick to the shelf and the bare face grain drinks the paint. Prime first, then use cabinet paint.
To fix a shelf that is already sagging, empty it, add a mid-span cleat screwed into studs on the back wall, and fasten a 1×2 or 1×3 to the front edge with construction adhesive and screws from underneath. That combination takes most sagging shelves back to full without replacing the panel. If the panel itself is warped, swap it for 3/4 inch ply.
When to Call a Pro
Call a contractor or carpenter when the shelf becomes structural, when the wall resists fasteners, or when the closet contains utilities.
- You plan to load the shelf with heavy items such as a stack of hard cases, a safe, or dense pantry goods over a span past 36 inches (91 cm)
- You cannot find solid framing behind the back wall, the wall is masonry, or the plaster is lath and will crumble around any anchor
- The walls are seriously out of plumb and the shelf has to line up with existing built-in wardrobe cabinetry
- Any electrical wiring, a junction box, or plumbing is in or behind the wall you intend to drill
- You are cutting into a wall where local rules or your building require a permit, or the home is a rental and the lease needs the owner written on the plan
A built-in wardrobe system that replaces or alters a load bearing partition is firmly pro territory. Shelf carpentry in a standard framed closet is not.
Maintenance
Check the shelf twice a year, and always before you stack anything new on it. Sagging shows up as a gap that opens under the front edge, which is easy to spot from a chair in the middle of the room.
Look for loose fasteners first, and tighten any screw that turns by hand. Replace screws that have backed out with slightly longer screws of the same type, into fresh pilot holes, rather than driving the old hole deeper. A screw head sitting proud of the surface is a filled hole, not a bigger problem.
Watch the ply faces for dark rings, softness or delamination, especially along the back edge against the wall, since that is where damp collects first. If the face is soft, cut the panel back to sound wood or replace it rather than filling the damage.
Touch up the finish when the edge paint wears through and fabric starts to catch. For ongoing loads, keep heavy bins toward the sides of the panel and off the middle, and add a mid-span cleat before the span creeps past what your thickness supports. Builders on r/DIY consistently report that engineered shelves sag under constant load, while plywood on cleats holds, and the same pattern shows up in practice.
Frequently Asked Questions
How thick should plywood be for a closet shelf?
Use 3/4 inch (19 mm) plywood for spans over about 24 inches (61 cm) or for anything heavier than folded clothes. 1/2 inch (13 mm) is fine for short runs under 18 inches (46 cm) holding clothing, towels or socks. Between the two, 5/8 inch (16 mm) handles spans to 24 inches. Add a 1×3 front nosing and you can push 3/4 inch ply to 36 inches (91 cm).
How far can plywood span without support?
Plan on 18 inches (46 cm) for 1/2 inch (13 mm), 24 inches (61 cm) for 5/8 inch (16 mm), and 28 inches (71 cm) for 3/4 inch (19 mm). A glued front nosing extends 3/4 inch to roughly 36 inches (91 cm). Add a mid-span cleat rather than pushing past these numbers, and remember the worst case is a fully loaded middle section, not an empty panel.
Is MDF a better choice for closet shelves than plywood?
Plywood is the better choice for most closets. MDF is smooth and paints beautifully, but it is more prone to creeping under a constant load and to swelling in humid spaces like garages and basements. Particle board is the weakest of the three for shelving. Plywood holds screws better, keeps its shape in heat and cold, and tolerates the occasional damp towel. Save MDF for painted cabinet parts, not shelves.
How do I fix a sagging closet shelf?
Empty the shelf, then add a cleat across the middle of the back wall, screwed into studs. Glue a 1×2 or 1×3 to the front edge and fasten it from underneath into that middle cleat. If the panel itself is bowed, replace it with 3/4 inch (19 mm) plywood rather than trying to pull it straight. Keep the heavy items toward the ends once it is reinforced.
Do closet shelves need to be screwed into studs?
Studs are strongly preferred wherever you can reach them, and most closet back walls have framing behind them. Where a cleat lands between studs, use toggle or heavy weight drywall anchors rated well above the load, or reposition the cleat. A back cleat with no front or side support is the real weakness; supporting the panel on three sides matters more than hitting a stud in one spot.
What paint should I use on a plywood closet shelf?
Prime with a stain blocking primer, then use cabinet or hard finish paint in two coats. Standard wall paint leaves a soft, slightly tacky film that books, baskets and fabric stick to. If you go with stain instead, seal it with two or three coats of polyurethane and seal every edge. Let the finish cure about 24 hours before you load the shelf.
Conclusion
Start with the measurement, not the cut. Measure the opening at four points, take the smallest, and confirm your studs before anything is cut.
Then choose 3/4 inch cabinet grade plywood for anything long or heavy, cut the panel undersize by 1/8 inch (3 mm), hang matched cleats on the back wall and both side walls, and level them before they cure. Fit the shelf dry, scribe the back edge if the wall is out of square, fasten it with two screws per cleat, and glue a 1×3 nosing to the front edge.
Finish last and finish everything: primer, two coats of cabinet paint, all faces and all edges, with a full cure before you load it. That is how to build a closet shelf from plywood that still looks straight and feels solid in five years, and once the shelf is up you can plan the styling with our guide to corner shelf units for the awkward spaces the panel does not cover.
