
How to Install Shiplap on a Wall: Easy DIY Guide (2026)
To install shiplap on a wall, you fasten boards horizontally into the wall studs with two finish nails per stud, spacing each row with a coin or tile spacer so the reveal stays consistent, then fill, caulk and paint. A single 8 by 10 foot accent wall takes most beginners a full day once you count drying time.
The look is simple. The details are what make it look expensive. Flat walls, uneven corners and a first row that starts a quarter inch high will undo a lot of careful work, and those are exactly the three things that go wrong when a shiplap wall is rushed.
Contents
Fall is a good time for this project. The boards can acclimate indoors for two days before you start, the house is comfortable to work in, and an accent wall finished now is the first thing people see when the door opens on holiday gatherings. If you want ideas for where the wall should go, start with a roundup of slat wall systems for storage-heavy spaces, since the two treatments share a lot of the same prep work.
Before you buy anything, take a tape measure to the wall and write down its width and height. A single number keeps you from over-buying boards, which is the most common beginner mistake with this project.
Time: one to two days for an 8 by 10 foot wall, plus 48 hours of board acclimation.
Cost: scales with wall area and material choice, so measure before you shop.
Difficulty: beginner to intermediate carpentry.
Skill level: basic cutting, measuring and stud-finding.
Tools and Materials
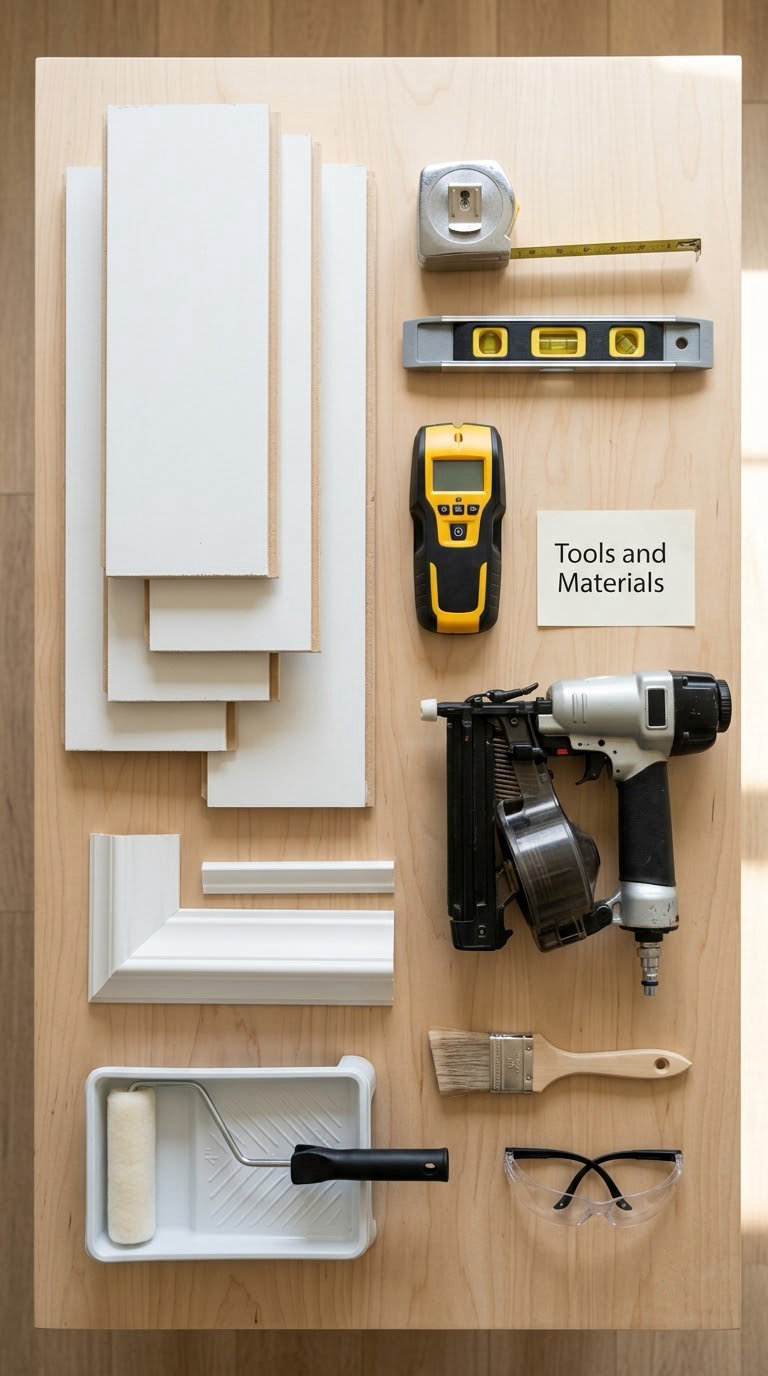
You can do this whole project with a hand saw, a hammer and about eight dollars of nails, but the tools below make the difference between a wall that looks good and a wall that looks custom.
Tools
- Stud finder — a battery or magnetic model; scanning the wall beats knocking on it every 16 inches.
- 4 foot level or a 24 inch laser level for long guideline runs.
- Tape measure and a 6 inch carpenter’s square.
- Brad nailer with 1 inch 16 gauge finish nails, plus a hammer and a handful of nails as backup.
- Circular saw or miter saw with a fine-tooth blade, plus a jigsaw for cutouts around outlets and pipes.
- Chalk line with a straightedge, plus a pencil and a stud marker.
- Tile spacers or plastic coins for spacing. Spacers beat pennies because they will not fall out while you hold the board.
- Wood shims about 1/16 inch thick for leveling the first row.
- Safety glasses, a dust mask and ear protection for cutting and nailing.
Materials
- Shiplap boards — real boards have a rabbet groove on two edges and overlap. Faux plywood is ripped from 1/4 inch sheets. Panels are 4 by 8 foot tongue-and-groove sheets. See our shiplap wall panel picks if you want panels rather than loose boards.
- Board count — divide the wall width in inches by the board face width, then add 10 percent for cuts and mistakes. An 8 foot wall with 5 inch boards needs about 20 boards, so buy 22.
- Finishing nails — 1 inch 16 gauge for thin boards, 1.5 inch if the board is 1/2 inch or thicker.
- Construction adhesive — optional, and skip it if you may want to remove the wall later.
- Outlet box extenders sized to your box depth, plus door jamb extensions for real shiplap thicker than 1/4 inch.
- Wood filler or spackle, paintable caulk, 120 to 150 grit sandpaper.
- Primer and paint — use a stain-blocking primer, and buy the same color for the wall behind the boards.
- Trim — baseboard, corner trim or an outside corner moulding, plus caulk and finish nails.
Before You Start: Prepare the Wall and Check the Project
Shiplap goes over drywall, not instead of it. The boards need solid backing and something to fasten into, and drywall gives you both, which is why you can install shiplap over an existing finished wall rather than tearing it back to studs.
Take off the baseboard, crown moulding and door casing, and pull the outlet and switch cover plates off. If a board will land on an outlet, stop there and note the depth of the box before you start — a standard 2 by 4 wall has a 4 inch box, and 3/4 inch shiplap on top of drywall needs a matching extender or the cover will sit proud of the wall.
Now check the wall itself. Look for damp areas, soft drywall, mold staining or efflorescence, especially in a basement or an exterior wall. If the wall is holding moisture, the boards will cup away from it later and no amount of finish will hide that.
Mark every stud with a pencil and a vertical line, and check the spacing as you go. Newer homes are usually framed at 16 inches on center, older ones at 24 inches, and 24 inch centers need a fastener pattern that catches each stud without splitting the board.
Unbox the boards and leave them in the room, stacked flat with the packaging off, for at least 48 hours. Boards that go up cold from the garage will shrink afterward and open visible gaps along the top of the wall, and that is the one finish defect that is genuinely hard to repair.
Most of this work needs no permit. Electrical work does: if you are moving an outlet, adding a box or running new cable, that is licensed work with an inspection, and it is not a project to improvise on. Our guide to installing a window air conditioner in a wall covers the same permit and electrical rules that show up whenever you cut into a finished wall.
Step-by-Step Instructions: How to Install Shiplap on a Wall
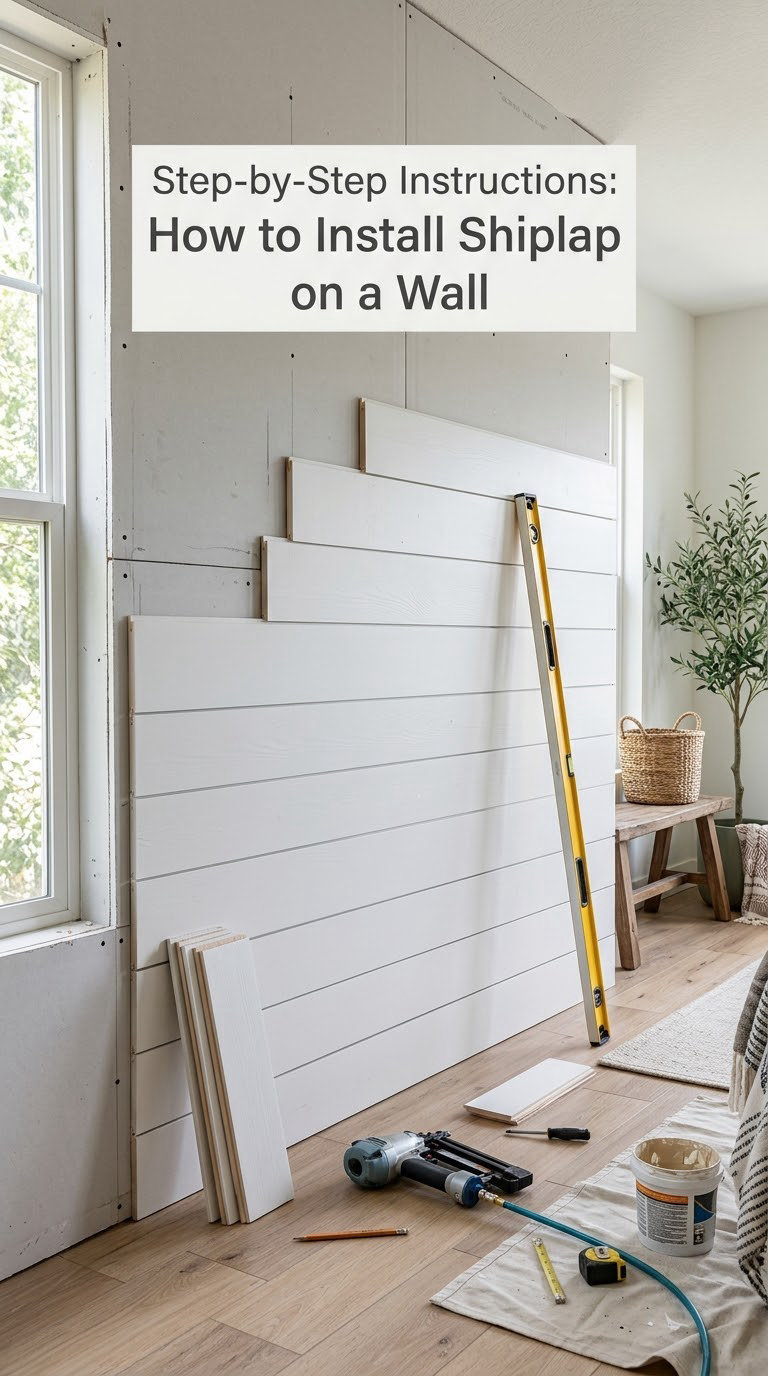
Follow these seven steps in order, and check each one before moving to the next. The order matters because later steps hide the evidence of earlier ones.
Step 1: Measure the Wall and Plan the Shiplap Layout
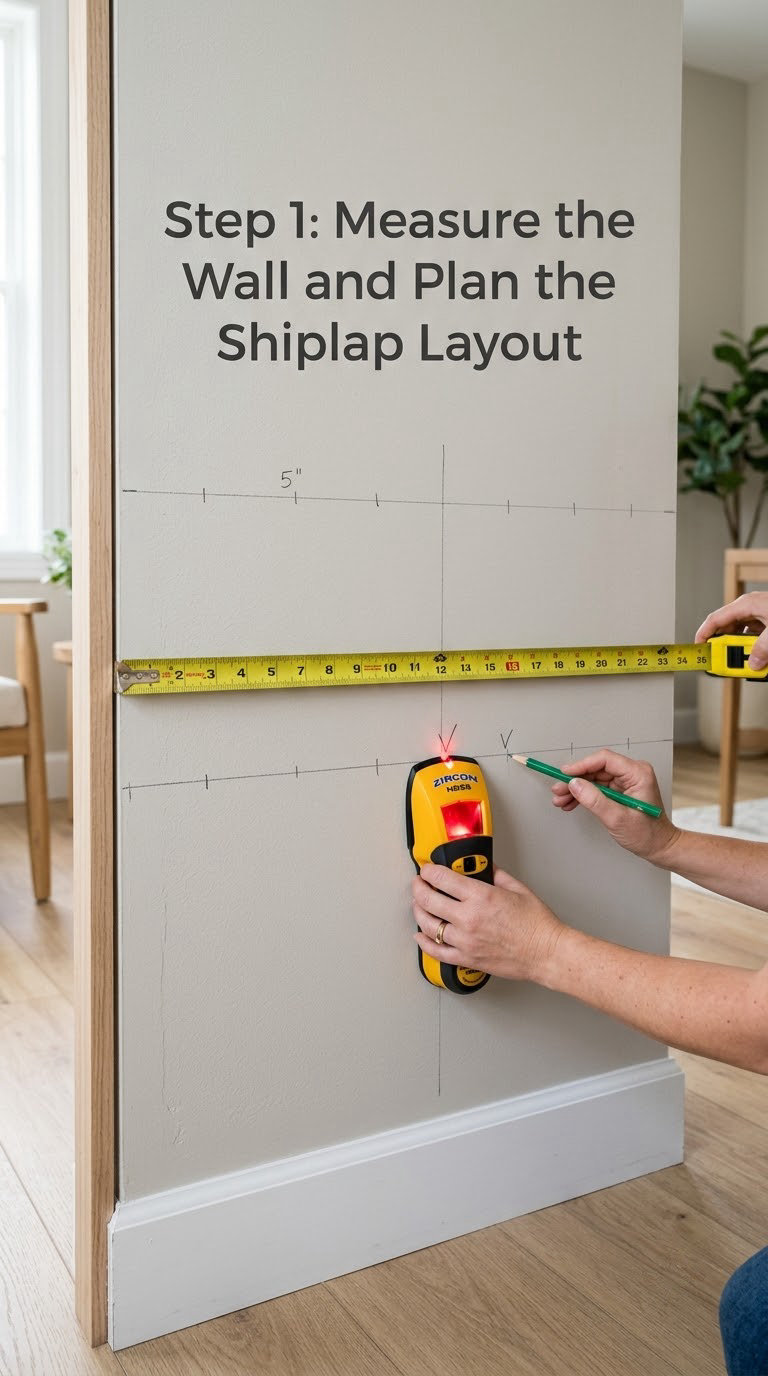
Measure the wall at the top, middle and bottom, then use the smallest number. Walls that look flat are often out of plumb by half an inch or more from floor to ceiling, and finding that out now saves you from a row that drifts.
Plan the run so the cut edge lands somewhere you do not mind looking at. Most people start in the least visible corner and work toward the door or the main sightline, which puts the imperfect boards at the end rather than in the middle of the wall.
Decide the reveal before the first cut. A 5 inch board with a 1 inch overlap shows about 4 inches of face, so an 8 foot wide wall works out to roughly 24 rows. Write the row height on the wall in pencil so you can see the plan.
Step 2: Prepare the Wall Surface
Fill nail holes and small dents with spackle, let it dry, then sand high spots down with 120 grit. Do not sand aggressively — the goal is a flat, solid surface, not a new one.
Wipe the wall down with a damp cloth and let it dry completely. Dust behind the boards will press into the seams during painting, and cleaning it now costs five minutes instead of an afternoon of chasing specks later.
If the wall is more than 1/4 inch out of plumb in a spot, build it out with furring strips. Nail 1/2 inch thick strips to the studs as a leveling plane, then fasten the shiplap into those instead. It is more work and the only reliable fix for a visibly uneven wall.
Step 3: Mark Studs and Establish a Straight Reference
Run a vertical pencil line down the center of every stud, top to bottom. Marking the center rather than the edge gives you a known target for the first nail in each row.
Set your starting height. Measure up from the floor and mark a light reference line at the base of the first board, then use a shim rather than forcing the board flush if the wall runs out of square.
For a long wall, snap a chalk line across the full width at the center of each stud. The line keeps every row at the same height, and it is the difference between a wall that reads straight and one that develops a slow drift by the far corner.
Step 4: Cut the First and Corner Boards
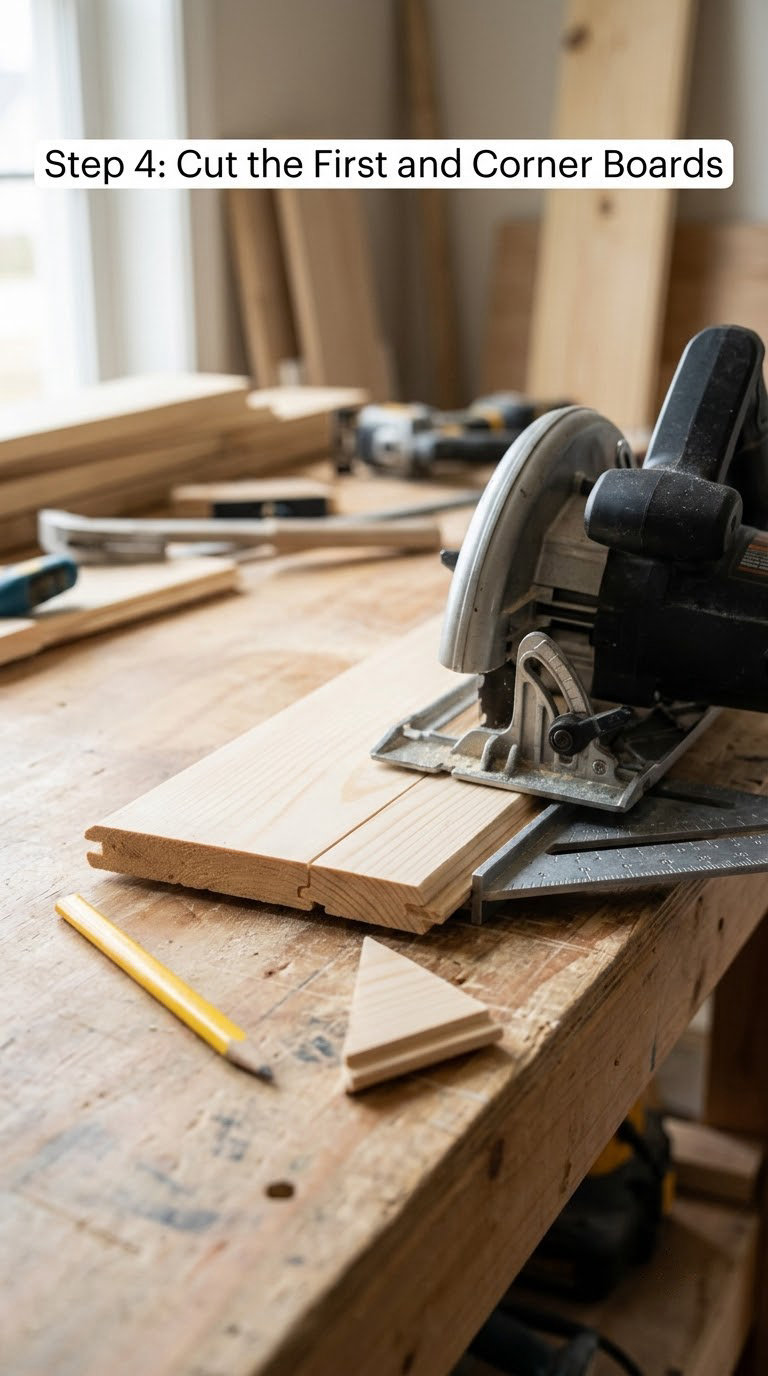
Measure from the corner, not from a reference stud, and subtract the reveal so the board sits where you planned. For a rough sawn board, take the measurement at the top edge and cut slightly long, then trim the bottom — the top of a wall is usually straighter.
Make one test cut and hold it in place before you cut a full row. If the end is short or long by more than a few millimeters, adjust your measurement rather than forcing the board. Walls are not square and the boards will not fix that for you.
If your boards are plywood strips, painter’s tape along the cut line prevents tear-out on the cut face. That one strip of tape saves a lot of sanding on splintery edges.
Step 5: Fasten Shiplap Boards Row by Row into Studs
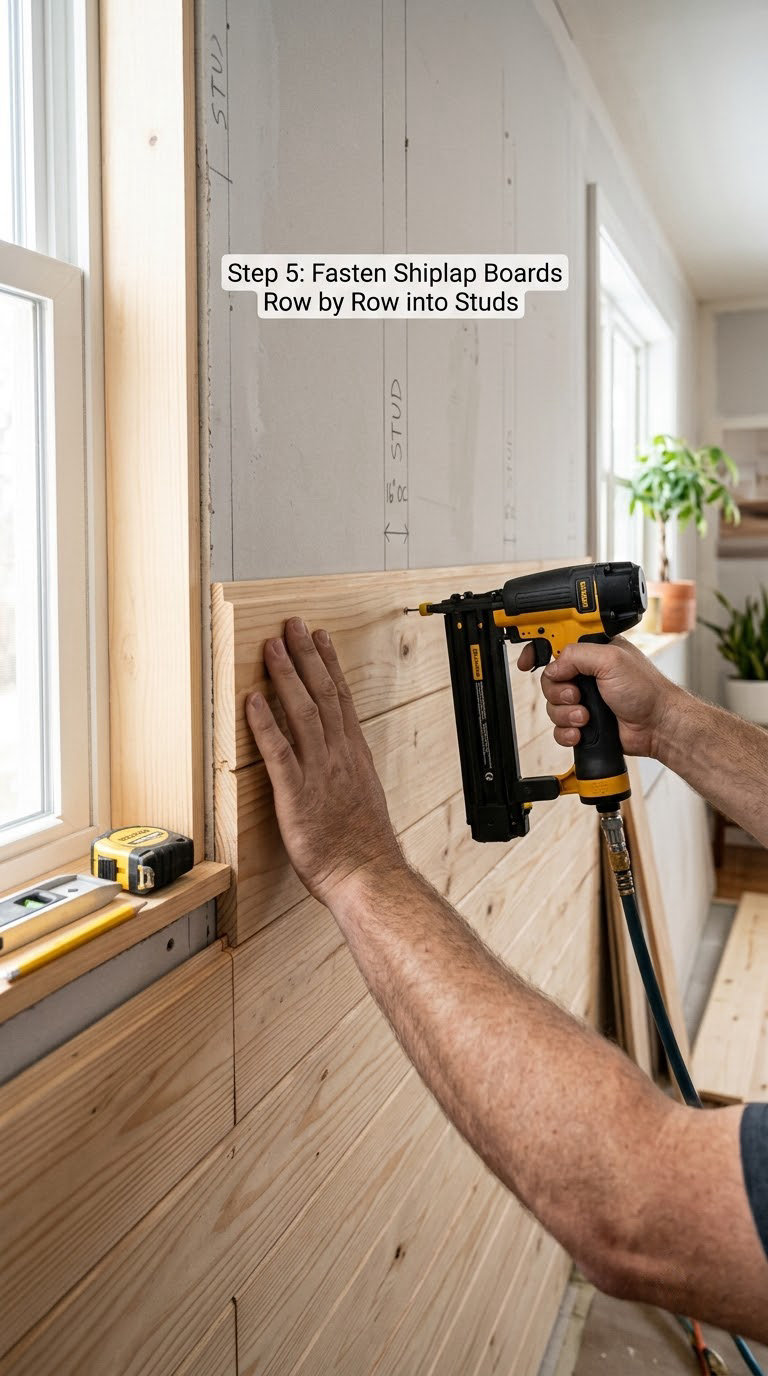
Hold the board at the marked height, check it with the level, and nail two nails per stud — one near the top edge, one near the bottom. The two-nail pattern stops boards cupping as the wood moves through the seasons, which is the single most visible long-term failure on a one-nail install.
Run a bead of construction adhesive along the back of the board if you want a permanent bond, then nail it. Skip the adhesive on plywood faux shiplap if you might want to remove the boards later; thin plywood pulls off a drywall face much more cleanly than a glued board does.
Set spacers at both ends and in the middle, then place the next board over the row below. Push the board toward the spacers rather than hammering them tight — a shim or a gentle knee pressure gets it seated without splitting the edge.
Stagger the joints. If a board ends near a stud, make sure the end of the next board up lands at least 8 to 10 inches away from the joint below it, so your eye does not find a vertical seam running up the wall.
Step 6: Fit the Final Boards, Trim, and Corners
Measure the last board from three points along the wall and use the widest measurement, then cut it to fit. Rip the final board to width if the remaining gap is narrower than the board, and nail it in the same two-nail pattern.
Cut around outlets, switches and pipes with a jigsaw. Drill a starter hole inside the cutout, follow the template you traced, and keep the hole a quarter inch smaller than the box so the cover plate hides the edge.
At the corners, decide on corner treatment before the last few rows. A vertical corner trim or outside corner moulding on both faces is the simplest approach for a beginner and hides the joint completely. Mitered corners look sharper but need careful alignment to stay tight.
Reinstall the baseboard and casing last. If your real shiplap is thicker than 1/2 inch, extend the door jambs with a matching block so the casing still sits flat, and keep the baseboard height at or above the board width so the wall does not look top-heavy.
Step 7: Fill, Sand, and Finish the Shiplap
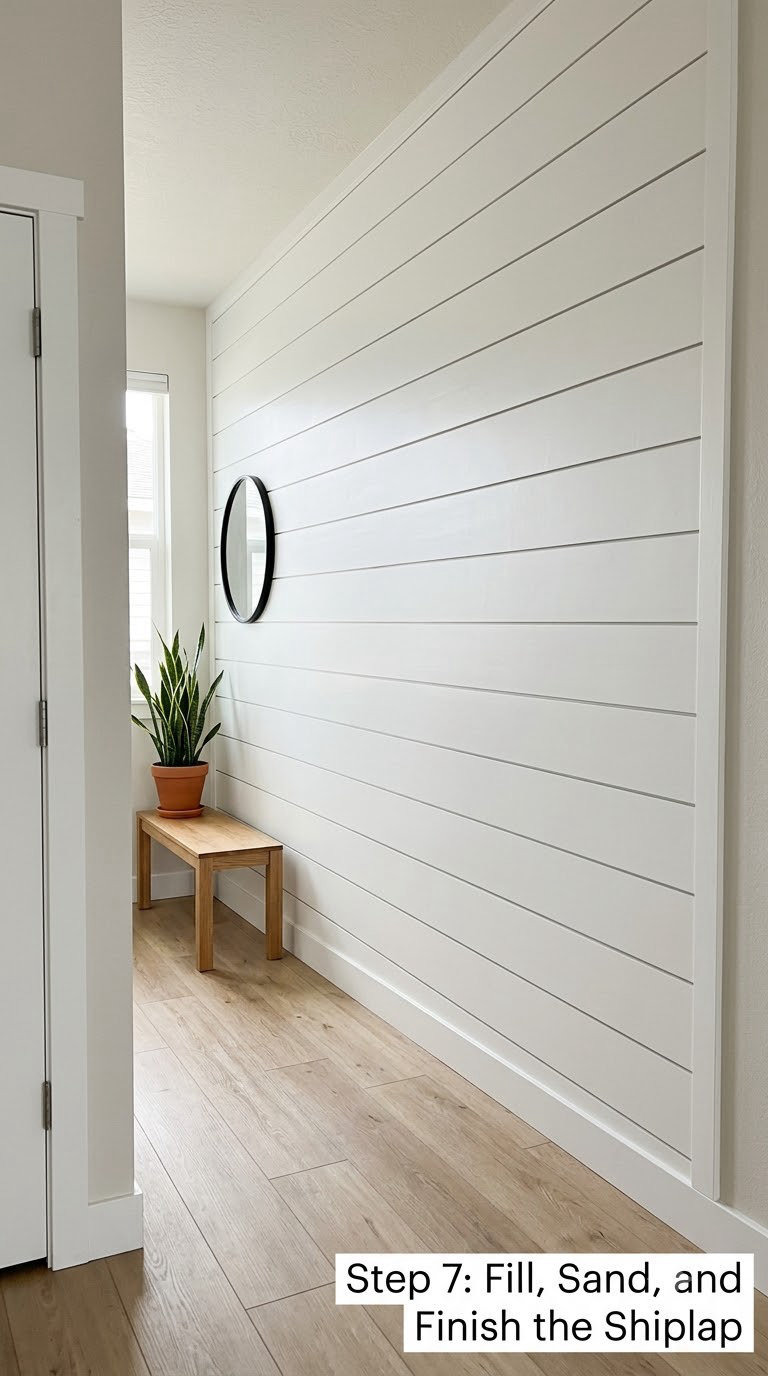
Fill each nail hole with a small amount of wood filler, pressing in with a putty knife. Keep the filler tight to the hole rather than spreading it across the joint between boards — filler smeared into the gap is what creates the lumpy, uneven look people try to sand out later.
Let filler dry fully, usually 30 to 60 minutes for a light product, then sand flush with 150 grit. Wipe dust off with a tack cloth before priming.
Run paintable caulk into the seams and around trim, tool it smooth, and let it cure for the time listed on the tube, commonly 24 hours before painting.
Prime first, then paint two thin coats rather than one heavy one. Bare plywood absorbs a lot of paint, so a stain-blocking primer is doing real work here, not decoration. Allow 4 hours between coats and a full 24 hours before the wall takes normal contact.
Common Mistakes to Avoid
These are the errors that show up again and again, and most of them are cheap to prevent on day one and expensive to fix on day three.
- Starting from an uneven reference. If the first row is off by a quarter inch, every row above it is off. Use a level, a shim and a pencil line, not the floor or ceiling as your guide.
- Missing studs. A board fastened only into drywall peels off the wall in a year. Verify stud centers after marking, and nail both near the top and bottom edge of every stud.
- Inconsistent gaps. Freehand spacing drifts. Use the same spacer at every point and check the row with a level before you nail it.
- Over-driving nails. Set the nailer so the head sits just below the surface. Flush or sunk heads tear the face fibre and show through paint.
- Skipping board acclimation. Cold boards shrink after install and open gaps at the top of the wall. Two days in the room, boxes open.
- Forgetting outlet extenders. Buy them before you start. Retrofitting a box behind finished shiplap costs half a day.
- Installing trim first. That means notching every board around the casing. Remove the trim, run the boards, then reinstall.
- Leaving the gaps unpainted. The wall behind the boards shows through the reveal and reads as dark smudges. Paint the wall the same color as the boards before the first nail goes in.
- Adhesive on the back of the board. It adds strength but blocks any future repair and makes removal tear the drywall face. Nails alone are usually enough.
- Rushing the finish. Filler, caulk and paint all need their full dry time. Painting early is the reason a careful install still ends up blotchy.
When to Call a Pro
Hire a carpenter or electrician when the wall involves more than board and fastener. The work crosses a line when the surface behind the boards is doing something other than sitting there.
- Electrical work. Moving or adding outlets, relocating switches, running cable through the wall or extending a box beyond its listing are licensed and inspected jobs. Do not splice wires inside a box you have just covered with shiplap.
- Plumbing or gas lines. If a wall contains a supply line, a vent or a gas line, boards cannot simply be fastened over it.
- Fireplaces and fire surrounds. Clearances around a hearth are code-controlled, and a combustible board too close to a fireplace is a hazard.
- Exterior walls or sheathing. Anything outdoors needs a different product, a weather-resistive barrier and a code-compliant fastening pattern.
- Structural modification. Moving a stud, cutting a wall back to a load path, or removing a section of wall carrying a beam needs a professional assessment.
- Heavily out-of-plumb walls. Extensive furring strip work is a carpentry job in its own right, and worth pricing against hiring out the whole wall.
A typical carpentry crew charges by the project rather than the hour for a single accent wall, and regional labor rates vary widely. If the wall is straightforward and you already own a nailer, doing it yourself is usually the economical choice.
Maintenance
Finished shiplap on an interior wall is close to maintenance-free, and most of the care is about cleaning technique rather than repair.
Vacuum or dust the grooves with a soft brush attachment, then wipe with a barely damp cloth and dry immediately. The shadow lines collect dust by design, and standing moisture in those grooves is what eventually causes swelling or mildew, especially in a bathroom.
Keep indoor humidity between 30 and 50 percent, particularly in a basement install. Seasonal movement shows up as a light gap at a joint or a board edge lifting slightly, and stable humidity keeps that movement small.
Touch up scuffs with the same primer and paint system you used originally. A bare scuffed board drinks paint and dries flatter than the surrounding finish, so spot-prime first and feather the edge.
Check the fastener pattern every few years if you hear a board tapping in a draft. A single nail lifting out of a stud usually means the board is flexing, and adding a second nail at the same stud fixes it in under a minute.
If you want to extend the same treatment to a ceiling, the sequence is identical but the reference is different — see rustic shiplap ceilings with beams before you commit, because ceiling boards are far less forgiving of a first row that is not perfectly level.
Frequently Asked Questions
Should I nail shiplap or glue it?
Nail it. Two finish nails per stud into the face of the board is enough for any interior wall, and it holds while still allowing repair. Construction adhesive adds strength but blocks future access and can tear the drywall face when boards come off. Skip adhesive if you rent, or if you may want to replace a damaged board later.
Do you install shiplap from the top or the bottom?
Work from a level reference line, not from the ceiling or the floor. Most people start at the bottom so leftover space is at the top, but if your ceiling runs out of square, start where the wall is truest and work up. Snap a chalk line across the full width at each stud and check every row against the level.
Do you leave a gap between shiplap boards?
Yes. Real shiplap overlaps at the rabbet groove and still shows a reveal, commonly a nickel width, while faux plywood and panels need a deliberate 1/8 inch gap. Set the reveal with a coin or a tile spacer at both ends and the middle of every row. Pennies work in a pinch but tend to fall out while you hold the board.
Can you install shiplap over existing drywall?
Yes, and that is the normal method. Shiplap attaches over finished drywall as long as the wall is dry, sound and flat, since the drywall is the surface and the studs behind it are what the nails go into. Patch holes and sand high spots first, and add furring strips where the wall is out of plumb by more than a quarter inch.
How do you install shiplap around outlets and switches?
Turn off the breaker and confirm the box is dead, trace the box outline plus a quarter inch of clearance, drill a starter hole with a bit larger than your jigsaw blade, then cut out the shape. Fit an outlet box extender so the box sits flush with the new surface, reinstall the device, and let the cover plate hide the cut edge.
What are the downsides of installing shiplap?
Three things come up most. The project takes longer than expected, usually a full day plus drying time for a single accent wall. The boards add real thickness, so outlets, switches and door jambs all need extending. And if you use adhesive, removing the wall later damages the drywall. Real shiplap is also more expensive than ripped plywood.
Conclusion
Start by measuring the wall at the top, middle and bottom, then mark every stud before a single board comes out of the box. Those two steps decide whether the finished wall looks straight, and nothing later can correct them.
Acclimate the boards for 48 hours, cut one test piece and hold it in place before you commit to a row, and check the first row with a level. Then work up steadily, keeping the reveal consistent with spacers and the joints staggered.
If this is your first time, hang a single test section on a spare wall or the far corner before covering the whole surface. Two hours of practice there is cheaper than a day of rework on the wall everyone walks past.
For colour and finish ideas, have a look at grey shiplap ideas and shiplap headboard designs, both of which use the same boards and the same fastening method at a smaller scale.
