How to Patch a Hole in Drywall: Simple Beginner Repair (2026)
How to patch a hole in drywall comes down to one decision: match the repair method to the size of the hole. A nail hole needs spackle. A doorknob dent needs a mesh patch. Anything wider than about 6 inches (15 cm) needs a piece of drywall cut in and screwed to new backing. Get that first choice right and the rest is sanding and painting.
I patched a closet wall in one afternoon with nothing but a putty knife, a tub of joint compound and a piece of scrap drywall. The finish looked like nothing had ever happened there. That result is not about talent. It is about thin coats, honest drying time and feathering the edges until your hand cannot find them.
Contents
Time: 30 minutes for a nail hole, 2 to 3 hours of work spread over two or three days for a fitted patch · Cost: a small tub of compound, a patch or a scrap of drywall sheet, and primer · Difficulty: Easy DIY to Moderate DIY · Skill level: complete beginner, with patience
Tools and Materials
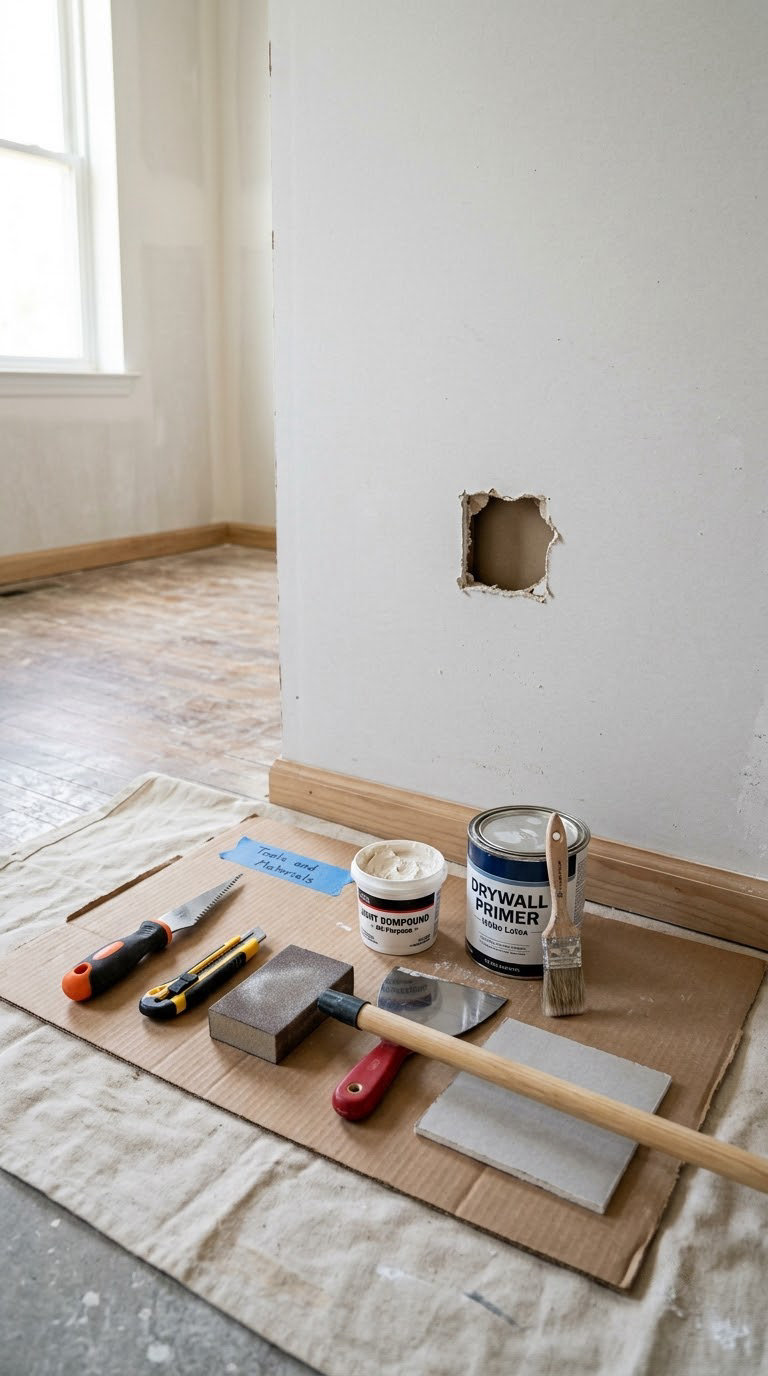
Everything in the first list is something you will actually use on the job. The second list is for the last hour, when the repair is smooth and you want it to disappear.
Essentials
- Spackling compound (about 4 oz) for nail holes, screw holes, and dents under 1/8 inch. A tub with a built-in applicator saves you washing a knife.
- Joint compound (1 gallon premixed, or a small box of setting-type) for anything you tape or fit a patch over. Premixed all-purpose dries in about 24 hours per coat.
- Putty knife, 1 to 2 inch wide for small holes, plus a 6 inch taping knife for feathering edges on medium patches.
- Utility knife with fresh blades for trimming paper and cutting a fitted patch to size.
- Drywall saw or keyhole saw for cutting back ragged paper and square new drywall.
- Sanding sponge or sanding block and 120 to 150 grit sandpaper for shaping, 200 grit for the final pass.
- Self-adhesive mesh patch in a size that overlaps the hole by at least 1 inch on every side, or a piece of drywall to fit and screw in place.
- 1-1/4 inch drywall screws and a drill or driver, plus a stud finder if the hole is anywhere near a stud or an outlet.
- Dust control: a drop cloth, a knee pad, safety glasses and disposable gloves.
Finishing supplies
- Interior primer (latex-based) to stop paint flashing over the repaired area.
- Paint and a small roller or brush that matches the sheen already on the wall.
- A clean damp rag for wiping compound off the floor and skirting before it cures.
- Fine sanding sponge for a last check after the second coat dries.
If you want the tools picked for you, our roundup of the best drywall tool kits we reviewed covers the putty knives, knives and sanders worth owning for jobs like this one.
Before You Start
Look at the damage before you buy anything. Press the area around the hole with your thumb: firm and solid means the gypsum is healthy and you can patch it. Soft, crumbly or stained means something behind the wall needs attention first.
Confirm you are dealing with drywall. Sniff is not a method, but tap is: drywall sounds hollow, plaster rings solid. On modern homes you can usually assume sheetrock, unless the wall is in a very old house with lath and plaster.
Lay down a drop cloth and tape it to the baseboard. Drywall dust is fine and it gets everywhere, including into a ceiling fan if you are working overhead. Wear eye protection and gloves; the paper edges cut easily.
Kill the power at the breaker if the hole is within a foot of an outlet, switch or light fixture, and shut off the water if it sits near a plumbing line. Do the same before you cut. Once the wall is open, keep one hand on the back of the board near the opening so you can feel for a wire or pipe the stud finder misses.
Ordinary drywall patching needs no permit anywhere in the US. It is cosmetic work on a non-structural surface. Permits come into play when you cut into framing that carries load, move plumbing, or open a wall in a building with special fire-rating requirements.
How to Patch a Hole in Drywall Step by Step
Step 1: Inspect and Clean the Hole
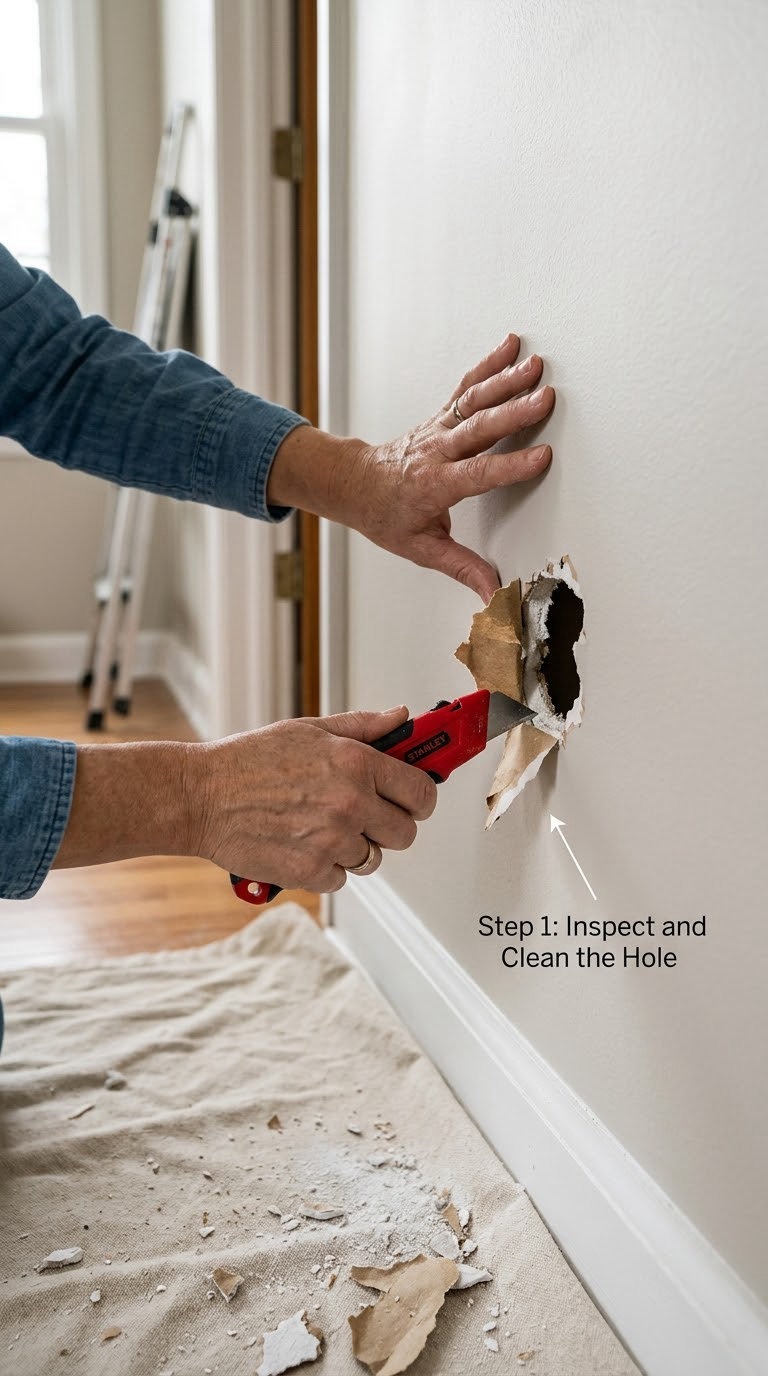
Inspect the hole first: how wide is it, is the paper torn or intact, and is anything wet behind it? Peel back any loose paper with the utility knife and pull out crumbling gypsum until the edges are solid. Wipe the dust off with a damp rag.
Check for hidden problems. Dark staining or a musty smell means moisture, and patching over it guarantees a repeat failure. If you can see a stud or blocking that is split or chewed, that gets fixed before any compound goes on.
Now size the job. Under 1/8 inch (3 mm) is a filler job. Up to about 3 inches (7.5 cm) wants a self-adhesive mesh patch. Between 3 and 6 inches (7.5 to 15 cm), cut in a piece of drywall or use a metal-reinforced patch. Past 6 inches, the repair needs backing strips screwed to the studs or joists behind it.
Step 2: Cut and Fit the Repair Patch
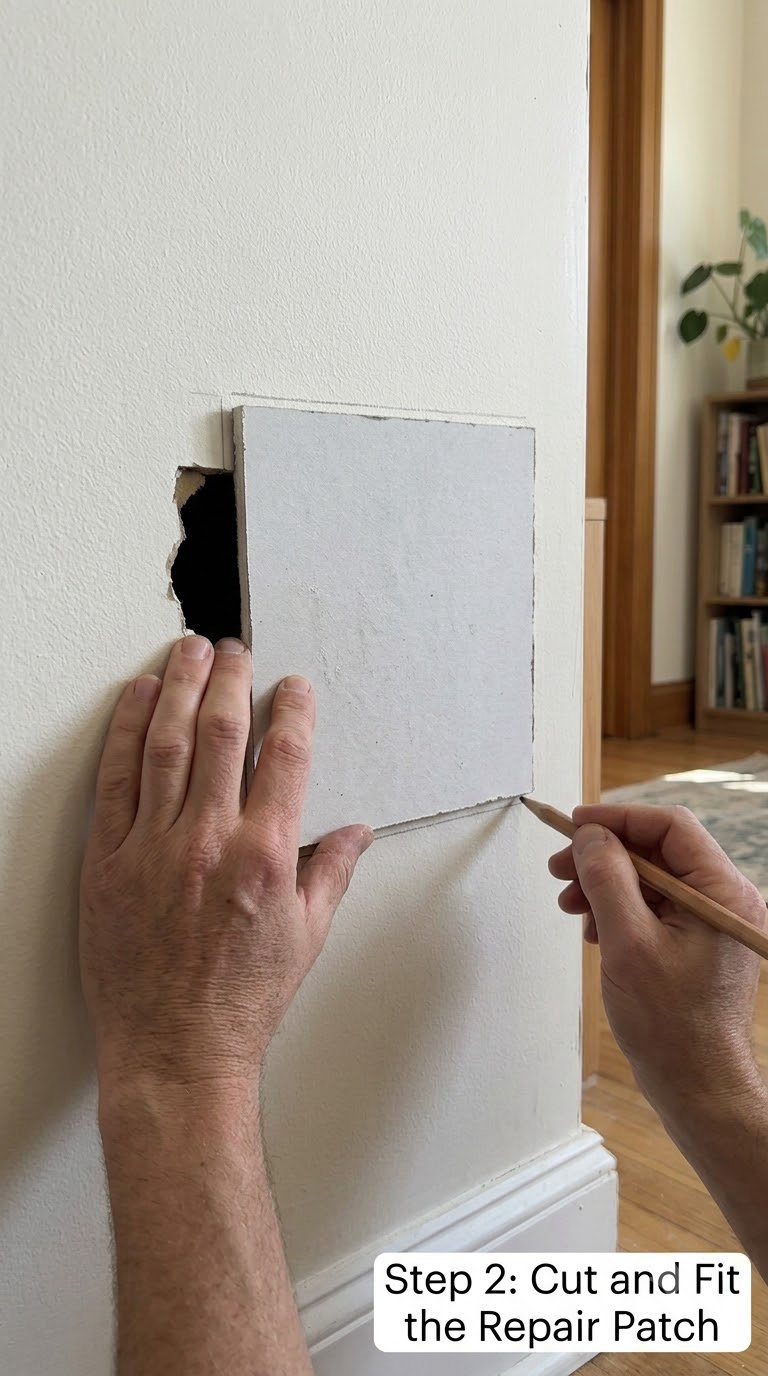
Cut and fit the patch so it lands on sound material, not on the hole. A mesh patch should overlap the opening by at least 1 inch on all sides, so an 8 inch patch handles most doorknob damage.
For larger holes, square up the opening with the drywall saw. Mark the outline with a pencil, cut along it, then cut a new piece of drywall the same thickness as the existing wall — usually 1/2 inch (12.7 mm) on interior walls. Dry-fit it, then screw it to the studs or blocking with 1-1/4 inch drywall screws every 6 inches around the perimeter and into any stud the patch crosses. Sink the screw heads just below the paper without punching through the face.
If no stud or blocking sits behind the opening, nail furring strips to the back of the wall first, at least 1-1/2 inches from the edge, then screw the new drywall into those strips. Beginners often skip this step, and the patch flexes every time the wall is touched.
Step 3: Apply the First Layer of Joint Compound
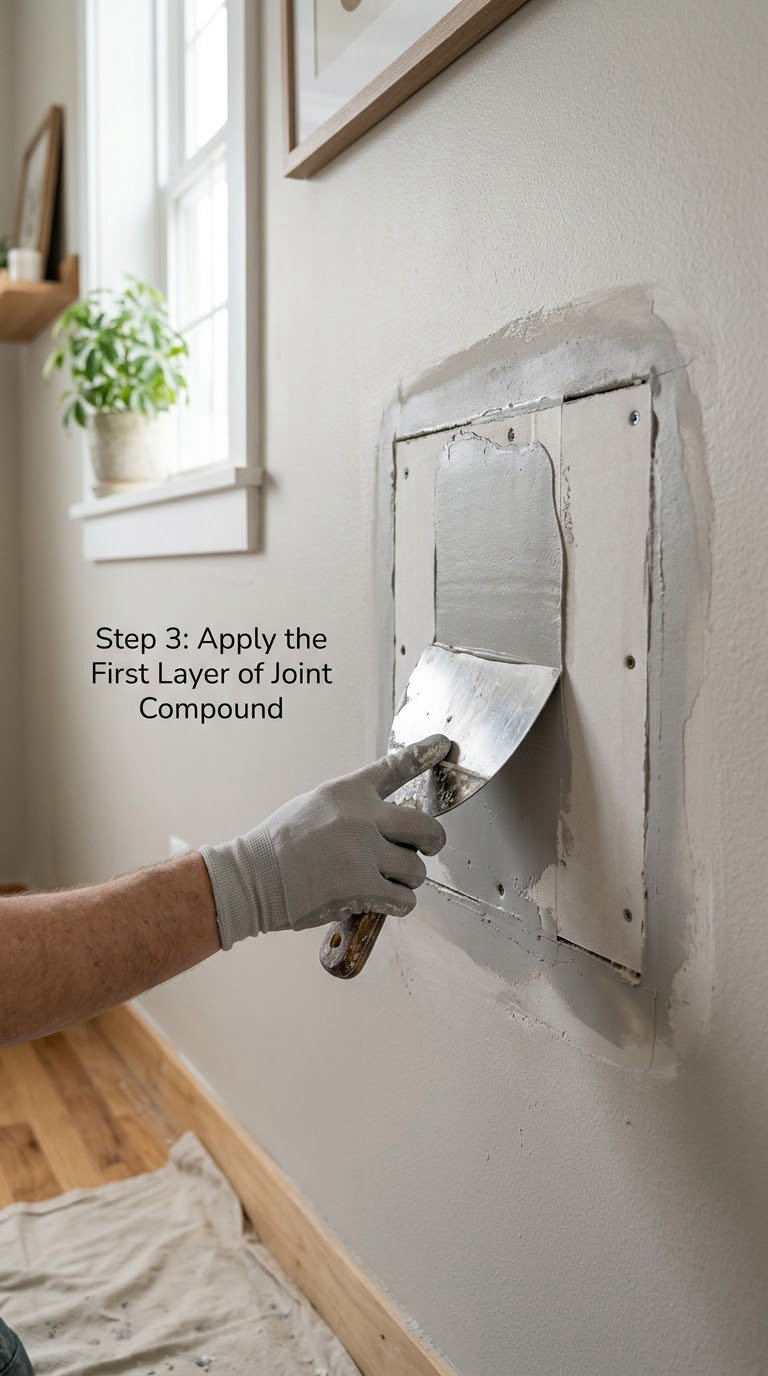
Mix setting-type compound to the consistency of thick yogurt, following the can. Premixed all-purpose needs no stirring at all, just a good stir to even out the water that collects on top.
Spread a thin coat over the entire patch with the 6 inch knife, holding it at a slight angle and drawing it firmly across the surface. Push harder at the center and lighten your pressure as the blade moves outward. That is what feathering means, and it is the whole difference between a repair you can see and one you cannot.
Let the coat dry fully before the next check — roughly 24 hours for premixed, or 45 to 90 minutes for setting-type compound in normal room conditions. Cool, humid rooms stretch that; cool and dry air shortens it.
Step 4: Sand and Add Additional Coats
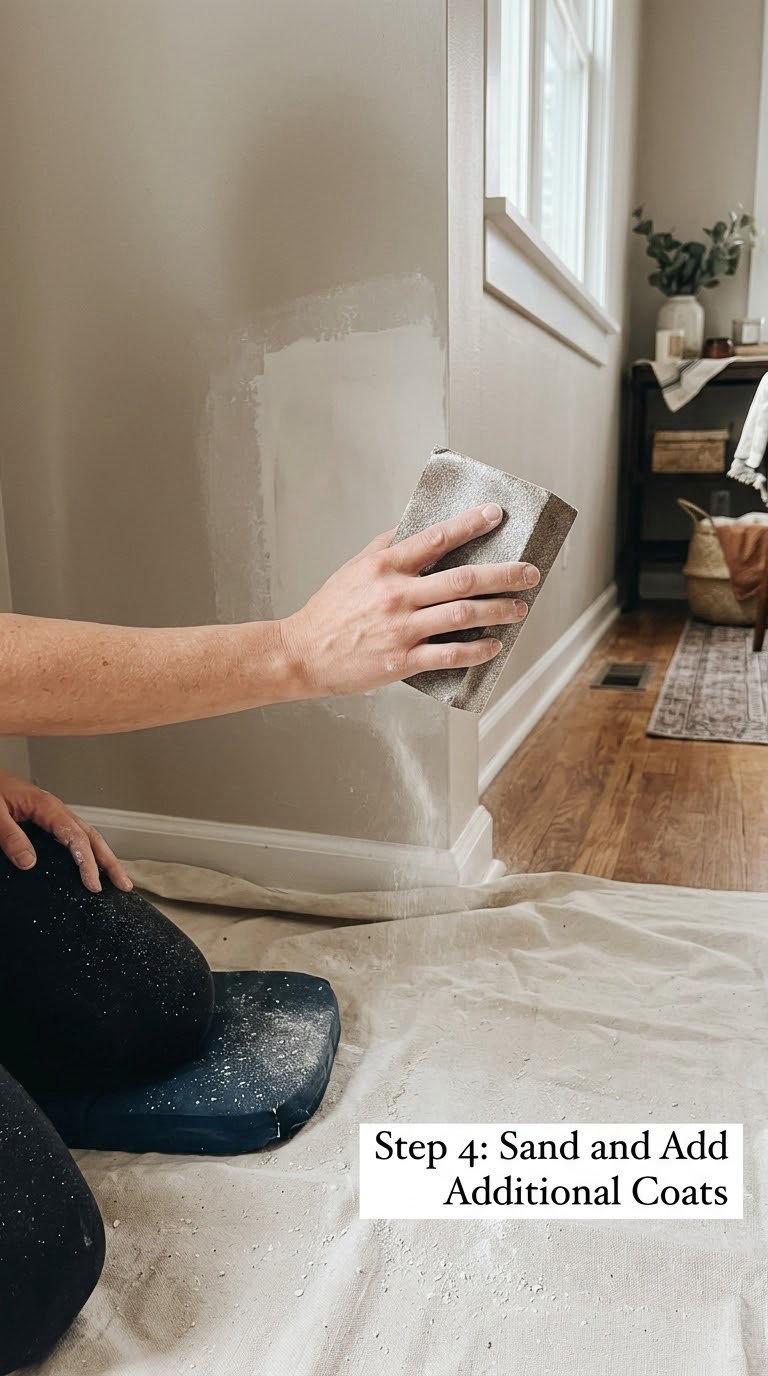
Sand the dried coat with 120 to 150 grit, using light circular or back-and-forth strokes. Sand until your fingers run across the repair and feel nothing, not until the wall looks white. You are leveling a surface, not removing it.
Look for two things: ridges where the compound mound sits proud of the wall, and low spots where the wall dips through it. Scrape the ridges down, fill the hollows, and go back over the edge with the knife to blend. Two or three thin coats is normal; one thick coat is how people end up sanding for an hour and tearing the paper.
Feather each new coat wider than the last, so the repair thins out to nothing over about 8 to 10 inches of wall. Give every coat its full dry time, sand the final coat with 200 grit, and vacuum or wipe the dust away before anything wet goes on.
One extra habit pays off: check the repair with a flashlight held flat against the wall. Raking light exposes bumps and hollows that look flat from straight on.
Step 5: Prime, Paint, and Finish the Wall
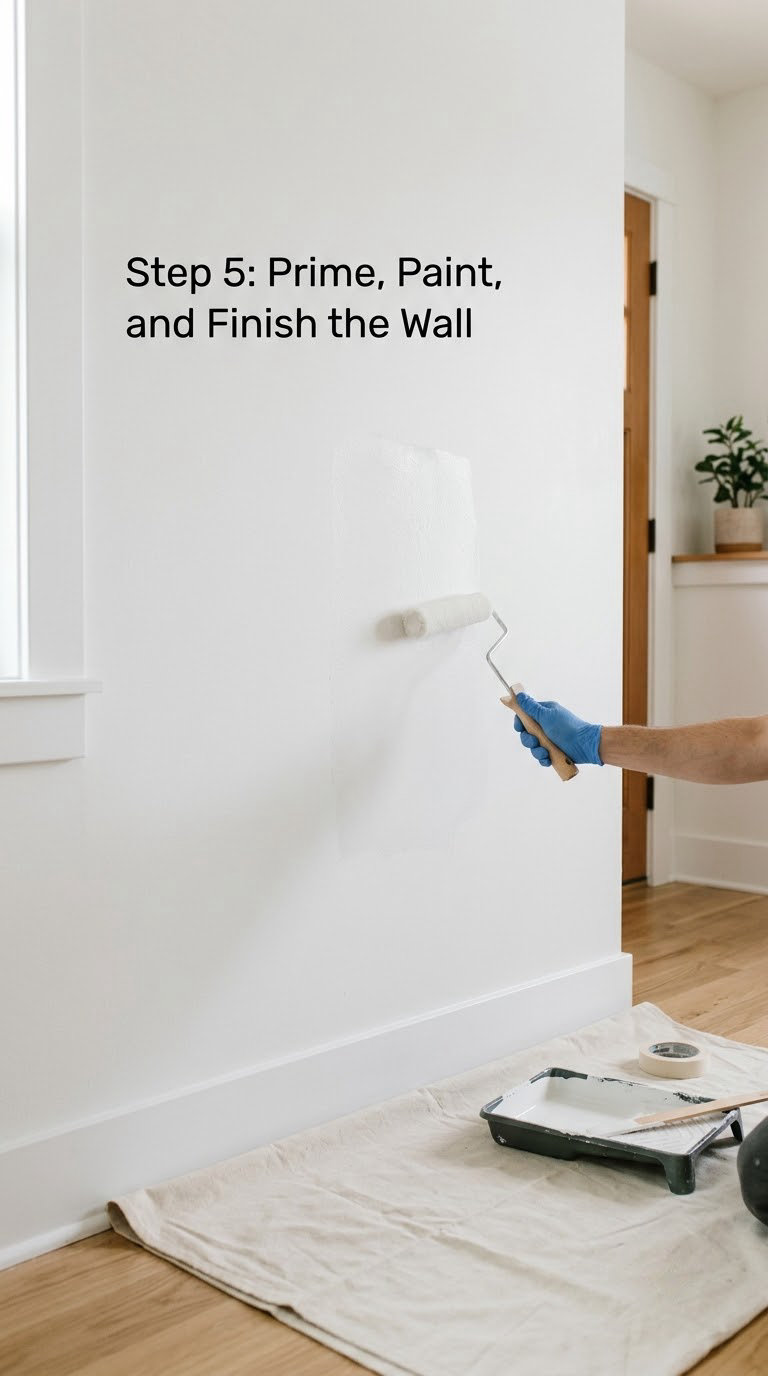
Prime the sanded repair before it takes paint. New compound is more porous than the wall around it, and without primer the paint dries flatter over the patch and shows up as a shiny rectangle once the wall is dry. That shine is called flashing, and it is the complaint homeowners send me most often about a repair they thought was finished.
Paint the primed patch with the same sheen as the wall — eggshell over eggshell, satin over satin. Rolling the edge lightly, working outward from the center, keeps the boundary soft instead of leaving a crisp outline where the new paint stops.
If your wall has orange peel or knockdown texture, a smooth patch will read as a flat spot no matter how good the paint job is. Blot texture over the repair with a stiff nylon brush or a texture sponge, or repaint the whole wall so the texture runs continuous.
Let the paint cure a day before hanging anything back on the wall, then anchor into a stud or blocking whenever possible. If the hole was near a stud, patch it into the framing and screw the new drywall straight into it — that repair holds weight just like the original wall did.
Common Mistakes to Avoid
Slapping on one thick coat. Thick coats dry lumpy in the middle and shrink at the edges, which is exactly what a patch is supposed to avoid. Fix it by scraping the high spots down and adding two more thin coats.
Leaving a hard edge around the patch. If you can trace the repair with your fingertip, primer and paint will trace it too. Fix it by feathering each coat 2 inches wider than the last until the transition has no edge at all.
Skipping the dry time. Sanding damp compound gums the paper, and painting damp compound traps moisture that comes back as a bubble or a soft spot later. Fix it by waiting until the whole patch has gone uniformly pale, with no darker damp patches left.
Sanding too hard or too early. You only need to knock off peaks. Fix it by using a sanding sponge instead of folded paper, and stopping the moment the surface feels uniformly smooth.
Using a patch that is too small. A patch with no margin of sound drywall around the hole tears loose later. Fix it by picking a size that overlaps the hole by 1 inch or more on every side.
Painting straight over the repair. Bare compound drinks paint differently and the repair flashes. Fix it with a coat of interior primer, even if the spackle says it is paintable.
When to Call a Pro
Stop and call a contractor if the framing is damaged, if the wall is a load-bearing section, or if the opening runs into wiring, insulation you suspect is compromised, or a plumbing line. Cutting into any of those needs a licensed trade and, in some jurisdictions, a permit.
Mold, brown water staining, or a patch that keeps cracking in the same place means moisture is still getting through. Patching hides the symptom until the wall comes off and the framing behind it is ruined.
Ceiling holes larger than 6 inches, or any ceiling work where joists and wiring are in play, belong to someone with a proper scaffold and overhead lighting. So do large holes low on exterior walls where the sheathing or house wrap may have been breached.
One practical rule: if you cannot see solid framing behind the opening, or if the wall flexes where it was solid, stop and get an opinion before you cut.
Maintenance
Most repeat drywall damage starts with moisture. Fix the dripping joint, the slow leak under a sink or the sweating window before you patch anything, and the repair holds for years instead of months.
Keep indoor humidity between about 30 and 50 percent through the dry months. Stable humidity keeps the paper from shrinking and opening hairline cracks at every taped seam.
In hallways and other busy spots, add a doorstop or wall guard where furniture and vacuum cleaners hit the wall. That is where most new holes come from.
Twice a year, walk the rooms with patched walls and run a hand along the repairs after a heating or cooling season. Fresh cracks, softness or a hollow sound are early warnings worth catching while they are still small.
Frequently Asked Questions
What is the best patch for a small hole in drywall?
For holes under 1/8 inch (3 mm), such as nail holes and picture hook holes, spackling compound on a 1 inch putty knife is the whole job. Sand it, fill it once more if it shrinks, then prime. For holes from 1/8 inch up to about 3 inches (7.5 cm), use a self-adhesive mesh patch that overlaps the hole by an inch on every side, then feather it with joint compound.
How large can the hole be before I need to cut out a drywall patch?
You can carry a repair with a self-adhesive mesh patch up to roughly 3 inches (7.5 cm). Between 3 and 6 inches (7.5 to 15 cm), cut a square of drywall to fit and screw it to framing or furring strips. Past 6 inches the hole spans the space between studs, so it needs a proper backing strip and two people to hold the board while it is screwed in.
How long should drywall compound dry before sanding?
Premixed all-purpose joint compound needs about 24 hours per coat in normal conditions. Setting-type quick-set compound hardens in 45 to 90 minutes depending on temperature and humidity. The surface tells you more than the clock: it is ready when it is uniformly pale and hard, with no darker damp patches left in the middle.
Can I use spackle instead of joint compound for a wall hole?
Yes for small holes. Spackle shrinks as it dries, so a second thin coat is usually needed, and it is not strong enough to reinforce a taped seam or carry a screw. Use joint compound for any mesh patch, any fitted piece of drywall, and anywhere you plan to hang weight back on the repaired area.
How do I make a drywall patch blend in with the surrounding wall?
Sand the repair flat, prime it so the paint dries evenly, then paint with the exact sheen already on the wall. If the wall has orange peel or knockdown texture, stipple the repair with a stiff brush or texture sponge so the texture runs past the patch edge, or repaint the full wall.
When does a drywall hole require a professional repair?
Call a contractor when the hole touches wiring, plumbing or insulation, when the framing behind it is damaged or load-bearing, when the wall flexes, or when moisture or mold is still present. Large ceiling openings and anything that needs a permit belong to a pro as well. Cosmetic patching of a small hole never requires one.
What to Do First
Start by measuring the hole and clearing out the loose paper. Everything after that follows from the size: spackle under 1/8 inch, a mesh patch up to 3 inches, a fitted piece of drywall past that. Take your time with the feathered edges and let each coat dry fully, and how to patch a hole in drywall stops being a job you dread and becomes one you finish the same afternoon.