15 Small Bedroom Ideas to Make It Look Bigger (October 2026)
These 15 small bedroom ideas to make it look bigger work by changing light, sightlines and apparent height, not by adding square footage. Hang the curtains near the ceiling, drop the bed low, keep furniture slim, and lift the clutter off the floor, and a 10 by 10 room reads noticeably bigger within a weekend. Warm, calm styling is what people are searching for in 2026, so nothing here depends on a trend that will date by next spring.
The problem with most small bedrooms is not the dimensions. It is that the eye hits something bulky, dark or crowded within the first few feet and stops. Each of the fifteen ideas below attacks one of those stops, with a cost tier, a difficulty level and a time estimate so you can pick the ones your room and your budget actually allow. If you rent, the renter note under each idea tells you whether it needs holes in the wall.
Contents
15 Small Bedroom Ideas to Make It Look Bigger at a Glance
| Idea | Cost | Difficulty | Time |
|---|---|---|---|
| 1. Light, reflective wall colors | Medium | Moderate DIY | One weekend |
| 2. Light-colored bedding palette | Low | Easy DIY | 2 hours |
| 3. Slim furniture instead of bulky pieces | High | Moderate DIY | A weekend |
| 4. Low-profile bed frame | High | Moderate DIY | A weekend |
| 5. Curtains hung high and wide | Low | Easy DIY | 2 to 3 hours |
| 6. Large mirror opposite the window | Medium | Easy DIY | 1 hour |
| 7. Vertical wall storage | Medium | Moderate DIY | Half a day |
| 8. Round or oval nightstand | Medium | Moderate DIY | 1 hour |
| 9. Centered bed with side clearance | Free | Easy DIY | 1 hour |
| 10. Light area rug in one large size | Medium | Easy DIY | 15 minutes |
| 11. Layered lighting, no bulky fixtures | Low to medium | Moderate DIY | 2 to 3 hours |
| 12. Ceiling and trim repainted white | Low | Moderate DIY | One weekend |
| 13. Fold-down or wall-mounted desk | Medium to high | Moderate DIY | 3 to 4 hours |
| 14. Sparse decor, three repeated colors | Free to low | Easy DIY | 2 hours |
| 15. One large focal piece | Medium | Easy DIY | 1 to 2 hours |
Cost tiers are relative: Free means materials you almost certainly own already, Low means one small purchase, Medium means a piece of furniture or a full set of supplies, and High means a bigger buy you keep for years. Actual amounts swing a lot by region and by whether you do the work yourself, so check locally before you commit to a number.
1. Use Light, Reflective Wall Colors
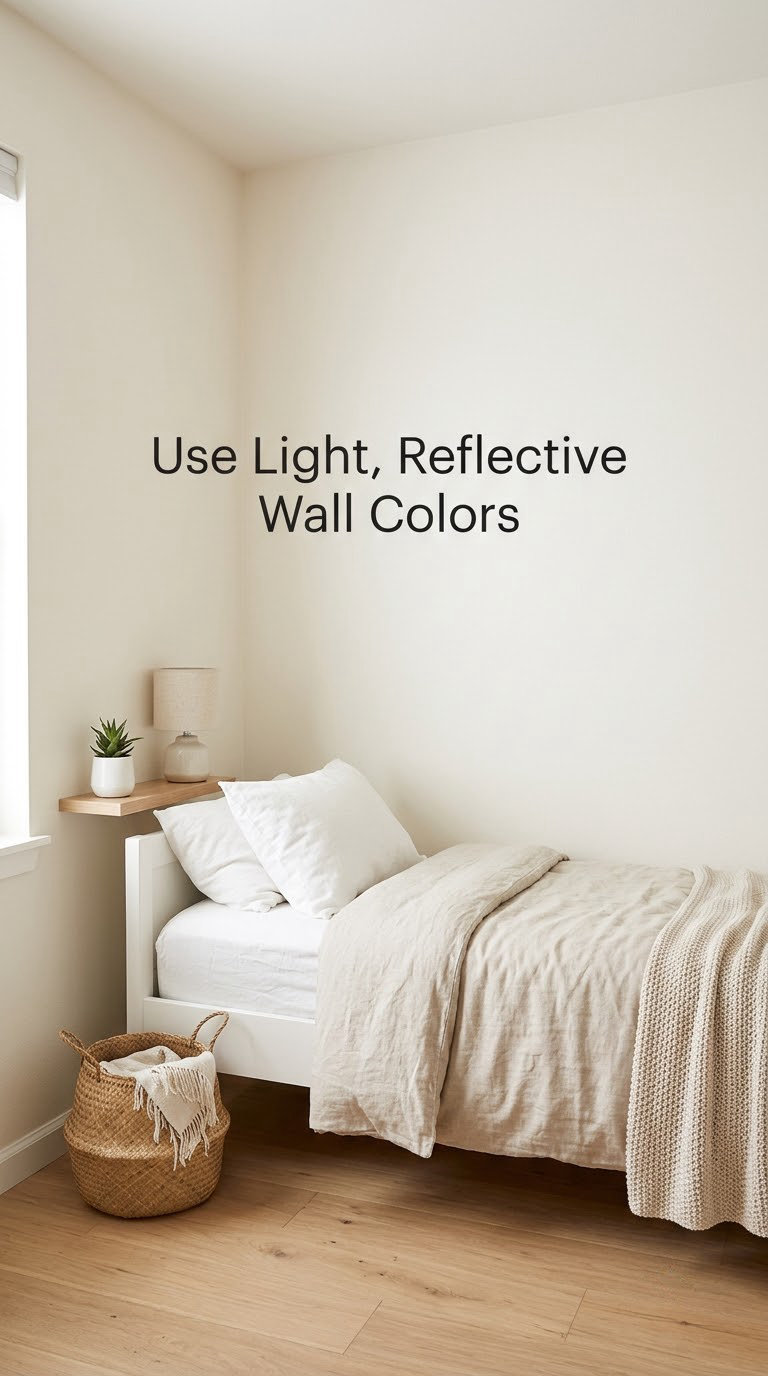
Light, reflective wall colors push the boundaries of a small bedroom back. A soft white, warm off-white or pale greige in an eggshell finish returns daylight around the room instead of swallowing it, so the walls stop being the nearest thing your eye hits.
The reason is simple: people judge distance by how much light comes back off a surface. Mid-tone colors sit in the middle and give the eye nothing to measure against.
How to pick and paint it
- Sample four colors on a 12 by 12 inch square (about 30 by 30 cm) of the actual wall, then look at them at three times of day, including at night under your usual bulbs.
- Choose eggshell rather than flat. It scatters light softly instead of creating a dead matte patch.
- Skip the deep mid-tones for all four walls. Reserve a saturated color for a single wall or for the ceiling of a room with good daylight.
- Patch first. Filling nail holes and sanding scuffs takes an evening and makes the finish look expensive rather than tired.
- Two coats over a primer, with a full drying window between them. Typical latex drying is 2 to 4 hours, and the room can usually be slept in that night.
Cost: Medium, mostly primer and two gallons of eggshell. Difficulty: Moderate DIY. Time: One weekend including drying.
Good to know: Renters can get most of this effect with peel-and-stick wall panels in a flat white, though seams show in raking light. And if your bedroom gets no natural light at all, a single dark accent wall behind the bed gives the room one clear depth cue instead of four flat ones.
2. Build a Light-Colored Bedding Palette
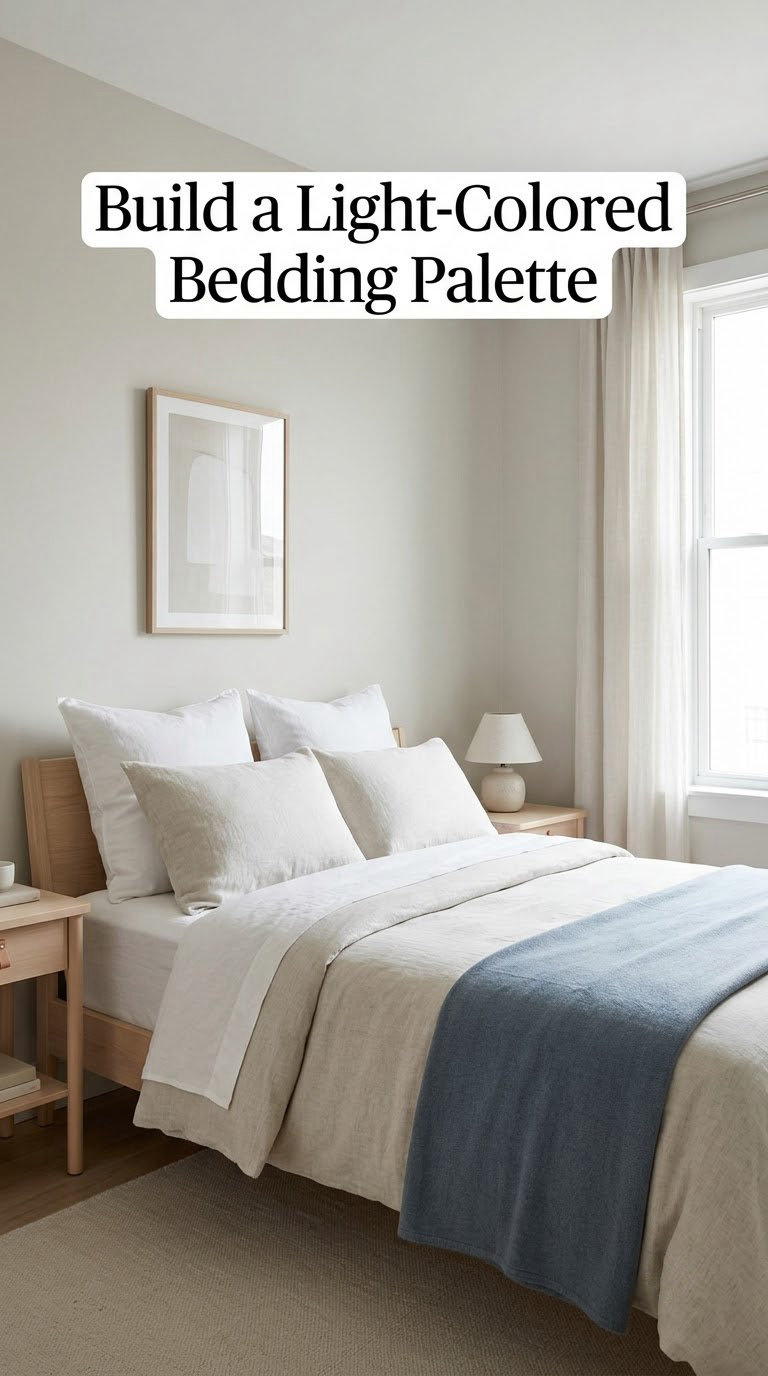
A light-colored bedding palette makes the bed recede into the room instead of becoming the heaviest object in it. White, cream, oatmeal, pale blue and soft blush all reduce the number of hard edges between you and the wall behind the headboard.
Bedding occupies the biggest uninterrupted surface in a bedroom. Every strong pattern on it adds a visual edge, and visual edges are what make a room read as busy and tight.
How to build it
- Choose a duvet cover in one quiet neutral and a flat sheet in the same family, so the top of the bed stays one continuous field.
- Add exactly one accent, such as a throw in muted blue, and repeat that accent somewhere else in the room.
- Skip busy patterns on the pillows that sit against the headboard. Those are the ones your eye measures the wall against.
- Keep the bed made, or at least smoothed, on the sides that face out. A fitted sheet hanging unevenly reads as clutter.
Cost: Low, one duvet cover and a throw. Difficulty: Easy DIY. Time: 2 hours including laundry.
Good to know: If your walls are already pale, a slightly deeper headboard wall or a colored throw does the contrast work without darkening the whole room. Our guides to bedroom color combinations cover how to pick two or three that work together.
3. Swap Bulky Furniture for Slim Pieces
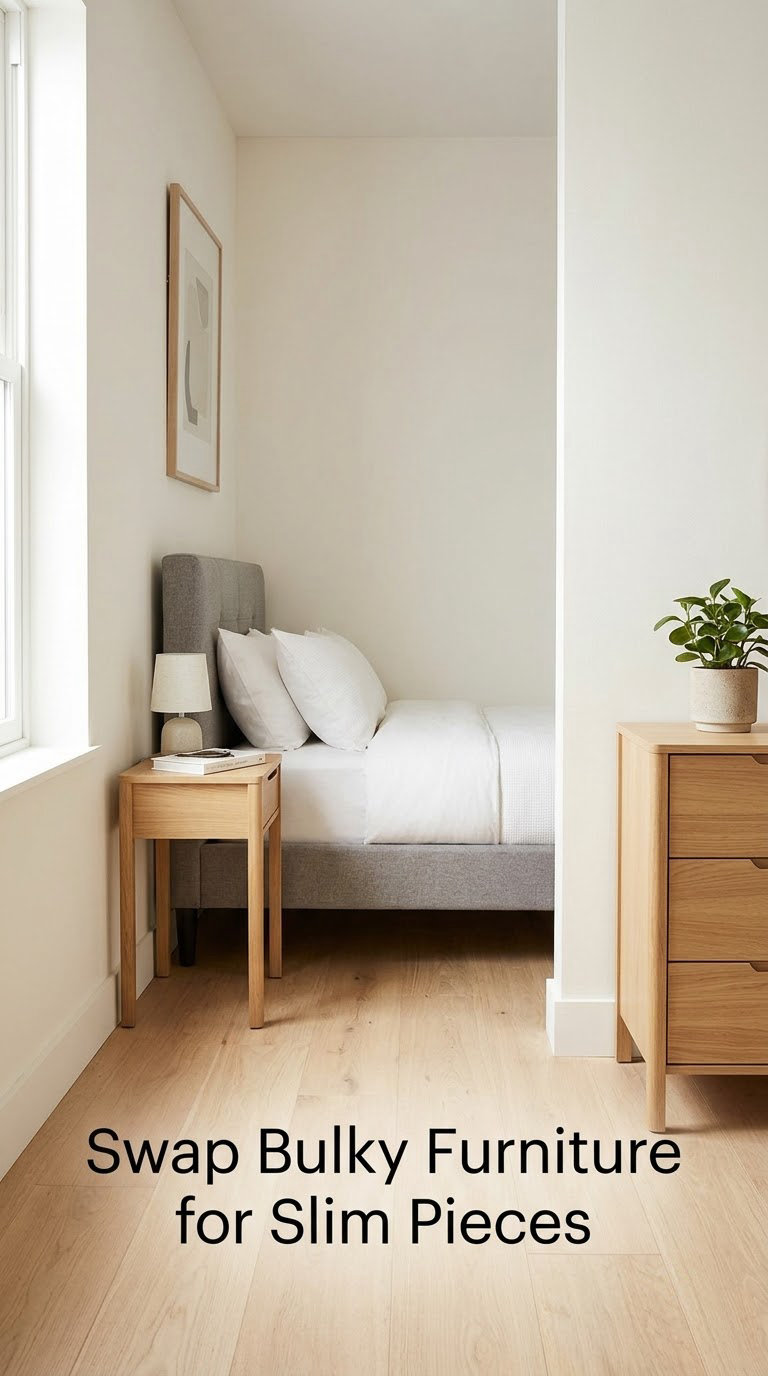
Replacing bulky furniture with slim pieces frees visible floor, and visible floor is what makes a bedroom feel larger. Narrow nightstands, low-profile dressers and open-legged tables show the floor line under and between them instead of blocking it.
People read floor as depth. A deep dresser creates a solid wall of object at chest height, and that reads as a wall, not as furniture.
How to do it
- Measure each piece before you replace it, including the walkway space you need on the sides. Write the numbers down.
- Swap the dresser for one that is 4 to 6 inches (10 to 15 cm) shallower than the old one and set on legs at least 5 inches off the floor.
- Choose nightstands whose top sits level with the top of the mattress. Anything taller reads as a second wall.
- Test each piece with painter’s tape on the floor before you commit. A taped footprint shows the real walking width in seconds.
Cost: High, this is furniture money. Difficulty: Moderate DIY. Time: A weekend if you move things one at a time.
Good to know: You do not have to replace everything. One bulky dresser is usually the single worst offender, and removing it often does more than adding a storage solution, which is what people report on home improvement forums.
4. Go Low With a Low-Profile Bed Frame
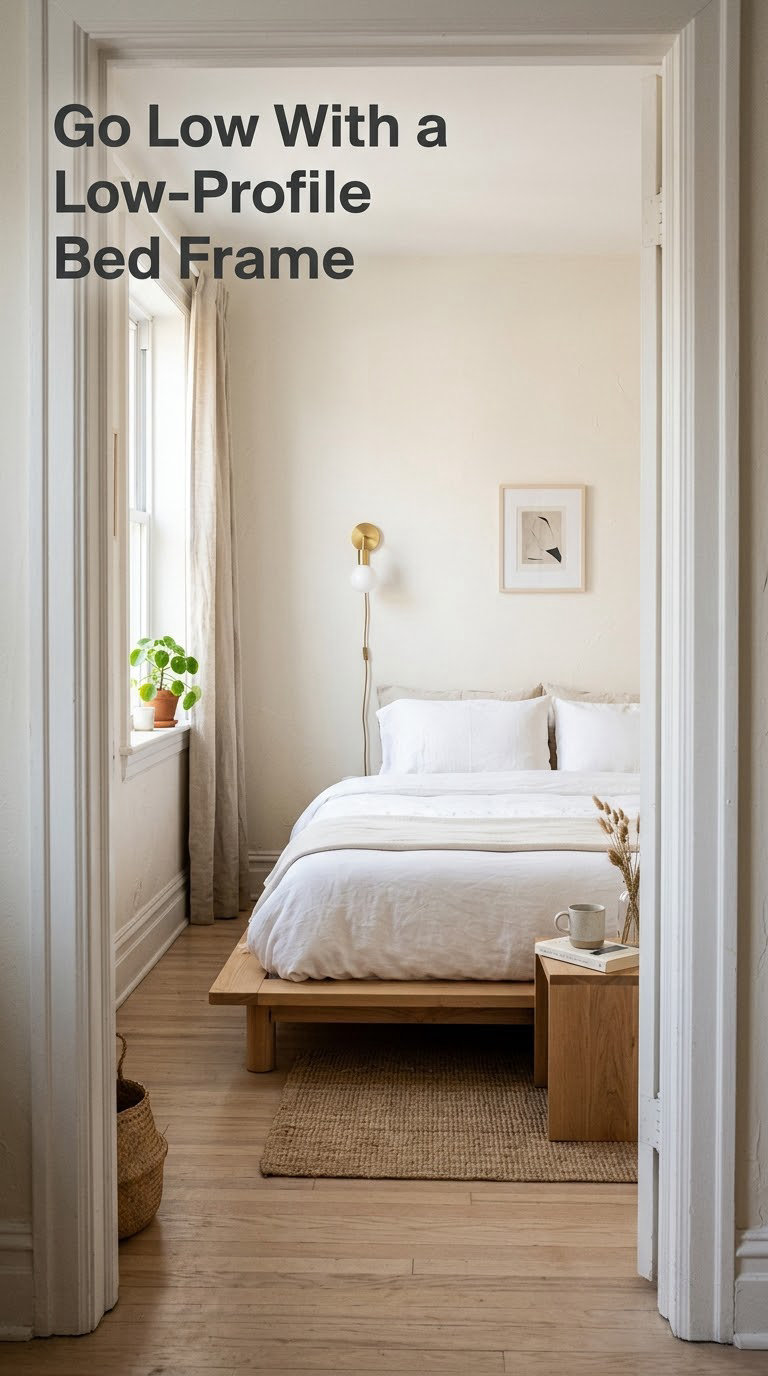
A low-profile bed frame lowers the tallest object in the room and opens the wall above the headboard. A platform bed, an upholstered base with no footboard, or a 3 inch low profile box spring instead of a standard foundation will do it.
Your eye estimates a room’s height by how far up the walls it can travel. A tall footboard or a stacked mattress stops that travel at the foot of the bed.
How to lower the bed
- Swap the standard foundation for a low profile box spring, typically about 3 inches tall, with no tools beyond a mattress foundation strap.
- Replace a footboard frame with a platform frame with a low headboard no higher than the top of the mattress.
- Aim for a total mattress height under about 15 inches (38 cm) from the floor.
- Check doorways and stairwells before the frame arrives. Narrow rental doors reject a lot of assembled frames.
Cost: High, a new frame and possibly a new mattress. Difficulty: Moderate DIY, or hire the delivery if the frame is heavy. Time: A weekend.
Good to know: You can get most of the effect for the price of a foundation by keeping an existing frame and dropping only the box spring. That is the version renters tend to regret not trying sooner.
5. Hang Curtains High and Wide
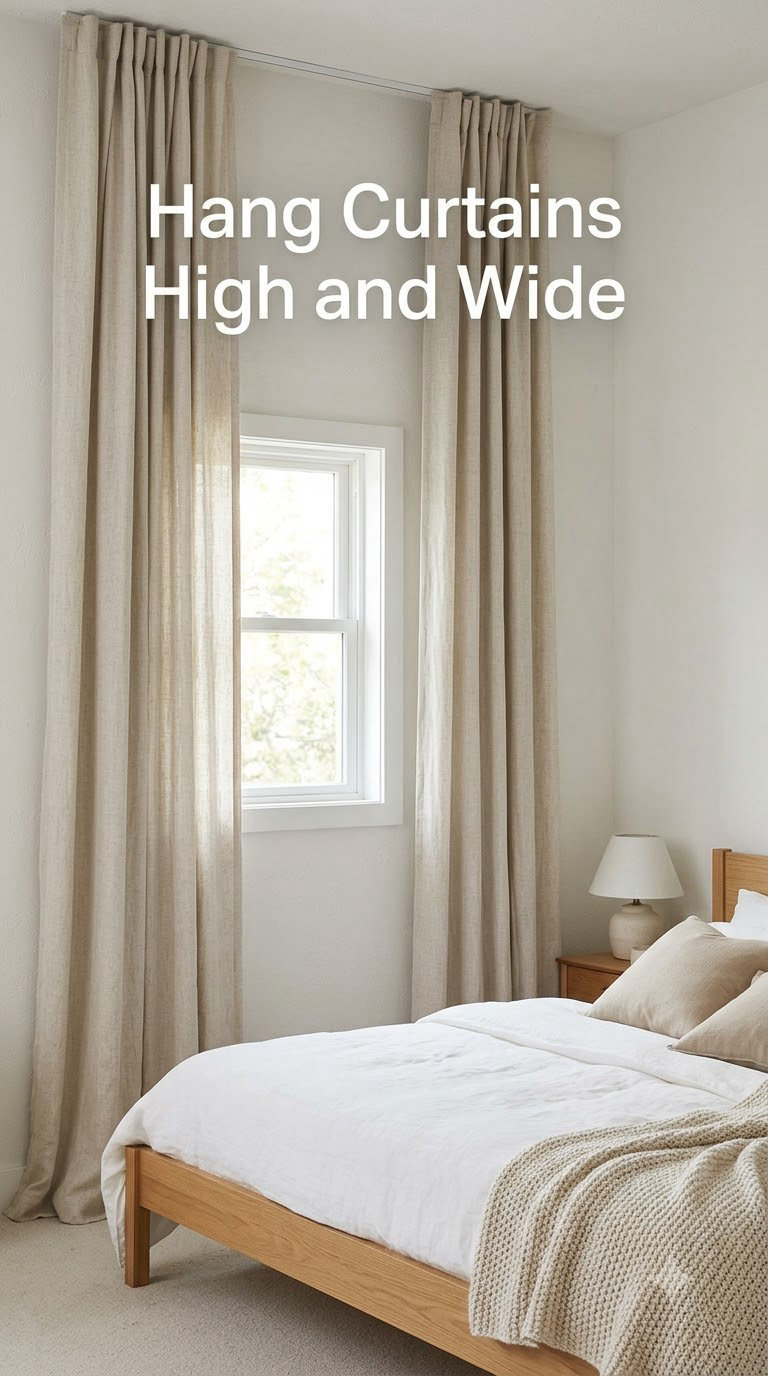
Hanging curtains high and wide makes a small window read as a tall opening instead of a hole in the wall. Mount the rod 6 to 8 inches (15 to 20 cm) above the frame, or 2 to 3 inches below the crown molding, and run the panels 8 to 12 inches (20 to 30 cm) past each side.
Height sells it. A rod near the ceiling pulls the eye upward and implies a taller wall, while wider panels soften the hard boundary of the window reveal.
How to hang them
- Buy panels at 1.5 to 2 times the window width so they can lie flat when open, rather than stacking in a bunch at the center.
- Set the rod so the gap above the frame is filled by fabric, leaving only a sliver of wall visible above.
- Use a wraparound rod if you want the panels to part fully without stacking, which keeps the glass visible in a narrow room.
- Hang the panels first, then re-measure before you order, since most window frames are wider than the opening suggests.
Cost: Low, panels, rod and brackets. Difficulty: Easy DIY. Time: 2 to 3 hours.
Good to know: Advice conflicts on floor-length panels. In a very small room, hem them to break just above the floor rather than touching it, because fabric puddled in an uneven heap reads as clutter. Full length still works well when the panels hang straight and pool evenly.
6. Add a Large Mirror Opposite the Window
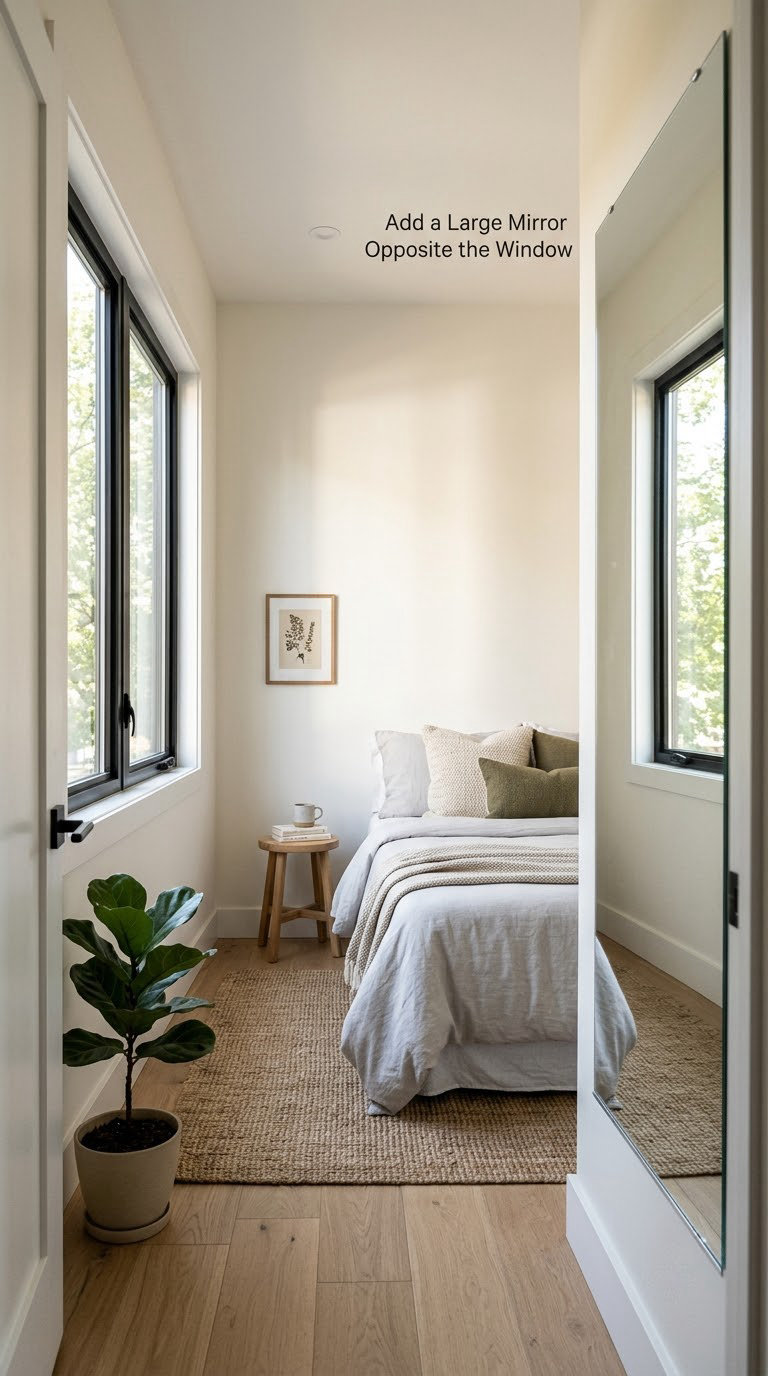
One large mirror placed opposite or beside the window reflects daylight back into the room and doubles the deepest sightline in the space. A full-length frameless mirror leaning against the wall is the simplest version and needs no holes.
A mirror returns light that would otherwise land on the wall behind you and disappear. That extra light reads as extra depth, and it works best when it reflects something worth looking at.
How to place it
- Hang or lean it where it reflects the window, not where it reflects the bed, unless a bold reflected bedding pattern is what you want to wake up to.
- Match the mirror height to roughly two-thirds of the wall so it does not cut the wall into two short bands.
- Keep it close to the window rather than directly across the room. Reflection falls off with angle.
- Lean a floor mirror 1 to 2 inches (3 to 5 cm) off the baseboard and anchor it if children use the room.
Cost: Medium for a wall mirror, Free for a thrifted or existing one. Difficulty: Easy DIY. Time: 1 hour.
Good to know: A leaning mirror is the standard renter hack because it needs no fixings at all. If you own a large mirror with a heavy frame, weigh it before you lean it; a full-length glass mirror can be awkward to steady on carpet.
7. Use Vertical Storage on the Walls
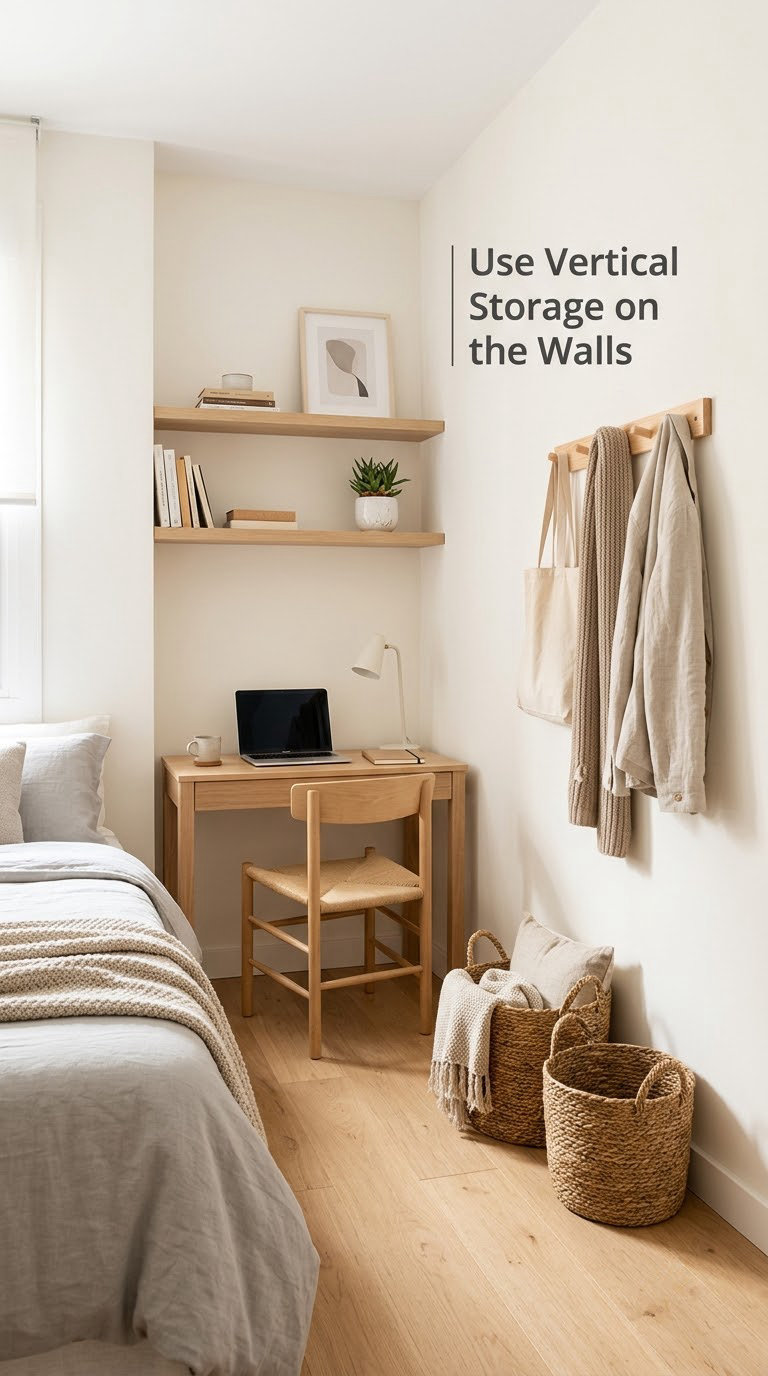
Vertical storage moves your belongings off the floor and onto the wall, which is the one surface in a small bedroom that is usually empty. Floating shelves, peg rails, wall baskets and over-door organizers all add capacity without adding footprint.
Clutter at floor level eats the depth cue. The same clutter hung at eye level reads as a designed arrangement, because your eye passes over it instead of stopping at it.
How to use the wall
- Keep the lowest shelf above head height, roughly 6 feet (180 cm) up, and put the bulkiest items there.
- Use two or three shelves rather than one long run, spaced 12 to 14 inches (30 to 35 cm) apart, so the wall keeps visible gaps.
- Add a peg rail inside a closet door or beside the bed for bags, hats and headphones.
- Anchor anything above a bed into studs, which are typically spaced 16 inches (40 cm) on center. Use a stud finder rather than guessing.
Cost: Medium, shelves, baskets and fixings. Difficulty: Moderate DIY. Time: Half a day.
Good to know: Command strips and removable adhesive hooks carry baskets and light frames only, so keep anything heavier on a real fixing. Our ideas for bedroom wall treatments cover the trickier surfaces, including sloped ceilings.
8. Choose a Round or Oval Nightstand
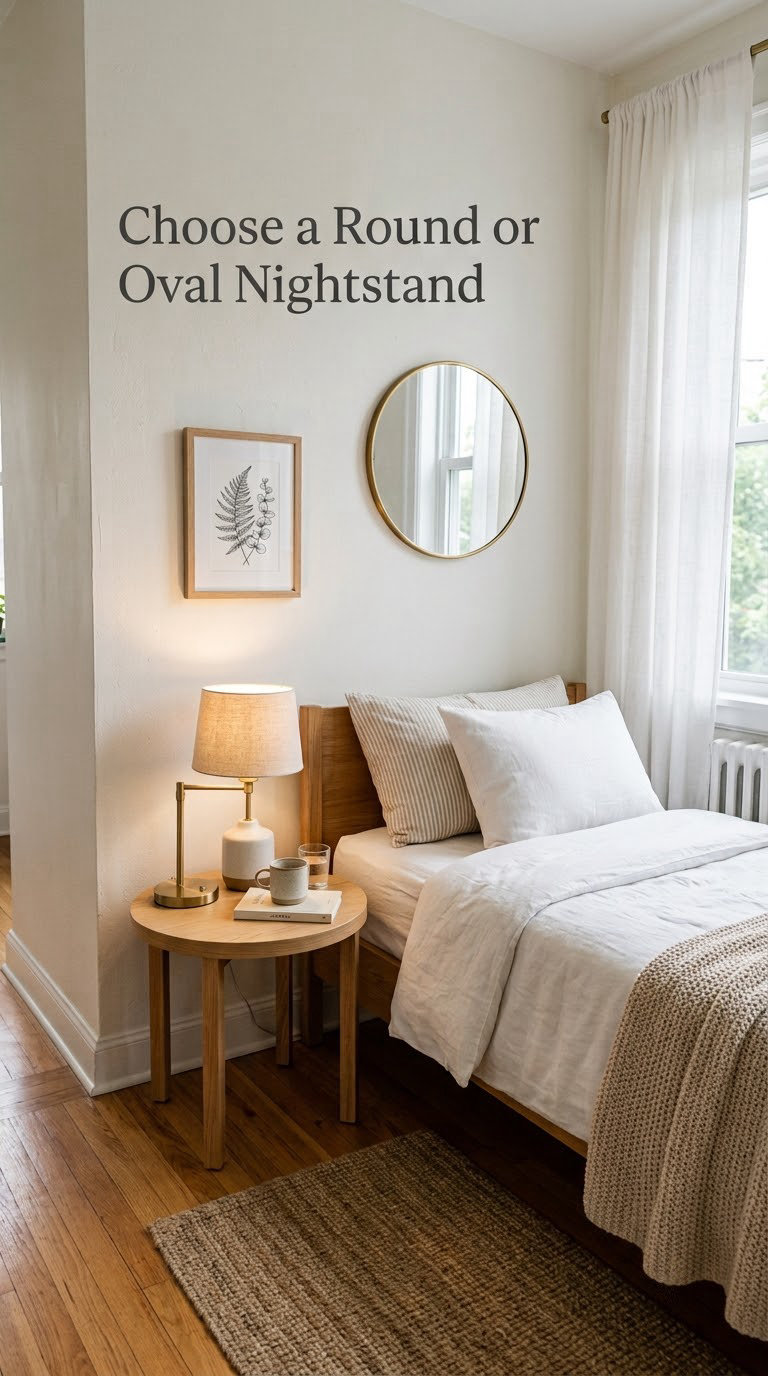
A round or oval nightstand softens a boxy room and makes a tight corner easier to walk past. Curved edges have no sharp corner to catch your shin in the dark, and the shape reads as deliberate rather than squeezed in.
A rectangle placed in the corner leaves two sharp points and no third surface to use. A round table gives you the same top area while giving your eye a curve to rest on.
How to fit one
- Measure the corner diagonally, not just the wall lengths. The circle has to clear the wall and the bed frame.
- Match the top height to the top of the mattress so the two form one line when you look at them side on.
- Choose one with a lower shelf or a single drawer if you need storage, since a top without a lip loses pens and glasses.
- Keep the diameter around 15 to 20 inches (38 to 50 cm) in a room under about 100 square feet.
Cost: Medium. Difficulty: Moderate DIY, mostly assembly. Time: 1 hour.
Good to know: A slim wall shelf works in the same role when the corner is truly tight, and it costs less than a table. Just keep the shelf deep enough, about 8 inches (20 cm), for a lamp base and a glass of water.
9. Center the Bed and Protect Side Clearance
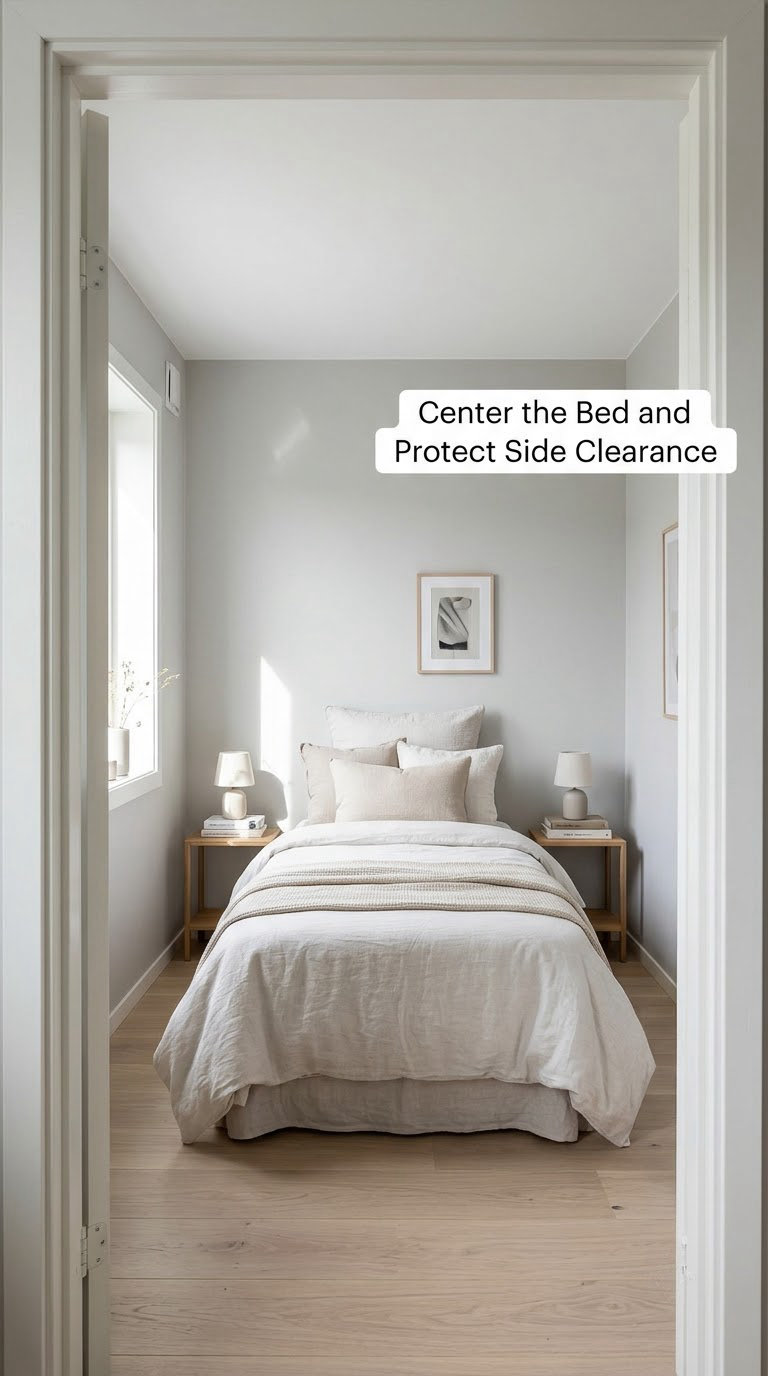
Centering the bed on the longest wall gives a small bedroom one obvious focal point and keeps the remaining furniture shallow. Just keep the clearances even so the walkway works on both sides.
A bed shoved into a corner creates two empty gaps and one cramped one, which reads as unresolved. A centered bed makes the eye settle in one place and lets the rest of the room stay quiet.
How to arrange it
- Tape the bed footprint on the floor and walk the path from the door to the window before you move a thing.
- Leave at least 24 inches (60 cm) of clear floor on the side you actually walk on, even if the other side gets 12 inches (30 cm).
- Push the headboard wall’s furniture to within 2 inches (5 cm) of the wall so the room reads as one continuous plane.
- Pull the bed a few inches off the wall at the head if a light or window is behind it, so you can clean and reach the outlet.
Cost: Free, this is rearranging. Difficulty: Easy DIY. Time: 1 hour.
Good to know: In a room narrower than about 8 feet (2.4 m), a centered bed will block a walkway. In that case, skip this idea and use idea 7 instead to buy back the floor space.
10. Anchor the Room With a Light Area Rug
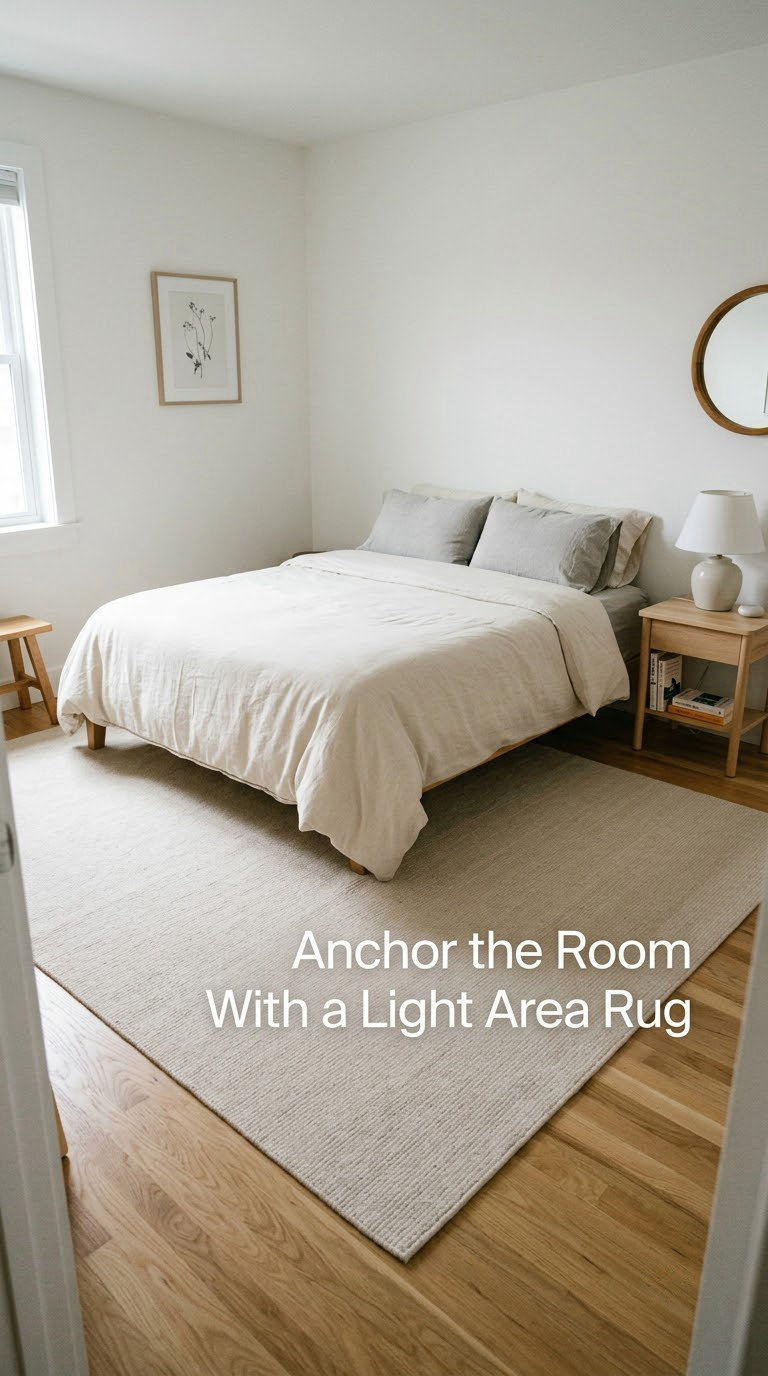
One light-colored rug in a large enough size defines the sleeping zone and connects the bed to the rest of the room. A low-pile beige or oatmeal rug warms hard flooring without adding a dark boundary that chops the floor into pieces.
A rug that stops short of the bed looks like a mat on the floor. A rug that runs past both sides and the foot makes the furniture sit on one surface, and that reads as a designed room.
How to size it
- Choose a rug at least two-thirds of the bed width, so it extends 18 to 24 inches (45 to 60 cm) past each side of the mattress.
- Let it run past the foot of the bed too, unless the door swings over that area.
- Choose a rug 5 feet (150 cm) or longer in the room’s short direction if you want the whole room to feel connected.
- Pick low pile, under about a quarter inch thick, so doors clear it and it does not become the trip hazard.
Cost: Medium. Difficulty: Easy DIY. Time: 15 minutes.
Good to know: Yes, a bigger rug works in a tiny room, and our reviews of small area rugs cover the sizes that actually get made. The one case where a large rug fails is a very short room, where you should run it across the width instead of the length.
11. Add Layered Lighting Without Bulky Fixtures
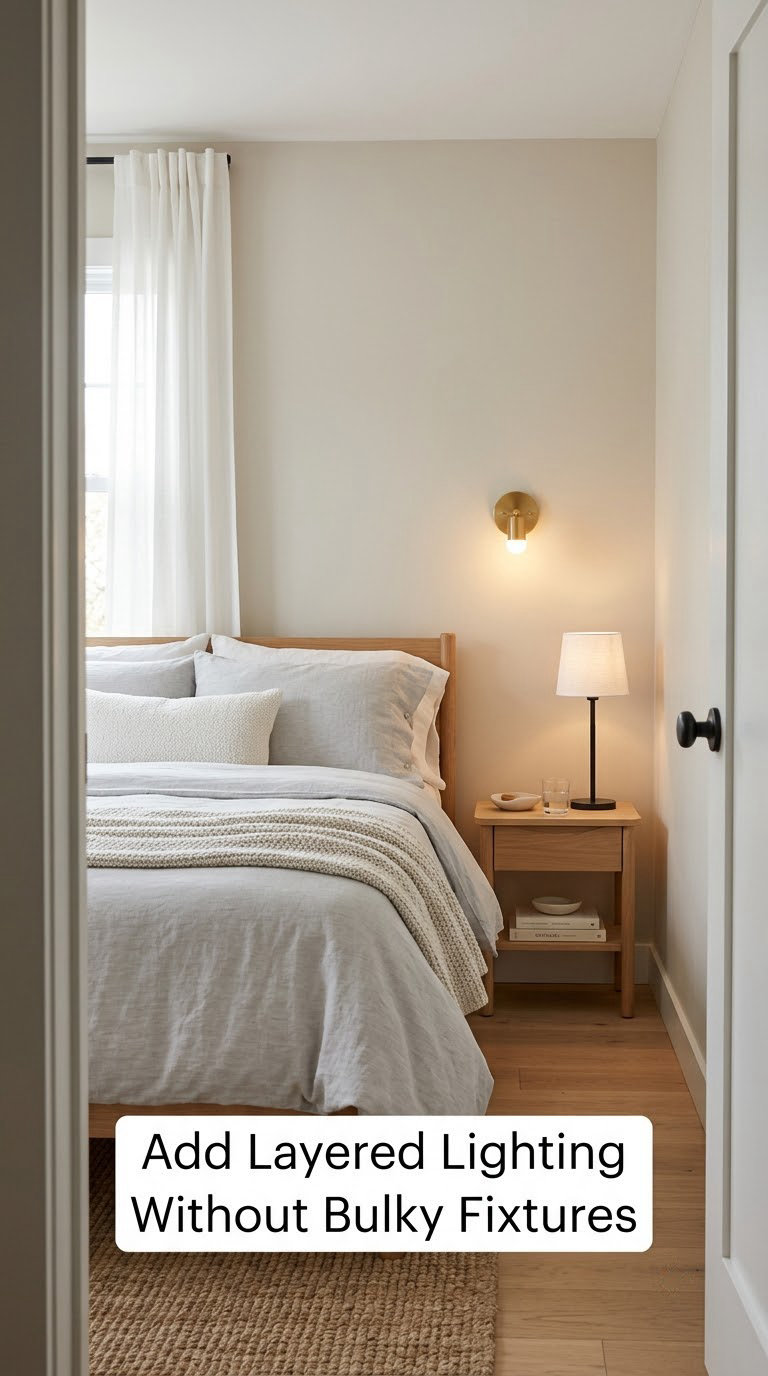
Layered lighting frees the nightstand surface and removes a bulky object from the bedside. Wall sconces, clip lamps and slim table lamps give you three separate levels of brightness without a single ceiling dome hanging over the room.
One overhead light makes a room read as a box with a light in it. Three lower sources at different heights spread the brightness and let you light only the part of the room you are using.
How to layer it
- Put a source at ceiling level for general brightness, another at eye level for reading, and a third low and warm for bedtime.
- Match every bulb in the room to the same color temperature, around 2700K, so the room does not shift color as you switch things on.
- Hang sconces so the widest part sits at about eye level when seated, not at shoulder height, or they glare.
- Fit a dimmer to the main circuit if the switch is on the same wall as a bed you share.
Cost: Low to medium. Difficulty: Moderate DIY. Time: 2 to 3 hours.
Good to know: Swapping table lamps for wall sconces is regularly named as the highest-impact, lowest-cost change in small bedrooms. New wiring, new circuits and anything touching a junction box are licensed electrical work in most places, so hire an electrician for those rather than guessing.
12. Repaint the Ceiling and Trim Bright White
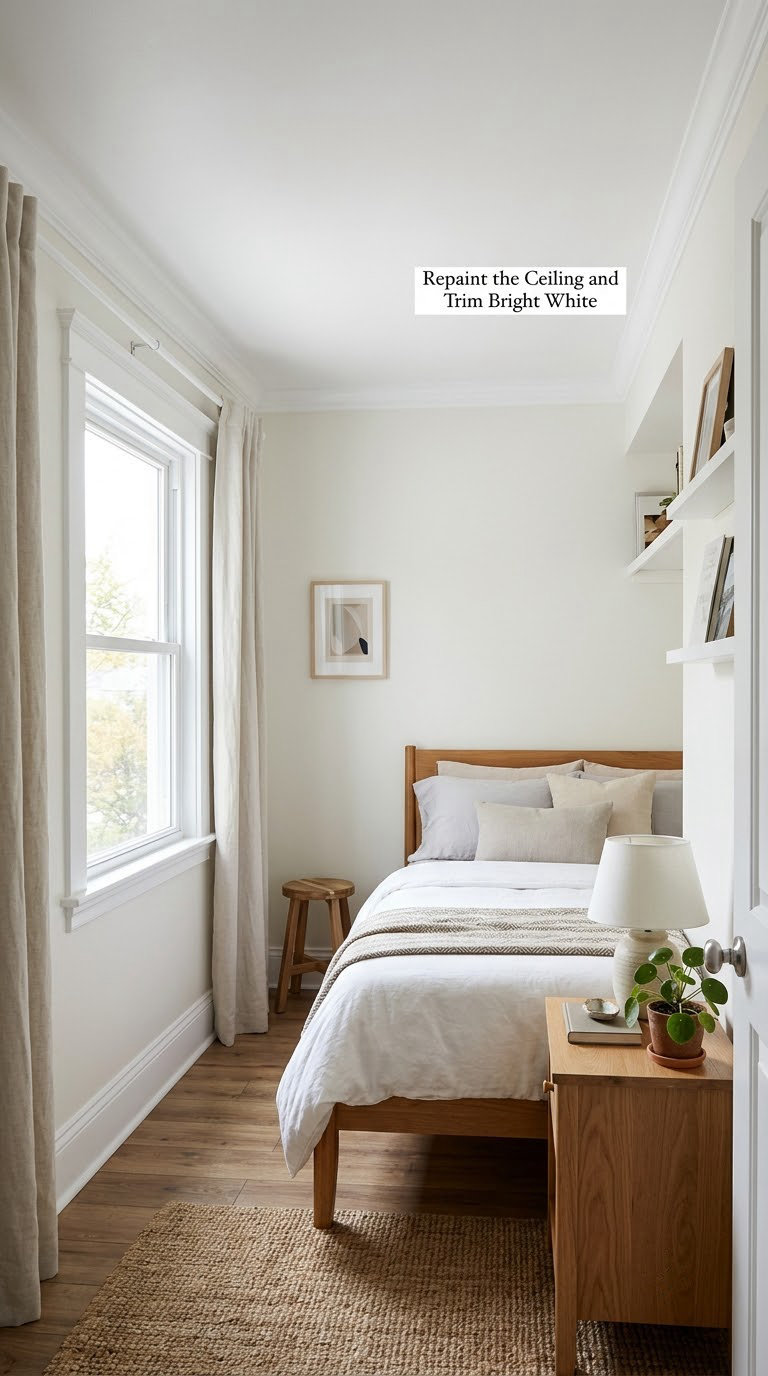
A bright white ceiling and trim reduce the number of visible boundaries in the room and make it read cleaner and taller. Ceiling paint that is flat, or one shade lighter than the walls, stops the ceiling from becoming a heavy grey lid.
Trim painted lighter than the wall draws a clean line along the edges of a room, and clean lines make a room look organized and larger rather than patched.
How to do it
- Paint the ceiling first, cutting in along the edges with a brush and rolling the field, then move to the walls.
- Use flat or matte ceiling paint rather than eggshell, since a textured-looking sheen catches every bump.
- Do the trim last in a satin finish, which wipes clean at skirting height.
- Let each coat dry fully between passes. Typical dry times are 2 to 4 hours, and the trim needs a longer cure before you lean anything against it.
Cost: Low. Difficulty: Moderate DIY. Time: One weekend.
Good to know: Drop cloths and a plastic sheet taped to the ceiling keep the floor clean and save you a second wash-up. Painting trim lighter than the wall is the single change people most often report as doing more than they expected.
13. Add a Fold-Down or Wall-Mounted Desk
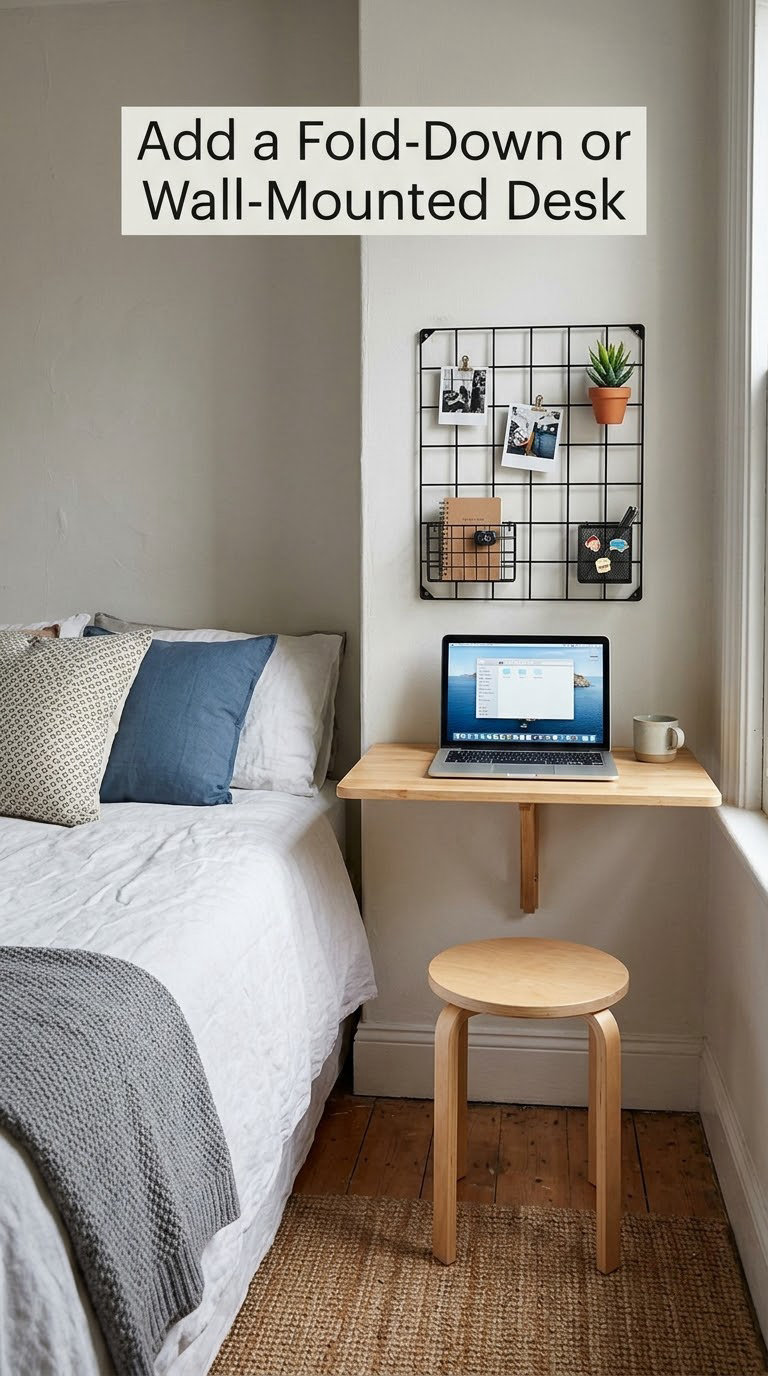
A fold-down or wall-mounted desk creates a work zone without permanently giving up floor space. When you are not working, the surface folds flat against the wall and the room returns to being a bedroom.
A bedroom that doubles as an office usually loses because the desk is a permanent object in the middle of the room. Wall-mounted storage moves both the working and the storing off the floor.
How to install one
- Choose a surface around 20 to 24 inches (50 to 60 cm) deep. Deeper is more comfortable but eats the walkway.
- Fix it into studs, which sit about 16 inches (40 cm) on center, and use the supplied brackets at both ends.
- Set the surface at about 30 inches (76 cm) from the floor for typing, or 28 inches (71 cm) if you use a drafting chair with armrests.
- Add a shallow shelf above for a laptop, a lamp and a folder, so the desk top stays clear.
Cost: Medium to high. Difficulty: Moderate DIY. Time: 3 to 4 hours including assembly.
Good to know: If you cannot drill, a laptop table, a narrow standing desk against a wall, or an over-door organizer all do the same job for the same reason. Our roundups of corner desks for small spaces cover the shapes that fit awkward corners.
14. Keep Decor Sparse and Repeat Three Colors
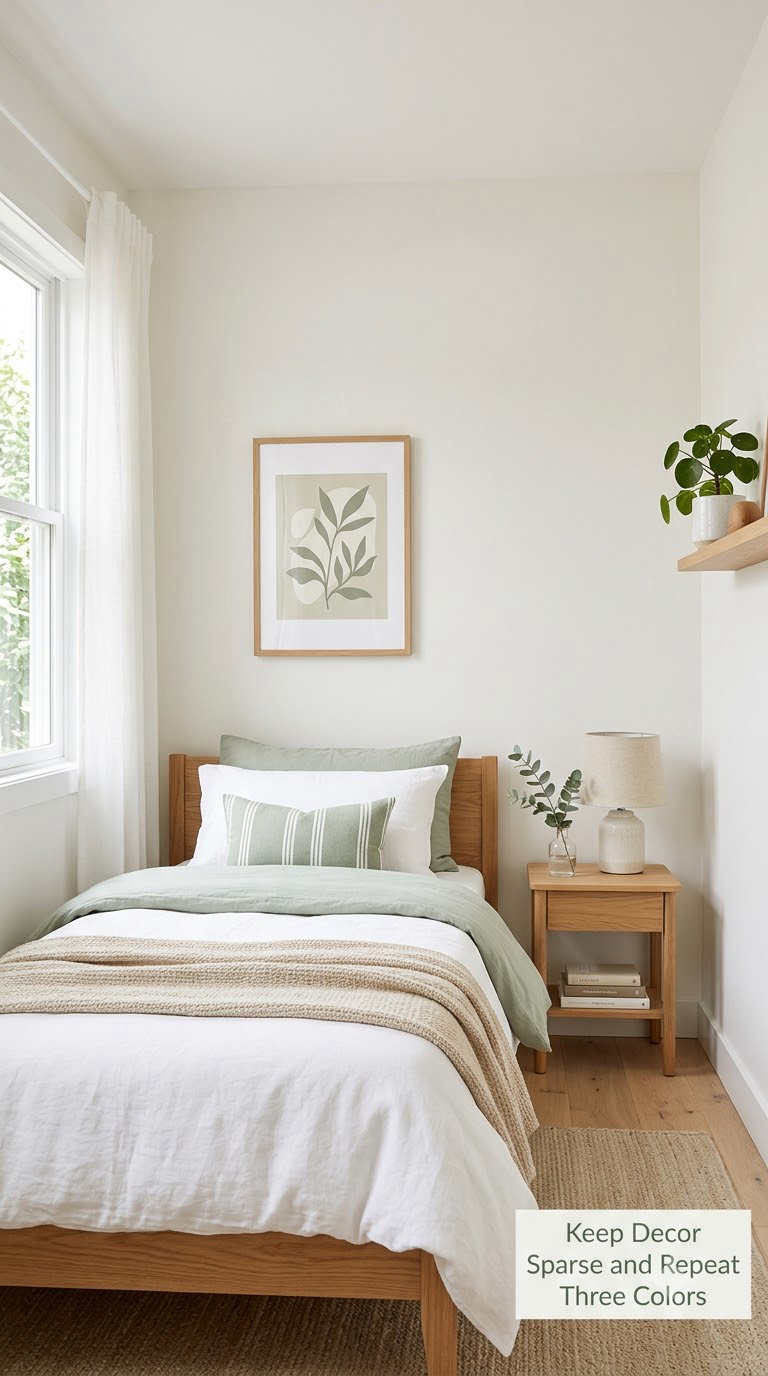
Keeping decor sparse and repeating three colors makes a small bedroom look intentional instead of crowded. Pick a base neutral, one supporting tone and one accent, then let those three do all the work.
Object count is the strongest lever most people have not pulled. Removing five small items from a nightstand changes how the room reads far more than any single new purchase.
How to edit a room fast
- Remove everything from the surfaces, then bring back only three items per surface. That is the whole rule.
- Repeat each of your three colors in at least three places, such as bedding, a frame and one object on a shelf.
- Group small items in odd numbers on a tray, so a cluster reads as one object instead of five.
- Set a landing spot near the door for keys, a bag and a charger, so the floor and the dresser top stay clear.
Cost: Free to low, mostly editing and storage bins. Difficulty: Easy DIY. Time: 2 hours.
Good to know: Do not over-edit. A bedroom with nothing on the surfaces feels like a showroom and stops feeling like somewhere you sleep. If you want help choosing the palette, small space paint color ideas and our bedroom color combination guide cover the palette side.
15. Create a Focal Point With One Large Piece
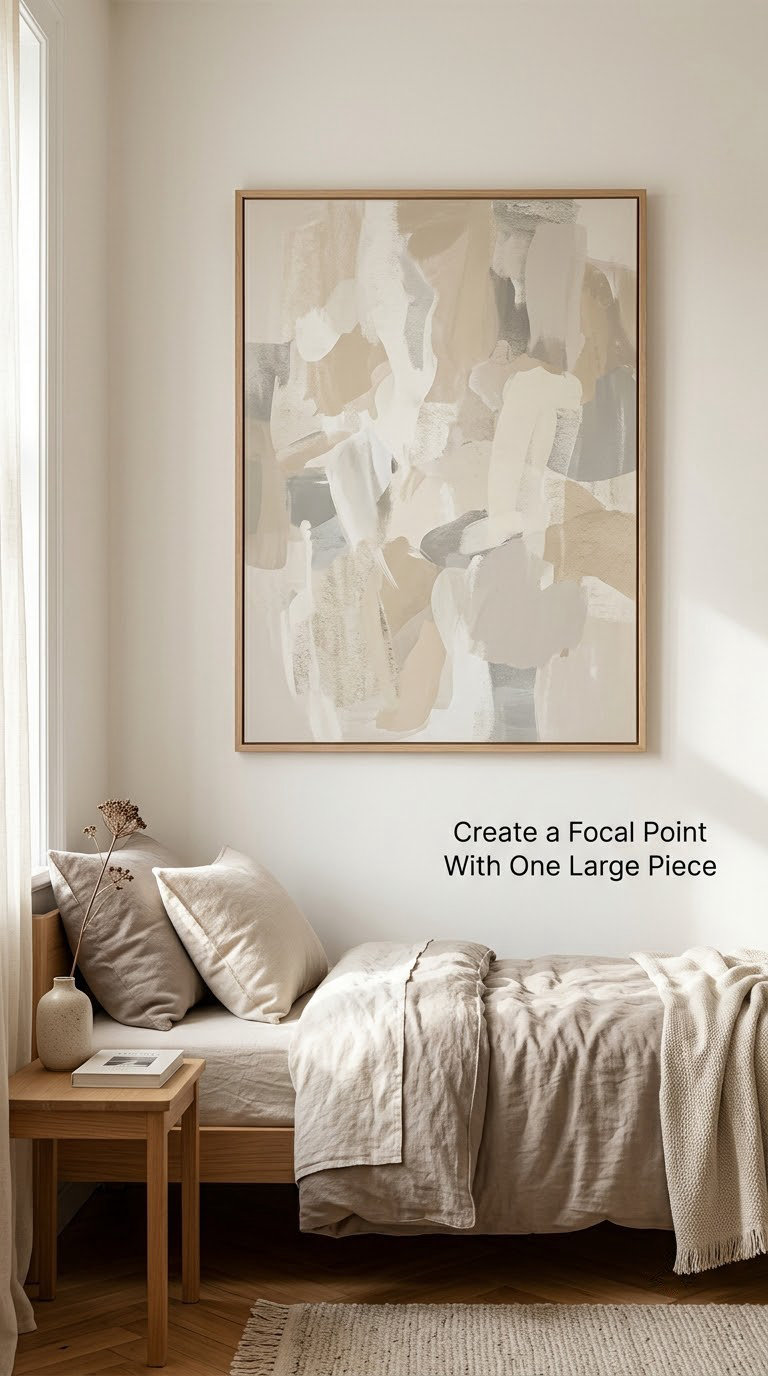
One appropriately scaled piece of art, a mirror or a textile replaces a scatter of small frames and makes a compact bedroom look deliberate. Scale it to the wall, not to the furniture underneath.
Lots of small pictures create lots of small edges, which is the same problem as a busy rug. A single object with a clear outline gives the wall one thing to rest on.
How to scale it
- For art above a bed, go two-thirds the width of the headboard or wider, and hang the bottom edge 6 to 8 inches (15 to 20 cm) above the headboard.
- For a gallery arrangement, keep the whole group within a frame you can draw on the wall, then hang it level and let the gap between pieces stay even.
- Hang the center of the piece about 57 inches (145 cm) from the floor when it stands alone on a wall.
- Choose a light frame or no frame at all in a small room, since a heavy dark border adds a border to your view.
Cost: Medium. Difficulty: Easy DIY. Time: 1 to 2 hours.
Good to know: If you would rather change the wall than hang anything, one wallpapered or painted accent wall works as a focal point on its own. Our bedroom wallpaper ideas cover removable panels for renters.
Planning Tips
- Measure before you buy anything. Write down wall lengths, ceiling height, window width including the casing, the door swing and the radiator position. Nearly every disappointing bedroom purchase traces back to a missing measurement.
- Tape it out. Mark the footprint of each piece with painter’s tape and walk the room. It costs nothing and shows the real walking width in seconds.
- Order by impact, not by convenience. Paint and curtains change more than any single piece of furniture, so do those first while the room is still empty.
- Keep a 10 to 15 percent budget buffer. Under-sized rugs, wrong-sized rods and one extra gallon of paint are normal, not failures.
- Check the rental terms before the first hole. Adhesive hooks, leaning mirrors, removable panels and tension rods cover a surprising share of these fifteen ideas.
- Do one room per weekend. Paint in one, textiles in the next. Rushing all fifteen at once is how rooms end up half finished for a year.
Frequently Asked Questions
What colors make a small bedroom look bigger?
Light, low-saturation colors do the most work: soft white, warm off-white, pale greige and oatmeal. Choose an eggshell finish so the surface scatters daylight rather than absorbing it, and keep mid-tones off all four walls. A single dark or saturated accent wall also works, provided only one wall carries it and the remaining three stay pale. Paint color ideas for small rooms are worth checking before you commit.
Should every small bedroom have a mirror?
A mirror helps when it reflects something worth looking at, usually a window or the clearest view in the room. A large frameless mirror on the wall opposite the window bounces daylight back into the space and doubles the deepest sightline. Skip it if the only available wall reflects a busy corner, because a mirror only makes the room feel bigger when what it shows looks like more space.
What furniture works best in a very narrow bedroom?
Furniture that is shallow and raised off the floor works best: nightstands 12 to 15 inches deep, dressers set on legs, floating shelves and wall-mounted desks. Skip anything with a deep overhang or a solid base that reaches the floor, since both read as extra walls. In a room under about 8 feet wide, move storage to the walls before you buy a single new piece.
How can I make a small rented bedroom look bigger without painting?
Most of the optical gains do not need paint. Hang curtains near the ceiling and wider than the window, lower the bed with a low profile box spring, lean a full-length mirror where it catches daylight, add a large light rug and move storage onto the walls with adhesive hooks and tension rods. These change light, sightlines and apparent height without a single hole in the plaster.
Is a large area rug good for a small bedroom?
Yes, as long as it is large enough to sit under the furniture. Choose one at least two-thirds the bed width so it extends 18 to 24 inches past each side, and let it run past the foot where the door swing allows. Keep it low pile, under about a quarter inch, so doors clear it. In a very short room, run it across the width rather than the length.
How should I measure a bedroom before buying furniture?
Record wall lengths at floor and ceiling, the ceiling height at its lowest point, window width including the casing, the door swing and where radiators and outlets sit. Then measure the widest walkway you need, usually 24 inches, and check that your door and stairwell will take the delivery. Tape each piece’s footprint on the floor and walk the route before you order anything.
If you only do three things this month, paint the walls a light reflective color, hang the curtains near the ceiling and wider than the window, then get the bed off the floor with a low profile base. Those three change light, apparent height and visible floor at once, and they work whether you rent or own.
The rest can wait until you have measured the room properly. Every idea on this list does more when you know your actual wall lengths and your actual ceiling height, and less when you guess.