How to Install a Bathroom Exhaust Fan: Easy DIY 2026
Most people find out they need a new bathroom vent fan the same way: paint peeling above the shower, a mirror that fogs for hours after a bath, or a fan that rattles loud enough to hear from the next room. Installing one is a normal weekend project for a handy homeowner, and in most cases you can do the whole job without touching a wall switch you don’t understand.
This guide walks through how to install a bathroom exhaust fan from the first breaker switch to the final airflow test, whether you are replacing a dead unit or putting one in a bathroom that never had one. Read the whole thing once before you buy anything, because the fan size, the duct route and the electrical box you find decide half the work.
Contents
Two numbers matter more than the rest. CFM, cubic feet per minute, tells you how much air the fan moves. Sones tell you how loud it sounds at full speed, and below 1.0 sone is what you want over a tub or next to a bedroom wall.
Time: 3 to 5 hours for a straightforward replacement, half a day if you are cutting a new opening · Cost: roughly a couple hundred dollars in parts for a like-for-like swap, more for a new circuit or roof vent · Difficulty: Moderate DIY · Skill level: Comfortable with a drill, a drywall saw and basic wiring
If your fan is going in as part of a bigger bathroom renovation, the rough-in sequence matters and timing is different. Our bathroom fan rough-in guide covers where the duct and box belong before the drywall goes up.
Tools and Materials for Installing a Vent Fan
You do not need a contractor’s tool belt for this job. Everything below comes from a normal homeowner’s kit, plus a few electrical items from the hardware store.
Hand and power tools
- Drywall saw (keyhole saw) or reciprocating saw with a fine-tooth blade for cutting the opening
- Tape measure, pencil, straightedge and a framing square
- Cordless drill with a 1/4 inch bit and a Phillips driver
- Non-contact voltage tester and a 2-pole tester you can clip across the wires
- Linesman’s pliers, wire strippers and side cutters
- Utility knife, plus a step ladder rated for your weight
- Caulk gun for exterior sealing, and a putty knife if you are patching drywall
- Shop vacuum or dust mask when working over finished ceilings
Materials and replacement parts
- The new fan housing with motor and grille, sized to your opening or the room
- 4 inch or 6 inch duct, rigid metal preferred, plus a duct connector or clamp and foil tape
- Backdraft damper sized to match the duct
- Exterior vent hood with a flanged, screened cover
- Wire nuts, a cable clamp and a junction box listed for the fan
- 14/2 or 12/2 cable with ground, matching whatever is already in the wall
- 1/4 inch and 1/2 inch drywall screws and joint compound if you enlarge the opening
- Exterior-grade silicone sealant and a small piece of flashing if you cut through a roof
Optional attic or roof pieces: 2×4 blocking for joist mounting, a roof vent cap, roofing nails and roofing cement for a shingle roof, and a soffit or gable exhaust if you are venting high rather than through the roof deck.
Part costs swing by region and by how fancy you go, but a basic 80 CFM fan and grille is a modest line item, while a quiet DC motor unit with a light runs several times that. A handyman or electrician quote for a standard ceiling swap usually lands in the mid hundreds, and a new circuit or roof penetration moves fast toward four figures.
Before You Start: Check the Opening, the Power and the Code
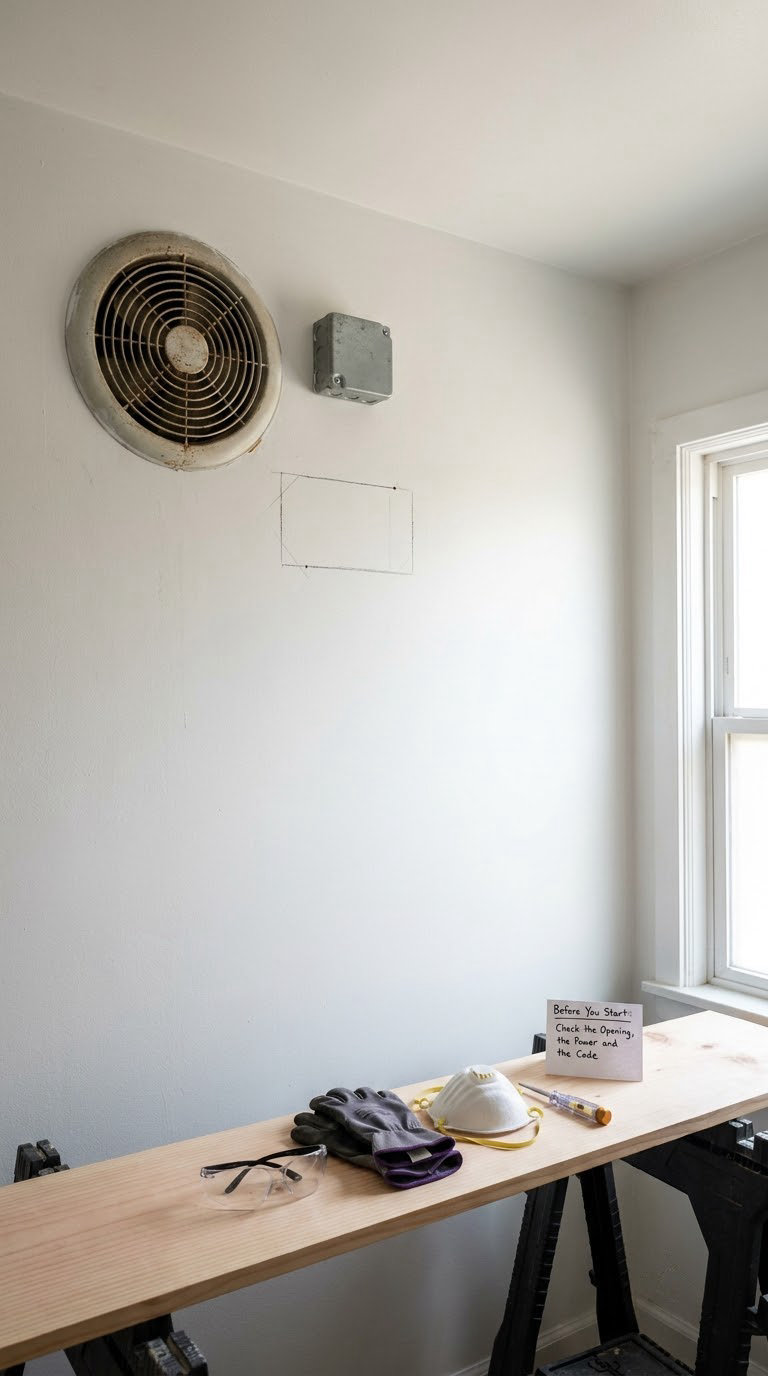
Ten minutes of checking here saves an hour of rework later. Look at the existing fan, then look at what feeds it.
Turn the old fan on and listen. A fan that hums but does not move air is usually clogged with lint and dust. One that sounds like a gravel shaker has a failing motor. Both mean replacement rather than repair.
Measure the existing housing across the mounting flange, usually 4 by 4 inches or 6 by 6 inches, and measure the ceiling hole itself, commonly 10 by 10 inches or 12 by 12 inches. Old fans are often fastened to a joist with an adjustable bracket, so the flange size matters more than the hole.
Confirm what is above the ceiling. Look for a joist within reach of your preferred spot, check where the duct currently runs, and note whether insulation is stuffed right above the opening. Attic insulation and ductwork are the two things that most often change your plan on site.
Then check the electrical side. Open the switch box and see whether you have a ground wire, what gauge the cable is, and whether the breaker serving it is 15 or 20 amps. A bathroom fan should land on a 20 amp GFCI protected circuit in most current codes, though a grandfathered 15 amp circuit is common in existing homes.
Local code and permit rules vary by city and county. Most jurisdictions treat a fan swap as routine, but a new circuit, a new opening, or any work in a fire-rated assembly usually needs a permit. A quick call to your local building department answers it in five minutes.
Finally, shut the breaker off and confirm the power is dead with a tester before you touch any wire. Do not skip this. Plenty of people have found a second circuit feeding the same switch, or a breaker labelled for a different room.
Step-by-Step Instructions: How to Install a Bathroom Exhaust Fan
Step 1: Turn Off Power and Remove the Existing Fan
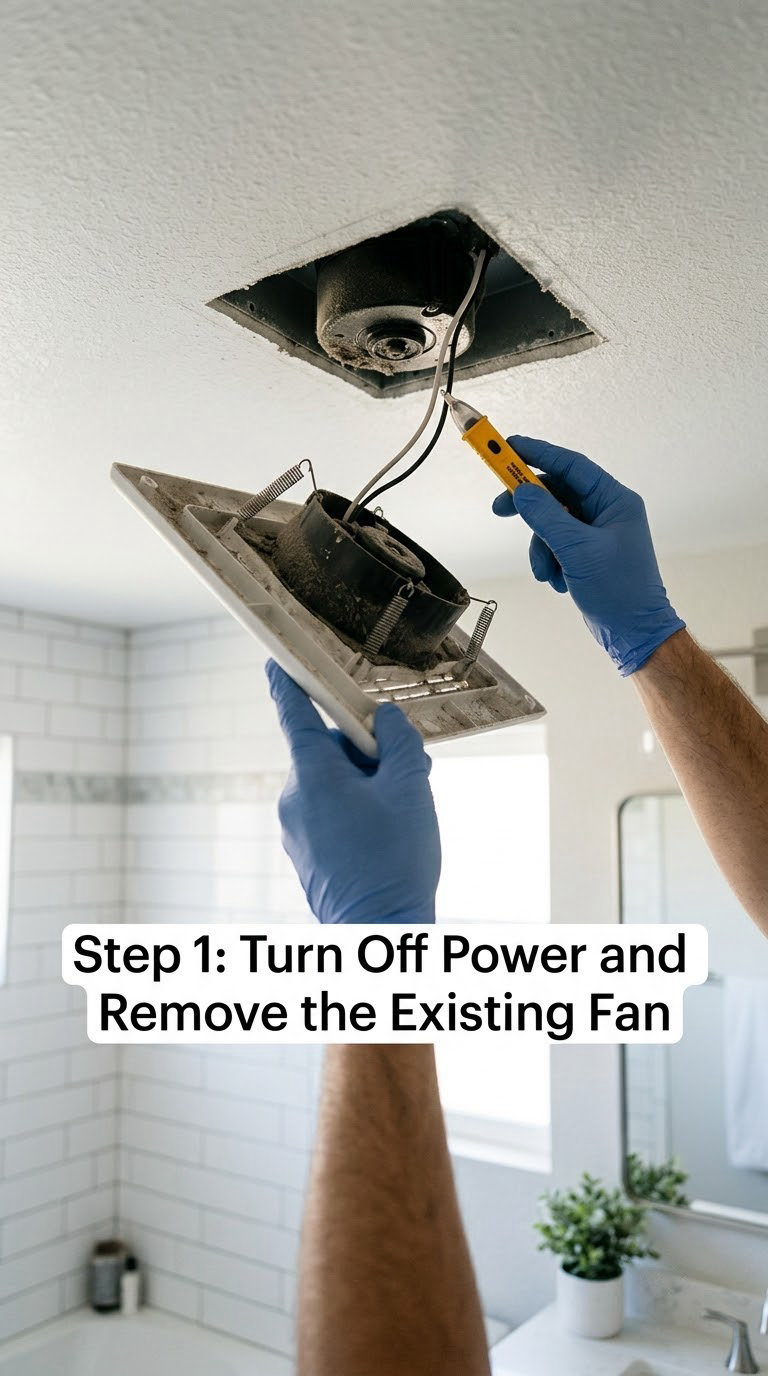
Switch off the breaker, then verify with a non-contact tester and a two-pole tester clipped across hot and neutral. Only when both agree is it safe.
Take a photo of the existing wiring before you disconnect anything. Note which screw the black wire lands on, where the white wire goes, and how the ground is attached. That photo is your reference if the new unit has different terminal markings.
From the room, press the spring clips on the grille sides and pull it straight down. From above, unplug the quick-connect plug or undo the wire nuts, then remove the two housing brackets or screws holding the fan to the joist. Lower the housing out carefully; old flex duct is often the only thing left holding it.
Step 2: Measure and Inspect the Opening
With the old unit down, look at the whole cavity. You want to know three things: the joist spacing, the condition of the existing duct, and whether the duct actually reaches outside.
Standard joists are 16 inches on centre, and an adjustable bracket grips a fan to that joist. If the opening has no joist near it, you will need to add 2×4 blocking between two joists and fasten the housing to that.
Follow the old duct from the fan to the vent. Disconnected ends left open in an attic are common in older homes, and a duct capped with a bag or tape inside the attic is worse than no duct at all. Replace any crushed, kinked or disconnected run rather than reusing it.
Step 3: Choose and Position the Exhaust Fan
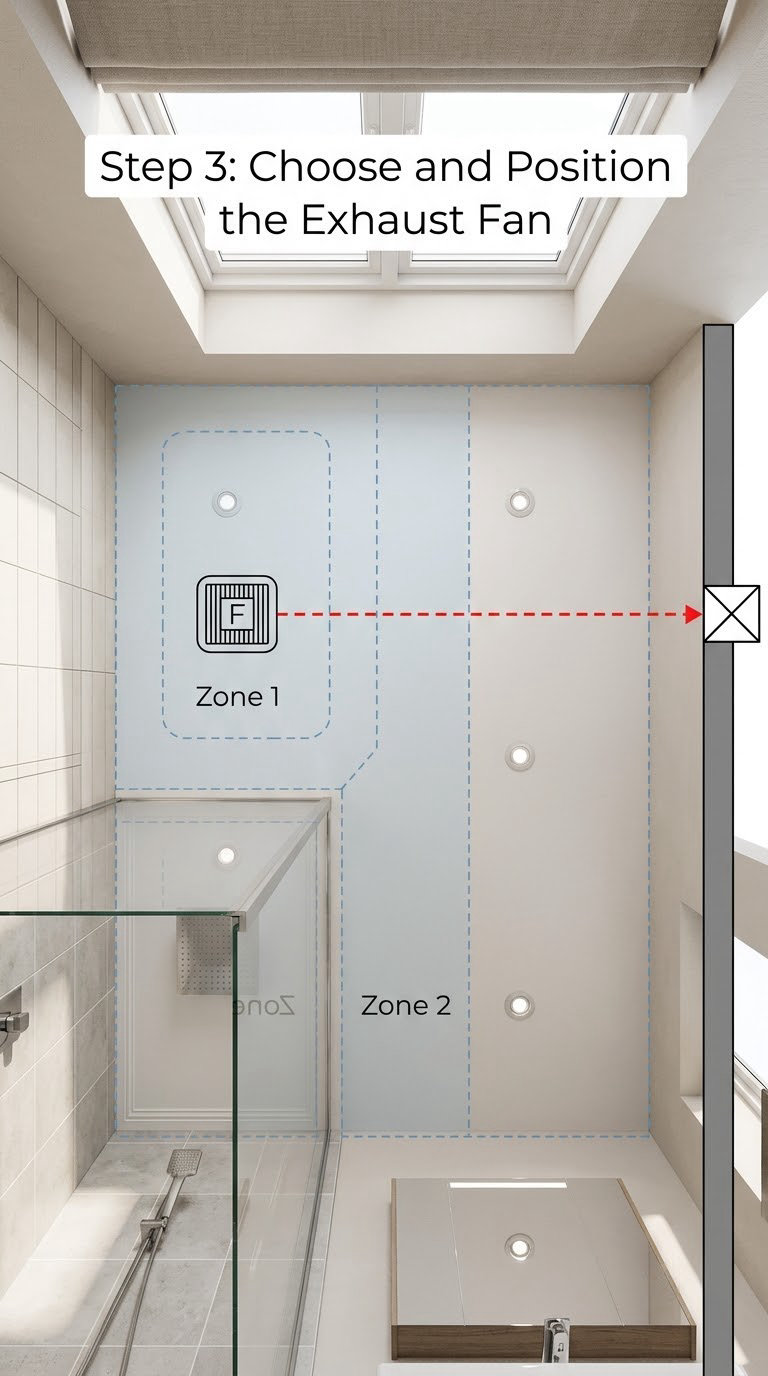
Size by airflow, using a standard rule of thumb: multiply the room’s length by width by height in feet, then multiply by 0.13. That gives you the CFM the room needs to clear moisture at least once an hour.
| Bathroom size | Recommended airflow | Good for |
|---|---|---|
| Under 50 sq ft | 50 to 80 CFM | Half baths, powder rooms, small toilet rooms |
| 50 to 100 sq ft | 80 to 110 CFM | Standard full baths with one shower |
| Over 100 sq ft | 110 to 150 CFM | Large baths, dual vanity rooms, wet rooms |
For a separate toilet room with no shower, a small fan on an adjustable timer is fine. For a shower you stand under, aim for the higher end of the range and pick something rated at or under 1.0 sone if anyone sleeps on the other side of that wall.
Position matters as much as size. Keep the fan away from the shower spray if your model is not rated for wet locations, aim it at the shower stall, and never place it directly under a window or a supply register. Above all, run the duct outside, and make it as straight and as short as you can.
If you are still deciding on hardware, our roundup of the best bathroom exhaust fans covers quiet models, humidity sensor units and fan-and-light combos.
Step 4: Prepare the Housing and Ductwork
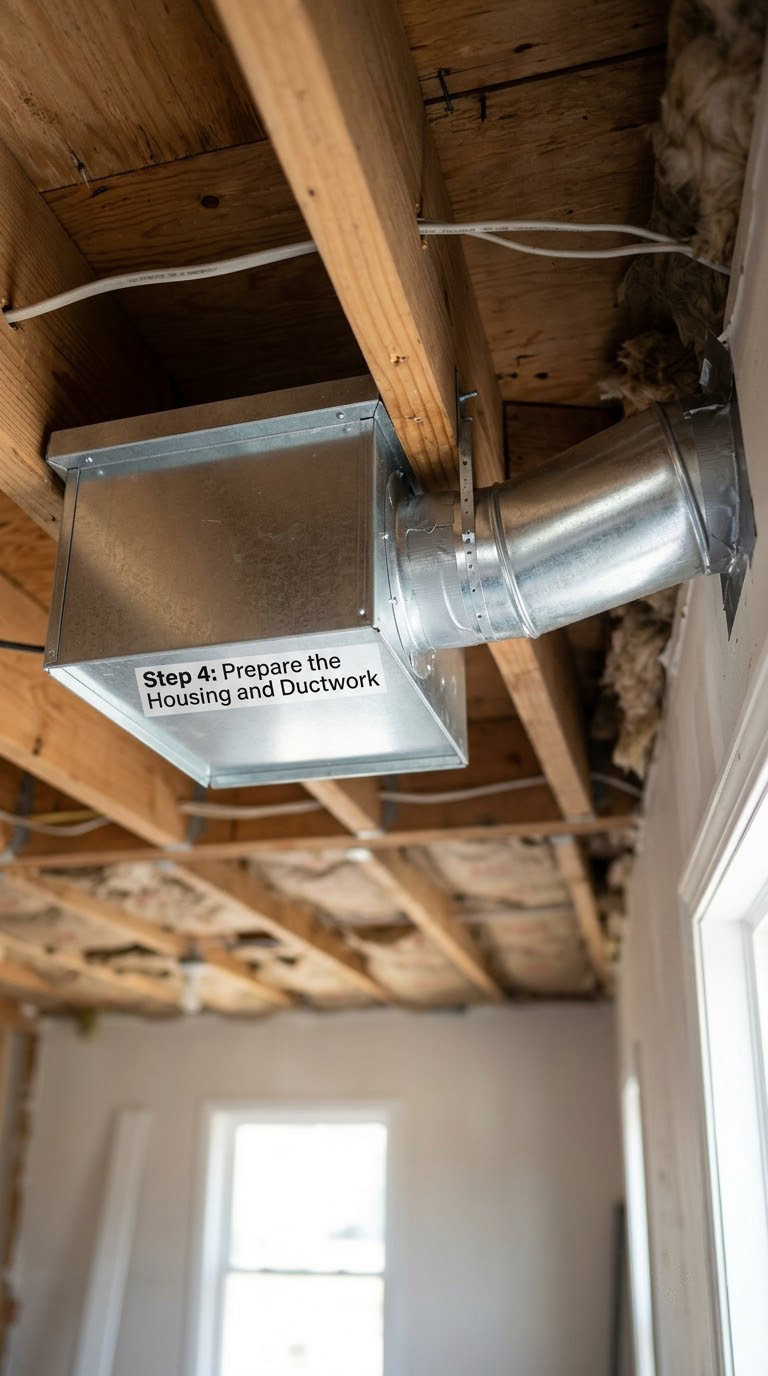
Set the housing in the opening, level it, and fasten it to the joist with the supplied brackets or screws every 8 to 10 inches. The housing should sit flush against the ceiling face; a fan that hangs an inch low draws in dirty air from the room instead of pulling moist air out.
Pick your duct before you buy, because the choice affects airflow more than most people expect.
| Duct type | Pros | Cons |
|---|---|---|
| Rigid metal | Best airflow, easy to clean, resists crushing | Harder to route around obstacles |
| Flexible aluminum | Bends around pipes and joists, quick to fit | Crushes easily and loses airflow over long runs |
| Insulated flexible | Reduces condensation in cold climates | Soft, expensive, must be supported every foot |
| Venting route | Pros | Watch out for |
|---|---|---|
| Roof through shingles | Short run, tidy exterior | Flashing and shingle work on a steep or high roof |
| Sidewall through siding | Easiest exterior finish, easy to check later | Keep the hood above the roof line and slope the duct |
Fit the backdraft damper to the housing outlet, slide the duct on until it is fully seated, then wrap the joint in foil tape. Not duct tape. Regular tape peels loose in a damp attic within a couple of years, and a leaking duct is how you get water on the drywall.
Support rigid duct with hanging straps or a wire so it does not sag, and keep the duct to roughly 10 feet of equivalent length. Each 90 degree bend counts as about 5 feet, which is why a straight run beats a clever one.
Step 5: Make the Electrical Connections
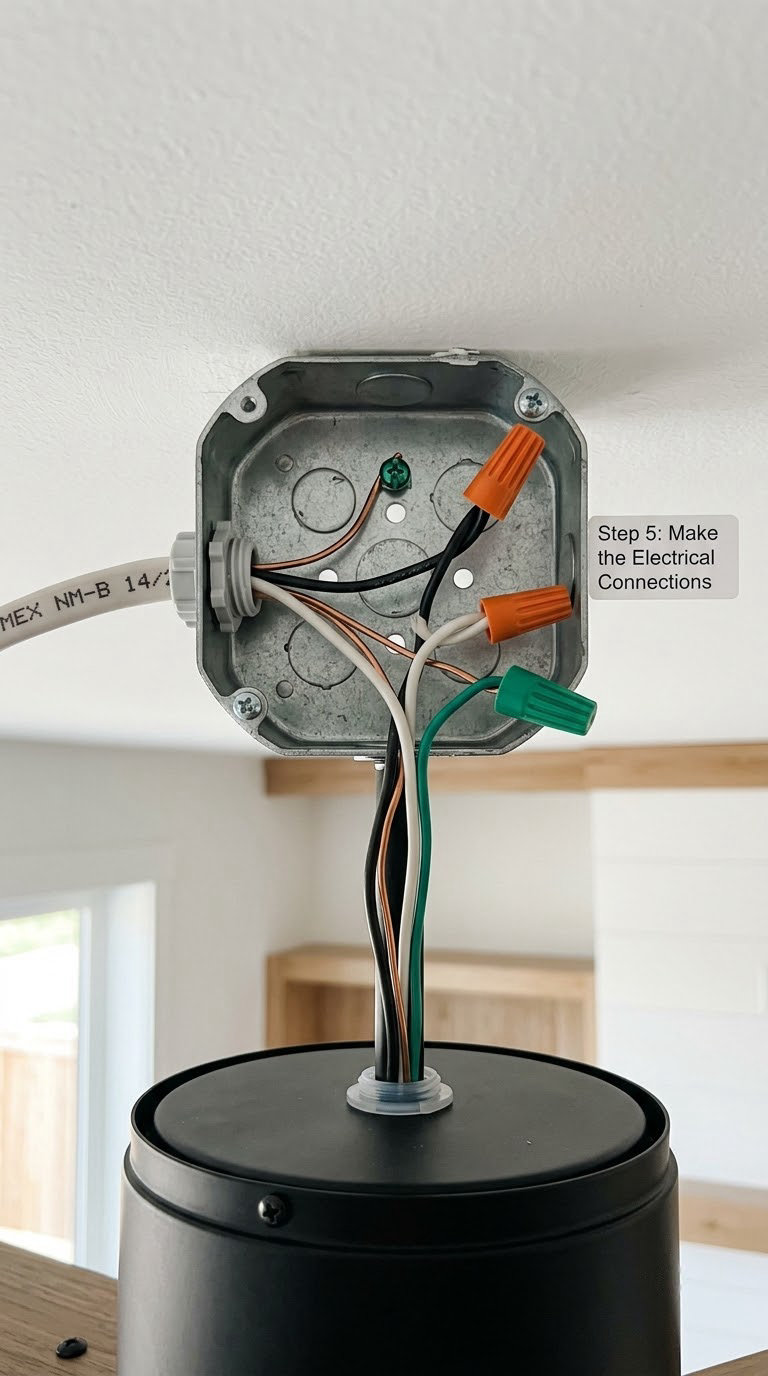
Run the cable from the switch to the fan housing, leaving 6 to 8 inches of slack at each end. Use a cable clamp inside the box and a listed junction box if the fan has one, which most do.
Wire it in this order. Black to black, white to white, green or bare copper to the housing’s green screw. Use wire nuts rated for the conductor count, and wrap each joint with electrical tape for good measure. A pigtail from the box ground to the fan ground keeps two grounds under one nut.
Put the wires in the wiring compartment, fit the compartment cover so no cord can be pinched by the blower, and confirm the damper flap can still swing open fully.
If you are running new cable rather than reusing what is there, size it to the load and the breaker: 14/2 on a 15 amp circuit, 12/2 on a 20 amp circuit. That work, plus anything involving aluminum wiring, a full panel, or a bathroom circuit that is not GFCI protected, belongs to a licensed electrician. No shame in it, and it is usually faster than the permit.
Step 6: Install the Fan and Grille
Set the motor and blower into the housing, or lift the complete housing into the ceiling opening if your unit is one piece. Secure it with the supplied screws through the flange, then check it hangs level with the ceiling.
Fit any light kit or heater module now, while the housing is still accessible. Follow the wiring diagram in the manual rather than guessing; the differences between a single switch, a double switch and a fan with light are the point where a lot of installs go wrong.
Snap or screw the trim grille into place. Many grilles have a light kit that clips on first and a decorative cover that goes over that, so read the few lines on the sheet before you press anything.
Step 7: Test, Seal, and Finish
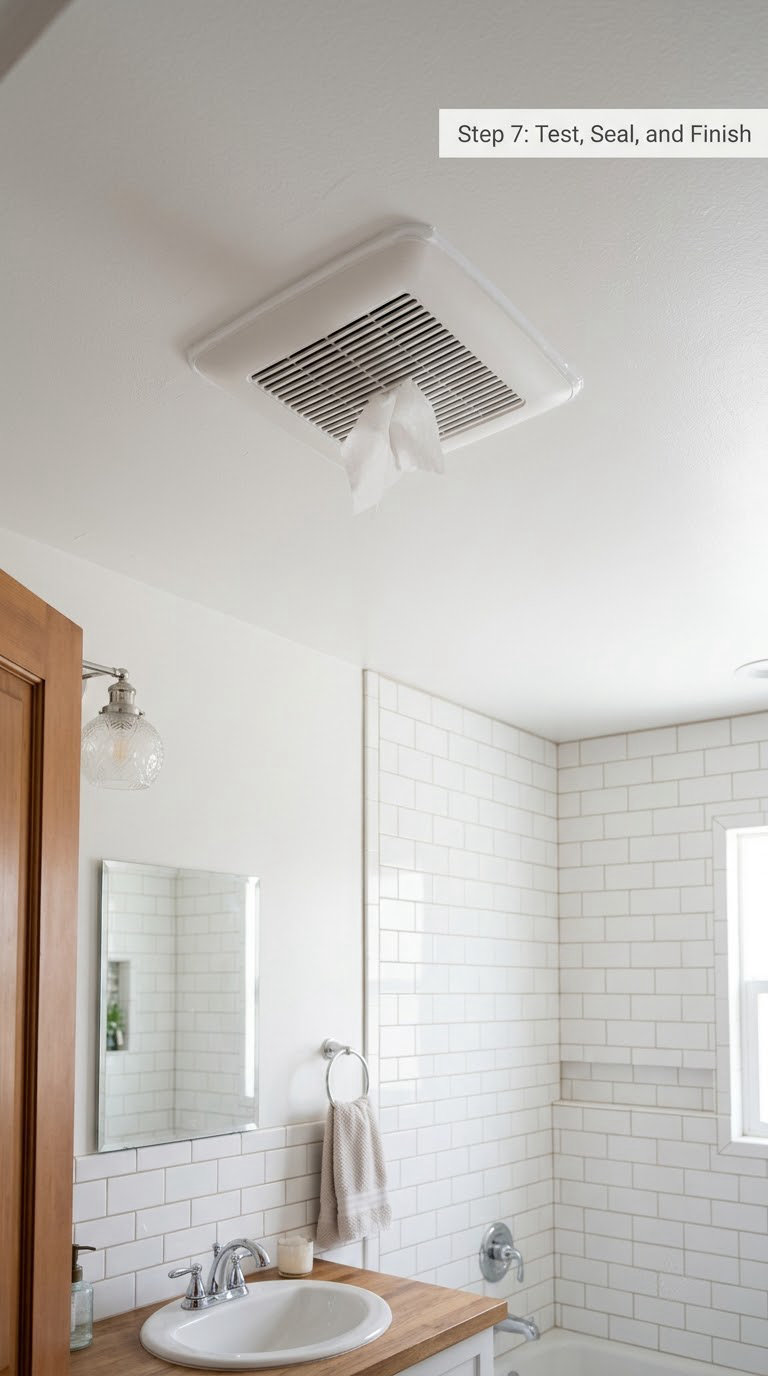
Restore the breaker and run the fan. A healthy fan pulls a light tissue toward the grille from about an inch away, spins evenly, and settles to a low hum with no rattle.
Seal the exterior connection from the inside if you can reach it: silicone at the vent hood flange, and a collar or duct sealant at every joint. Then close up the drywall gap, screw in short pieces of 1/4 inch or 1/2 inch drywall to bridge the gap, feather the edges with joint compound and let it dry 24 to 48 hours before sanding and painting.
Do not forget the backdraft flap. On a cold night it should swing shut when the fan stops, so you do not pull warm attic air back through the house.
Common Mistakes to Avoid
Most disappointing fans come down to one of these, and each has a simple fix.
- Venting into the attic. This is the big one. Moist air dumped into an attic condenses on decking and sheathing, and you end up with mold above the bathroom. Fix: run the duct to an exterior hood, always.
- Undersized fan. A 50 CFM unit in a 90 square foot bath runs constantly and still stays damp. Fix: size with the room-volume calculation and buy the next step up when the formula lands near a limit.
- Kinked or compressed duct. A tight bend or a squeezed run can cut airflow by more than half without any visible sign. Fix: keep bends gentle, support the duct, avoid pushing it past joists under tension.
- Loose duct joints. A joint that only feels snug will whistle and leak. Fix: fully seat the duct and wrap every joint in foil tape.
- Wrong wire pair or missing ground. Fix: match black to black, white to white, and bond ground to the housing screw. Never rely on the neutral for ground.
- No backdraft damper. Fix: install one at the housing outlet so cold air does not flow back in.
- No solid joist under the housing. A fan hanging on drywall alone will vibrate. Fix: add 2×4 blocking and fasten to that.
- Grille installed before the duct is sealed. Fix: finish the duct and attic side first, then trim the room.
If your old unit rattles on start-up, check the damper and the housing screws before blaming the motor. Loose backdraft dampers are the usual culprit, and swapping in the correct size of damper solves most noise complaints. Our guide to bathroom fan dampers covers which type fits which housing.
When to Call a Pro
Some parts of this job are not worth a weekend afternoon. Hire a licensed electrician or HVAC contractor when any of these apply.
- You need a new circuit, a new switch run, or a panel change
- The home has aluminum or cloth-sheathed wiring, or no ground wire at the box
- The bathroom circuit is not GFCI protected and you are adding a fan or light
- The duct run requires a roof penetration on a steep or high roof, or you need to cut into a firestopped assembly
- The joists need cutting, notching or structural modification
- You have no attic access and the job needs new framing above the ceiling
- Your municipality requires a permit and inspection for this scope of work
- You find water damage, rot or mold that needs addressing before the fan goes back up
As a rough split, a handyman can handle a like-for-like swap where the wiring is already correct, while wiring, new circuits and roof vents belong to licensed trades. That split keeps the inspection happy and usually costs less than fixing a failed inspection later.
Maintenance: Keeping the Fan Working Quietly
Two cleanings a year is enough for most homes, and it takes about ten minutes. Vacuum the grille first, then wash it in warm soapy water and dry it fully before it goes back. Grit trapped in the vents is what turns a quiet motor into a rattler.
While the grille is off, look up at the damper and the visible duct connection. Check the screws holding the housing to the joist and tighten anything loose. Look for water staining or damp insulation, which means a duct or exterior hood leak rather than a fan problem.
From outside, check the vent hood in spring and fall for bird nests, leaves and a stuck flap. A blocked exterior hood is the single most common reason a brand new fan performs badly.
Replace the unit when you hear grinding, when it runs at full speed without moving air, when the motor gets hot to the touch after a few minutes, or when the motor is more than about fifteen years old. Motors fail gradually, and a fan that has needed rewiring once is usually near the end.
Frequently Asked Questions
Can I install a bathroom exhaust fan myself?
Most homeowners can, especially when they are replacing a working fan with a new one in the same opening and reusing the existing cable. The work is mostly drywall saw, drill and duct fitting. Find a joist, run duct to an exterior vent and seal it, then wire three connections. Hire an electrician for a new circuit, a new switch run or aluminium wiring, and get help for roof penetrations on steep roofs.
Do bathroom exhaust fans need to be vented outside?
Yes. Every bathroom fan must discharge to the outdoors through a duct and a vent hood, which most current codes require explicitly. Venting into an attic or a wall cavity pushes humid air into your building envelope, where it condenses on cold decking and sheathing and grows mold. Never cap an old duct inside the attic. If no exterior route exists, plan one before you buy the fan.
Is it better to vent a bathroom fan through the wall or the roof?
Whichever gives you the shortest, straightest run to the outside. A sidewall vent through siding is easier to finish and easy to inspect later, and the hood must sit above the roof line. A roof penetration is tidier and shorter on a low roof, but flashing and shingle work is a separate skill. Measure both routes before choosing, and count each 90 degree bend as about five feet of equivalent duct.
What size exhaust fan do I need for my bathroom?
Multiply the room’s length, width and height in feet, then multiply by 0.13 to get the CFM you need. A 5 by 7 by 8 foot room comes to roughly 110 CFM. Small powder rooms under 50 square feet can run on 50 to 80 CFM, and full baths above 100 square feet need 110 to 150 CFM. For the shower you stand under, choose the higher end of the range.
Do I need a permit or an electrician to install a bathroom fan?
A like-for-like swap is usually fine on your own, but rules vary by city and county. A new circuit, a new opening in framing, or work near fire-rated assemblies often needs a permit and inspection. Call your local building department before you start. Use a licensed electrician whenever you add a circuit, work with aluminium or cloth wiring, or the bathroom circuit is not GFCI protected.
How long should I run the exhaust fan after a shower?
Twenty to thirty minutes of continuous run clears most of the moisture from a typical shower. A humidity-sensing fan set to shut off when the air dries does this automatically and often ends up running about as long on its own. For general habit, run it during the shower and for 20 to 30 minutes after, or until the mirror and walls stop feeling tacky. Leaving it on overnight is not usually necessary.
Conclusion: Start With the Opening and the Breaker
Start where the job really starts: the ceiling cavity. Check for a joist, follow the existing duct to see whether it reaches outdoors, and look at the switch box for a ground wire and the right cable. Size the fan from the room dimensions and the shortest straight run, not from a guess.
If the wiring is straightforward and the vent already goes outside, this is a satisfying weekend job. Grab a step ladder, a tester and a roll of foil tape, and take your time with the seal at the top of the job rather than the trim at the bottom.