20 Closet Organization Ideas for Small Closets (October 2026)
Small closet organization ideas work best when you attack the closet in a fixed order: hanging space first, then shelves, then floor, then the door. Add a second hanging rod, switch to slim velvet hangers, and off-load whatever does not need daily access. That combination alone can recover up to 30% more usable room in a reach-in closet without a remodel.
Most small closets are not too small because people own too many clothes. They feel small because a few usable inches sit empty while the rest is buried in a toppled pile. The twenty ideas below are ordered roughly by impact, so you can stop after the first three and still see a difference.
Contents
20 Closet Organization Ideas for Small Closets at a Glance
Cost tiers here are relative, and real costs move with regional lumber and hardware prices. Free means re-purposing what you already own. Budget covers one organizer or a small hardware kit. Mid-range covers a rod kit plus two or three pieces. Premium covers a modular system or a full accessory set. Custom means a carpenter or a closet company.
| Idea | Closet zone | Cost | Difficulty | Time |
|---|---|---|---|---|
| 1. Double-hanging rods | Hanging area | Budget to mid-range | Moderate DIY | 2 to 3 hours |
| 2. Narrow rolling cart | Floor | Budget | Easy DIY | 20 minutes |
| 3. Vertical shoe stacks | Floor and corners | Budget | Easy DIY | 30 minutes |
| 4. Low cube organizers | Floor | Budget | Easy DIY | 30 minutes |
| 5. Shelf risers | Shelves | Budget | Easy DIY | 15 minutes |
| 6. Over-the-door organizer | Door | Mid-range | Easy DIY | 15 minutes |
| 7. Tiered hanging organizer | Hanging area | Budget | Easy DIY | 10 minutes |
| 8. Daily-wear shelf zone | Shelves | Free | Easy DIY | 45 minutes |
| 9. Clear lidded shoe bins | Floor | Mid-range | Easy DIY | 45 minutes |
| 10. Door-mounted pull-out rail | Door | Mid-range | Easy DIY | 30 minutes |
| 11. Drawer organizers | Dressers | Budget | Easy DIY | 30 minutes |
| 12. Rolling closet island | Walk-in floor | Premium | Easy DIY | 30 minutes |
| 13. Matching baskets | Shelves | Mid-range | Easy DIY | 30 minutes |
| 14. Ledge shelves above the rod | Hanging area | Budget | Moderate DIY | 1 to 2 hours |
| 15. Wall hooks for bags | Walls and door | Budget | Easy DIY | 45 minutes |
| 16. Pull-out valet rod | Hanging area | Budget | Easy DIY | 45 minutes |
| 17. Seasonal rotation bins | Beyond the closet | Free to mid-range | Easy DIY | 2 hours, twice a year |
| 18. Adhesive hooks and strips | Walls and door | Budget | Easy DIY | 30 minutes |
| 19. Mirror on the back of the door | Door | Budget | Easy DIY | 20 minutes |
| 20. Custom center tower | Full closet | Custom | Hire a pro | 1 to 2 weeks |
1. Install Double-Hanging Rods for Twice the Clothing Space
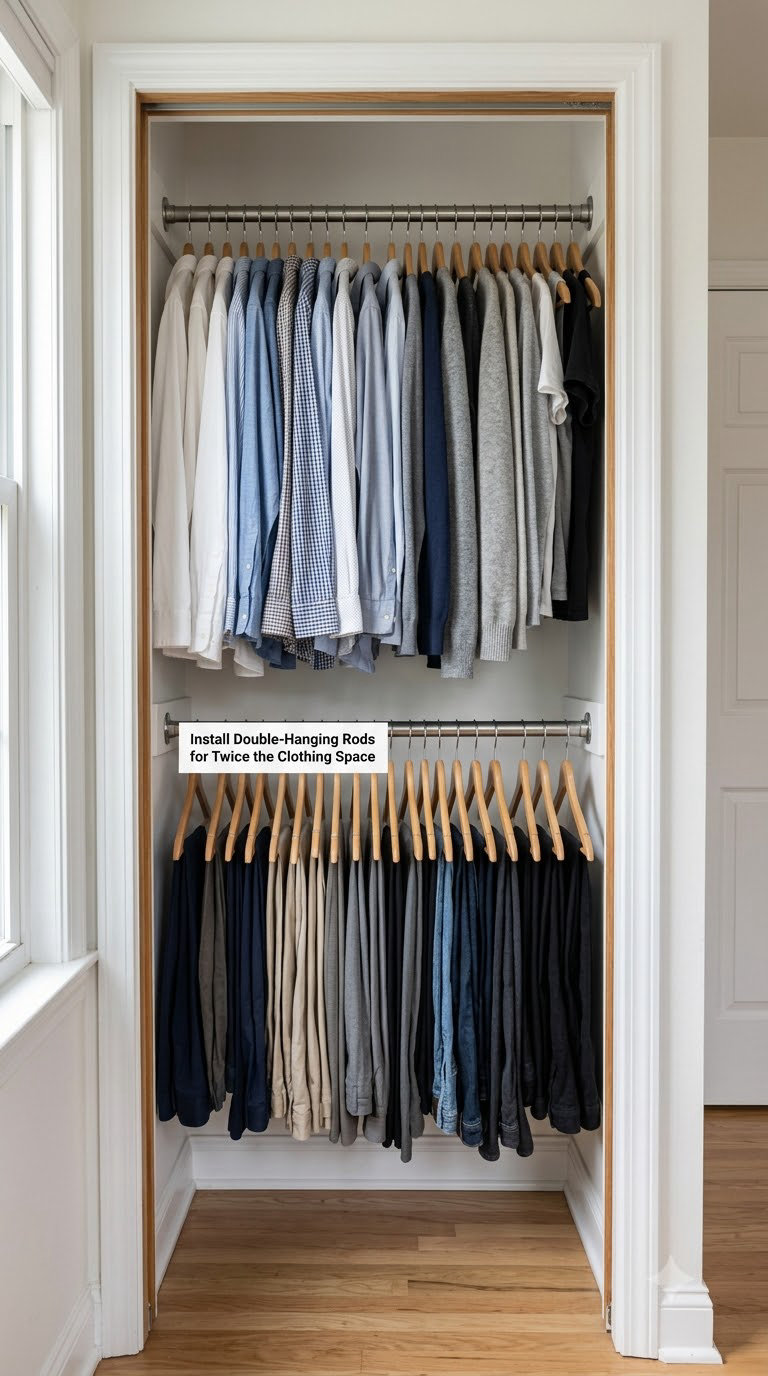
A second hanging rail turns one wasted band of air into a full tier of usable hanging space, and it is the single highest-impact change you can make in a small closet. The upper rod takes shirts and folded pants on hangers, the lower rod takes trousers and skirts, and the gap between them costs you nothing.
Measure the vertical distance from the existing rod to the closet floor. Most reach-in closets have 40 to 60 inches (about 102 to 152 cm) of clearance under a standard 60-inch rod, which is enough for two tiers if you hang the lower garments short or folded over a hanger bar. For a closet under 48 inches wide, a retrofit rod kit that mounts into the side walls beats a full-length replacement rail.
- Mark the second rod height on both side walls, roughly 36 to 40 inches (91 to 102 cm) below the upper rod.
- Level the mark with a 24-inch spirit level before you drill a single hole.
- Anchor into studs where possible; use drywall anchors rated for the load elsewhere.
- Hang longer garments on the lower rod and shorter shirts on the upper rod so the stack stays visible.
- Add a slim velvet or nonslip hanger on every bar so more garments fit per inch.
Cost: Budget to mid-range tier · Difficulty: Moderate DIY · Time: 2 to 3 hours including drying time for anchors.
Good to know: Never double-hang bulky knits and sweaters. The lower tier crushes shoulders and stretches the neck, and readers who try it usually end up folding those pieces instead. Renters can skip drilling with a tension-mounted closet rod that spans wall to wall.
2. Use a Narrow Rolling Cart Between Hanging Sections
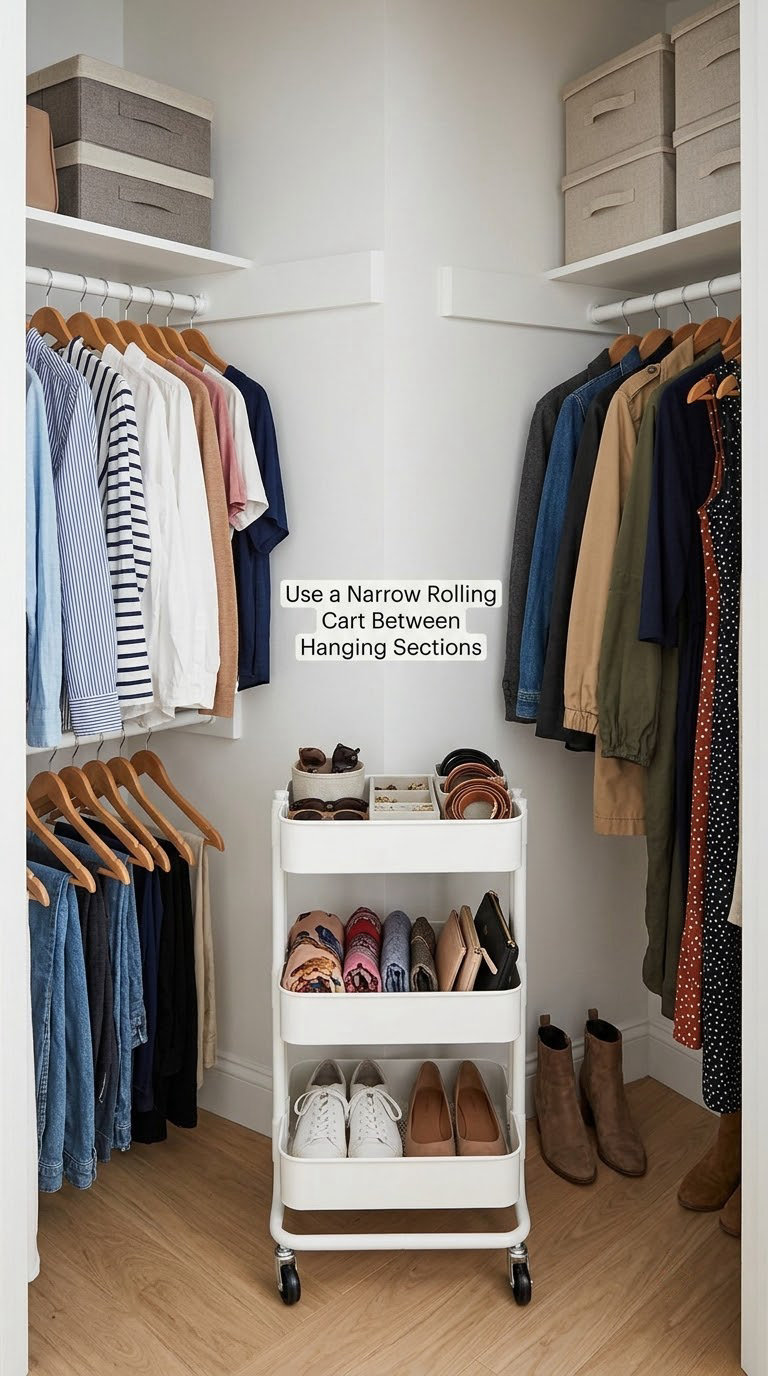
A slim rolling cart turns the dead strip of floor under hanging clothes into a storage surface without narrowing the walkway. Casters let you pull it out, load it, and push it back, which is the difference between a cart you use and a bin you avoid.
Buy a cart no deeper than 12 to 14 inches (30 to 36 cm) and no wider than your narrowest section of floor, usually 12 to 18 inches. Two shallow shelves and a raised edge keep shoes and small accessories from sliding off when you pull the cart out. Add a fabric liner on the top shelf for jewelry and belts.
- Measure the gap between the two hanging runs, then measure the door swing with the door fully open.
- Choose a cart with casters that lock, so it does not roll when the closet door bumps it.
- Load the heavier items on the lower shelf and lighter accessories on top.
- Keep one section of the cart empty for the things you grab most often.
Cost: Budget tier · Difficulty: Easy DIY · Time: 20 minutes.
Good to know: A loose runner rug under the cart stops it from rolling while you load it. In a closet narrower than 30 inches (76 cm), skip the cart and use idea 4 instead.
3. Add Vertical Stacked Organizers for Shoes
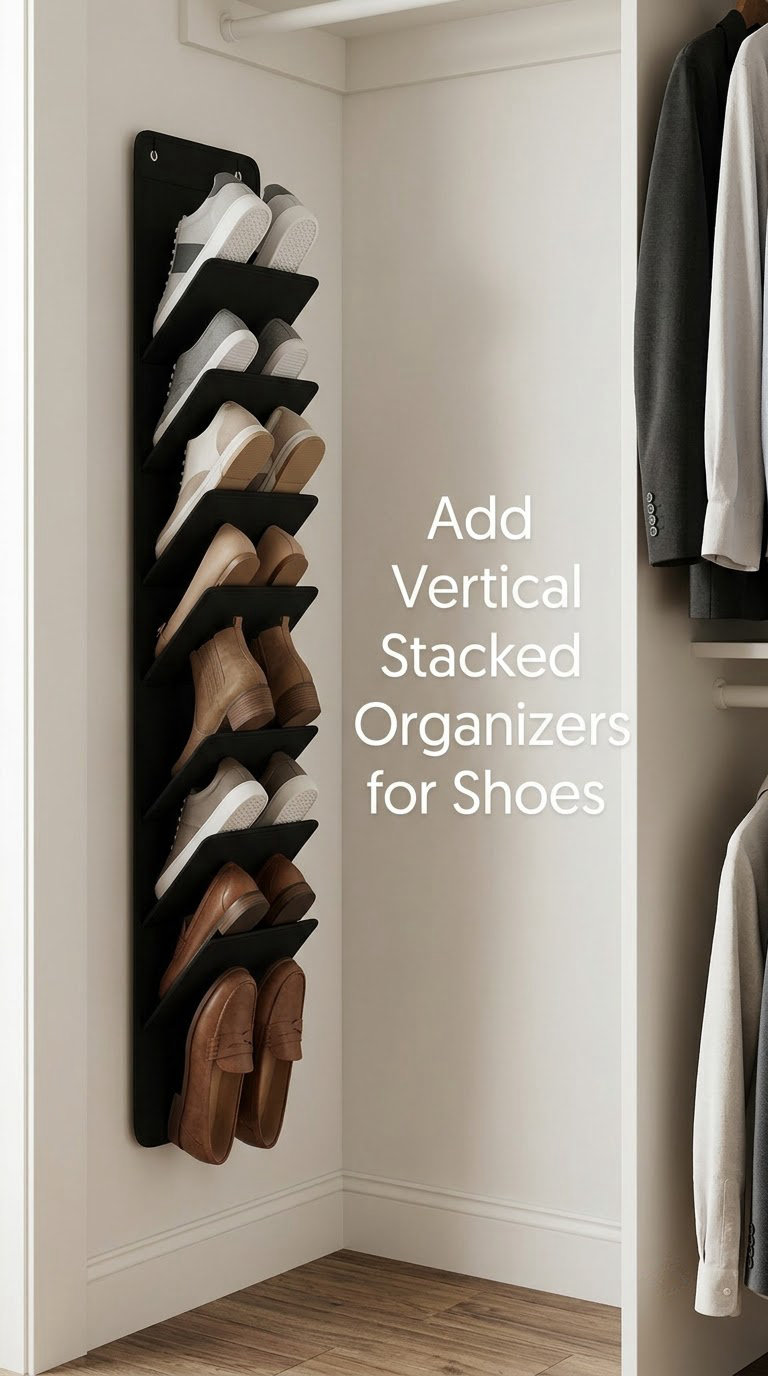
A vertical shoe stack converts a floor strip into a column, so you get five or six pairs of storage out of the footprint of one pair. It works in a reach-in closet corner where a horizontal rack would block the door or eat the walkway.
Look for a stack that is open on at least one face so you can see the shoes without unstacking. A tension-mounted version leans into the wall with no floor anchor, which is the easiest renter option. Check the height of the tallest pair against the space under the hanging clothes before you buy.
- Measure the vertical clearance from the floor to the lowest hanging garment, then subtract 2 inches (5 cm) for handling.
- Count your shoes and divide by the number of tiers to check the stack will not overflow.
- Load the heaviest shoes on the bottom tiers so the base does not tip.
- Pair shoes toe to heel so each slot holds one matched set.
Cost: Budget tier · Difficulty: Easy DIY · Time: 30 minutes.
Good to know: Deep narrow shoe bins fail badly for people who wear a 13 or 14. Measure the length of your longest shoe and add an inch; if the stack slot is shorter, use a wider open-front cube or a wall-mounted pair rack instead.
4. Put Folded Clothes in Low Cube Organizers
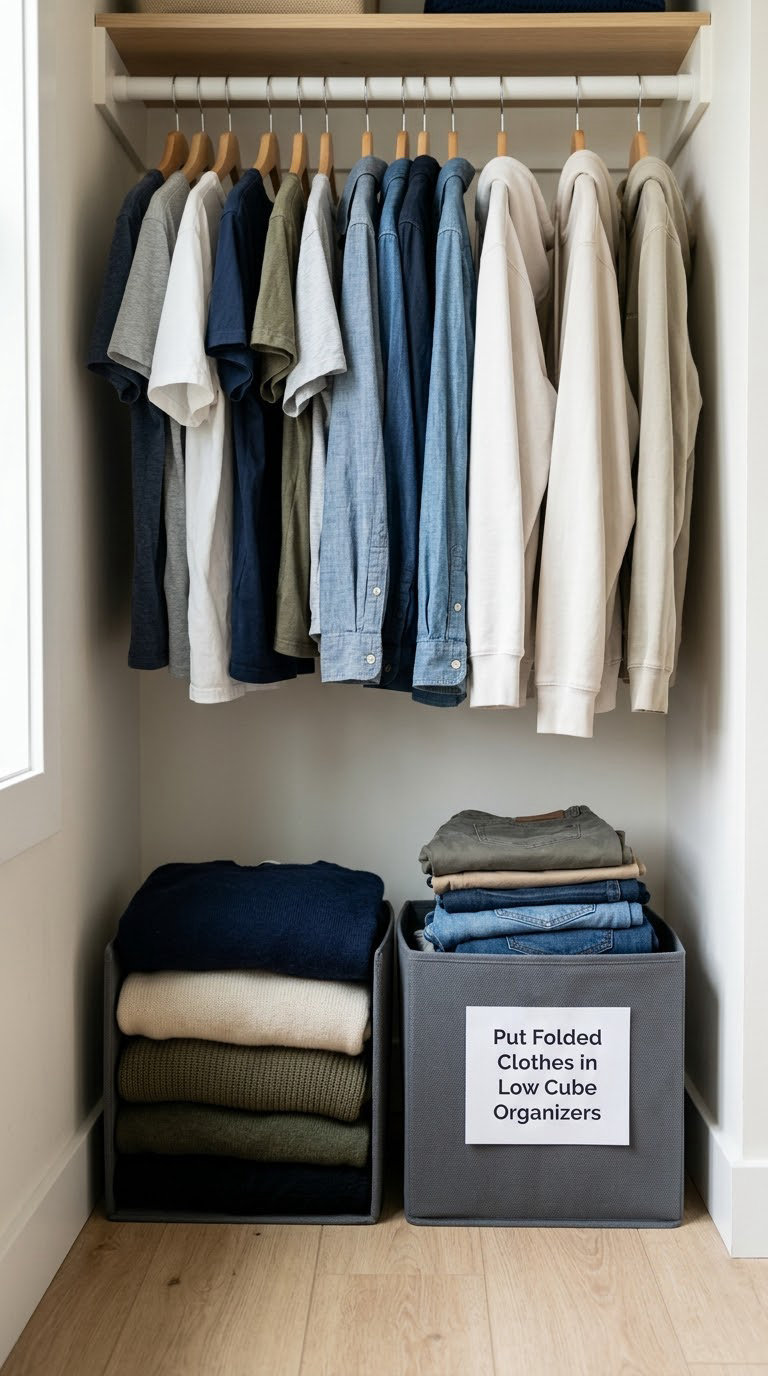
Low cubes give folded clothes a defined home, which stops the pile on the closet floor from spreading every time you pull one shirt out. They also create a hidden cavity underneath if you raise them on a small riser.
Pick cubes that match the width of the closet’s widest section so two or three fit in a row without gaps. A standard cube interior of about 10 by 10 by 10 inches (25 by 25 by 25 cm) fits a stack of rolled or folded tees, but jeans and sweaters need a deeper 12-inch cube. Label the front of each cube so you do not unpack everything to find one shirt.
- Sort clothing into categories that match real use, not the season: work shirts, weekend layers, undergarments.
- Fold each category to the same footprint so stacks stand level.
- Fill each cube no more than two-thirds full, or items jam and stop sliding in and out.
- Stack only the two or three lightest cubes, and only if the floor is level.
Cost: Budget tier · Difficulty: Easy DIY · Time: 30 minutes plus folding time.
Good to know: Overfilled pull-out cubes tip. If your floor is uneven, add a shim under the low corner or use a single row instead of a stack.
5. Add Shelf Risers to Double Vertical Space
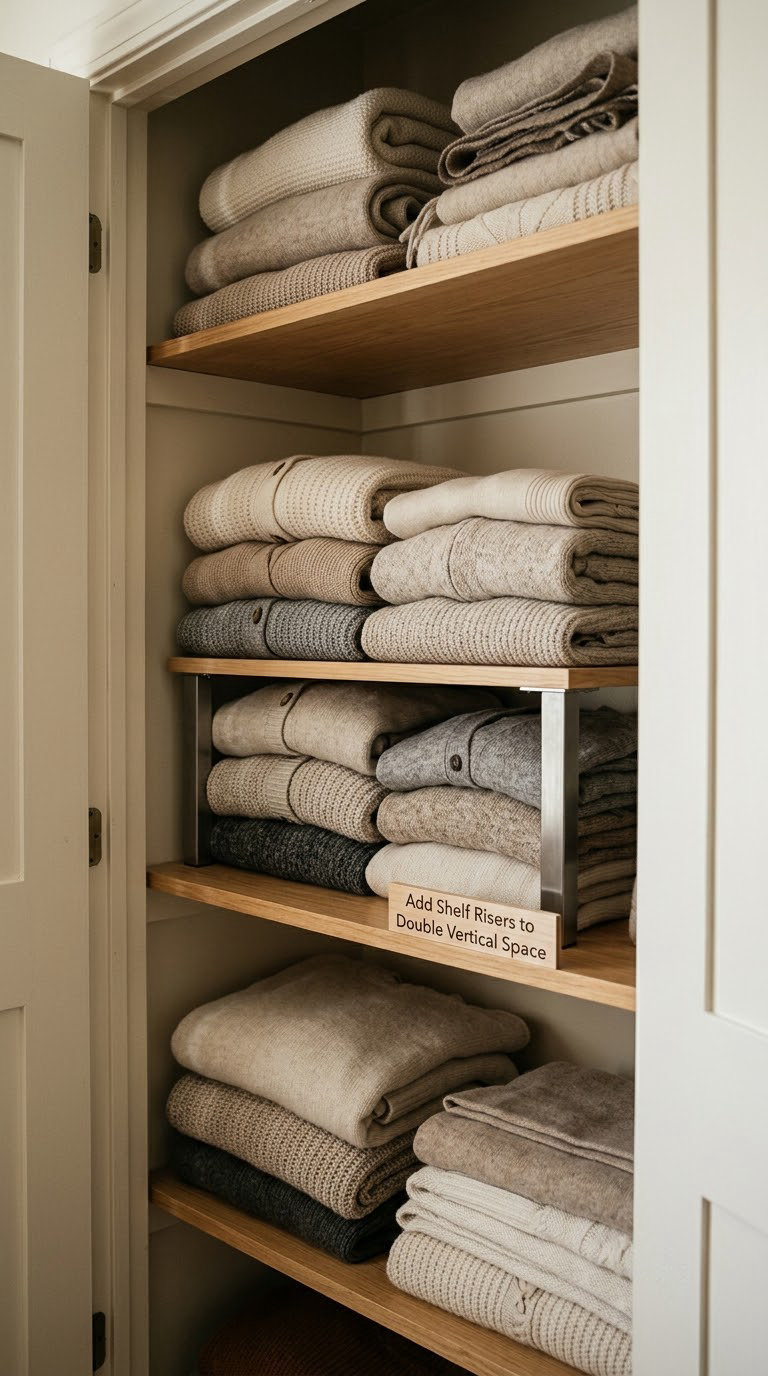
A shelf riser lifts an existing shelf and creates a second level underneath, so a closet with one shelf gains two. It is the fastest way to use the air gap that most builders leave between a closet’s top shelf and the ceiling.
Measure the gap you want to fill, then choose a riser that is slightly less than that measurement. Many risers adjust in height, which lets you fine-tune clearance for tall cereal boxes or folded denim. Keep the heavier items low and the lighter items on the elevated surface.
- Measure the vertical gap between your shelf and the surface above it, not the closet’s full height.
- Set risers on the shelf, spaced near each end and the middle for long shelves.
- Check the load rating and stay under it; particleboard shelves bulge under concentrated weight.
- Place the riser nearest the wall if you plan to reach in from one side only.
Cost: Budget tier · Difficulty: Easy DIY · Time: 15 minutes.
Good to know: Riser gaps are usually too shallow for folded jeans. Use them for rolled clothes, towels, hats, and sweater storage bags, and put bulkier knits on the base shelf.
6. Hang Accessories on an Over-the-Door Organizer
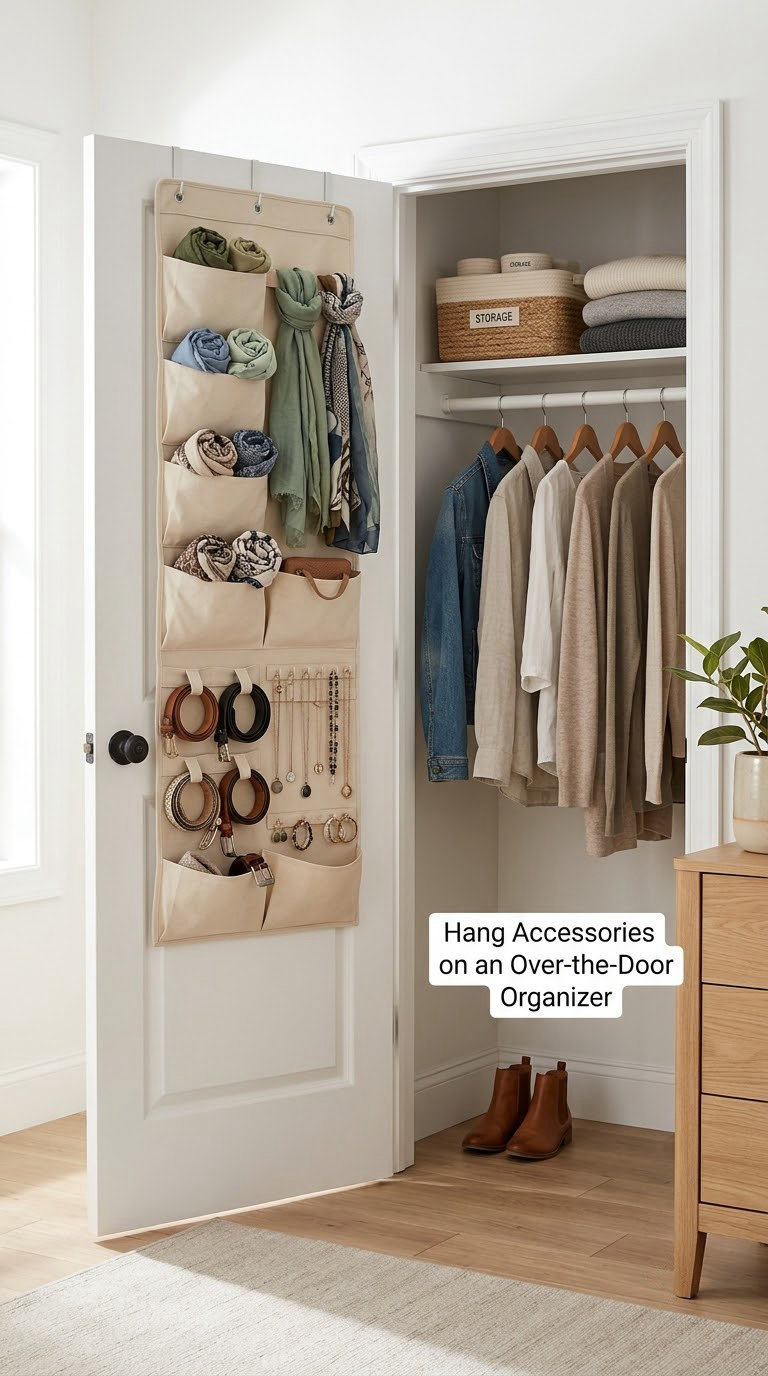
An over-the-door organizer turns the back of a closet door into a full storage wall you never counted. Slim mesh and metal-framed versions hold scarves, belts, ties, hats, and jewelry without touching your shelves or floor.
Measure the door thickness first. Most over-the-door units are built for doors between 1.3 and 1.75 inches (33 to 44 mm) thick, and the hooks that hang over the top will not clear a door with a thick molding profile. Then check that the organizer, once loaded, does not stop the door from closing or hit the closet rod.
- Measure door thickness and the gap between the open door and the rod.
- Choose a unit with a shallow depth, ideally under 4 inches (10 cm), so coats still slide past.
- Load the lowest pockets with the most-used items and heavier scarves, not shoes.
- Add a small hook strip on the door’s interior edge for hats and tote bags.
Cost: Mid-range tier · Difficulty: Easy DIY · Time: 15 minutes.
Good to know: This is the number one budget idea for renters because it requires no drilling at all. If the door hits the rod, hang the organizer on the room side instead.
7. Use a Tiered Hanging Organizer for Accessories
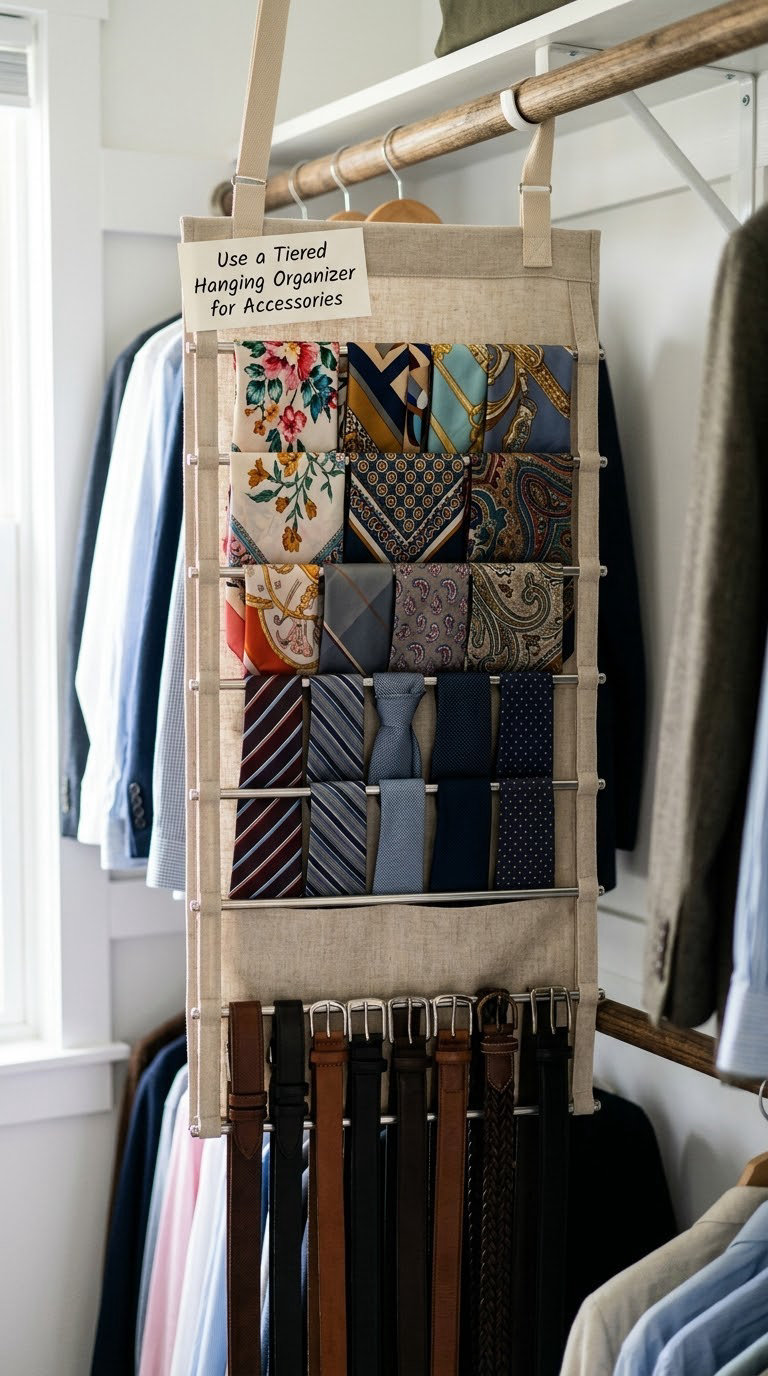
A cascading hanging organizer separates scarves, ties, belts, and small accessories onto individual bars so nothing tangles. It hangs from the rod you already have, so it costs no floor space at all.
Match the tier count to how much you actually own. A five-tier unit on a short closet rod can crowd the garments beside it, so in a narrow reach-in a two or three-tier version usually fits better. The 6-compartment style that hangs like a closet organizer also works for folded sweaters and small handbags.
- Check the drop length of the organizer against the clearance below your rod.
- Load the top tier with the tallest items such as scarves, the bottom tier with flat items such as ties.
- Use the side pockets for small pieces that would otherwise fall between bars.
- Hang the unit at one end of the rod so the rest of the hanging space stays clear.
Cost: Budget tier · Difficulty: Easy DIY · Time: 10 minutes.
Good to know: Wrapping each scarf once before hanging it stops the ends from fraying into neighbouring tiers. Avoid loading silk or anything you want to keep crease-free on the bottom bar.
8. Create a Dedicated Shelf for Frequently Used Items
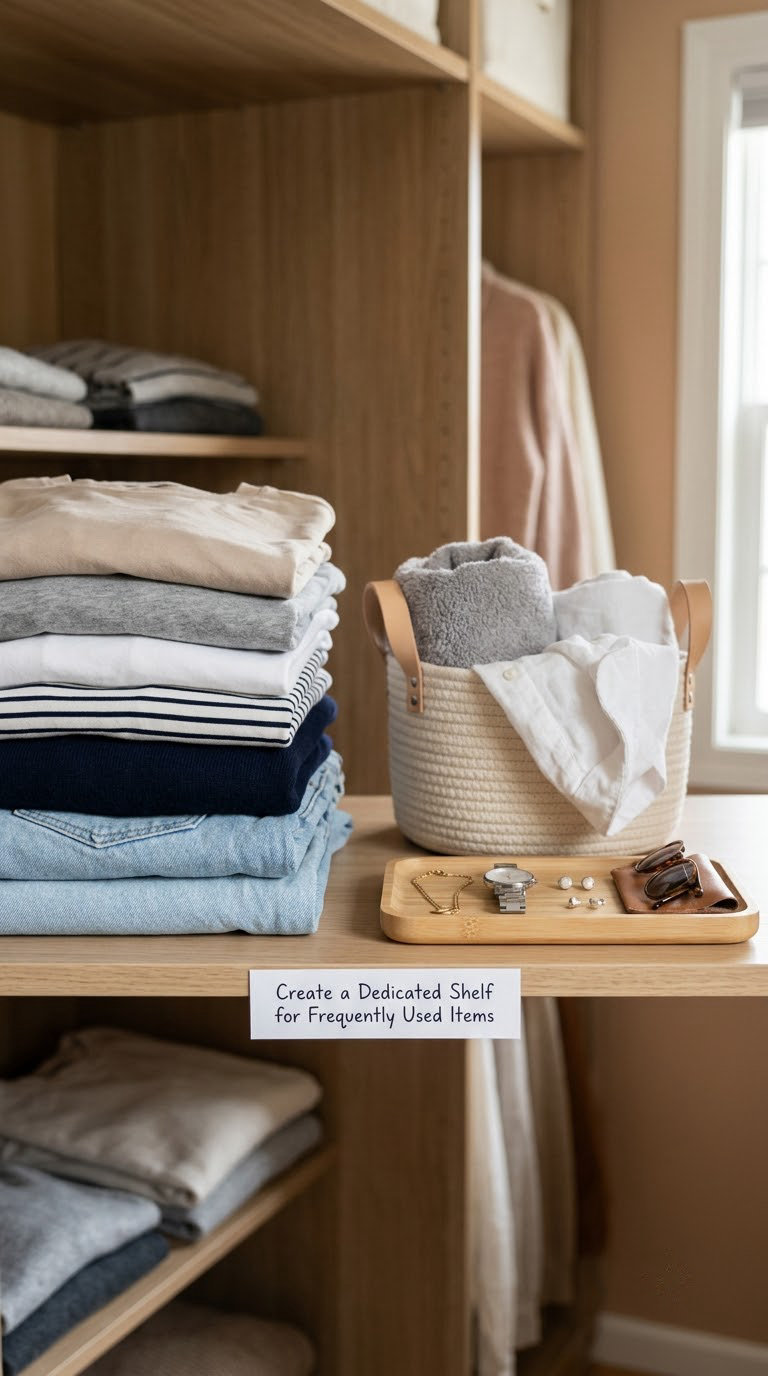
Give one whole shelf to the things you wear every single day, and the searching stops. This is the cheapest idea on the list because it uses space you already have and simply changes what goes on it.
Think of your closet in three tiers of value. Prime real estate is eye-level rod space and the first shelf: daily work clothes, the outfit you repeat, your work bag. Non-prime real estate is the top shelf, the back of a deep closet, and the floor under hanging clothes: seasonal pieces, backups, rarely worn specials. Everything that loses, ships, or needs a stepladder belongs in the second category.
- Pull out everything and make three piles: weekly, occasionally, and never.
- Give the daily shelf only the weekly pile, folded in one consistent style.
- Put a small tray on the shelf for the accessories you actually use, such as a watch, a belt, sunglasses.
- Move the never pile out of the closet entirely in this step.
Cost: Free tier · Difficulty: Easy DIY · Time: 45 minutes for the first sort.
Good to know: Doing this first makes every other organizer on this list work better, because you are not building storage around clothes you will donate. Sort first, buy later.
9. Store Shoes in Clear Bins Below the Hanging Clothes
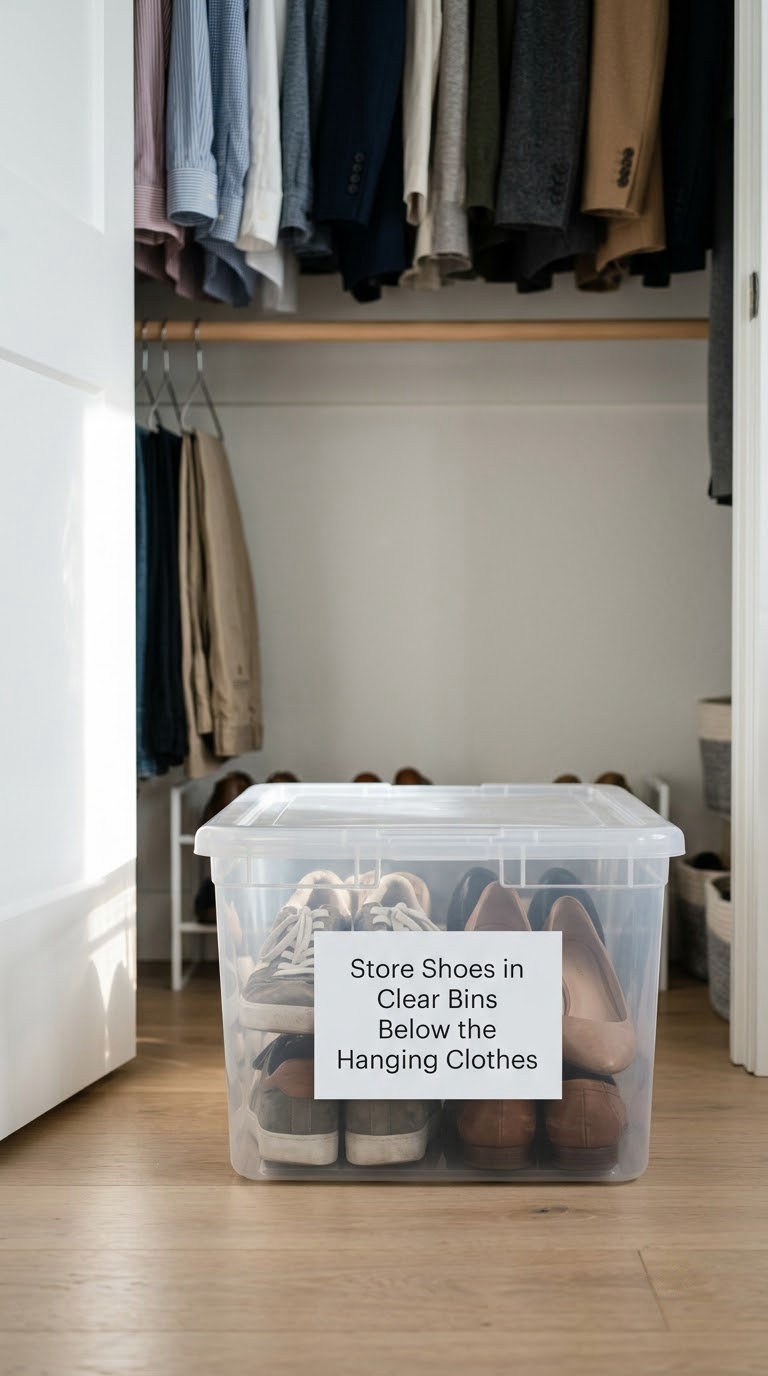
Clear lidded bins under the hanging clothes protect footwear from closet dust while keeping it visible, which is a real problem for tall boots and suede. A closed bin also stops a shoebox stack from collapsing under its own weight.
Match the bin to the shoes rather than the shelf. Wide front openings suit slippers and sneakers, deeper bins suit ankle boots, and a ventilated design suits anything that needs air. In a damp climate, skip lidded bins for daily shoes or leave the lid cracked, because trapped moisture invites mildew.
- Measure the clear height under the hanging clothes with your longest garment already in place.
- Choose a bin a half inch (13 mm) narrower than that space so it slides in without a fight.
- Stack at most two bins high, and put the full pair on the bottom.
- Label the front face of each bin rather than the lid, which disappears when stacked.
Cost: Mid-range tier · Difficulty: Easy DIY · Time: 45 minutes.
Good to know: Rigid clear plastic handles daily items better than fabric bins, which sag on their own weight and are hard to pull over a lip on an uneven floor. Reserve fabric under-bed bins for things you touch once a season.
10. Add a Door-Mounted Pull-Out Rail
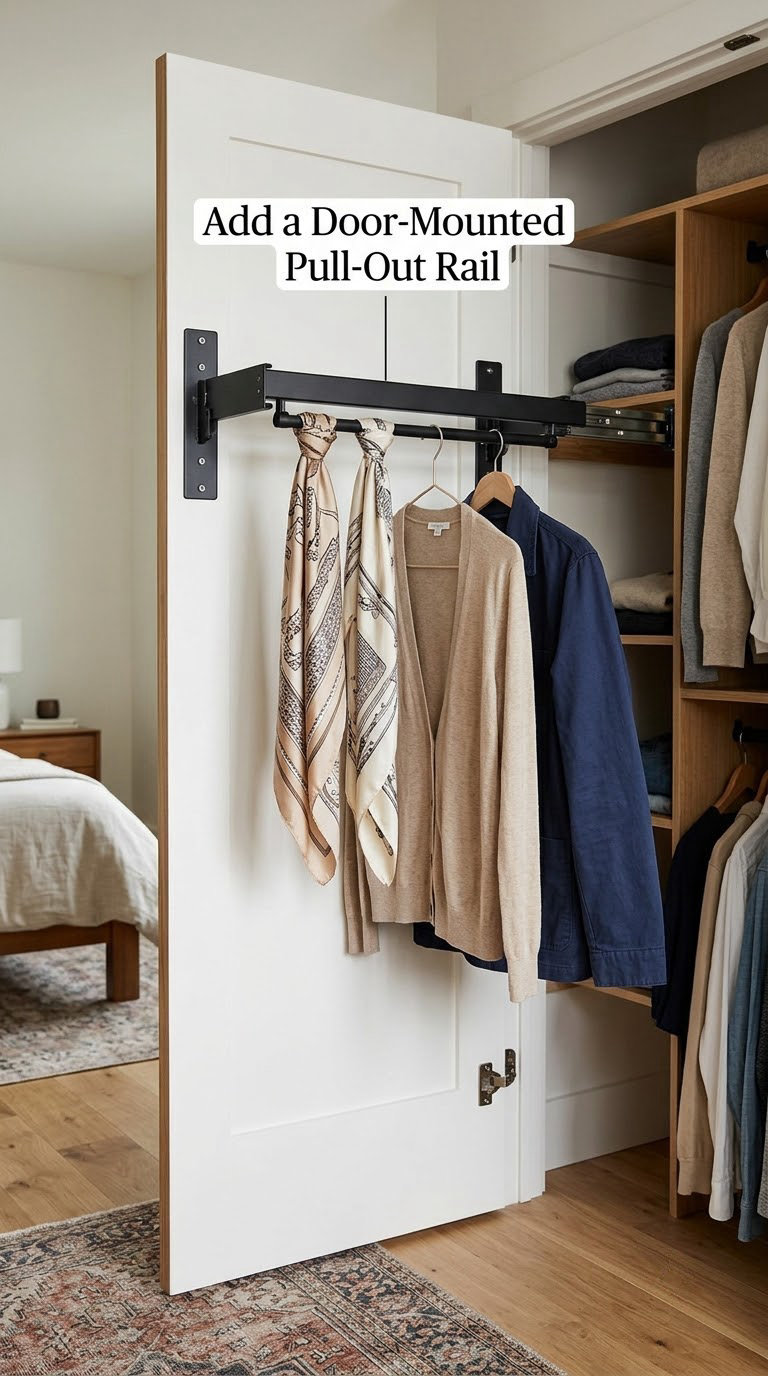
A retractable rail mounted inside the closet door adds hanging capacity in a space that is usually just flat painted wood. Pull it out when you are picking an outfit and push it in when the door closes.
These rails usually mount with screws and are rated well below what a standard closet rod holds. Treat the published rating as a ceiling and stay under it, because the door swings and the load moves every time it does. Lightweight scarves, belts, and thin jackets are the sensible load; a winter coat is not.
- Open the door fully and check it does not hit the closet rod or the shelving in front of it.
- Mount the rail high enough that the door clears it in the open position.
- Hang items across the rail rather than bunched at one end.
- Test the door swing with a full load before you put anything back in the closet.
Cost: Mid-range tier · Difficulty: Easy DIY · Time: 30 minutes.
Good to know: In a closet narrower than 24 inches (61 cm), a door rail plus an over-the-door organizer on the same door can crowd the opening. Pick one, not both, and check the swing with a tape measure first.
11. Use Drawer Organizers Inside an Existing Dresser
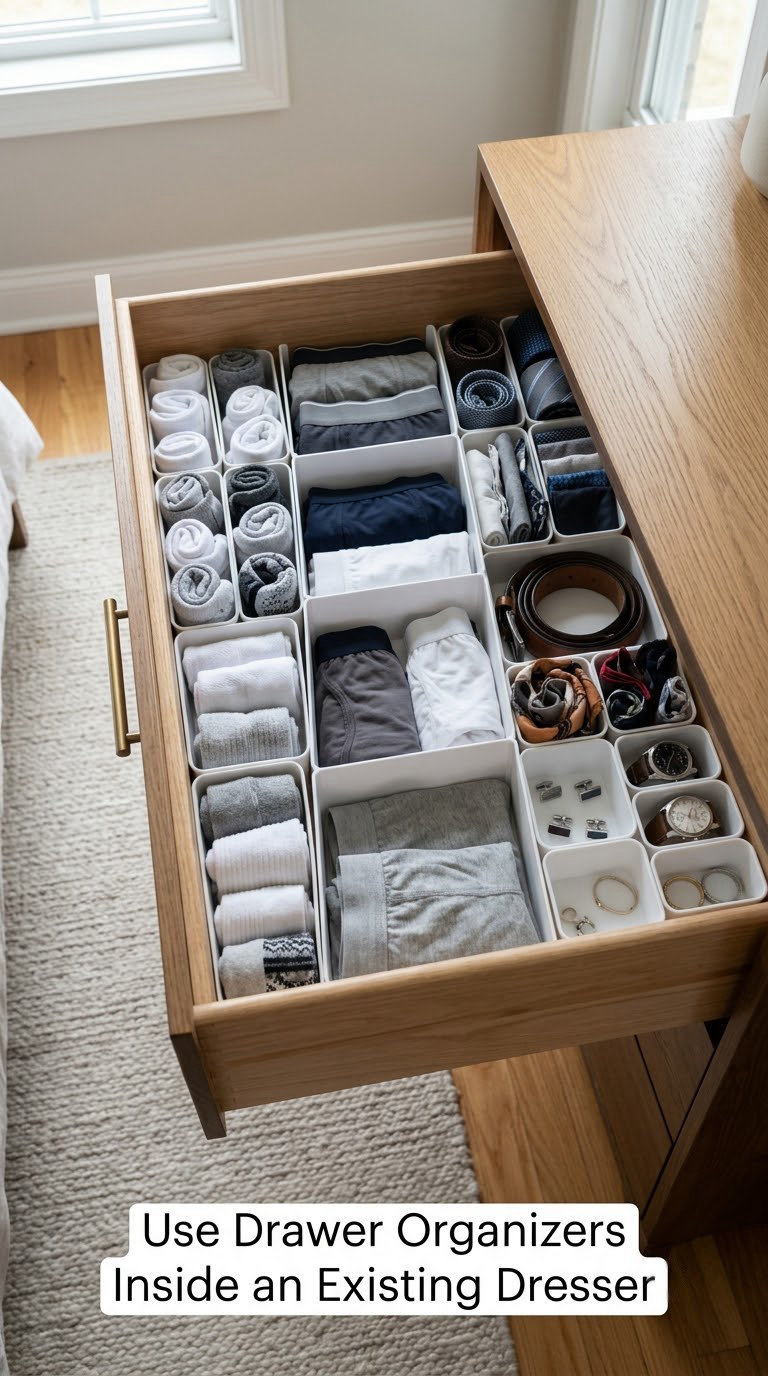
Adjustable dividers and shallow bins turn a dresser drawer from a single deep cavity into labeled zones, so socks stop migrating to the back of the drawer and never resurface. In a small closet, a dresser or chest outside the closet frees up hanging space that drawers otherwise waste.
Expandable dividers work in most drawers because they tension against the sides. Fixed-size trays suit deeper drawers with a wide opening. Match the divider height to the drawer: a divider that is too tall stops the drawer from closing, and one with sharp edges can snag delicate knit fabric when you reach past it.
- Measure the internal width and depth of the drawer, not the outside of the dresser.
- Choose dividers that expand at least an inch (25 mm) past your measured width for grip.
- Add one small bin per category: socks, underwear, workout clothes, accessories.
- Keep one zone empty for the items that generate loose receipts and stray hair ties.
Cost: Budget tier · Difficulty: Easy DIY · Time: 30 minutes.
Good to know: A dresser in the room, not the closet, is often the better play. It gives a second person somewhere to dress without both of you crowding the same rod, and a full-length mirror nearby handles the final check.
12. Add a Closet Island for Folded Clothing
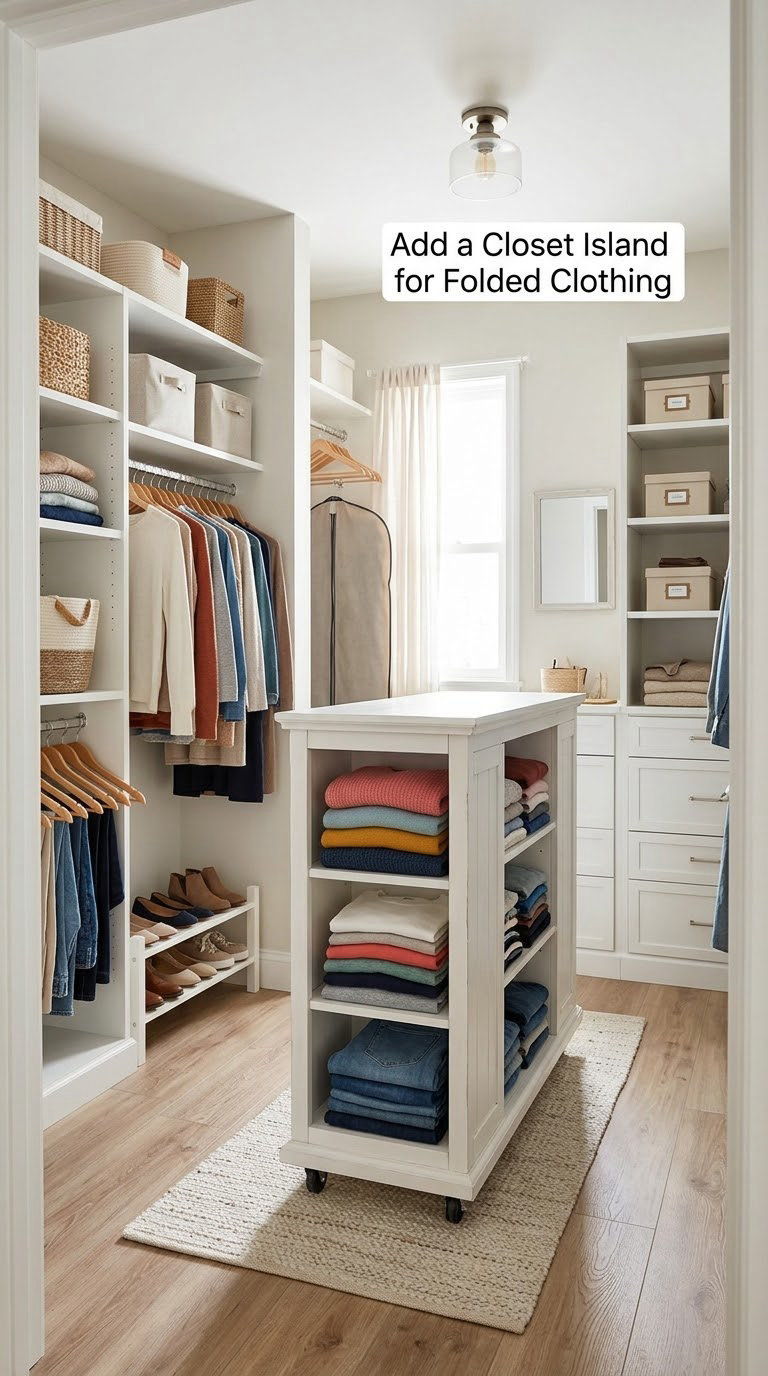
A narrow rolling island adds storage on both faces and pulls the middle of a walk-in closet into use. You reach both sides without stepping over shoes, and the casters let you move it out when you want to clean or measure the floor.
This one only works in a walk-in. You need roughly 36 inches (91 cm) of clearance on at least two sides to walk around it, and the island itself should be no deeper than 18 inches (46 cm) or it will choke a tight aisle. The most useful configuration is drawers on one side and open shelves or baskets on the other.
- Tape the island footprint on the floor with painter’s tape and walk around it before you buy.
- Check that the ceiling clears the tallest item you plan to put on top.
- Anchor the top shelf if you will store heavy sweaters on it.
- Use the top surface as a folding station, which is the real reason people keep it.
Cost: Premium tier · Difficulty: Easy DIY · Time: 30 minutes to assemble and position.
Good to know: In a reach-in closet, skip the island and use a slim rolling cart from idea 2 instead. Pushing a wheeled box into a narrow closet is a good way to hurt a toe.
13. Use Matching Baskets for Flexible Storage
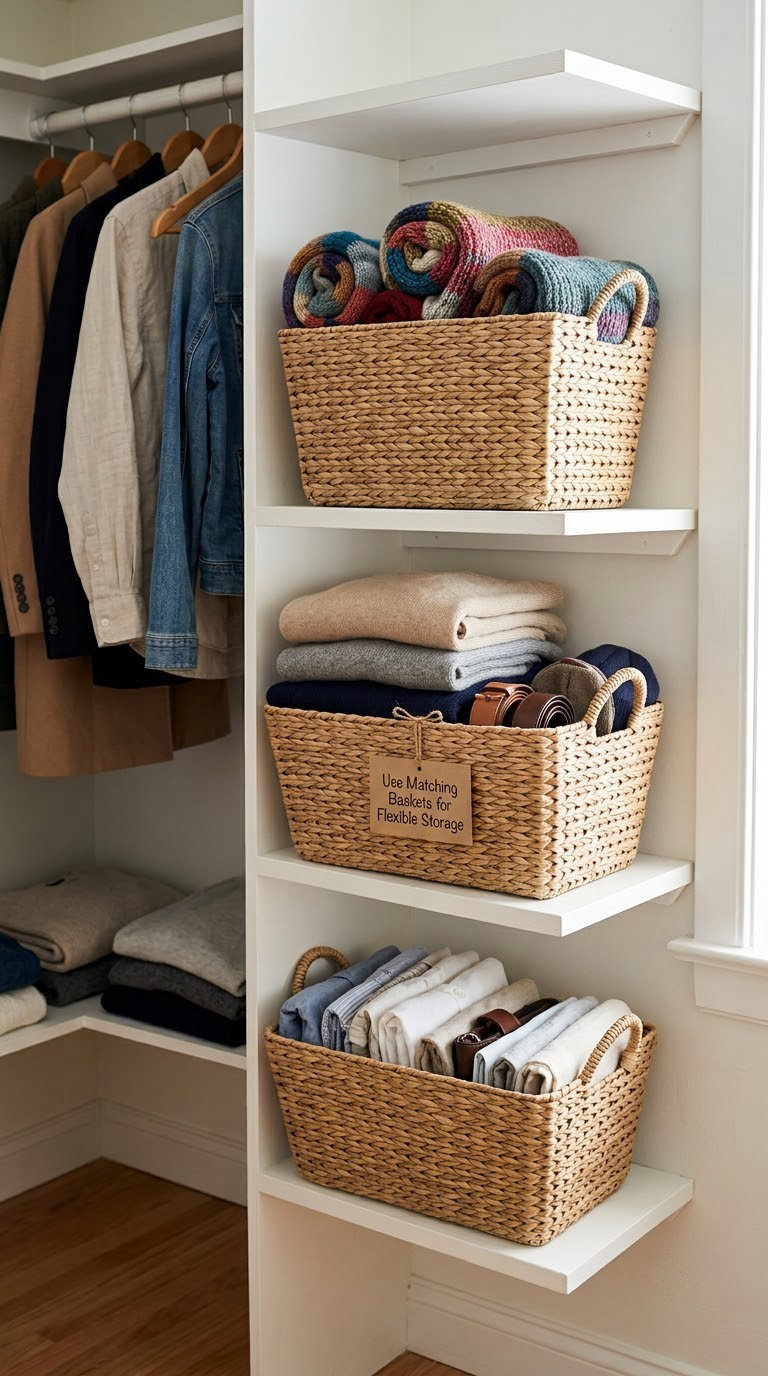
Matching baskets do two jobs at once. They contain soft items that refuse to stack neatly, and their identical fronts make a small closet look composed even when the contents differ.
Choose one basket size and stick to it. Mixing three different diameters on one shelf is what makes most closets look busy rather than organized. Closed-front or lidded styles hide the mess if you prefer, but open weave lets you see the contents, which is faster in the morning.
- Measure shelf clearance and choose a basket height that leaves a finger’s width above it for lifting.
- Group contents by use: travel blankets, workout gear, winter accessories.
- Fill each basket so items sit above the rim slightly, which makes them easy to grab.
- Line the inside of each basket with a washable liner if you store sweaters.
Cost: Mid-range tier · Difficulty: Easy DIY · Time: 30 minutes.
Good to know: Baskets are flexible storage because you can relocate one without disturbing anything else. That matters in a shared closet, where one person’s off-season gear should not require rebuilding the other person’s shelves.
14. Add Small Ledge Shelves Above the Closet Rod
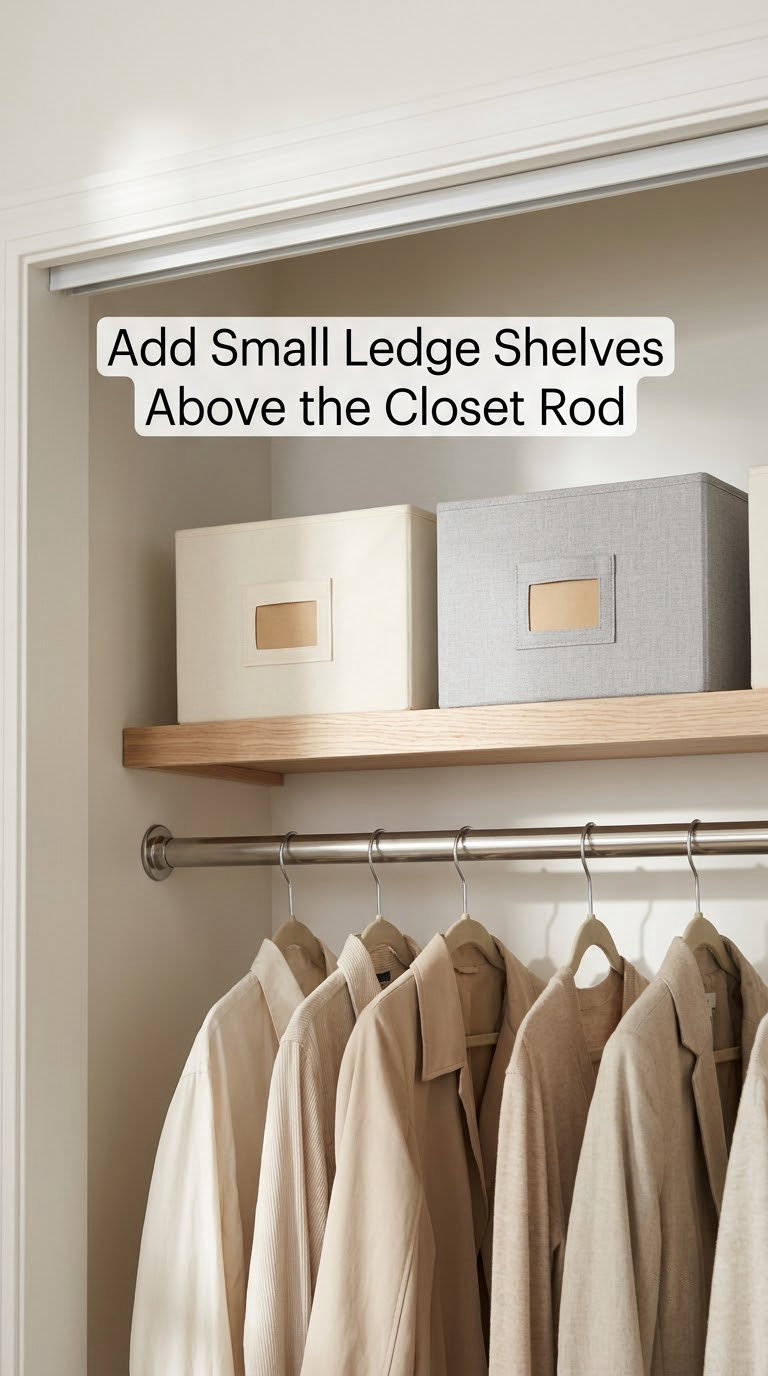
A shallow ledge above the closet rod uses the empty band of air between the hangers and the ceiling for boxes, hats, and seasonal gear. It keeps the closet floor clear and stops the top of the door from being the only place you can put anything.
Most closets have a closet rod set about 2 inches (5 cm) below the top shelf’s underside, which is not enough for a ledge. If yours has no usable gap, you are looking at replacing the rod with a higher-mounted one, which turns this into a moderate project rather than a quick install.
- Measure the gap between the top of your hangers and the closet ceiling or upper shelf.
- Choose a ledge depth of 8 to 10 inches (20 to 25 cm) so it clears the door hardware.
- Check the door swing with the ledge loaded, since a door knob can strike a shallow shelf.
- Anchor into studs and keep the front edge free of heavy items.
Cost: Budget tier · Difficulty: Moderate DIY · Time: 1 to 2 hours.
Good to know: Anything on a ledge above eye level is a reach, not a grab. Store boxes you only need twice a year here, and keep a foldable step stool in the room so you are not standing on a chair.
15. Hang Bags Individually with Hooks or Stands
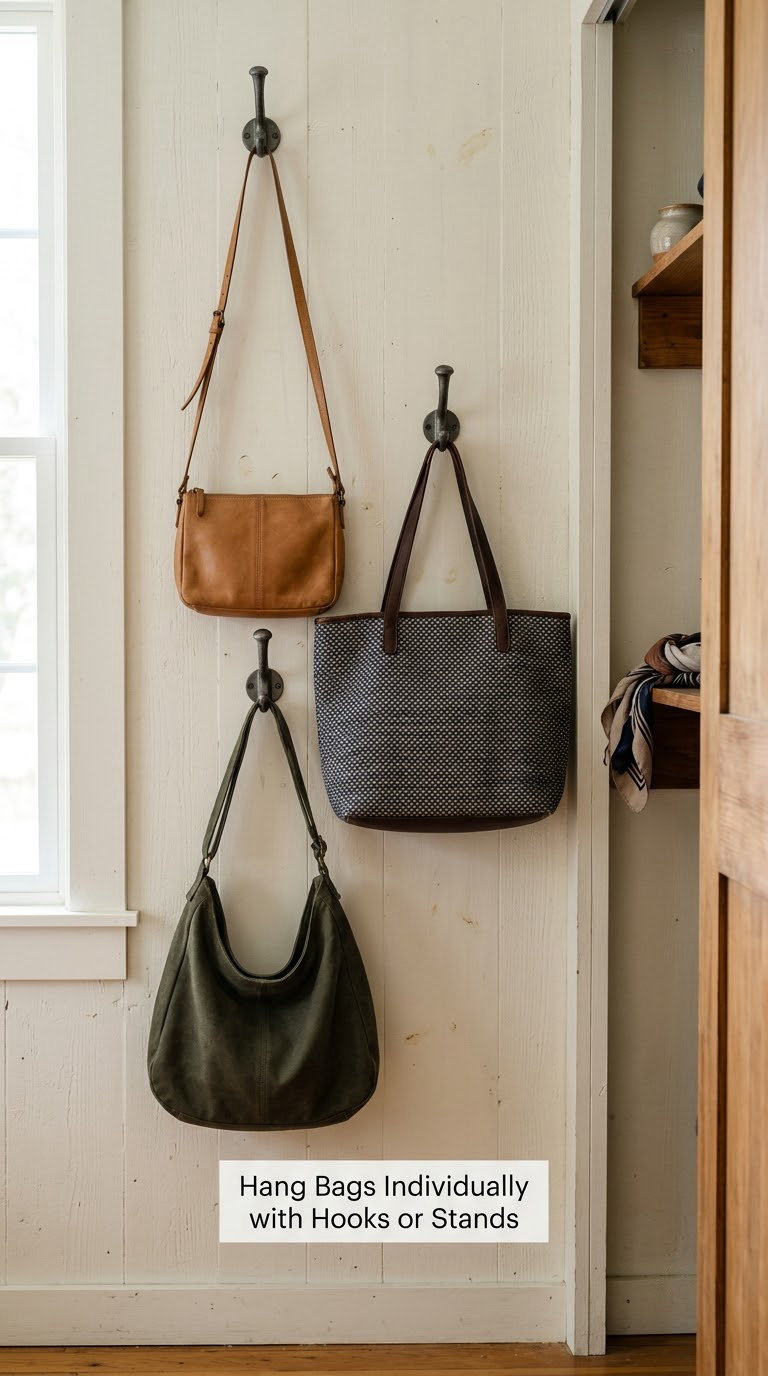
Wall hooks keep handbags off the shelves and stop a heavy tote from crushing the shelf below it. Hanging them at staggered heights lets you fit more bags in the same vertical strip of wall.
Use a plate or a solid lag into a stud rather than a small drywall anchor for anything heavy. A purse hanging by its strap puts all of the weight on a single stitched point, so slip a wide hanger hook or a shelf bracket under the strap to spread it. On a plaster or lath wall, use a toggle anchor rated well above the bag’s weight.
- Stud-find the wall and mark positions in a staggered pattern rather than a straight line.
- Space hooks 10 to 12 inches (25 to 30 cm) apart vertically to stagger bag heights.
- Hang bags flat against the wall with the strap looped over the hook, not twisted into a knot.
- Test each hook with a heavy bag for a few minutes before you trust it fully.
Cost: Budget tier · Difficulty: Easy DIY · Time: 45 minutes.
Good to know: A vertical bag stand or an over-the-door rack does the same job with no wall damage at all. If you rent, that is the version to buy, and you can take it with you.
16. Install a Small Pull-Out Valet Rod
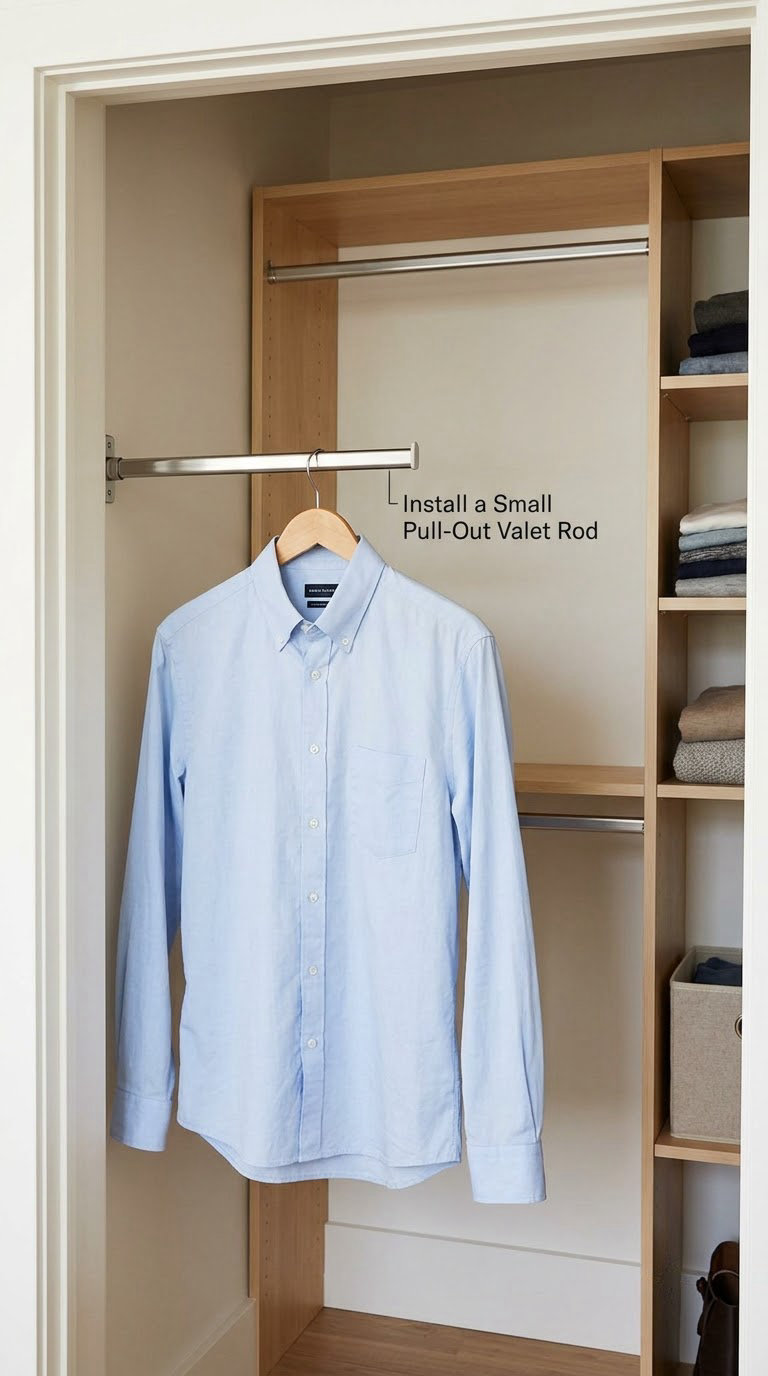
A retractable valet rod gives you a temporary place for the outfit you are wearing today, or for a shirt that needs air-drying after a wash. It extends out when needed and sits almost flush against the wall when not.
This is a small add-on, not a main rod. Most are rated for a handful of garments, and some are designed for exactly one at a time. Mount it at shoulder height on a side wall near the door so you can reach it without stepping into the closet.
- Pick a side wall with 12 to 18 inches (30 to 46 cm) of clear width beside the hanging run.
- Mount it above the level of your longest hanging garment so the extension does not sweep through clothes.
- Check that the extended rod clears the door in the open position.
- Limit the load to what the manufacturer states, and treat a single shirt as the safe case.
Cost: Budget tier · Difficulty: Easy DIY · Time: 45 minutes including drilling and patching.
Good to know: A tension-mounted version needs no holes and takes ten minutes, but it cannot hold much. If your main rod is already full, this is a pressure valve, not a solution.
17. Rotate Seasonal Clothing Into Labeled Bins
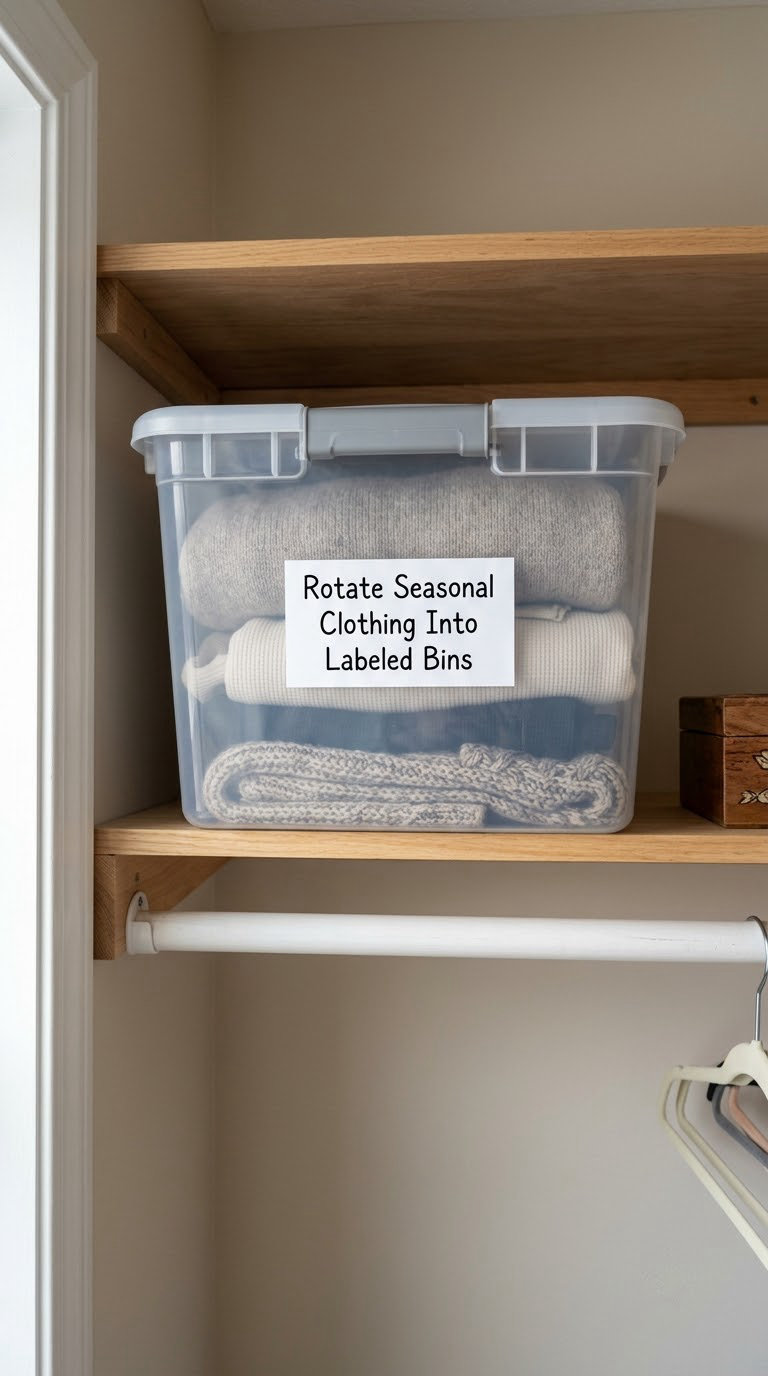
Moving off-season clothing out of the closet twice a year is the fastest way to shrink what you look at every morning. Two clear bins of winter coats in the corner of a bedroom do more for daily closet space than any organizer you can buy.
Use clear bins so you can see the contents without opening anything, and label each one by category and size rather than by season alone, since a wool coat crosses two of them. For a small apartment, suitcases work well: pack the season into one, and the closed suitcase doubles as a bench. Rolling cubes under the bed are the other reliable spot, as long as you check the clearance under your specific bed frame first.
- Sort into seasonal, occasional, and keep-forever piles, and be honest about the middle one.
- Pack one bin per category, folded, with a scented card or cedar block inside.
- Store the bins on a high shelf, under the bed, or in a garage shelf, out of sunlight.
- Set a two-date reminder each year: one in spring, one in autumn.
Cost: Free to mid-range tier · Difficulty: Easy DIY · Time: About 2 hours per switch.
Good to know: A three-month clothing rotation is a simpler version of the same idea and works for people who find a full seasonal audit overwhelming. Beds with unusual legs and low support bars can defeat under-bed storage, so measure before you commit.
18. Use Command Strips for Lightweight Closet Accessories
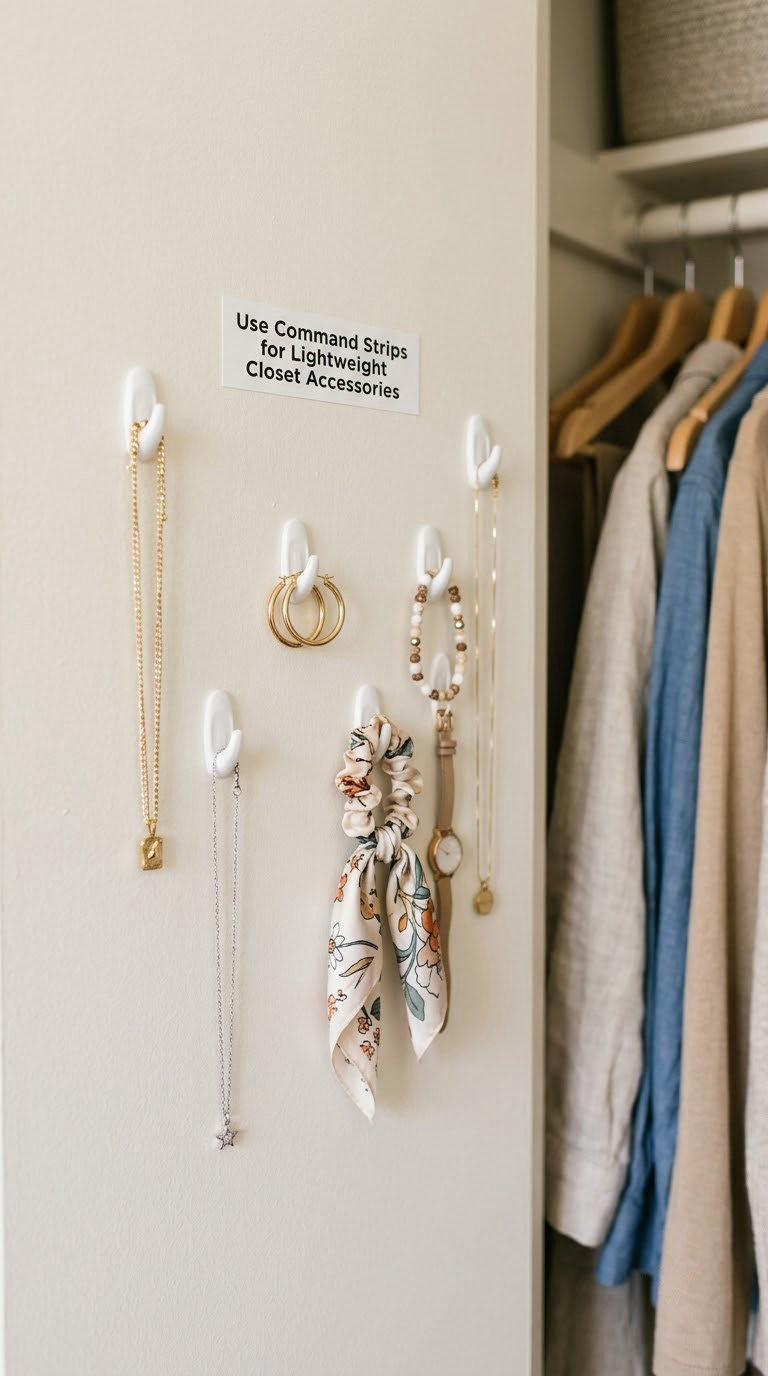
Adhesive hooks put hats, belts, jewelry, and keys on the wall, the back of the door, and the side of the closet frame, and they cost nothing in repairs. They are the strongest renter idea in the whole list, and the most frequently recommended one for closets specifically.
Weight ratings assume a clean, painted, non-textured surface and a wait time after application. Rough drywall, unpainted masonry, and wallpaper will not hold the rated load, and a failure leaves a section of paint peeled back with it. Test the heaviest item you plan to hang on one strip for a full day before you trust a whole wall of them.
- Wash the wall with isopropyl alcohol and let it dry fully, usually 30 minutes.
- Apply the strip and wait the stated time, commonly 24 to 72 hours, before loading it.
- Hang only lightweight items: hats, belts, jewelry, keys, hand towels.
- Remove by pulling the tab slowly along the wall, at a low angle, never straight out.
Cost: Budget tier · Difficulty: Easy DIY · Time: 30 minutes plus waiting.
Good to know: Adhesive is not a fix for structural weight. If you need to hang a purse, a shelf, or a heavy bag, use a stud-anchored hook from idea 15, and confirm you are allowed to drill before you start.
19. Add a Full-Length Mirror on the Back of the Door
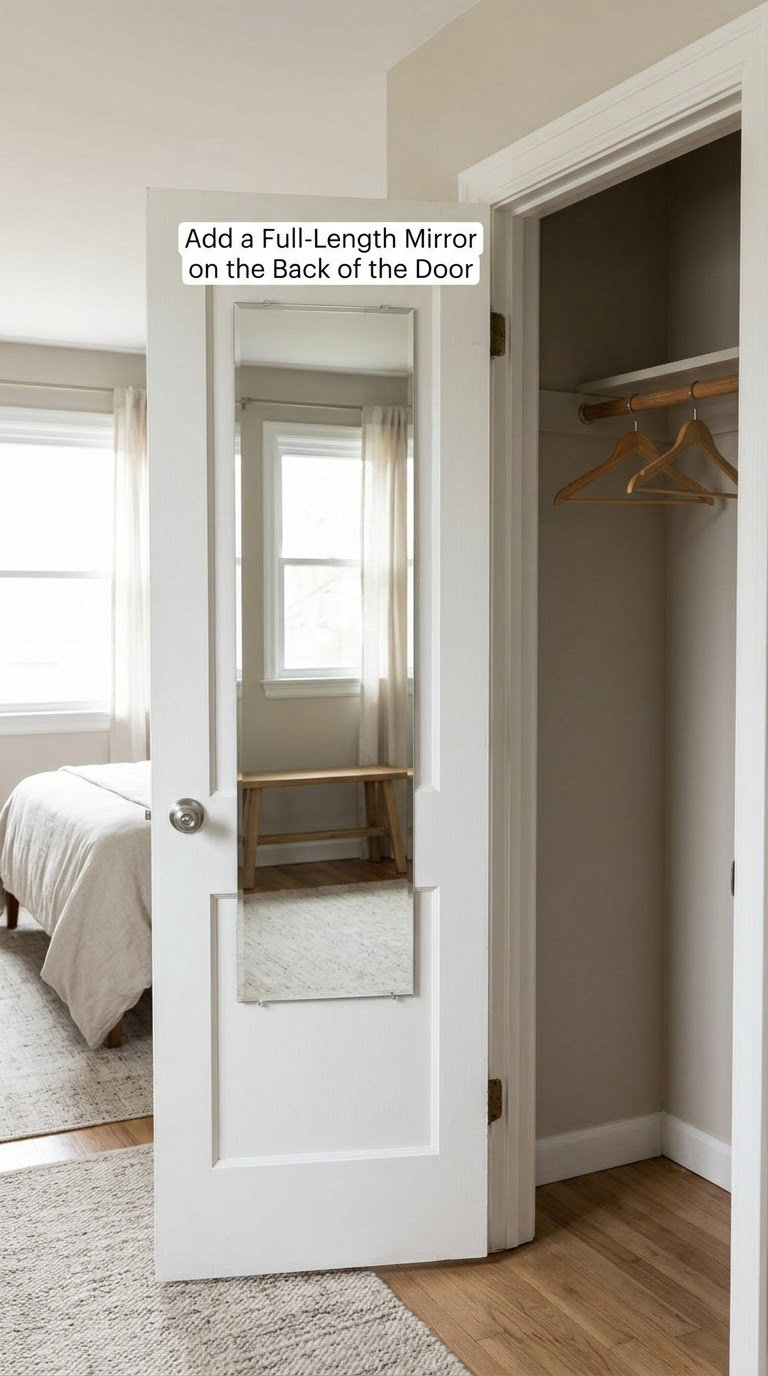
A slim full-length mirror on the back of the closet door lets you check an outfit without craning at a bathroom mirror across the hall. It also makes a small closet read as a dressing space rather than a cupboard.
Door-mounted mirrors attach with adhesive, suction cups, or a screw bracket, and the adhesive types need a flat, clean surface. Leave clearance at the edges so the mirror does not foul the door frame when the door is open, and check that the door still closes with a draft in the room. Avoid a mirror directly opposite a window that gets strong afternoon sun, since the backing can warp over time.
- Measure the door face width and height, staying 3 inches (8 cm) clear of each edge and the hardware.
- Check the swing with the mirror mounted but not adhered, and confirm the door latches.
- Use the mounting method the manufacturer rates for your door material.
- Keep the mirror below closet rod height so it does not reflect overhead clutter into the room.
Cost: Budget tier · Difficulty: Easy DIY · Time: 20 minutes.
Good to know: In a rental, a tension-hook mirror that hangs over the top of the door avoids adhesive residue on the paint entirely. It is the one mirror method that leaves the door completely clean when you move out.
20. Build a Custom Center Tower for Maximum Storage
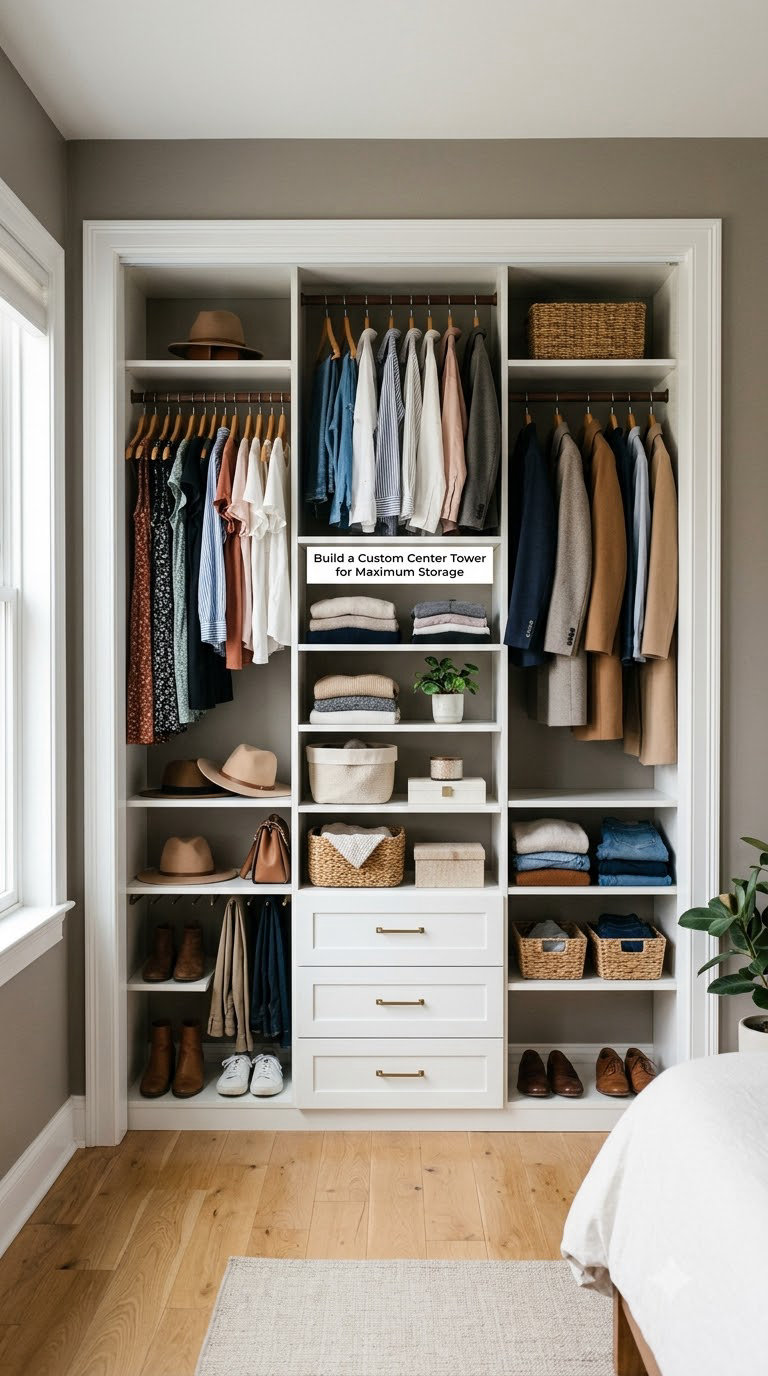
A center tower is the premium answer for an awkward closet: a floor-to-ceiling unit that splits the width into two hanging bays on either side and fills the middle with drawers, shelves, and a short hanging section. It is the only idea on this list that changes the closet’s actual capacity rather than redistributing it.
The middle is where the value sits, and it depends entirely on the dimensions. A closet with 60 inches (152 cm) of width can lose 18 to 24 inches (46 to 61 cm) to the tower and still keep a workable hanging run on each side, so measure the hanger width and the length of your longest garment before committing. A shallow room needs a wardrobe unit with roughly 13 inches (33 cm) of depth rather than the standard 22 inches (56 cm). Leave a gap at the back or sides so trapped air can move, or add a small vent slot, to prevent mildew in a fully enclosed closet.
- Measure width, depth, and ceiling height, then note every obstruction including light fixtures and outlet locations.
- Sketch the tower layout and confirm each remaining bay fits a garment at its true length.
- Choose plywood or finished laminate over particleboard for drawer and shoe shelves, which take repeated point loads.
- Get a local carpenter to build and install it, or hire a closet company if you want a fitted result.
Cost: Custom tier, the most expensive option on this list by a wide margin · Difficulty: Hire a pro · Time: 1 to 2 weeks including design, build, and install.
Good to know: Get the electrical and lighting checked if a fixture sits inside the closet, and confirm whether your lease or association requires approval for permanent built-ins. Do the measuring and decluttering first, because a custom build is a poor way to solve a closet that is holding too many clothes.
Planning Tips for Closet Organization Ideas That Stick
- Measure everything before you buy anything. Record the closet width, depth, ceiling height, the length of your longest garment, and your largest shoe size. The most common wasted purchase is an organizer that does not clear the door swing.
- Check the door swing on the floor plan. Lay painter’s tape on the floor where the door and any new cart or island will sit, then walk the path. If you have to turn sideways, the piece is too deep.
- Sort before you sort out. Pull everything out, make three piles, and only then decide which organizer to buy. Buying a beautiful organizer for clothes you are about to donate is the most common way these projects stall.
- Stay under the load rating. Shelf dividers, hanging organizers, door rails, and adhesive hooks all have published limits. Overfilling a pull-out drawer or cube makes it tip, which is the fastest route to a mess on the floor.
- Check your lease before drilling. Adhesive hooks, tension rods, and over-the-door racks leave the wall alone. Anchoring into studs does not, and repairing drywall is more expensive than the organizer was.
- Work top-down and off-site first. Rotate seasonal items out, then install anything that needs a ladder or a stud, then add shelf organizers, then fill the floor. Doing it in that order means you are not moving finished work out of the way repeatedly.
- Keep a 10 to 15 percent budget buffer. Hardware always needs one more bracket than the package contains, and closet walls are rarely square. A small buffer turns a two-hour job into a one-afternoon job.
- Assign one reset habit. The single thing that keeps an organized closet organized is putting the laundry away on the day it is washed. A closet stays tidy when nothing accumulates, and no organizer fixes a pile that never leaves the bed.
Some of these pair well with a dedicated look elsewhere on the site. If the closet shares a room with a desk, our picks for corner desks for small spaces are worth a look, and small area rugs help define a walk-in zone. For a closet that needs to be usable at night, see our guide to LED closet lighting for walk-in closets, and for organizing neckwear specifically, our tie racks reviewed cover the door-mounted options in more depth.
Frequently Asked Questions
What is the best storage system for a very small closet?
For most small closets, a double-hanging rod plus slim velvet hangers plus a 6-compartment hanging organizer returns the most capacity. The second rail uses air that is currently empty, the slim hangers fit more garments per inch, and the hanging organizer uses the vertical plane instead of the floor. Add clear lidded bins under the hanging clothes last, once the vertical space is already used.
How much space should be left between a closet rod and the wall?
Leave 2 to 4 inches (5 to 10 cm) between the end of the rod and the side wall so hangers can be pulled straight out instead of catching on the bracket. Do not leave more than that. In a narrow closet, every extra inch off the rod length is a garment you lose, so measure the rod rather than the closet before buying hangers.
How do I organize a small closet on a budget?
Start with the free changes: sort everything into three piles, give one shelf to daily wear, and move off-season clothing into labeled bins outside the closet. Then spend on three pieces only, usually a second rod, an over-the-door organizer, and a set of clear bins. Adhesive hooks cover accessories for very little and need no tools.
Can I add organizers to a rental closet?
Yes, as long as you avoid anchoring into the wall. Tension-mounted rods, over-the-door racks, adhesive hooks, and freestanding cubes all leave the paint untouched. If you must drill, confirm your lease allows it first and use removable drywall anchors, which are far easier to patch than a lag screw.
How do I keep a small closet from becoming cluttered again?
Keep the volume down rather than adding organizers. The habit that works is putting laundry away on the day it is washed, so nothing accumulates on the bed or the closet door. A once-a-season rotation out of the closet, plus a one-in-one-out rule, keeps the closet holding only what you actually wear.
Measure your closet this week, then do three things in order: sort everything, add a second rod, and move the seasonal stuff out. Those three changes do more for 20 closet organization ideas for small closets than any single product you can buy, and they cost almost nothing. Everything else on this list is there when you are ready for the next step.