How to Pressure Wash a House: Proven October 2026 Guide
Pressure washing a house is one of the fastest ways to freshen up tired siding, but it is also one of the easiest ways to gouge it if you wing it. The trick is matching the right pressure, nozzle, and detergent to the siding you actually have, then working methodically from low to high and back down again. This guide walks through the whole job — tools, safety, prep, the wash itself, and the cleanup — so the results look professional without paying for a crew.
If you want a quick start on gear, our roundup of the 10 Best Amazon Prime Big Deal Days Pressure Washer Deals points to the models our team has watched perform well in real backyards. The rest of this guide covers how to use one.
Contents
Time: 3 to 6 hours for a single-story home · Cost: mostly the washer rental or purchase, plus detergent · Difficulty: Moderate DIY · Skill level: Comfortable with a garden hose and a ladder
Tools and Materials
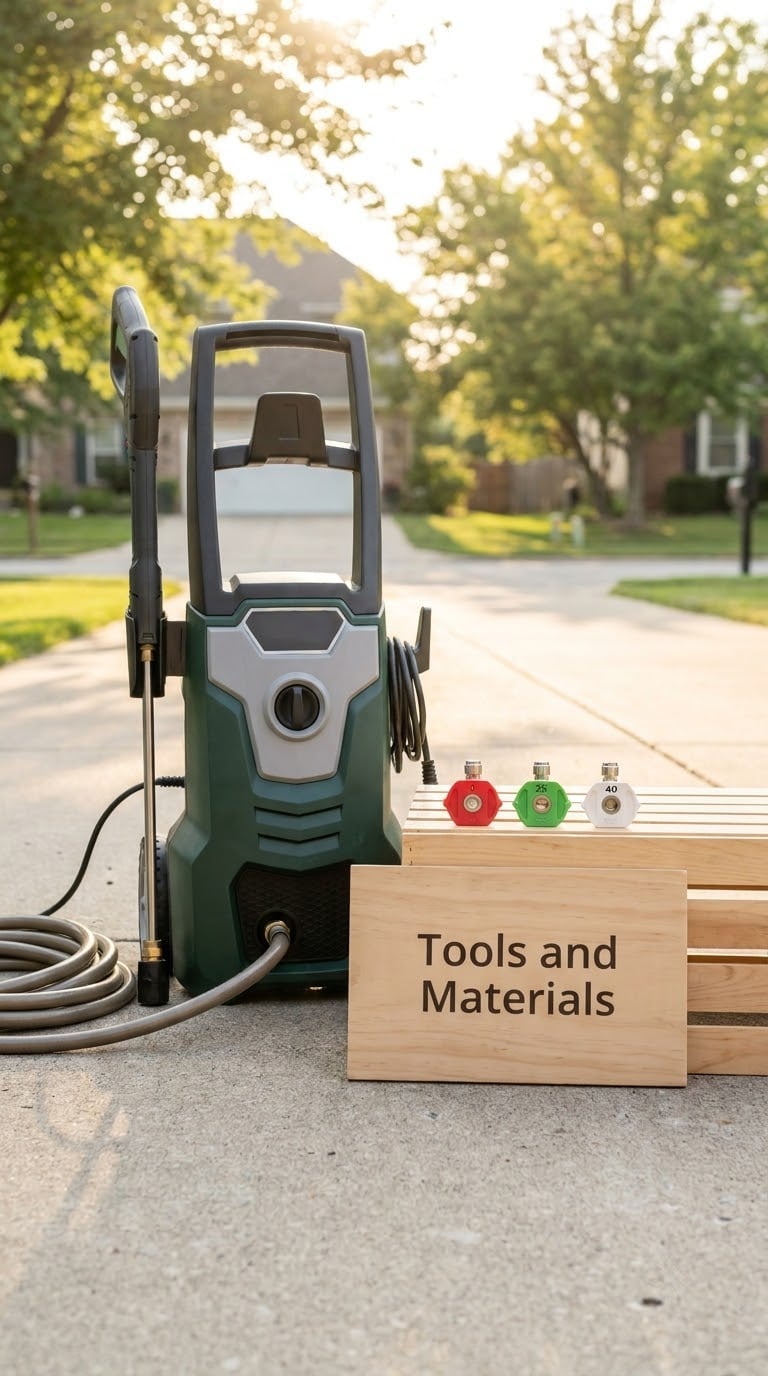
You can get a solid clean with a basic electric unit or a beefier gas model, but the nozzles and technique matter more than the brand on the box. Here is what to gather before the day of the wash.
Pressure washer
- Electric units in the 1,500 to 2,000 PSI range handle most one- and two-story homes with vinyl, aluminum, or painted wood siding.
- Gas machines in the 2,500 to 3,000 PSI range reach higher, work faster, and are the usual pick for stucco, brick, or two-story jobs where you need extra oomph.
- Skip anything above 3,500 PSI for siding — that is territory for concrete driveways, not clapboard.
Nozzles (color-coded)
- 40 degree (white) — the everyday siding nozzle, the widest and gentlest fan.
- 25 degree (green) — for stubborn mildew, algae, and cobwebbed corners.
- 15 degree (yellow) — concrete, brick, and very tough grime on masonry only.
- 0 degree (red) — almost never for siding; it will etch.
- A soap nozzle (black) if your machine does not have a built-in detergent reservoir.
Accessories
- Garden hose long enough to reach the farthest work area, with a GPM (gallons per minute) rating close to your washer’s spec.
- Extension wand or telescoping wand (12 to 18 feet) for second-story work without climbing.
- Drop cloths, painter’s tape, and plastic sheeting for covering outlets, lights, and shrubs.
- Exterior house wash or a mildewcide safe for your siding type.
- Stiff bristle brush for pre-treating heavy mildew patches.
- Safety glasses, closed-toe shoes with grip, ear protection (gas units are loud), and work gloves.
Before You Start
Half of pressure washing is preventing damage, and that all happens before the trigger ever gets pulled. Take an hour to walk the house and clear the deck — literally.
Safety check
- Eye and hand protection are non-negotiable; a ricocheting piece of grit can do real damage.
- Never aim the wand at a person, a pet, or yourself, even at low pressure.
- Keep the spray away from electrical fixtures, the meter box, and any exterior outlet, even one you have covered.
- If you must use a ladder, keep someone spotting you and never lean out to extend reach — that is how falls happen.
Home prep
- Close all windows and doors. Check that window screens are seated and not torn.
- Cover outdoor outlets, light fixtures, doorbells, vents, and the HVAC intake with plastic sheeting and painter’s tape.
- Move patio furniture, grills, and planters away from the work area.
- Wet down nearby plants and cover delicate shrubs with a drop cloth. Detergent and high-pressure runoff will scorch leaves fast.
Pick the right day
- Overcast or light cloud cover is ideal — direct sun bakes detergent onto siding before you can rinse it.
- Wind under 10 mph so overspray does not drift into a neighbor’s yard or your car.
- Above 40°F (4°C) so surfaces do not ice, and so detergent does not leave a film.
- Check local water-use rules; some municipalities restrict outdoor water during drought.
Step-by-Step Instructions
The basic flow is: inspect, cover, apply soap, rinse low, spot-treat, rinse high, dry, inspect. The order matters — working bottom up for soap, top down for the final rinse, uses gravity to your advantage instead of streaking grime across clean siding.
Step 1: Inspect the Exterior and Pre-Rinse Plants
Walk the entire house before the washer comes out of the truck. Look for loose siding panels, cracked or missing caulk, peeling paint, torn window screens, and soft spots in wood trim. Anything loose is going to get worse with a pressure washer pointed at it, so tape, repair, or plan to work around it first.
While you walk, drag the garden hose around the foundation and soak the plants along the work area. Wet leaves absorb detergent runoff far better than dry ones, and pre-soaked soil holds chemicals away from roots. A two-minute pass now saves a lot of brown leaves next week.
Step 2: Cover Outlets, Lights, and Landscaping
Use painter’s tape and plastic sheeting to seal every outdoor outlet, light fixture, doorbell button, dryer vent, and the HVAC intake. Water forced into an outlet under pressure can trip a breaker or worse, and the intake on a heat pump is easy to forget until the unit is pulling damp air.
Lay a drop cloth or tarp over the shrubs directly under the section of wall you are about to wash. This is the simplest way to keep the most concentrated runoff off tender foliage. Move the tarp as you move around the house.
Step 3: Mix and Apply the Detergent
Fill the washer’s detergent reservoir (or attach a siphon or foamer) with an exterior house wash that is safe for your siding. Vinyl and aluminum tolerate most general-purpose formulas; painted wood and stucco need a milder, non-bleach mix unless you are specifically targeting mildew.
Switch to the black soap nozzle, drop to the lowest pressure setting, and apply from the bottom up in long, even horizontal passes. Working from the bottom up keeps the soap from streaking down onto dry, untreated siding and leaving visible lines. Let the solution dwell for 5 to 10 minutes, but do not let it dry on the wall — if the sun is strong, mist with water to keep it active.
Step 4: Rinse Detergent From the Bottom Up
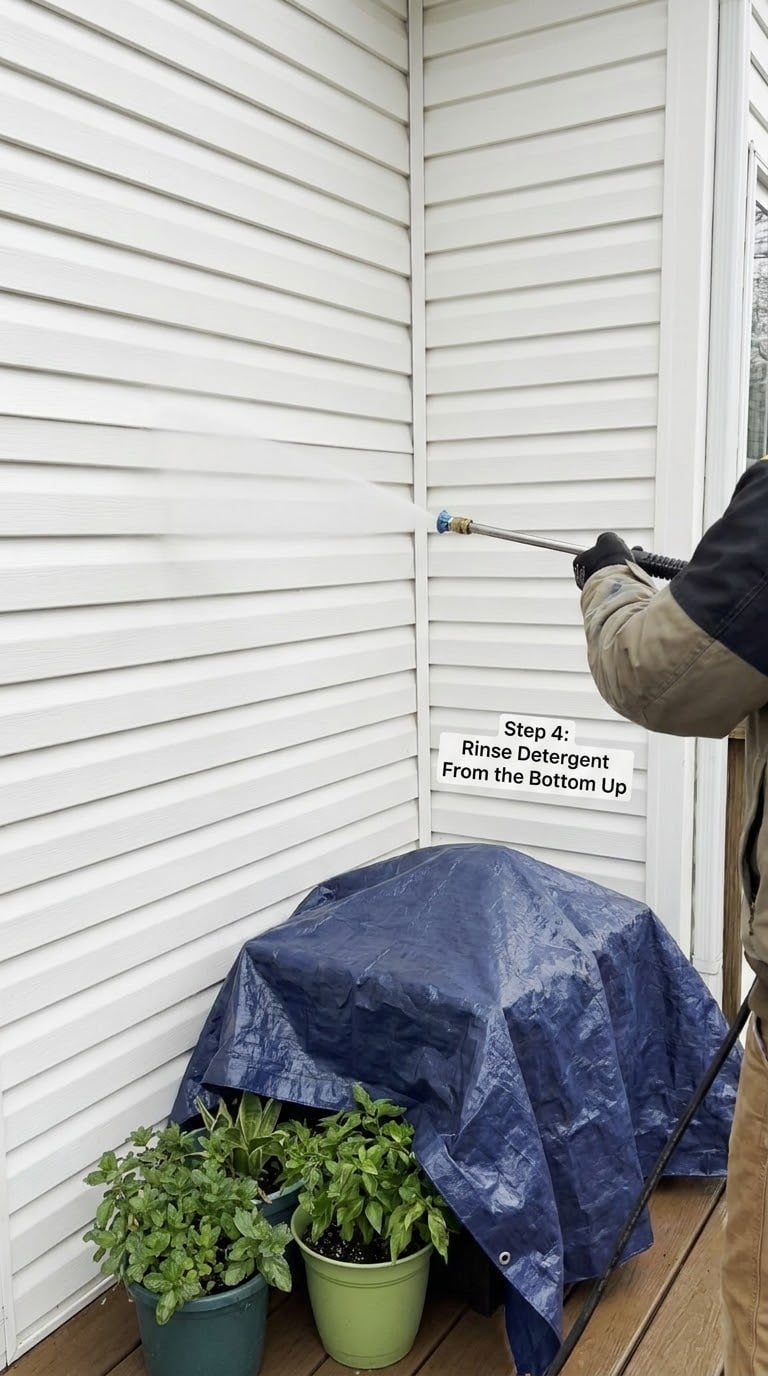
Switch back to the 40 degree (white) nozzle, stand about 12 to 18 inches (30 to 45 cm) from the wall, and rinse the same way you applied the soap — bottom up, smooth overlapping horizontal passes, working in sections roughly 6 to 8 feet wide. The wide fan keeps the pressure gentle enough to clean without etching.
Keep the wand moving. Lingering in one spot, even with the 40 degree nozzle, can leave a visible line you will not see until the wall dries. Rinse before the detergent dries on the surface to avoid residue and oxidation streaks, especially on darker siding.
Step 5: Switch to a 25 Degree Nozzle for Stubborn Spots
For mildew patches, algae blooms in corners, and cobwebs under the eaves, step down to the 25 degree (green) nozzle. Hold the tip a bit farther back — 18 to 24 inches (45 to 60 cm) — and use the same horizontal pass pattern. The narrower fan doubles the impact on the same area without going full red-tip on the siding.
Never aim upward into lap siding or window frames. Water forced under the laps can get behind the siding and cause swelling, rot, or interior water stains that show up months later. Keep the spray angled slightly down.
Step 6: Tackle Specific Surfaces
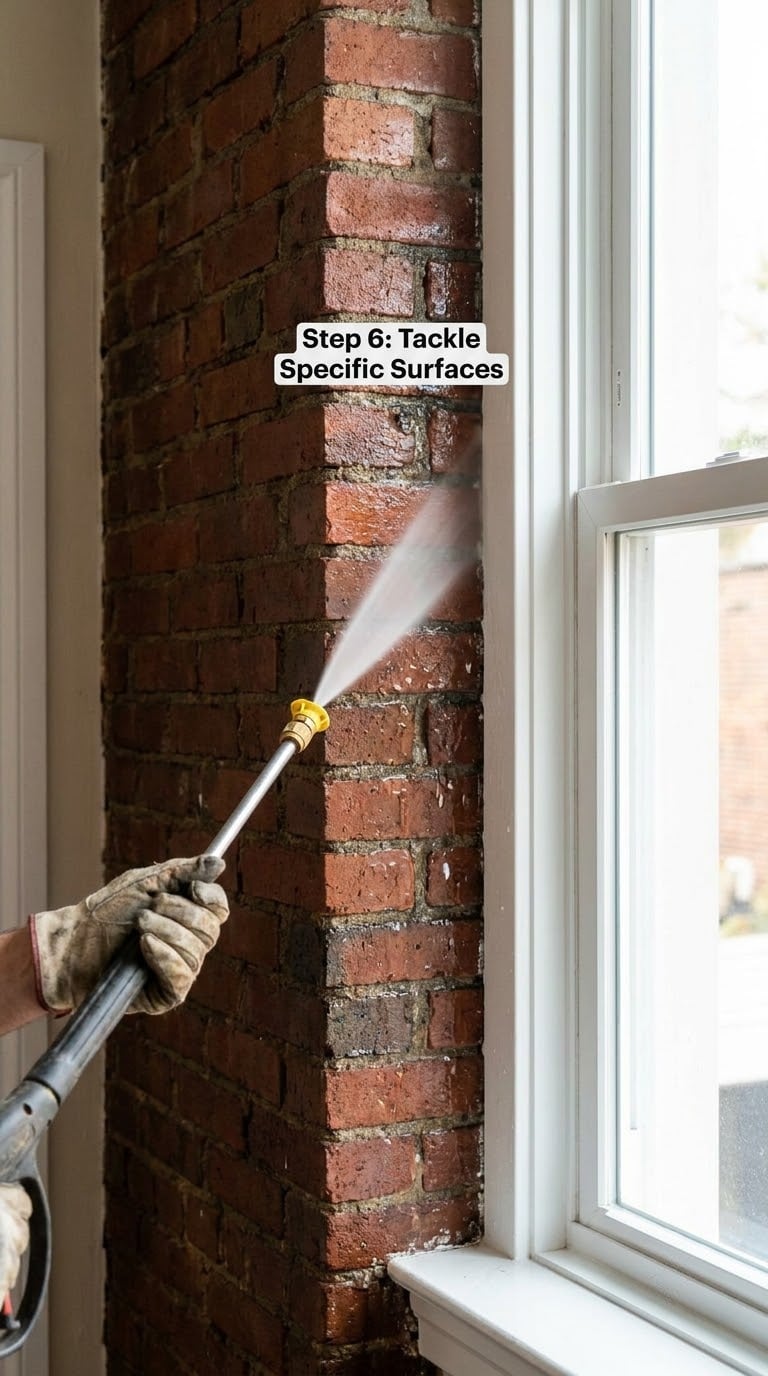
Different siding asks for different pressure. The wrong setting will either do nothing or do too much.
Vinyl and aluminum siding — 1,500 to 2,000 PSI with a 40 degree nozzle at 12 to 18 inches (30 to 45 cm). Soft, even passes. Avoid spraying under the laps.
Brick and masonry — 2,500 to 3,000 PSI with a 25 degree nozzle at 12 inches (30 cm). Brick is tough but the mortar is not, so keep the wand moving and do not dwell on joints.
Stucco — 1,500 PSI or less with a 40 degree nozzle at 24 inches (60 cm). Stucco is soft and cracks easily. If in doubt, soft wash instead — see below.
Painted wood siding — 1,200 to 1,500 PSI with a 40 degree nozzle at 18 inches (45 cm). If the paint is already flaking, pressure washing will strip it. Plan a repaint after.
Brick or stone veneer — treat like brick, but reduce PSI if the mortar is older or you see crumbling.
Step 7: Rinse From the Top Down
After the heavy cleaning is done, do one final pass with the 40 degree nozzle, this time starting at the top of each wall and working down. This carries any loosened grime and detergent film to the ground instead of dragging it across siding you already cleaned. You will be surprised how much dirt still shows up in this final rinse.
Hit window glass last with plain water, low pressure, and a wide fan so you do not leave spots that harden in the sun.
Step 8: Dry, Inspect, and Touch Up Caulk
Let the house air dry for 2 to 4 hours in good weather. While you wait, rinse the patio, walkways, and any plants that got overspray, and pull the protective plastic off the outlets and lights.
Once the siding is dry, walk the house again. Look for missed spots (they will look darker than the rest), lifted paint around trim, and any damaged caulk around windows, doors, and corner boards. Plan to re-caulk and repaint after a fully dry surface — usually 24 to 48 hours — so the new sealant bonds to clean, dry material.
Common Mistakes to Avoid
Most pressure washing damage comes from a short list of habits. Here is what to watch for and how to fix it before it costs you a piece of siding.
- Holding the wand too close. Etching lines look like clean stripes until the wall dries, then they are permanent. Pull back to 12 to 18 inches (30 to 45 cm) and keep the wand moving.
- Spraying upward under siding laps. Water gets behind the panels, swells the wood, and invites rot. Angle the wand slightly down.
- Using a 0 degree nozzle on siding. That red tip is for cleaning rebar and chewing gum off concrete, not your house. Use 25 or 40 degree only.
- Letting detergent dry on the wall. Streaks, oxidation marks, and a hazy film. Rinse within 10 minutes, or mist the wall with water if the sun is fast.
- Blasting windows. Glass can take the pressure, but the seals cannot. Hit the glass at an angle, not straight on.
- Forgetting to cover outlets. Pressure water finds its way into every unsealed gap. Tape them over before you start.
When to Call a Pro
DIY pressure washing is great for one-story homes with reachable eaves and forgiving siding. Some jobs are worth paying out for, especially if mishandling the work costs more than the service.
- Two stories or more with no flat ground to work from. Telescoping wands help, but if you find yourself climbing a ladder with a pressure washer in hand, you are one slip away from a serious injury. Pros bring lifts.
- Homes built before 1978. Lead paint is a real hazard when disturbed. A certified lead-safe contractor has the equipment and training to handle it.
- Damaged or rotting siding. Pressure washing accelerates what is already failing. Get the siding assessed first; if replacement is on the table, see our guide to the cost to replace siding on a house for what to budget.
- Delicate stucco or EIFS finishes. These need soft washing, not high pressure, and pros know the chemistry.
- Large jobs where renting a lift is half the cost of a crew. At that point, a professional wash usually includes the equipment, the insurance, and the cleanup.
Pro pricing varies by region and size, but most single-story homes land somewhere between a couple hundred and several hundred dollars. Our cost guide on installing gutters on a house includes a section on related exterior maintenance budgets that puts the numbers in context.
Maintenance
Once the house is clean, keep it that way with a light touch and a yearly habit.
- Annual light rinse. A quick pass with a garden hose or low-pressure rinse each spring washes off pollen before it sticks and stops mildew from getting a foothold.
- Full wash every 2 to 3 years. In humid climates, expect to wash more often — green buildup can return within two years. In drier areas, three to four years between full washes is normal.
- Trim shrubs back 12 to 18 inches (30 to 45 cm) from the walls. Airflow dries the siding faster and denies mildew the shade and moisture it needs.
- Spot-treat mildew as soon as you see it. A spray bottle with a 50/50 water and white vinegar mix, or a mildewcide, beats a full wash for a small patch.
- Inspect caulk and paint yearly. Caulk that fails lets water in. Paint that peels traps moisture. Catching either early is a 15-minute fix instead of a siding replacement.
Frequently Asked Questions
What PSI should I use to pressure wash a house?
Most one- and two-story homes clean well between 1,500 and 2,500 PSI. Vinyl and aluminum siding are happy at the low end with a 40 degree nozzle. Brick and masonry can take 2,500 to 3,000 PSI with a 25 degree nozzle. Stucco and painted wood do best at 1,200 to 1,500 PSI, or skip pressure washing entirely and soft wash instead.
Can you pressure wash a house with lead paint?
If your home was built before 1978, assume lead paint is present on exterior trim. Pressure washing can release lead dust and chips into the air and soil, which is a real health hazard. Hire an EPA RRP-certified lead-safe contractor who uses containment, HEPA vacuuming, and proper disposal. Do not DIY this one.
How often should you pressure wash a house?
A full pressure wash every 2 to 3 years keeps mildew and algae from setting in. In humid, shaded, or tree-heavy lots, plan on every 2 years. In drier climates with full sun, 3 to 4 years is usually enough. A quick garden-hose rinse once a year in spring extends the time between deep washes.
Is it okay to pressure wash vinyl or wood siding?
Yes for both, with the right setup. Vinyl is forgiving at 1,500 to 2,000 PSI with a 40 degree nozzle held 12 to 18 inches away. Painted wood wants lower pressure (1,200 to 1,500 PSI) and the same wide fan. Never aim upward into the laps on either material, and keep the wand moving so you do not etch the surface.
Should I use hot or cold water to pressure wash a house?
Cold water is fine for most exterior house washing. Detergent does the chemical work, and pressure does the mechanical work. Hot water helps cut grease on driveways, garage floors, and grills, but it is not necessary on siding and it adds cost and safety concerns. A cold-water washer with the right nozzle and detergent will get a house clean.
Do I need a permit to pressure wash my own house?
In most places, no permit is required for a homeowner washing their own home with a residential pressure washer. Where issues come up is water-use restrictions during drought, rules about detergent entering storm drains, and historic district guidelines on exterior work. Check your city or county website before you start, especially if you plan to use bleach-based cleaners.
Pressure washing a house is mostly patience and the right nozzle. Start with the lowest pressure that does the job, work bottom up with soap and top down for the final rinse, and keep the wand moving. Pull back to 12 to 18 inches (30 to 45 cm), use the 40 degree fan on siding, and switch to the 25 degree only for the stubborn spots. If your home is two stories, has lead paint concerns, or shows any rot or damage, a professional is cheaper than a siding replacement. Otherwise, set aside a Saturday, prep the plants and outlets, and enjoy the curb appeal when the siding dries.