
How to Build Steps for a Deck: Safe, Code-Ready DIY Guide 2026
Deck stairs are notched stringers carrying treads, hung off the deck’s rim joist at the top and set on a solid landing at the bottom. Learning how to build steps for a deck means measuring the total rise, cutting every riser to the same height, and bolting the whole flight to something that will not move. Get those three things right and the rest is carpentry.
Time: one full weekend, plus curing time for a concrete landing · Cost: materials only, usually a few hundred dollars for lumber, fasteners and a landing pad · Difficulty: intermediate · Skill level: comfortable with a circular saw and a framing square
Contents
Honestly, the construction is the easy half. Nobody finds layout precision intuitive, and a half-inch error repeated down six risers turns into a trip hazard by the bottom step. Spend the hour up front on the math and the saw work goes fast.
- Measure the total rise to the finished landing
- Find the number of risers
- Find the number of treads
- Find the exact riser height
- Lay out the stringer on the ground
- Mark and cut the first stringer
- Test-fit before cutting the rest
- Attach stringers, treads and risers
If you are building steps so the dog can get up and down, or replacing a flight that already wobbles, the same sequence applies. Read through the whole thing first, including our picks for the best steps for RVs if you also want a separate set for a trailer or boat deck.
Tools and Materials
Tools
- Tape measure, 25 foot minimum. You will measure the deck at three points and the landing diagonally. A 25 foot tape beats a 6 foot tape every time.
- Framing square with stair gauges. The gauges let you transfer riser height and tread depth straight onto the stringer without re-measuring.
- Speed square and a straightedge. For snapping lines across the stringer and checking your angle.
- Circular saw with a fresh framing blade. A dull blade kicks up pressure-treated dust and wanders off the line. A hand saw or jigsaw finishes the inside corner notches.
- Drill/driver plus an impact driver. Structural screws into the rim joist go in with the driver; deck screws go in faster with the impact.
- 4 foot level, torpedo level, and a machete or chisel. The level for stringers and railing, the torpedo for treads, the chisel for trimming.
- Clamps, chalk line, tape, pencil, and a square-edge utility knife.
- Work gloves, eye protection, a dust mask, and hearing protection. Pressure-treated sawdust is not something you want in your lungs.
Materials
Quantities below assume a 36 to 48 inch wide straight flight with six to eight risers, built in a single weekend.
- Pressure-treated 2×12 stringers. Three pieces, 10 to 12 feet long, is the standard for stairs up to about 48 inches wide. Use four if your plan needs them spaced closer for composite treads.
- Pressure-treated 2×6 lateral supports. Two or three, 8 to 10 feet long, screwed behind the stringers under the treads so the treads are not cantilevered off a single edge.
- Tread boards. For a 36 inch wide flight, two 5/4 x 6 inch boards per step. The formula: two 5-1/2 inch boards plus a 1/4 inch gap equals an 11-1/4 inch tread run, which clears the 10 inch minimum comfortably.
- Riser boards, if you want closed risers. Same width as the treads, cut to the exact riser height.
- Skirt or fascia boards if you want the sides closed off and the stringers hidden.
- Exterior-rated structural connectors. Stair stringer straps or joist hangers rated for the load, plus 3 inch structural or deck screws, plus 8d galvanized nails. Bolts beat screws on a rim joist connection when the flight is wide or high.
- Landing pad. Either a 36 x 36 inch concrete pad at 2,500 psi or stronger, four to six pavers on a compacted base, or a slab of stone set on a gravel bed.
- Weed barrier fabric and gravel if you are going the paver or gravel route.
- Exterior stain or sealer and an end-grain sealer. Pressure-treated lumber holds moisture for weeks, so this comes later, not on day one.
Frame stringers in pressure-treated pine or cedar. Treads are where people spend money, and that choice changes how the frame has to be built, which is covered further down.
Before You Start
Call 811 and have buried utilities marked before you dig a single hole, and stay clear of the locate flags until the backfill is done. A shovel through a gas line or an irrigation line is the fastest way to turn a weekend project into an expensive one.
Check your local building department before the first cut. A low freestanding staircase on a ground-level patio often needs no permit, while anything that attaches to an elevated deck, changes the deck’s load path, or carries a guard usually does. Rules vary by jurisdiction, so treat the numbers below as a working reference and confirm what your inspector will actually enforce.
Code numbers worth knowing
- Maximum riser height: 7-3/4 inches, and stay within 3/4 inch of the adjacent risers.
- Minimum tread depth: 10 inches, measured nose to nose rather than by board width.
- Minimum stair width: 36 inches. 48 inches is easier to use and is often required locally.
- Baluster opening: 4 inches maximum, so a 6 inch sphere should not pass through.
- Handrail required: at 4 or more risers, graspable, 34 to 38 inches above the nosing line.
- Landing pad: 36 x 36 inches minimum, solid and level, never loose soil.
- Concrete strength: 2,500 psi. A standard mix is adequate for a landing.
- Stringer spacing with 2x treads: 18 inches on center maximum, which means three stringers on a 36 inch flight.
Put on eye protection, gloves and a mask before the first cut, not after. Keep the circular saw unplugged while you clamp stringers and layout gauges, and never reach past a spinning blade to clear offcuts.
Look at the connection at the top before you commit. The stringers hang off the rim joist or a ledger board, and that rim joist has to be a real structural member, not a decorative trim board someone nailed on. If you cannot trace where the deck’s load actually goes, that is a job for an engineer rather than a weekend.
One more honest note on difficulty. The math is the barrier for most first-timers, not the carpentry. If you have never cut a stringer before, buy one extra 2×12, practice the layout on scrap, and keep the first one as a spare in case you overcut an inside corner. Everyone overcuts the first one.
Finish timing matters too. Fresh pressure-treated lumber is heavy and wet. Let it dry a few weeks in the sun before you stain it, or the finish will peel off in a year.
Step-by-Step Instructions
By the end of these six steps you will have a straight, level flight with even risers, a solid base and a code-compliant handrail. Work in this order because each step depends on the last one being right.
Step 1: How to Build Steps for a Deck Without Overloading It
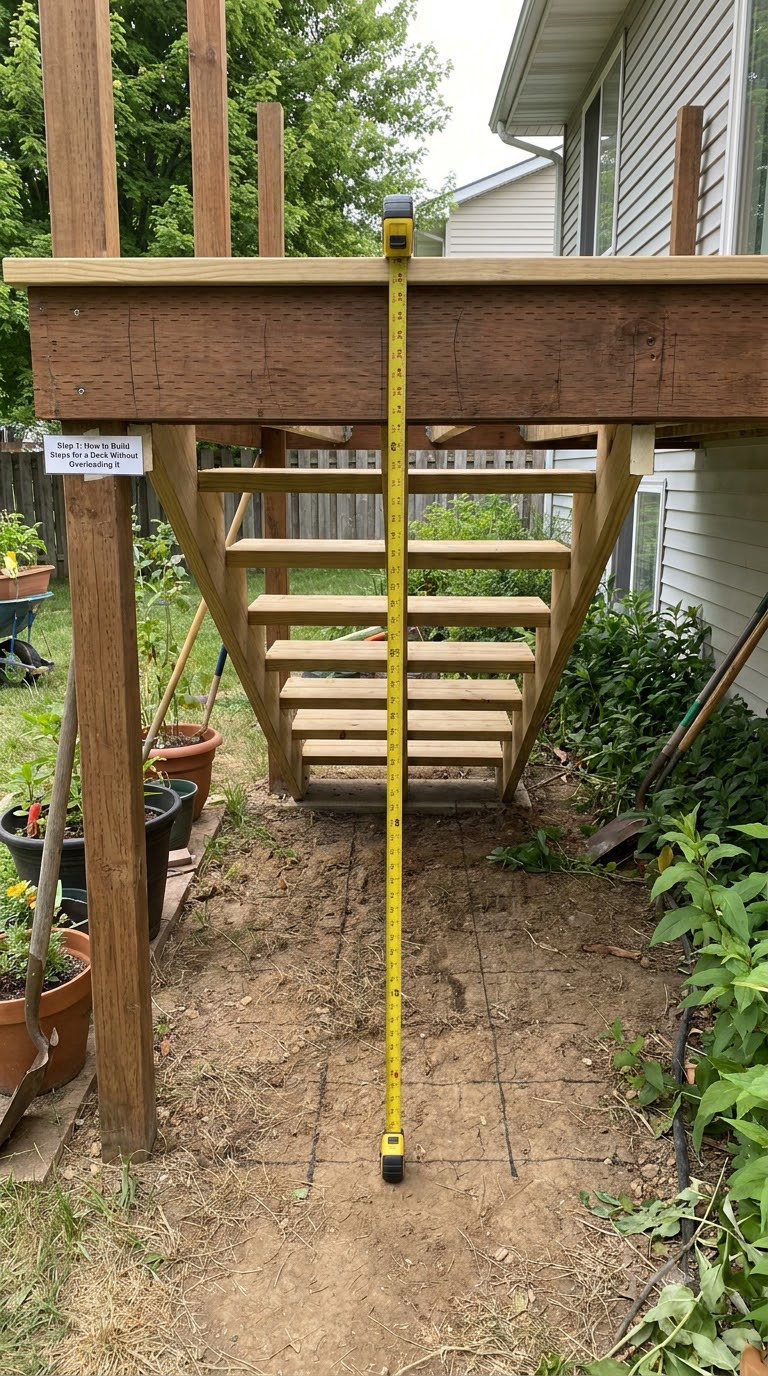
Measure from the finished deck surface down to the finished landing. Not to the dirt. Not to the grass. Whatever your bottom step will sit on, finished and level, that is the bottom of your measurement, and this is the single most common way people miscalculate a deck staircase.
Measure the total drop at three points across the stair opening. If those numbers differ by more than a quarter inch, your deck is out of level and you need to shim or fix the deck before the stairs, not after.
Divide the total rise by seven inches to get a starting number of risers, then round to the nearest whole number. A 42 inch drop gives exactly six risers at 7 inches each. A 46 inch drop divides to 6.6, which rounds to seven risers, and those seven come out at 6-9/16 inches each.
The number of treads is always one less than the number of risers, because the top of the flight meets the deck surface and does not need a tread of its own. Six risers means five treads.
Then divide by the exact riser height to get your tread depth and total run. With seven risers at 6-9/16 inches and 11 inch treads, the run out from the deck is 5 treads x 11 inches, plus one nosing overhang, plus the thickness of the top deck board.
Stand back and look at that run before you go further. You may only have three feet of yard between the deck and a fence. If the run does not fit, you are looking at a switchback with an intermediate landing, or at a shorter stair with fewer, taller risers. Both change the plan, so find out now.
Also decide whether the stairs are freestanding or attached. Freestanding stairs with their own posts are simpler and they move independently as the ground settles. Deck-attached stairs transfer load into the deck frame, which is why the connection details matter so much.
Step 2: Set the Footings and Stringer Layout
Mark where the bottom step lands and check what you have there. Loose soil, grass or bare dirt will let the base settle and eventually drop one end of the flight. That is the most common complaint in homeowner forums, and the fix is decided at this step, not later.
For a paver or stone landing, dig down far enough to get below the frost line in your area, add 4 to 6 inches of compacted gravel over a weed barrier membrane, and level it. Check the grade so water runs away from the stairs, not toward them.
For a concrete pad, dig to the same frost depth, form a 36 x 36 inch pad, set it on compacted gravel, and pour to at least 2,500 psi. Slope the top about 1 percent away from the deck. Give it at least 24 to 48 hours before loading it, longer in cold weather.
Staked posts on the freestanding option follow the same rule: set them below your local frost depth in concrete, plumb them, and bolt the stringers to the post tops with a galvanized through-bolt or an approved bracket.
Once the base is solid and level, mark the stringer locations on the deck rim joist. Two stringers suit treads of 5/4 inch 2x lumber at up to 18 inches on center; three is the safe default for a 36 to 48 inch wide flight. Composite and 5/4 composite treads want 9 to 12 inches on center, which usually means a fourth stringer.
Hold both stringer positions up against the rim joist and check they land on the rim joist or on a joist behind it, never on air. Mark the level line at the correct height on both sides of the opening.
Step 3: Cut the Stringers and Install Support Blocks
Lay your first 2×12 on flat ground with the 2×12 side on the ground and the width running left to right. Clamp a framing square to the edge with stair gauges set to your exact riser height and tread depth, and walk the layout along the board marking each step.
Remember that the layout includes the thickness of the top tread board. Many people cut the stringer to the exact total rise and then find the top step sits a board too low. Add the tread thickness to the layout, or shim the top attachment later.
Mark the top of the board at the total rise measurement plus tread thickness, and mark the bottom where the plumb line from the top corner hits the ground. That bottom mark is your total run, measured to the inside of the bottom notch.
Cut the sawdust off the top end first, then cut down to the line. After that, stand the board on end and drop a plumb line from the top notch corner to find the exact bottom cut line. Then cut the notch steps with the circular saw and finish each inside corner with a jigsaw or hand saw.
That last part matters. A circular saw blade leaves a small angled corner inside each notch, and if you leave it, the tread will rock. Take the corners back to the line with a jigsaw. A quick pull on the saw for those few cuts is the difference between a solid stair and one that creaks.
Now mark the second stringer with a story pole. Cut a scrap stick showing the riser height, stand it on the deck, and step it down until you hit the landing. Every notch on the stick lines up with a tread position. Transfer that layout onto the remaining stringers and cut them the same way.
Support blocks come next. Screw a pressure-treated 2×6 across the back of the stringers, tight under the tread line, and fasten into the notches so the treads are supported on three edges instead of cantilevered off two. This is what keeps a wide stair from twisting.
Step 4: Attach the Stringers and Build the Steps
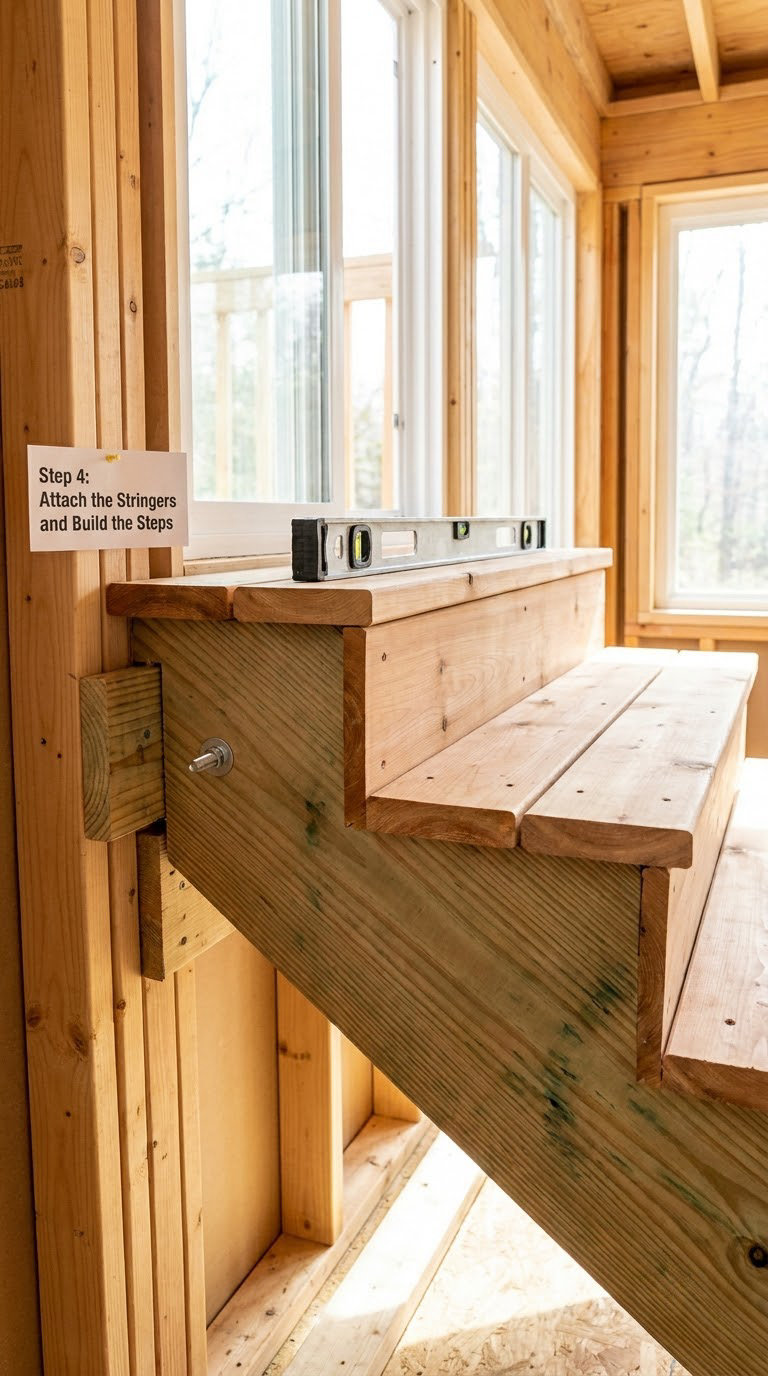
Hoist the assembled flight into position with a helper or a temporary block brace. Plumb both outer edges with the level before you drive a single fastener, then brace it in that position. Bracing wrong is faster than unbolting wrong.
Attach the top of each stringer to the rim joist or ledger with approved structural hardware. Joist hangers, stair stringer straps or through-bolts into the rim joist are the accepted methods; a handful of drywall screws into the face of the deck is not. Follow the connector manufacturer’s fastener pattern exactly, because an under-fastened connection gets pulled out of the rim joist over time.
Screw the 2×6 lateral supports in behind the stringers with structural screws into solid wood. Every fastener you drive should end in framing, not in the gap between members.
Now check the assembly is square. Measure diagonally from one outside corner of the bottom cut to the opposite top corner, then across the same two corners, and compare. Equal diagonals mean square. Adjust and re-check before the treads hide the frame.
Attach the bottom of each stringer to the post, pad or concrete, making sure the top of the base plate is level and plumb with the frame. A flight that is level at the top and loose at the bottom will feel strange underfoot for years.
Install the treads one at a time. Working from the bottom up keeps the layout honest. Set each tread with the same overhang at the front, usually 1 to 1-1/4 inches past the riser line, and leave a 1/4 inch gap between boards so water can drain and the boards can move. Two screws per board per stringer, or structural screws through the support blocks, is enough.
Pre-drill near the ends of pressure-treated boards to avoid splitting, and keep all fasteners flush. A proud screw head is a shin catcher and a trip hazard.
Add risers last if you want a closed look. Cut each riser to the exact riser height and leave a 1/4 inch gap above the tread below it. A little slope on the top tread helps water run off, though it is optional.
Step 5: Add Guardrails, Handrails, and Lighting
Anything with four or more risers needs a graspable handrail, and a drop of more than 30 inches to the surface below generally needs a guard as well. Check both, because a low set of steps off a raised deck can need a guard even when the drop feels manageable.
Mount posts so the fasteners land in solid framing. Bolting through the stringer into a post, or through the rim joist into a joist, is the way to get real strength. Set posts at the top and bottom of the flight, spaced no more than 6 feet apart on center, with the handrail running continuously across the break between stair and level surface.
Height runs 34 to 38 inches measured from the nosing line. Attach balusters so the gap between them is under 4 inches, which is the 6 inch sphere test: if a ball can pass through, the spacing is wrong. Decorative cable or metal panels rated for the opening work fine if they pass the same test.
At the deck connection, close the gap between the stair rail and the deck guard. People catch their ankles there constantly. A short return or a filler piece usually solves it.
For lighting, run an exterior-rated line or use low-voltage stair lights, and mount them to the stringer sides or under the treads so the path is lit without glare in anyone’s eyes. Anything involving new wiring on a circuit belongs to a licensed electrician. Do not splice into an existing outlet inside the house without one.
Step 6: Finish, Check, and Maintain the Staircase
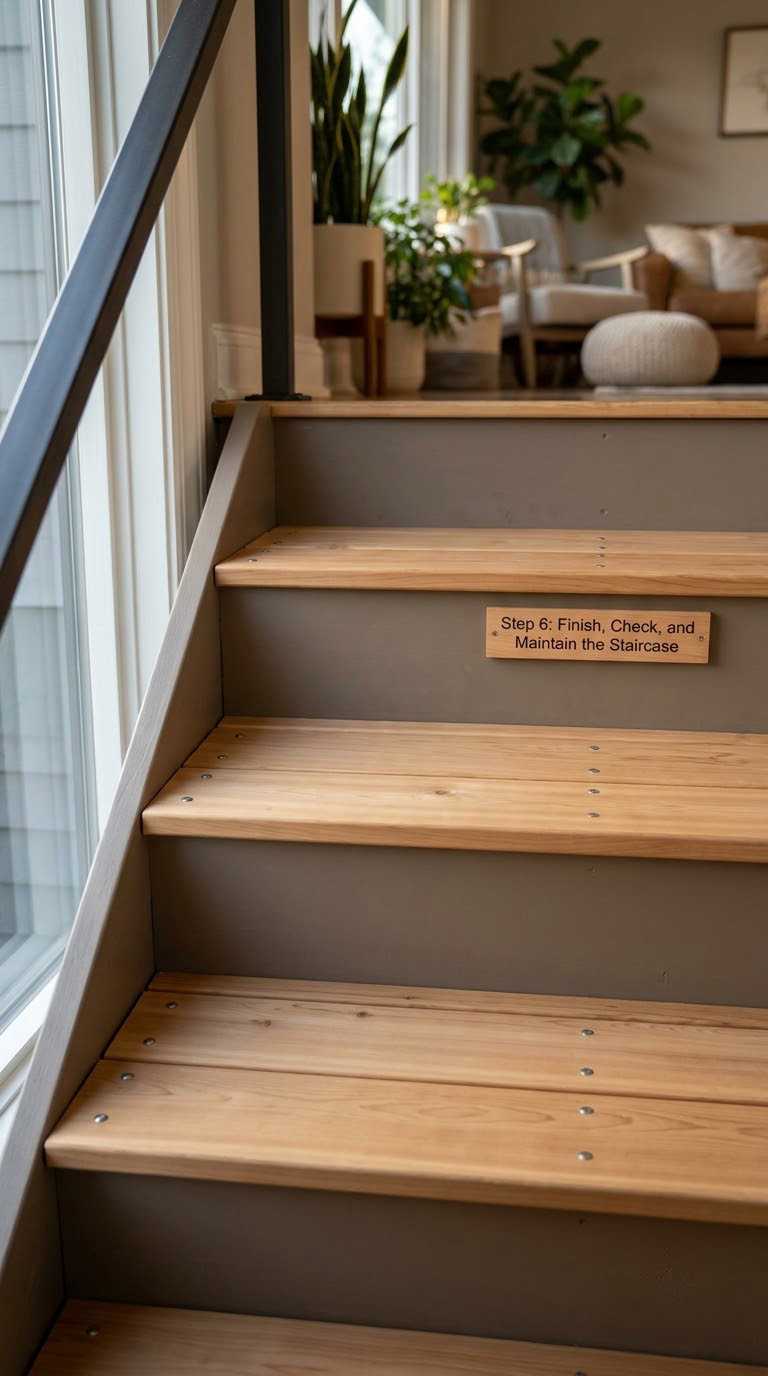
Run one last inspection before you call it done. Walk down the flight slowly with a hand on the rail and feel for movement at the top connection, at each tread and at the base. Compare risers with a level and a straightedge held across two of them. Any riser that stands more than 3/4 inch proud of its neighbors needs adjusting, and a little longer means a math error, not a build error.
Check every fastener by hand. A screw or nail that has backed out is a five-minute fix now and a splinter hazard later.
Seal all cut end grain first. The end grain on the bottom of each stringer and the cut ends of the treads absorb water fastest, and that is exactly where rot starts. Brush on an end-grain sealer or a thinned exterior sealer, let it dry, then apply your stain or sealer over the whole flight, two coats with a full dry time between.
Wait a few weeks for new pressure-treated lumber to dry down before finishing. Sealing wet wood traps moisture and guarantees peeling.
Water is the enemy. Check after the first few rains that water runs off the treads and away from the base, and that the landing is not sitting in a puddle. Standing water at the bottom of a staircase will rot the stringers from the end grain faster than anything else.
Write down the date you finished it. A year later, look at the stringer ends, the riser bottoms and the base. That check takes ten minutes and catches decay long before it becomes a structural problem.
Common Mistakes to Avoid
- Measuring to bare soil instead of the finished landing. Build the pad or set the pavers first, then measure. Every riser is wrong by the thickness of the base if you do it backwards.
- Overcutting the inside notch corners. A circular saw leaves an angled corner and the tread rocks on it. Finish every notch with a jigsaw or hand saw and test-fit before cutting the second stringer.
- Uneven risers. Divide the total rise, do not eyeball each step. A riser that differs by an inch from its neighbor is a genuine trip hazard, and it is the most common code rejection on an inspection.
- Letting treads cantilever off the stringers. Add the 2×6 lateral supports behind the frame so the tread is supported along its back edge too.
- Resting the flight on dirt or grass. It settles unevenly and one end of the stair drops. Use a pad, pavers or posts on a solid base.
- Mismatched stringer spacing. Two stringers with composite treads will flex and can crack. Composite needs 9 to 12 inches on center; 2x lumber treads can go to 18.
- Fastening into nothing. Every screw should end in the rim joist, a joist or a post. Probing for studs by feel after driving a screw finds out too late.
- Leaving the top connection to the deck loose, or skipping the railing. The stringer-to-deck joint is load-bearing and the guard is code-required at four risers. Do not do new wiring yourself either.
When to Call a Pro
Hire a licensed contractor or a structural engineer, not a handyman, when any of these apply.
- The deck is elevated. Stairs hung off a deck more than a few feet off the ground transfer real load into that frame, and a rotted or undersized rim joist is not something to discover mid-build.
- You cannot trace where the load goes. If the rim joist is missing, the ledger is fastened with drywall screws, or the deck was built without a beam at the stair opening, stop and get an engineer to look.
- Your local code requires a permit and an inspection and you are not confident you can meet the drawing. The inspection fee is cheap next to a rebuild.
- The frost line is deep or the soil is unstable. Deep footings, questionable fill or a high water table need a footing design rather than a guess.
- A stair gate is required for a small child. Self-closing, self-latching gates on elevated decks are a safety device, and the hinge and latch hardware need to be rated for the job.
- Any electrical work is involved. New circuits, exterior-rated fixtures on a new run, or anything at the service panel goes to a licensed electrician.
Most of these situations share one symptom: you are guessing at something structural. Guessing is fine for tread overhang and fine for stain color. It is not fine for a load path.
Maintenance
Decay and fasteners fail on a schedule you can actually track. A ten-minute routine twice a year catches everything worth catching.
- Spring, after the ground thaws: walk the flight with a level on two or three risers. Seasonal ground movement is normal; a stair that has dropped a quarter inch at one end needs the base rechecked.
- Spring and fall: check the stringer ends, the riser bottoms and the base plate for soft spots. Press a screwdriver into suspect wood. If it sinks in, that section needs cutting out now.
- Twice a year: run a finger over the deck screws and bolts at the rim joist. Backed-out fasteners are the top maintenance item on any deck staircase.
- After storms or heavy use: look for movement at the top connection, especially if the deck is 20 feet or more from the house and moves in the wind.
- Annually: look for carpenter ants, mud dauber nests, and piles of fine sawdust near joints, all of which point to insects using damp wood.
- Every two to three years: clean the treads with a deck cleaner, let them dry fully, and refresh the sealer. Grit and damp organic debris accelerate rot faster than weather alone.
- Handrail and lighting: tighten rail bolts twice a year and replace any burned-out stair lights before winter so the path stays visible.
If the original stairs were built on bare soil and now sit unevenly, you do not necessarily need a rebuild. Resetting the base on a proper pad and adding a plumb adjustment at the low end often buys another decade. We covered the honest limits of a DIY fix like that in our step-by-step build guide format, and the same discipline applies.
Frequently Asked Questions
How wide should deck steps be?
Most exterior staircases are at least 36 inches wide, but wider steps are easier to use and are often required by local code. Forty-eight inches feels noticeably better when two people carry something down. Whatever width you choose, count on three stringers for 2x lumber treads, and check that the opening, the railing hardware and the deck joist spacing all line up with the width before you cut anything.
What is the correct rise and run for deck steps?
A comfortable exterior staircase uses evenly spaced risers between about 6-1/2 and 7-3/4 inches, with treads at least 10 inches deep and nosing overhang of at least 1 inch. Measure the total rise to the finished landing, divide by your target riser height, round to a whole number of risers, then subtract one for the tread count. Consistency matters more than the exact number.
What wood is best for outdoor deck steps?
Pressure-treated lumber is the usual choice for stringers and framing, while cedar, redwood or composite is common for visible treads. Cedar and redwood take stain beautifully and check less than pine; composite outlasts everything but is unforgiving about stringer spacing. Whatever you choose, use exterior-rated fasteners compatible with pressure-treated wood and a finish suited to wet, sunny conditions.
Do I need a permit to build steps for a deck?
It depends on height and on what you are attaching to. A simple freestanding flight from a low ground-level deck often needs nothing. Stairs hung off an elevated deck, anything that alters the deck’s load path, and guards on drops over 30 inches usually require a permit and at least one inspection. Call your local building department and describe the deck height and the stair location rather than guessing.
Can deck stairs rest on dirt or grass?
Not well, and it is one of the most common questions on homeowner forums. Soil settles unevenly, so the low end drops and the flight tilts, which is uncomfortable and eventually fails at the stringer ends. Use a concrete pad, pavers on compacted base, stone on gravel, or posts set below the frost line. A freestanding staircase on its own posts is the most forgiving option on soft ground.
Do deck stairs need a handrail?
Four or more risers is the usual trigger, and a drop of more than 30 inches to the surface below generally requires a guard as well. Handrails must be graspable and sit 34 to 38 inches above the nosing line, running continuously from the top of the flight across any level break. Baluster openings are limited to 4 inches, so check that any decorative panel actually passes the 6 inch sphere test.
Start With the Measurement, Not the Lumber
If you take one thing from how to build steps for a deck, make it the total rise measurement. Everything downstream depends on it.
- Measure the drop from the finished deck surface to your finished landing, at three points across the opening.
- Divide by 7 inches, round to a whole riser count, and subtract one for the treads.
- Confirm the run fits your yard before anything else, or plan a switchback.
- Build the base before you cut, so the bottom of the measurement is where the stairs will actually sit.
- Test-fit one stringer, finish the notch corners by hand, then cut the rest from that template.
Build it in dry weather, keep the fasteners flush, and seal the end grain once the lumber dries. That is the whole job. The staircase will outlast the deck if you respect the math.
