15 Garage Organization Ideas on a Budget (October 2026)
If you have been putting off the garage because the pile in there feels like a project, here is the fix: these 15 garage organization ideas on a budget cost almost nothing, and the first four are free. Most of the work is moving things you no longer use out of the door, then giving what stays a real home.
Garages rarely fail because people own too much. They fail because nothing has an assigned spot, so every trip out there ends with something new on the bench and something old on the floor. Sort first, then spend, in ascending order of cost. Material prices vary a lot by region, so treat every range here as a rough guide rather than a quote.
Contents
Last updated October 2026.
15 Garage Organization Ideas on a Budget at a Glance
Here is the whole list before the detail. Every cost is a realistic US range, and every time assumes one person with basic hand tools unless I say otherwise.
| Idea | Cost | Difficulty | Time |
|---|---|---|---|
| 1. Budget pegboard for hand tools | 25 to 70 dollars | Easy DIY | 2 to 3 hours |
| 2. Shelving above the workbench | 20 to 60 dollars | Easy DIY | 3 to 4 hours |
| 3. Pallet shelving for bulky storage | 0 to 45 dollars | Easy DIY | 3 to 5 hours |
| 4. Vertical bike and gear rack | 40 to 120 dollars | Easy DIY | 2 to 4 hours |
| 5. Overhead ceiling-mounted storage | 120 to 300 dollars | Hire a pro | One day |
| 6. Clear, labeled bins and totes | 40 to 90 dollars | Easy DIY | 3 hours |
| 7. DIY tool caddy | 10 to 35 dollars | Easy DIY | 1 to 2 hours |
| 8. Wall-mounted small bin grid | 20 to 50 dollars | Easy DIY | 2 hours |
| 9. Rolling utility cart | 35 to 80 dollars | No build needed | 20 minutes |
| 10. Corner storage for oversized items | 60 to 200 dollars | Moderate DIY | Weekend |
| 11. Sports and outdoor gear zone | 30 to 80 dollars | Easy DIY | 2 to 3 hours |
| 12. LED shop light upgrade | 40 to 120 dollars | Hire a pro | 2 to 4 hours |
| 13. Charging and electronics shelf | 25 to 70 dollars | Easy DIY | 2 hours |
| 14. Drawer organizers for small parts | 15 to 60 dollars | Easy DIY | 2 hours |
| 15. One-in, one-out system | Free | Easy DIY | 1 hour to set up |
Doing all fifteen lands somewhere between 300 and 900 dollars depending on what you already own and whether you hire anyone. For a broader look at the layout side of things before you start, my [30+ garage workshop layout ideas](https://www.rosenberryrooms.com/garage-workshop-layouts-ideas/) covers the floor plans that make these upgrades land in the right spot.
1. Install Budget Pegboard for Frequently Used Tools
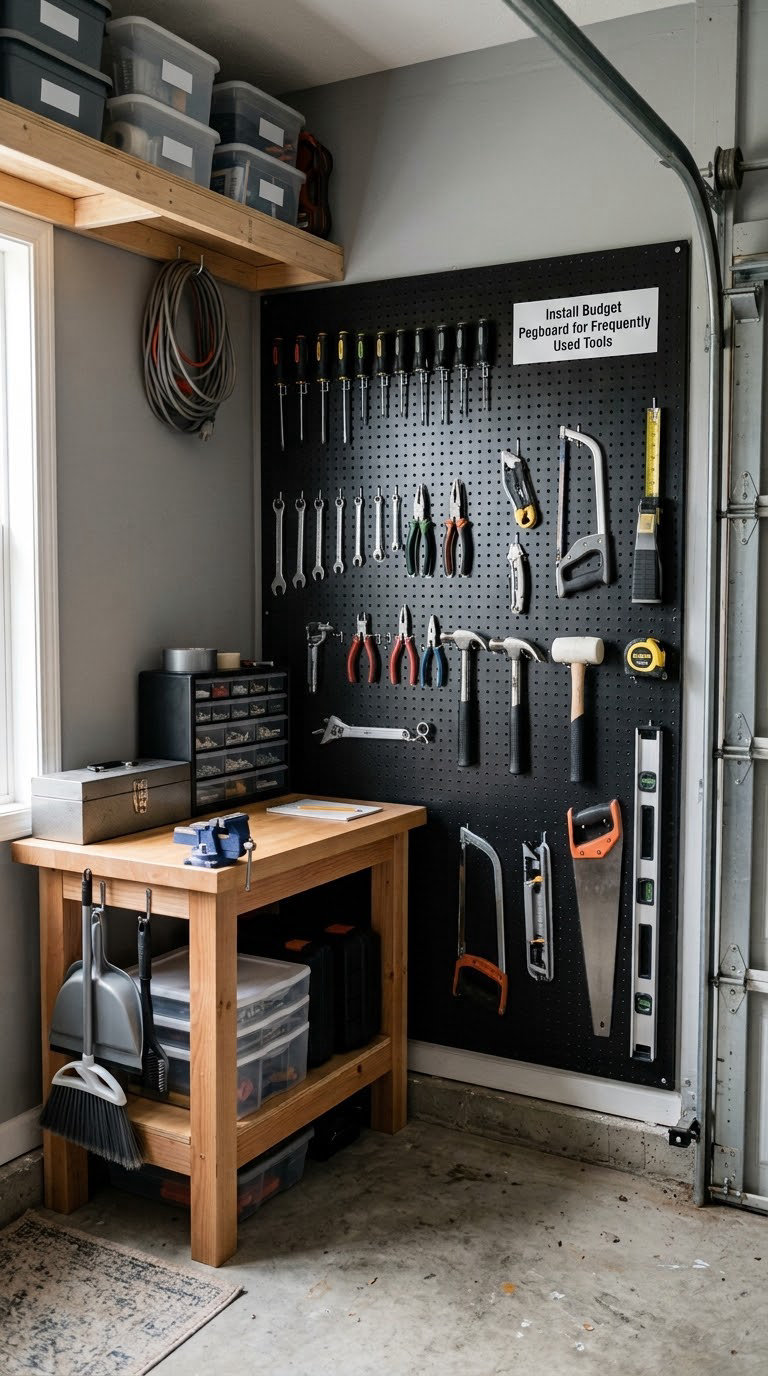
A pegboard turns a blank wall into a tool wall, and it is the cheapest way to get your most-used items off the bench and off the floor. Unlike a slat wall or a track system, pegboard is thin, cheap, and tolerant of a crooked wall.
How to do it: Measure the wall area you want and buy a sheet that matches. Mount it on furring strips, small lengths of 2×4 screwed into studs, so the board stands off the wall about three-quarters of an inch and the holes stay useful. Use pan-head screws with washers, not drywall screws, because a loaded board pulls right out of a hollow wall. Draw the outline of each tool on the board with a silver paint pen before it goes up, so a missing tool leaves a visible ghost. Then add a light and a couple of hooks for the things that do not have holes.
Cost: 25 to 70 dollars for a four-by-eight sheet, furring strips, screws and a can of paint. Difficulty: Easy DIY. Time: 2 to 3 hours plus paint drying, typically two to four hours before you touch it.
Good to know: Painted pegboard needs a scuff-resistant finish, or tool outlines disappear after a season of hooks being pulled out. If you rent and cannot drill, look for a freestanding pegboard panel on casters instead of a wall-mounted one.
How to Install a Budget Pegboard
Start by finding every stud in the run you plan to cover, then mark them on the wall before you cut anything. Cutting a sheet to fit is far easier than forcing it around an outlet, so lay it on the floor first and outline the openings for any outlets or the garage door opener.
Mark horizontal furring strips at 16 inches on center, level them, and fasten them into the studs with 3-inch screws. Screw the board into the strips through a washer so the head sits proud of the surface and hooks still slide in. Check the wall for level before you finish the last screw, because a sagging board under ten hammers will stay sagging for years.
Before painting, mark your tool positions. Draw each tool in place, label it, and leave a margin of about an inch around anything you might replace. That spare room is what keeps the board useful when you buy a bigger clamp next year.
2. Add Shelving Above the Workbench
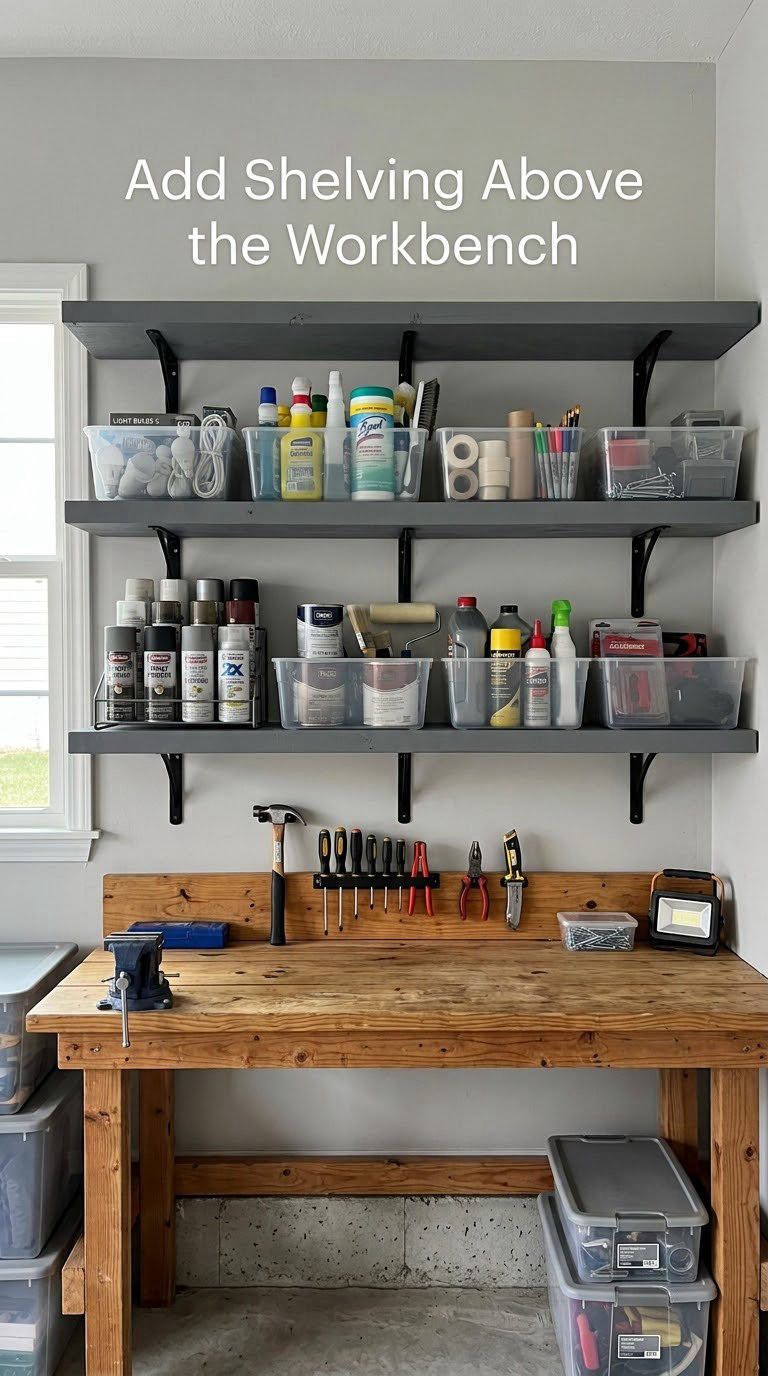
The band of wall between the top of your workbench and the ceiling is the most wasted square footage in most garages. Wall-mounted shelving there keeps paint, cleaners, sealants and paper towels one reach away without stealing floor space from the car.
How to do it: Run a 2×4 ledger into the studs at 16 inches on center where the shelves will sit. Cantilever the shelf boards off the ledger with joist hangers or angle brackets, spacing them so you have about 12 inches of clearance for a paint can. Keep the heaviest items, like gallon containers of solvent and stacked lumber, on the lowest shelf; a gallon weighs close to nine pounds and the top shelf should not be where it lands. Spacing of 18 to 24 inches between shelves works better than stacking them tight, because you need finger room to pull a bin out.
Cost: 20 to 60 dollars using a single sheet of plywood cut into two shelves plus a ledger and brackets. Difficulty: Easy DIY. Time: 3 to 4 hours.
Good to know: Shelf depth beyond 16 inches is wasted space in most garages, since you need your hand on the back of a can to lift it out. Paint and chemical storage stays a real concern, so keep anything flammable on a shelf where a spill cannot reach a pilot light or a charging battery.
3. Use Pallet Shelving for Large Storage
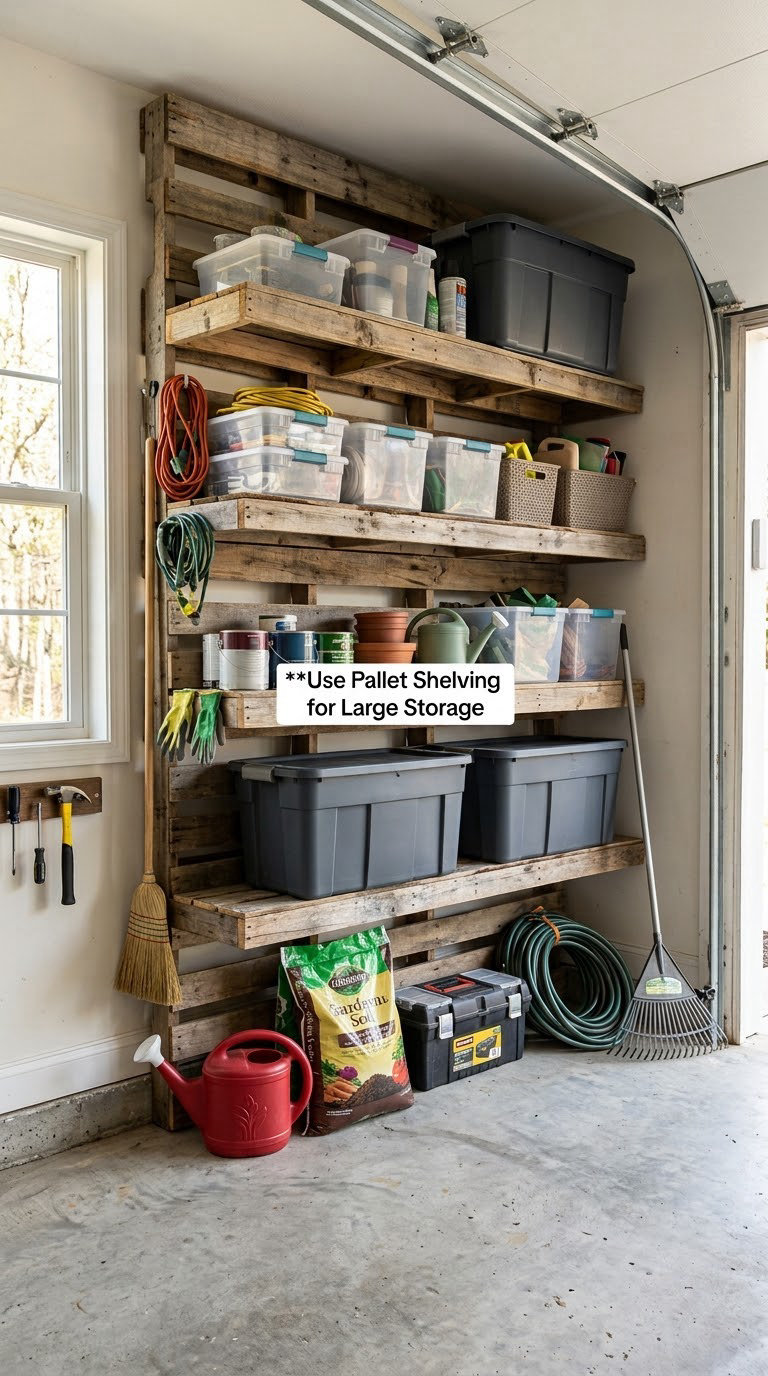
Wood pallets turned upright into shelving is the cheapest way to get big loads of bulky stuff off the floor. Two pallets and a few screws make a bay that will hold totes of holiday decor, camping gear or bagged garden soil.
How to do it: Look for pallets with three stringers or four stringers rather than block pallets, and skip any that smell strongly of chemicals or show soft, crumbly wood. Stand a pair of pallets upright, end to end, with the open sides facing each other, and cut each stringer down to 3.5 inches tall with a circular saw. Screw the shortened stringers to the pallet deck with 2.5-inch deck screws, which hold far better than nails in end grain. Set the base on a 2×4 on the floor so the top surface sits level and you can slide bins under. Check level on both ends before you load it.
Cost: Free to 45 dollars. Difficulty: Easy DIY. Time: 3 to 5 hours for two bays with a circular saw.
Good to know: Wood pallets are the one budget shelf that will sag if you overfill the middle bay, so keep weight toward the ends and stack heavy bins on the bottom. If you would rather buy, [premium garage cabinet organization systems with workbenches](https://www.rosenberryrooms.com/best-premium-garage-cabinet-organization-systems-with-workbenches/) is where to look when you want closed storage that hides dust.
4. Create a Vertical Bike and Sports Gear Rack
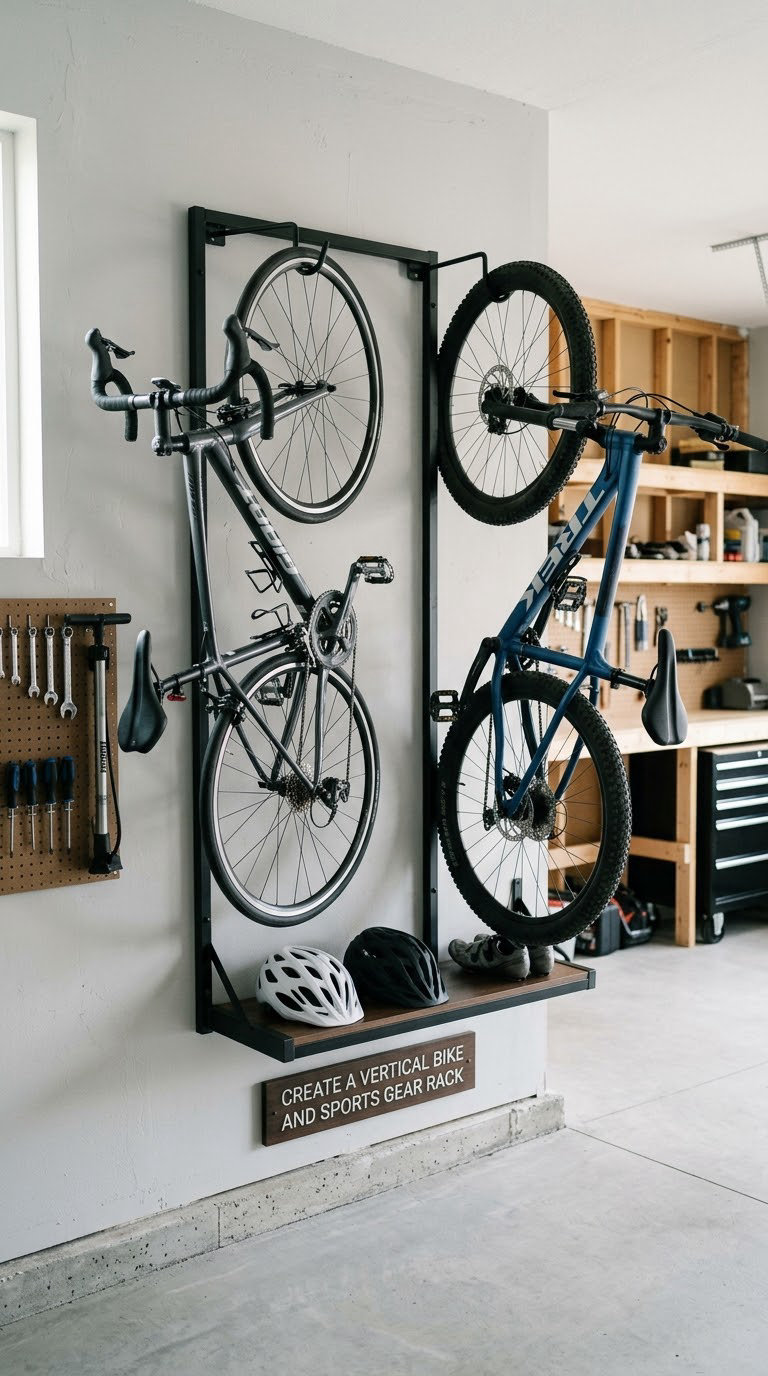
Bikes take up more floor than anything else in a two-bike garage, and most of that space is unusable because you have to walk around them. A vertical rack or a set of ceiling hooks gives each bike a wall of its own and frees a strip of concrete you can actually park against.
How to do it: For a wall-mounted vertical rack, bolt it into studs spaced 16 inches apart and keep the lowest hook around 18 inches off the floor so the front tire clears without scraping. For ceiling hooks, find a joist with a stud finder and lag it into the wood, then add a 2×4 between hooks so several bikes share the load instead of one. Hang bikes by the front wheel with the fork supported, and put the heavier bikes on the inside position nearest the wall. Follow the same pattern for skis, snowboards and a ladder, which most people store leaning where somebody eventually walks into it.
Cost: 40 to 120 dollars for a two-bike rack, less if you build from 2×4 and heavy hooks. Difficulty: Easy DIY. Time: 2 to 4 hours.
Good to know: Full suspension bikes and e-bikes are heavier than the weight rating on most racks, so check the rating before you buy and test it with one bike before you hang two.
5. Add Overhead Ceiling-Mounted Storage
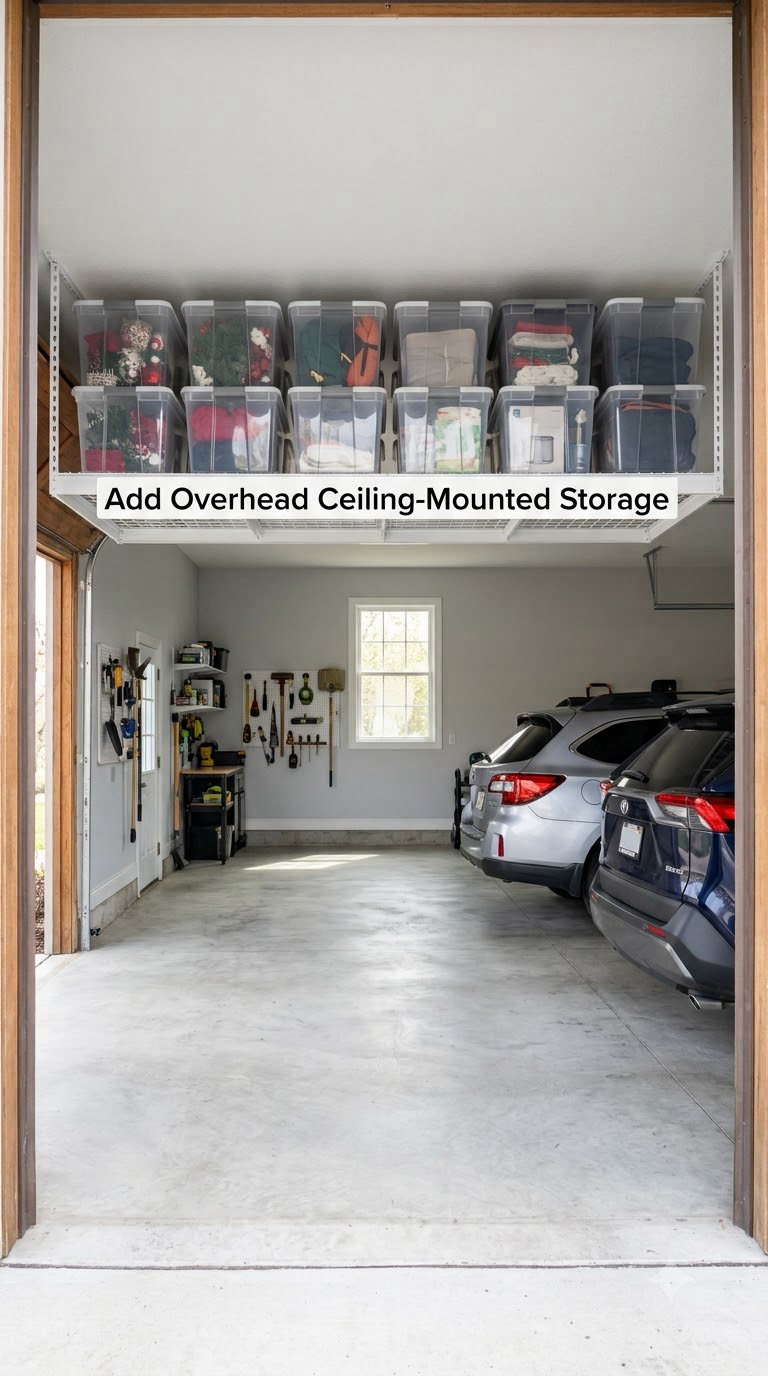
Overhead racks are the highest-impact change you can make to a garage and also the one most likely to need a second pair of hands. They reclaim the entire ceiling plane for seasonal bins, leaving the floor free for the car, the mower and the wheelbarrow.
How to do it: Choose an adjustable rack rated for the weight you intend and mount it to the bottom flange of the ceiling joists, never to drywall. Aim for a 12-inch clearance above the highest point of your vehicle. Distribute the load across at least four joists and keep the heaviest bins directly over the joists rather than between them. Drive the lag screws from underneath through the hanger flange, and add a washer plus a nut where the joist depth allows it.
Cost: 120 to 300 dollars for the rack and hardware, which is the single most expensive item on this list. Difficulty: Hire a pro if you are not comfortable overhead, otherwise moderate DIY with a second person. Time: One day including a ladder and a helper.
Good to know: Homeowners on forums report pulley shelving is a two-person job and rarely cheaper once you count the hardware and the time, so buy it installed or skip it. Whatever you park up there, write it on the side of the bin, because a bin on the ceiling is the item you will forget.
6. Use Clear, Labeled Bins and Transparent Totes
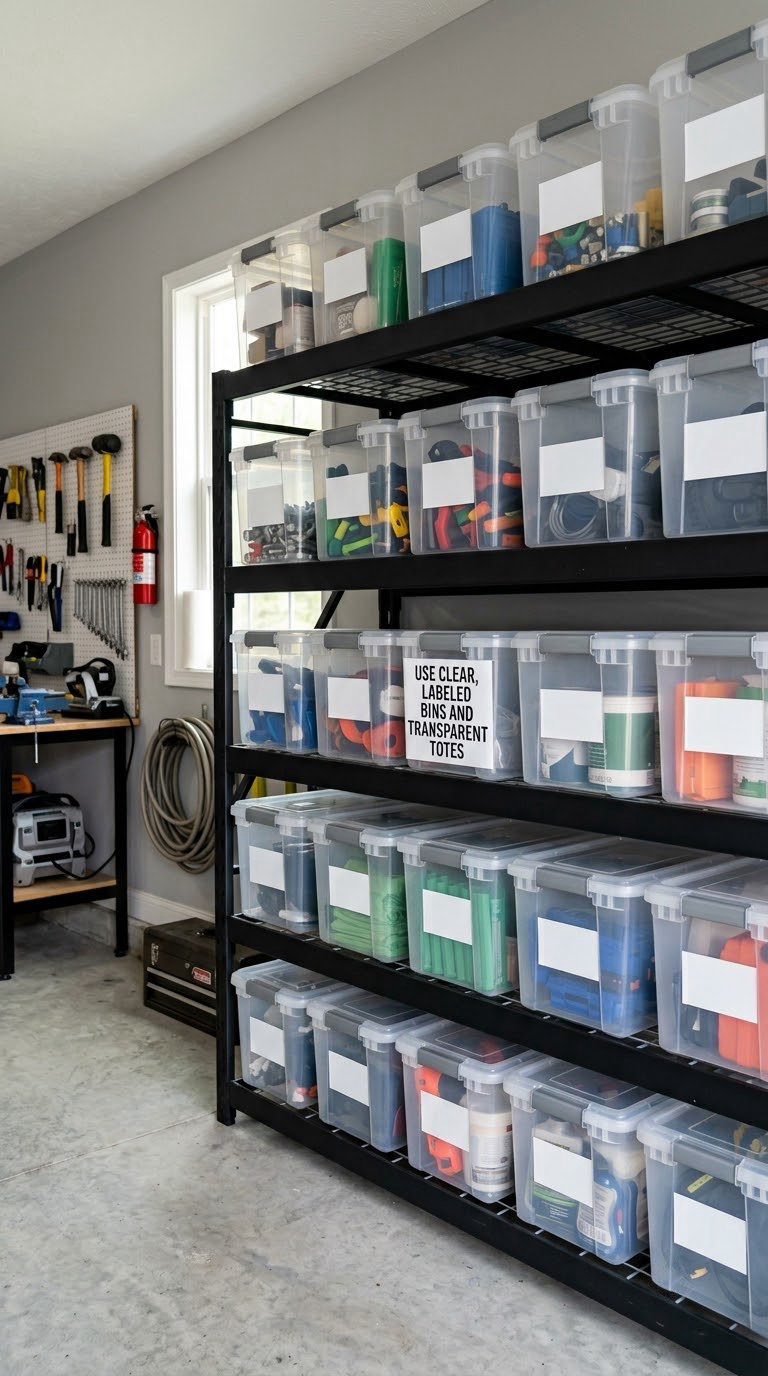
Bins are not organization on their own. Empty identical containers stacked in a corner is storage. What makes it work is matching lids, consistent labels, and a rule that everything in a bin is the same kind of thing.
How to do it: Buy one bin size per category and resist mixing. Small hardware does not need the same tote as Christmas decorations. Print labels on adhesive sheets rather than masking tape, because tape falls off in a cold garage within a season. Label three sides, including the front and one long side, so you can read the bin no matter how it is turned. Fill each bin to about three-quarters full so nothing gets buried, and keep a matching lid order at the bottom of the stack.
Cost: 40 to 90 dollars for a stack of eight to ten totes plus a sheet of labels. Difficulty: Easy DIY. Time: About 3 hours, most of it filling and labeling.
Good to know: Clear versus opaque is a real disagreement. People organizing for a garage that passersby see every day often choose opaque bins because the garage stops advertising its clutter. Whichever you pick, stack lids on and never stack a bin taller than about shoulder height.
7. Build a Simple DIY Tool Caddy
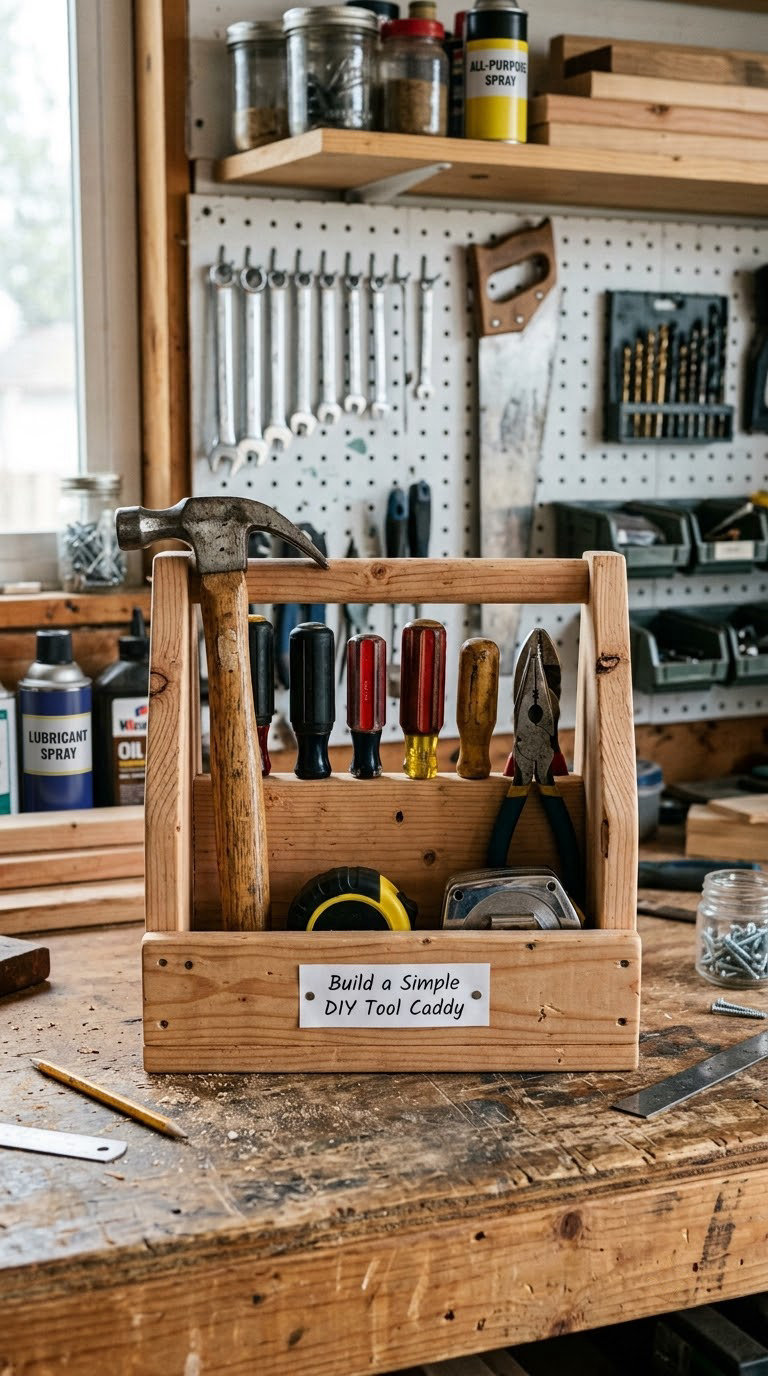
A tool caddy solves a different problem from a tool wall. A wall holds the tools you use once a week; a caddy holds the tools you grab mid-project when you do not want to stop and walk to the wall.
How to do it: Cut the sides and ends from a half-inch sheet of plywood, glue and screw a bottom in, then add a handle from a length of 2×4 turned on edge. Drill a row of holes an inch down from the rim and add a dowel rail, so screwdrivers and pliers hang inside instead of lying flat. Line the bottom with a scrap of rubber shelf liner so parts do not skate around on the drive home. Make two, one for fasteners and one for hand tools.
Cost: 10 to 35 dollars in plywood, screws and handle stock. Difficulty: Easy DIY. Time: 1 to 2 hours after a first cut.
Good to know: Keep the caddy sized so it clears the underside of your workbench top when pushed in, which usually means under 6 inches tall. A shallow caddy on a shelf within arm reach of the bench is the version people actually keep using.
8. Install Wall-Mounted Storage Bins
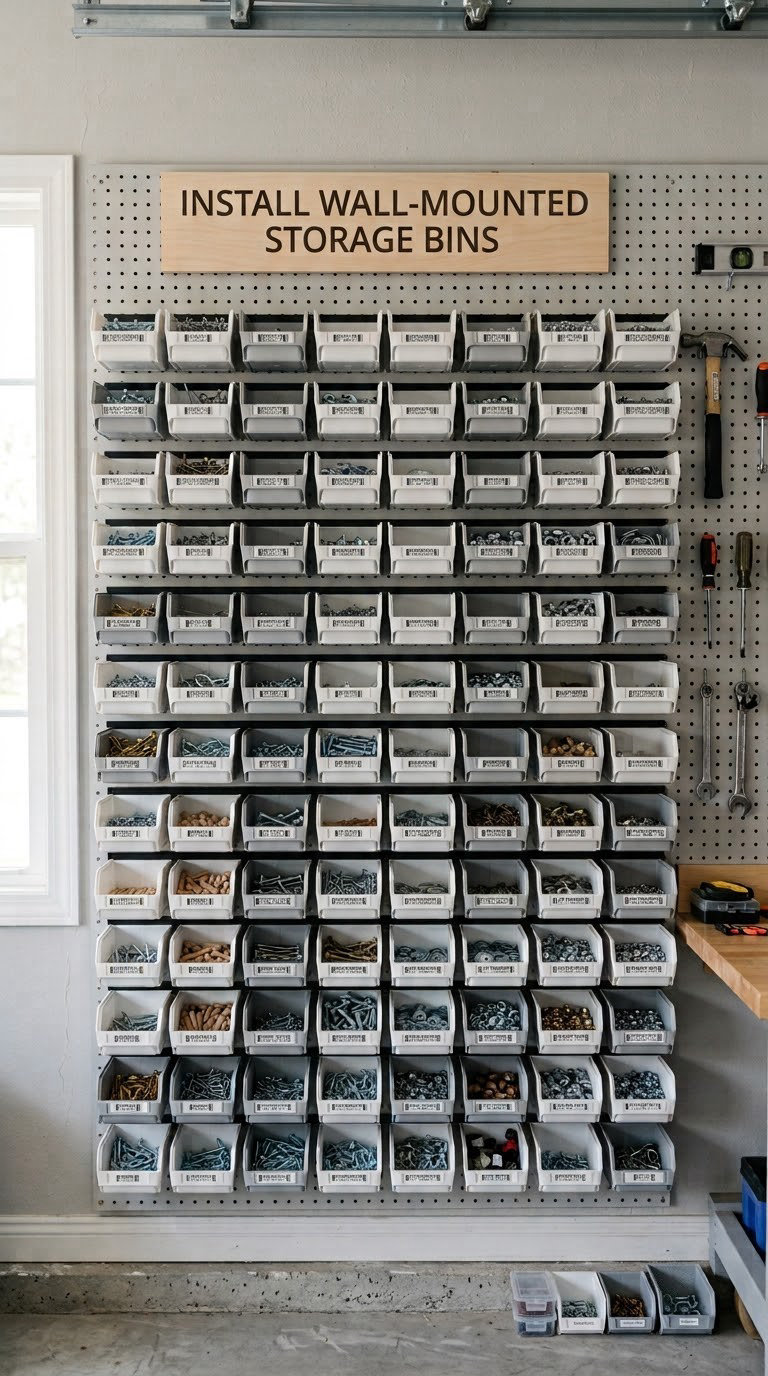
Loose screws, nails, washers and wall anchors are the items that end up in kitchen junk drawers and are never found again. A grid of small wall bins gives each category a permanent, visible home.
How to do it: Get a steel wall-bin rail system rather than individual clip-on bins, since the rail lets you swap positions later. Mount the rail into studs and space it so the bins sit between shoulder and eye height, which is where your hand naturally goes. Use magnetic label holders on the front of each bin rather than stickers on the bottom edge. Sort into what you actually reach for: wood screws, masonry anchors, nails, hooks and hangers, and a small bin for the odd loose washer you will swear you need next year.
Cost: 20 to 50 dollars for a rail set plus six to ten bins. Difficulty: Easy DIY. Time: 2 hours.
Good to know: Put a magnetic strip on the workbench wall for the tools you grab constantly and leave the bins for consumables. That split is what stops the bin grid from becoming the place everything ends up again.
9. Add a Rolling Utility Cart
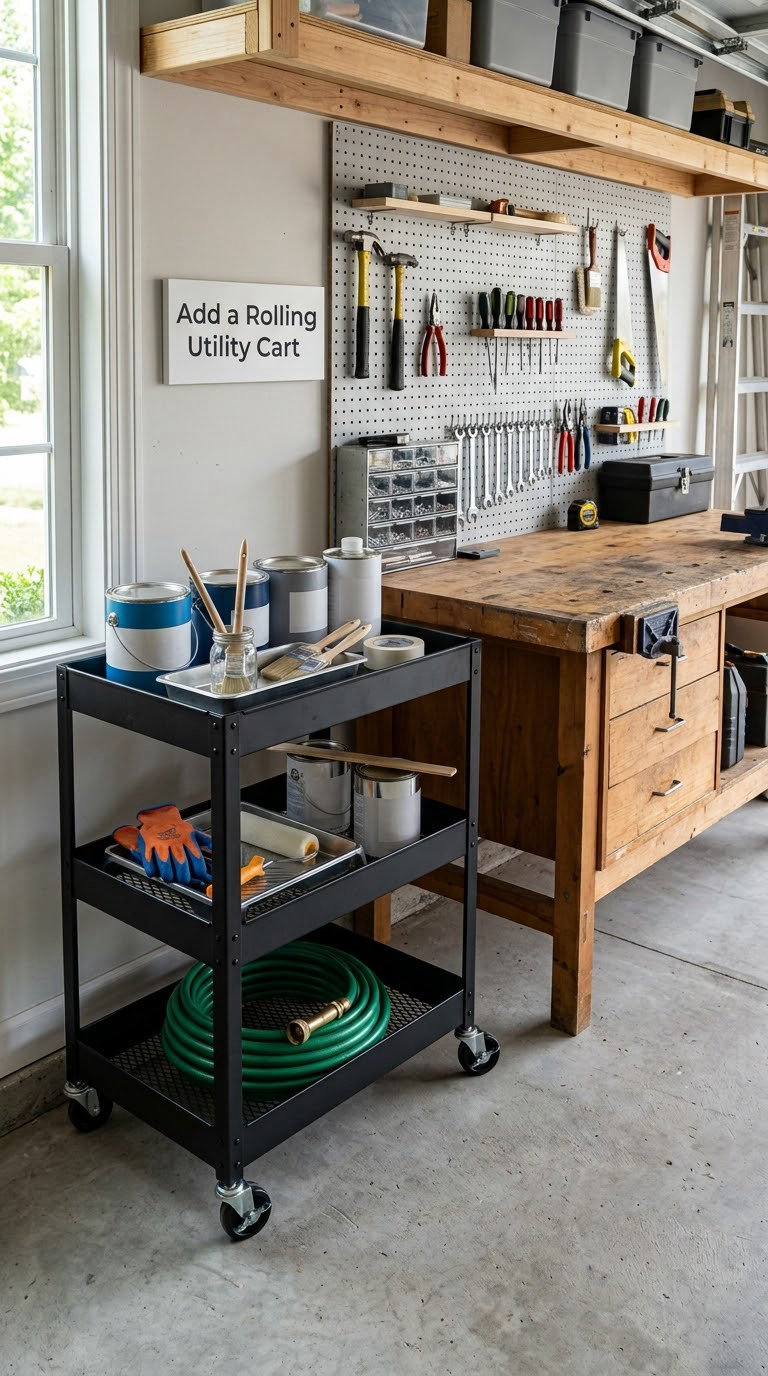
A utility cart is the cheapest way to get a project from the back wall to the car door without a second trip. It also gives you a defined staging surface, so supplies for one job stay together instead of spreading across the bench.
How to do it: Pick a cart with a lip around the top tray so paint cans and bottles do not slide off when you cross the driveway. Two trays is more useful than one, with the heavy items on the lower. Load it per project, then wheel it back to a wall hook or a corner when the job is done. For a DIY version, casters from a hardware store on a plywood frame work fine, but build the handle tall enough to push rather than pull.
Cost: 35 to 80 dollars, or about 25 dollars for a homemade two-tier plywood version. Difficulty: No build needed. Time: 20 minutes.
Good to know: Store paint and solvents on the lower tray so a tip does not put a can at head height. Wipe the tray monthly, because a sticky cart turns into a mobile junk drawer within about two months.
10. Use Corner Storage for Oversized Items
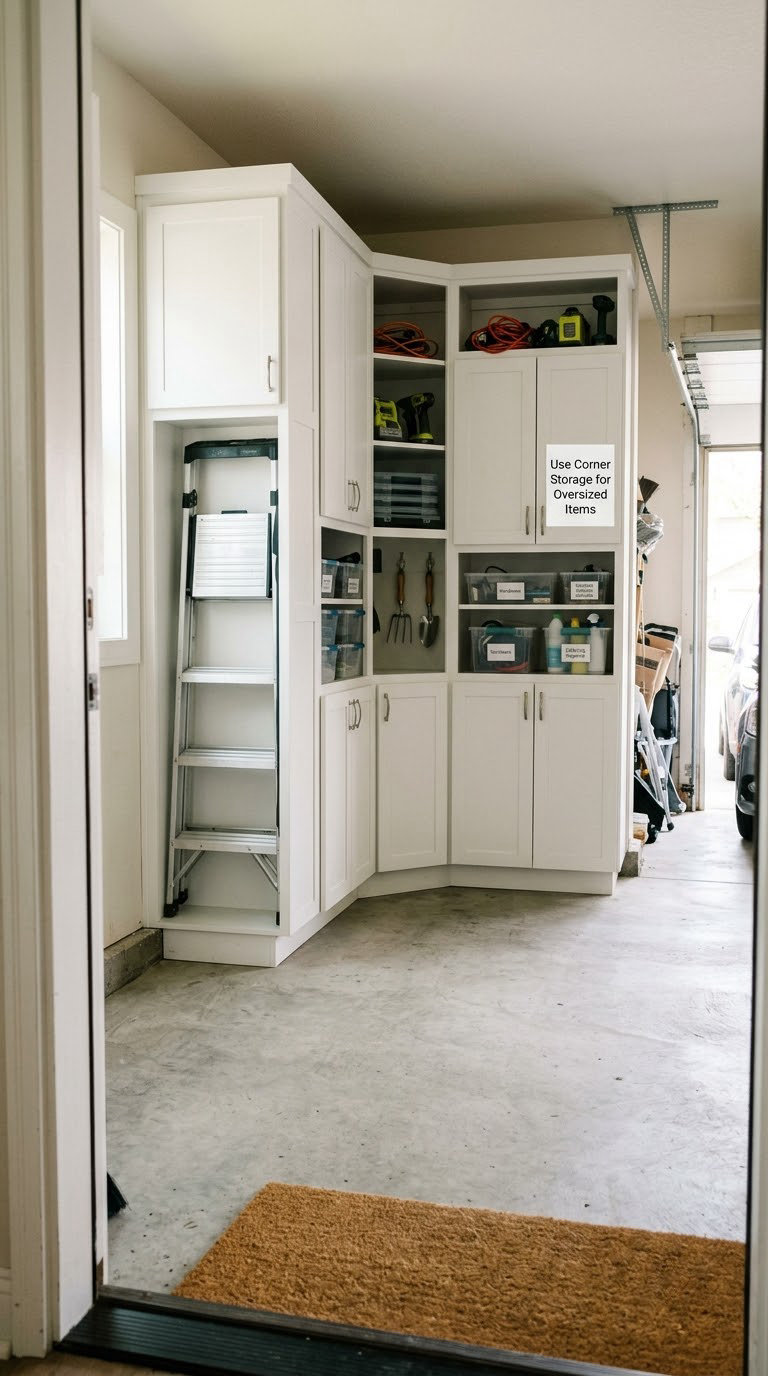
Corners are dead space by design. Nothing sits in them without something custom-built or consciously placed, which makes them ideal for the awkward, oversized, rarely-used items that block everything else.
How to do it: For the vertical corner solution, cut two triangular shelf panels from plywood and stack them on a slim base, which turns an 8-foot corner into four or five tiers. For ladder storage, run two horizontal cleats between studs and lay the ladder across them so the rails, not the rungs, take the weight. Measure the corner diagonally before you build anything, because square corners in older garages are rarely square.
Cost: 60 to 200 dollars. Difficulty: Moderate DIY. Time: A weekend for a built corner unit.
Good to know: Round trash cans are the reason people end up with a blocked corner in the first place. Switching to square or rectangular cans with straight sides lets them stack against a wall, which matters in a one-car garage where a few inches decide whether the car door clears the bin.
11. Create a Dedicated Sports and Outdoor Gear Zone
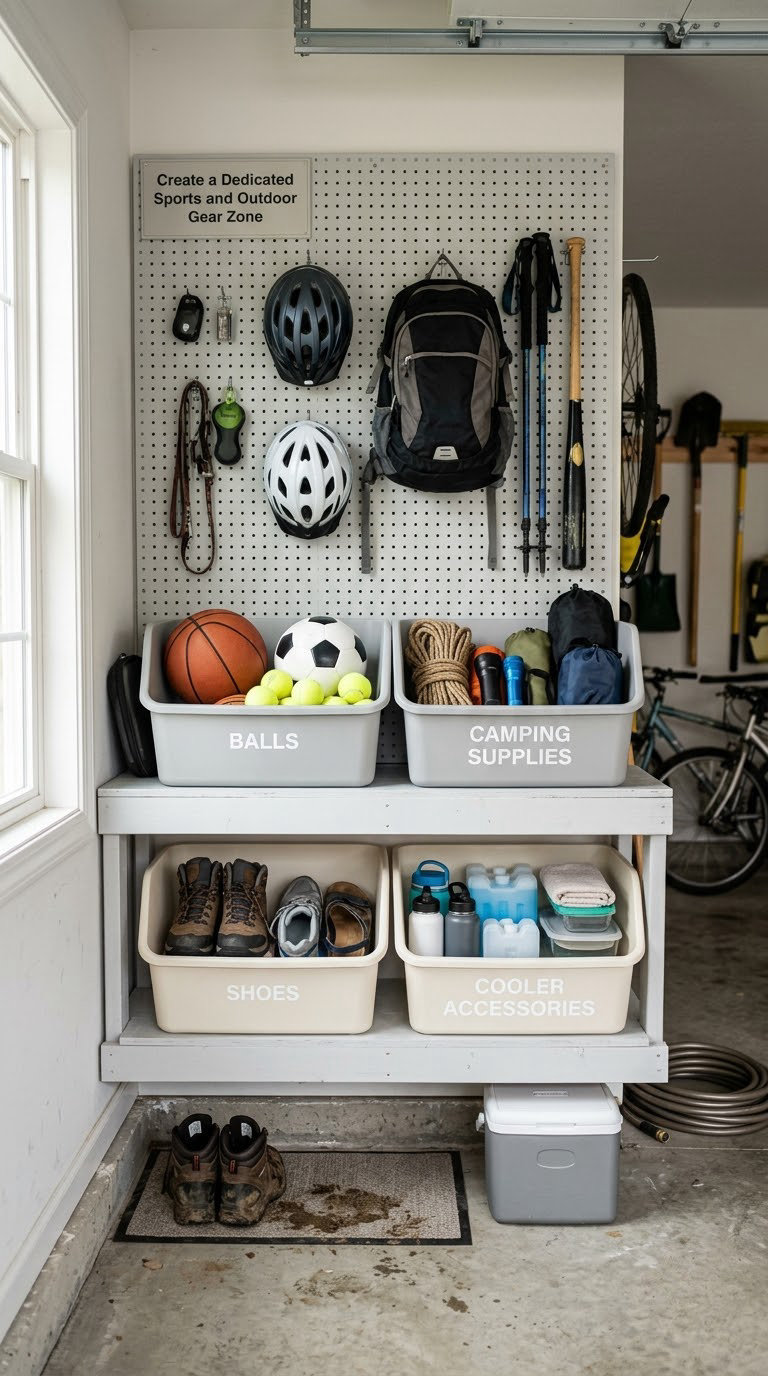
Sports gear migrates into the house because the return trip to the garage is too many steps. Putting it in one zone near the door people already walk through fixes the behavior problem that storage alone never does.
How to do it: Pick the wall closest to the door that leads into the house and give it to gear, not paint. Add one low open bin per category, since kids will use an open bin and ignore a lidded one. Give muddy shoes their own shelf with a lip so grit stays contained, and hang helmets on hooks at kid height rather than adult height. Keep the whole zone within a single step of the door; that single step is the difference between gear that comes back inside and gear that stays out.
Cost: 30 to 80 dollars for bins, a shelf board and hooks. Difficulty: Easy DIY. Time: 2 to 3 hours.
Good to know: Back-to-college season in late summer is when basic plastic bins are cheapest and most color options show up, which makes it a good time to stock up. Sort balls, camping gear and shoes separately, because a bin of mixed gear is a bin nobody wants to dig through.
12. Upgrade Lighting with LED Shop Lights
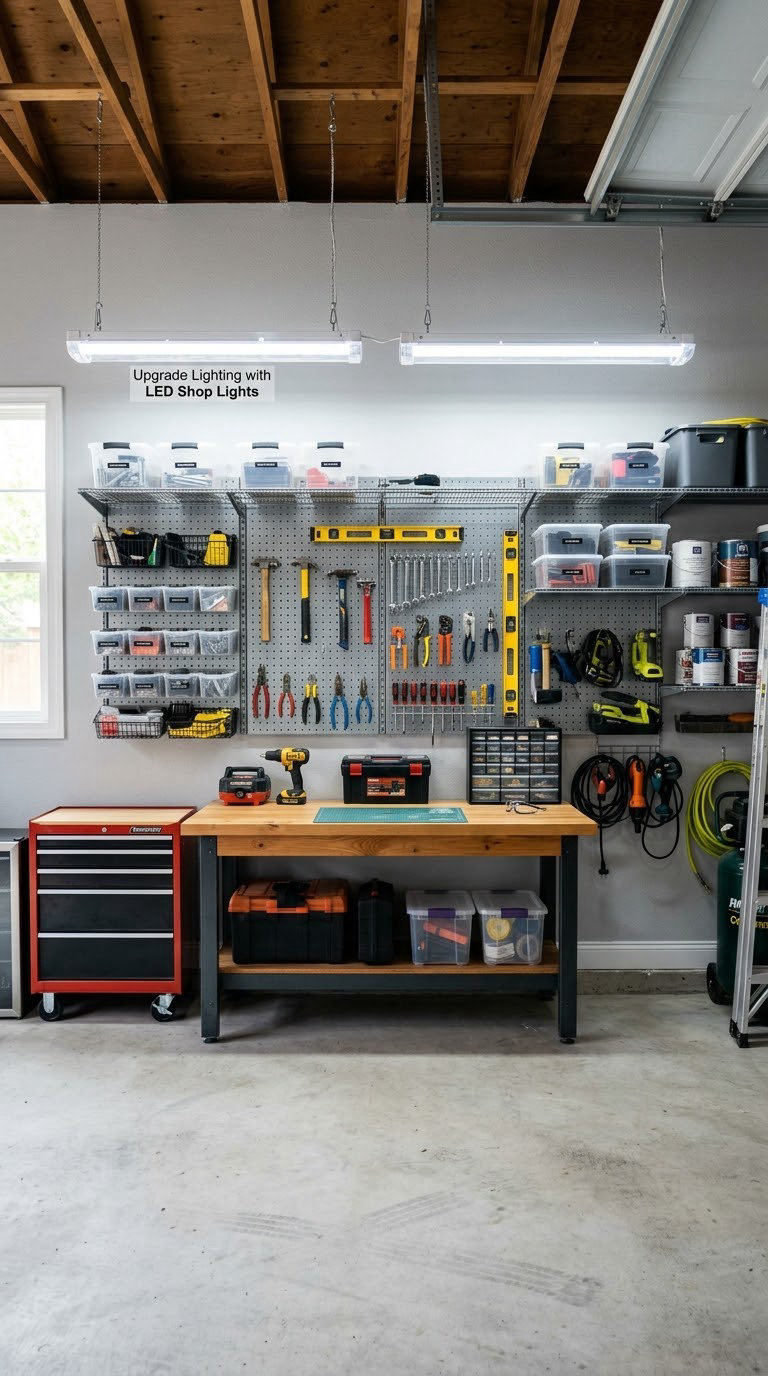
No storage system feels finished in a garage you dread walking into. Brighter light does two things at once: it makes the space work harder at night, and it makes you far more willing to put things back after dark.
How to do it: Replace a single bare bulb with two or four 4-foot LED shop fixtures mounted parallel to the joists, spaced about 6 feet apart across the width of the garage. Mount them to the framing with the supplied brackets, not to the drywall. Electrical work in a garage involves wiring a new fixture in a damp location, so use fittings rated for that and follow your local permit rules; if you are not comfortable with the junction box, this is the one item on this list worth handing to a licensed electrician.
Cost: 40 to 120 dollars for the fixtures, or about 60 dollars for an electrician’s labour on top. Difficulty: Hire a pro for the wiring. Time: 2 to 4 hours including the electrician.
Good to know: Clean the diffuser and the bulbs before you replace anything, because a dirty fixture loses a surprising amount of output. Painting the ceiling and joists bright white before you swap in the new lights roughly doubles how much light reaches the floor.
13. Add a Simple Charging and Electronics Shelf
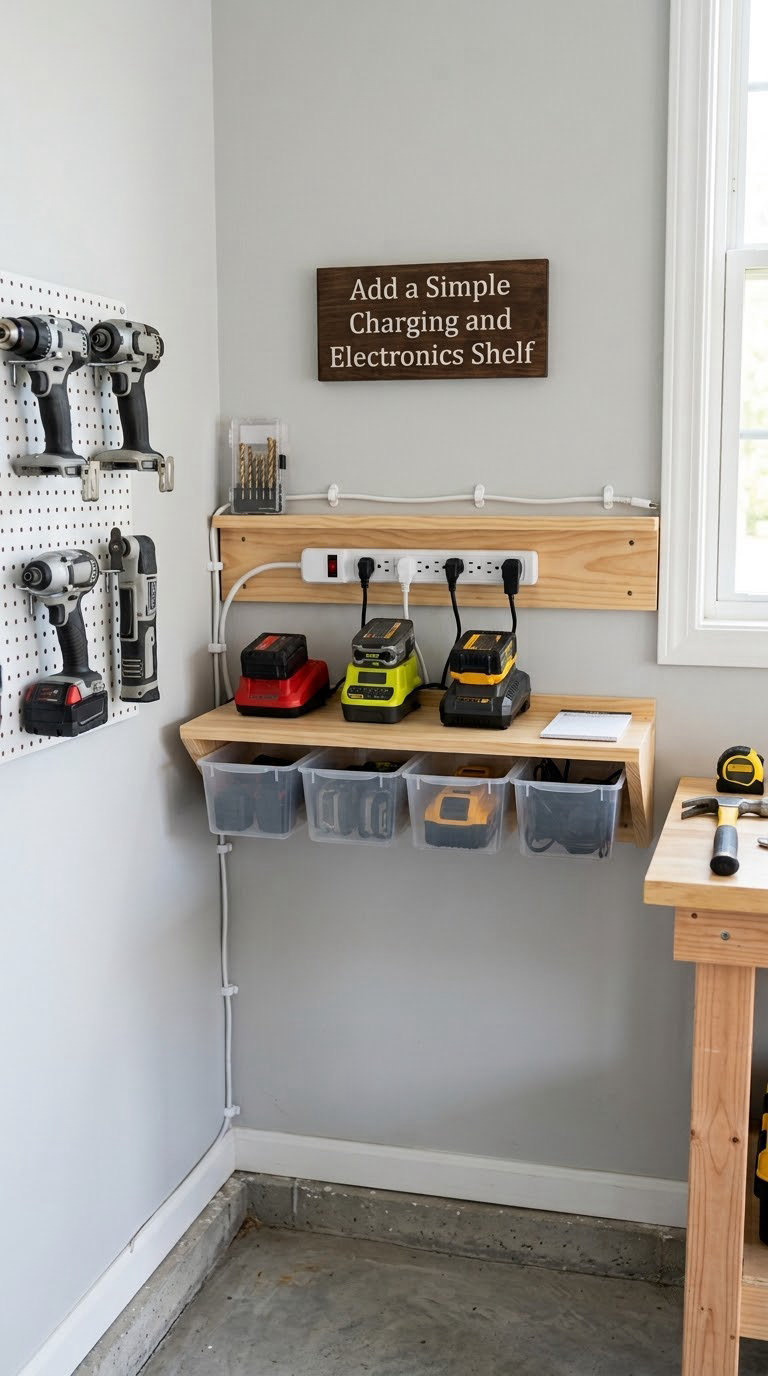
Cordless tool batteries, chargers and garage sensors need one home, and that home should not be the middle of the workbench. A shallow shelf with a power strip and a few cord clips keeps chargers plugged in and off your project surface.
How to do it: Install a shelf at about waist height near the bench, not above head height, since batteries are heavy and you want to grab them without a ladder. Mount a strip-style power strip to the underside of the shelf so the plugs do not dangle. Run the cords up the wall through adhesive cord clips every 12 inches or a flexible conduit sleeve, then coil the slack and zip it. Label one bin for charged batteries and one for spares, so you stop testing batteries mid-project.
Cost: 25 to 70 dollars. Difficulty: Easy DIY. Time: 2 hours.
Good to know: Keep the shelf clear of anything combustible and off the floor, where a damp slab can reach a charger. If you add a garage door opener or camera later, plan the shelf near an existing outlet rather than running a new cord across the floor.
14. Use Drawer Organizers for Small Parts
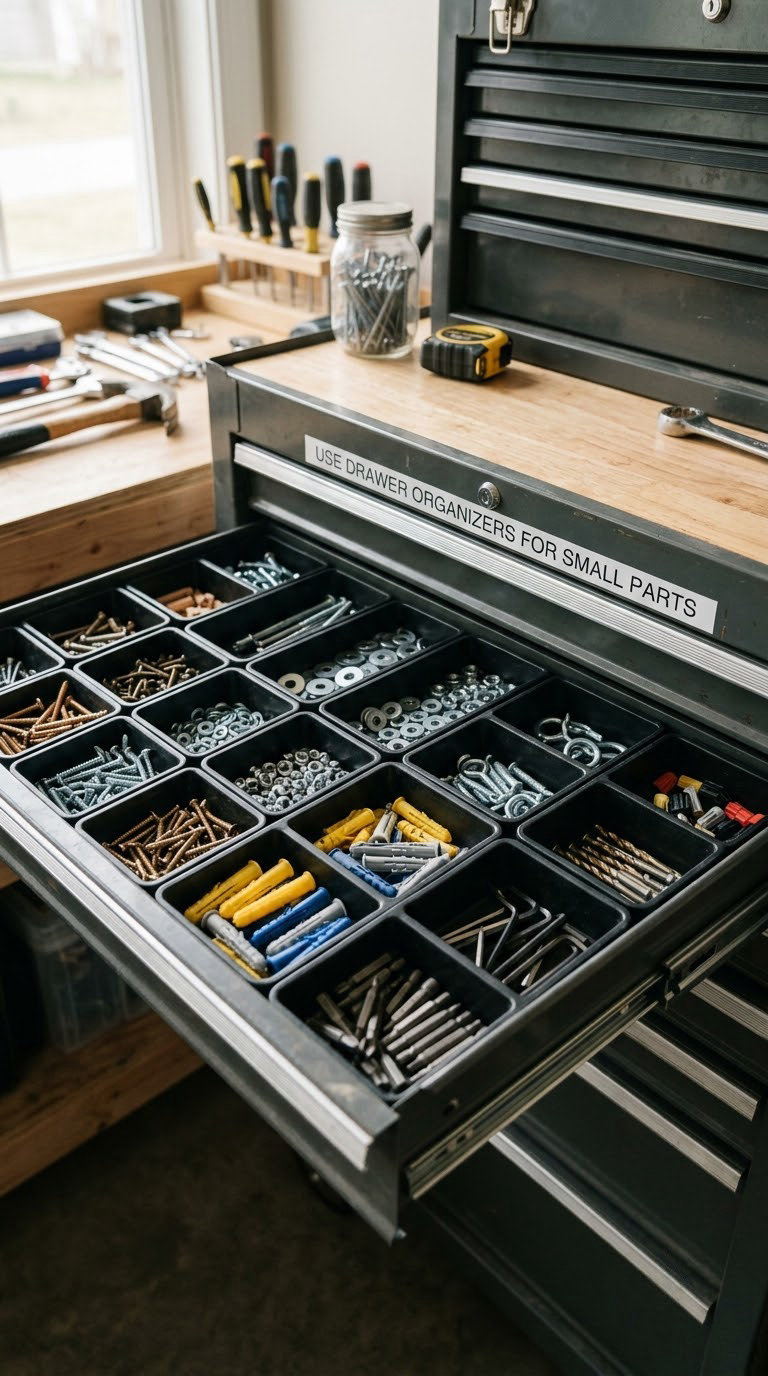
Divided trays solve the problem nobody sees until it is 9pm and you are looking for a specific washer. They also turn the back of the workbench into usable storage instead of a surface.
How to do it: Buy adjustable trays rather than a fixed set, so the dividers can be moved as your mix of hardware changes. Pick one drawer for fasteners and one for electrical, and keep them separate, since a 1-inch wood screw and a wall plug in the same tray is a small accident waiting to happen. For a cheap version, sectioned lunch containers or old cutlery trays work nearly as well. Fill the smallest compartment with washers and nuts, which otherwise disappear into every other box.
Cost: 15 to 60 dollars for two drawer organizers and a small magnetic tray. Difficulty: Easy DIY. Time: 2 hours to sort and place.
Good to know: Secondhand metal lockers from an auction or a used-equipment seller are a cheap way to get proper drawers with real weight capacity, and they double as a cabinet. Skip plastic shelving entirely if you have ever watched a plastic unit bow under stacked totes.
15. Establish a One-In, One-Out Garage System
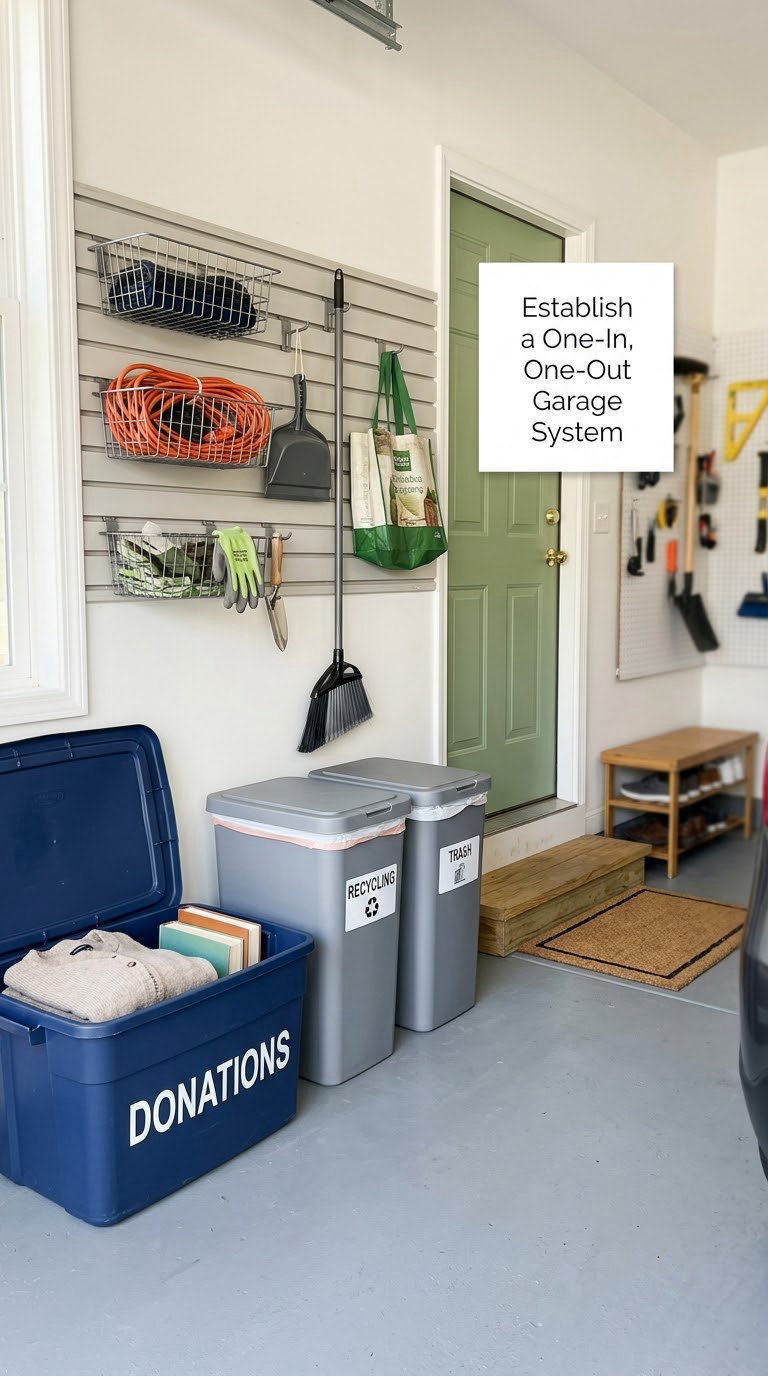
This is the idea that keeps the other fourteen working. Storage systems fail from intake, not from bad hardware, and the cheapest fix is a rule about what is allowed to come in.
How to do it: Set a concrete trigger: the next new bin, pair of boots or piece of equipment means one existing item leaves. Keep a clearly marked donation bin near the door and an empty spot beside it so both stay available. Do a ten-minute reset once a week, putting back the four or five things that drifted out rather than doing a whole weekend clean again. When something has sat in the donation bin untouched for sixty days, take it out of the garage.
Cost: Free. Difficulty: Easy DIY. Time: One hour to set up, ten minutes a week after that.
Good to know: Buying storage before decluttering is the most common way people end up with a garage full of empty bins. Zone and purge first, then buy, and you will usually discover you need half the containers you thought you did.
Planning Tips
A few things that decide whether these upgrades actually pay off, gathered from the mistakes people most often regret. The same clear-out-first logic applies indoors too, and my [simple room makeover strategies](https://www.rosenberryrooms.com/simple-strategies-for-a-room-makeover/) work through it room by room.
- Measure before you buy anything. Tape the areas on the floor where your shelves will go, and note joist spacing by driving a nail into the ceiling in several places. A 4-foot shelf that lands between joists will need its own supports.
- Check load ratings against real weight. A gallon of paint is close to nine pounds, and a tote of seasonal decor can pass forty. Match the rating on the shelf to the heaviest thing you plan to store there, not the lightest.
- Work in ascending cost order. Free fixes first, then under-25 dollar fixes, then shelving, then anything overhead. Doing it in this order means you are not holding an empty wall waiting for a bin to fill it.
- Clean and paint before you install. A degreased, patched, painted surface is the cheapest upgrade there is, and it is much easier to do with an empty garage than around installed shelves.
- Keep a 10 to 15 percent budget buffer. Drywall repair, a stud you hit, a level you did not own. That buffer covers the small surprises that turn a two-hour job into a Sunday.
- Do not improvise around electricity, gas or fire load. Anything involving new wiring or a heater follows local permit rules and belongs with a licensed tradesperson. Store flammables away from chargers and heat sources, and never block an exit.
- Renting or cannot drill? Use freestanding shelving on casters, over-door hook racks, tension-mounted pole systems and adhesive-rated bins. Keep everything removable and you will not owe anyone a wall patch.
Frequently Asked Questions
What is the cheapest way to organize a garage?
Decluttering is the cheapest way to organize a garage, and it costs nothing. Sort everything into keep, sell and donate piles over one or two weekends, then walk your daily items to the door and decide what is truly rare. Zoning the remaining items before you buy a single shelf usually means you need half the storage you thought you needed.
How can I organize a garage with no shelving?
Without any shelves, lean on vertical and hanging solutions. J-hook hooks or a French cleat strip hold ladders, brooms and yard tools, wall-mounted hooks carry bikes and helmets, and labeled bins stack directly on the floor against a wall in one neat column. Building storage from pallets or a ledger board with brackets costs very little and creates shelf space anyway.
What storage is best for a small garage?
In a small garage, the floor is the scarcest resource, so wall-mounted and overhead storage win over floor units. Narrow shelving 12 to 16 inches deep against one wall, a pegboard on the side wall, and vertical bike storage usually return more usable space than a wide shelving run. Put daily items between knee and shoulder height and seasonal items above that.
Are overhead garage racks safe for everyday storage?
They are safe when they are correctly mounted and loaded. Bolt the rack into the ceiling joists, not drywall, keep at least a 12-inch clearance above your vehicle, and place heavy bins over the joists rather than between them. Check the rating before you load it, and consider hiring an installer if you are not confident working overhead.
How do I organize a garage before selling it?
Empty it completely. Most buyers discount a garage for clutter far more than for missing storage, so pull everything to the driveway, sort what stays with the house, and donate the rest in the two weeks before the listing goes live. Sweep the floor, wipe the walls, and photograph the empty space so the listing shows what the buyer could have.
Can I install garage storage in a rented garage?
Yes, if everything is removable. Freestanding shelving on casters, over-door racks, tension poles for brooms and adhesive bins leave the walls untouched, which matters when you may need to restore the space before you move out. Photograph the walls before you start and check your lease, since some shared garages and HOAs restrict what can be stored or attached.
Where to Start This Weekend
Do not start with the pegboard. Start by emptying one wall completely, sorting what you keep, and mapping which of these 15 ideas serves that wall.
Over three weekends, work in cost order: first the free work of purging, zoning and clearing floor space, then the cheap fixes like hooks, a tool caddy and labeled bins, and only then shelving and lighting. People who go in that order rarely need more than a few hundred dollars, because the first weekend shows you exactly what is still missing after everything else is gone.