
How to Replace a Bathroom Vanity: Easy DIY Guide 2026
Replacing a bathroom vanity is one of those projects that looks bigger on Instagram than it really is. Most homeowners with a basic toolbox can pull the old cabinet out, set a new one in place, and have the faucet running again by the end of a Saturday. The catch is the plumbing, and a slow leak you don’t catch on day one can cost you a ceiling repair six months later. This walkthrough covers every step, from shutting off the water to testing the new connections, so you can finish the job clean, level, and leak-free.
Time: 4-6 hours for a first-timer, 2-3 hours if you’ve done one before. Cost: Varies by vanity and faucet selection; budget for the new cabinet, top, faucet, supply lines, and a few consumables if you don’t already own them. Difficulty: Moderate DIY. Skill level: Comfortable with a drill, level, and adjustable wrench.
Contents
Tools and Materials
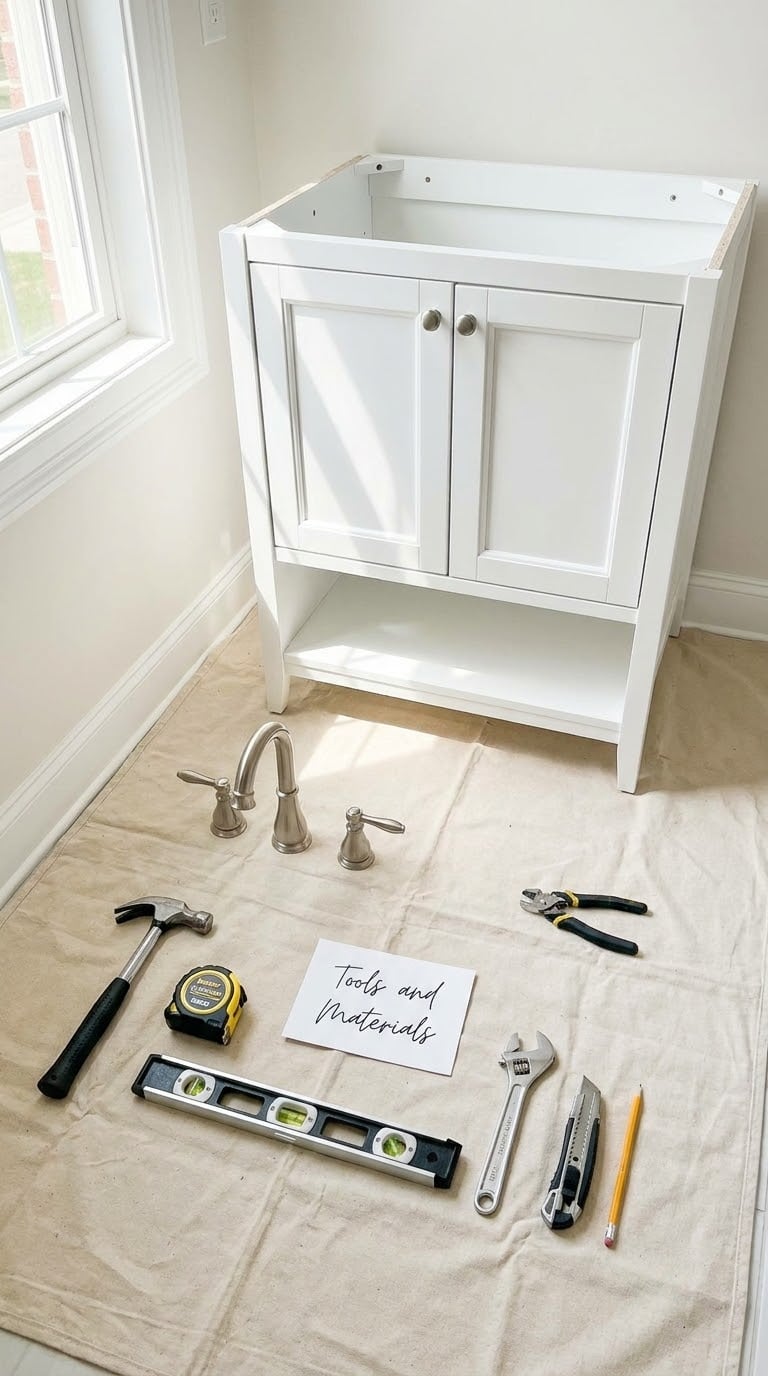
Gather these before you start, so you’re not running to the hardware store with the water shut off.
Tools
- Basin wrench (10 inch reach works for most P-traps and supply nuts)
- Adjustable wrench, 8 inch and 10 inch
- Utility knife with fresh blades
- Pry bar, 12 inch
- Drill/driver with 1/8 inch and 3/16 inch bits
- 24 inch level
- Tape measure
- Stud finder
- Putty knife, 1.5 inch
- Bucket, 2 gallon
- Old towels or a drop cloth
- Safety glasses and work gloves
Materials
- New vanity and top set (verify rough-in height and width)
- Supply lines, 3/8 inch compression, braided stainless, 20 inch length (2)
- P-trap assembly, 1.5 inch, with slip joint (only if old one won’t align)
- Silicone caulk, clear, kitchen-and-bath grade
- Plumber’s tape (PTFE), 1/2 inch
- Shims, plastic or composite (4-6)
- 2×4 blocking, 8 inch length, if no studs line up with the back rail
- Cabinet screws, 3 inch, zinc plated (4-6)
- Painter’s tape
- Spackle and a putty knife for patching old screw holes
Before You Start
Replacing a vanity is a wet job. Plan for water in the sink and a small mess on the floor even when nothing goes wrong.
Shut off the water at the two angle stops (the small oval handles on the supply lines under the sink). Turn clockwise until they stop, then open the faucet to release pressure. If the stops won’t fully close or the handles spin freely, plan to call a plumber before going further. Place a bucket and towels under the P-trap before you touch a wrench.
Cover the tub with a towel so dropped tools don’t chip the porcelain. If you’re working near a GFCI outlet or cutting into drywall, kill the breaker for that bathroom before you start. Verify the wall is clean, dry, and flat. Measure rough-in plumbing height (usually 18-22 inches from the floor) and the wall-to-pipe depth so the new vanity actually fits without forcing it.
Most straight replacements don’t need a permit. You only need one if you’re moving the drain, relocating supply lines, or altering electrical. If your project includes any of those, check with your local building department before you start. For a basic swap, you’re clear to go.
Step-by-Step Instructions
Step 1: Shut Off the Water and Disconnect the Plumbing
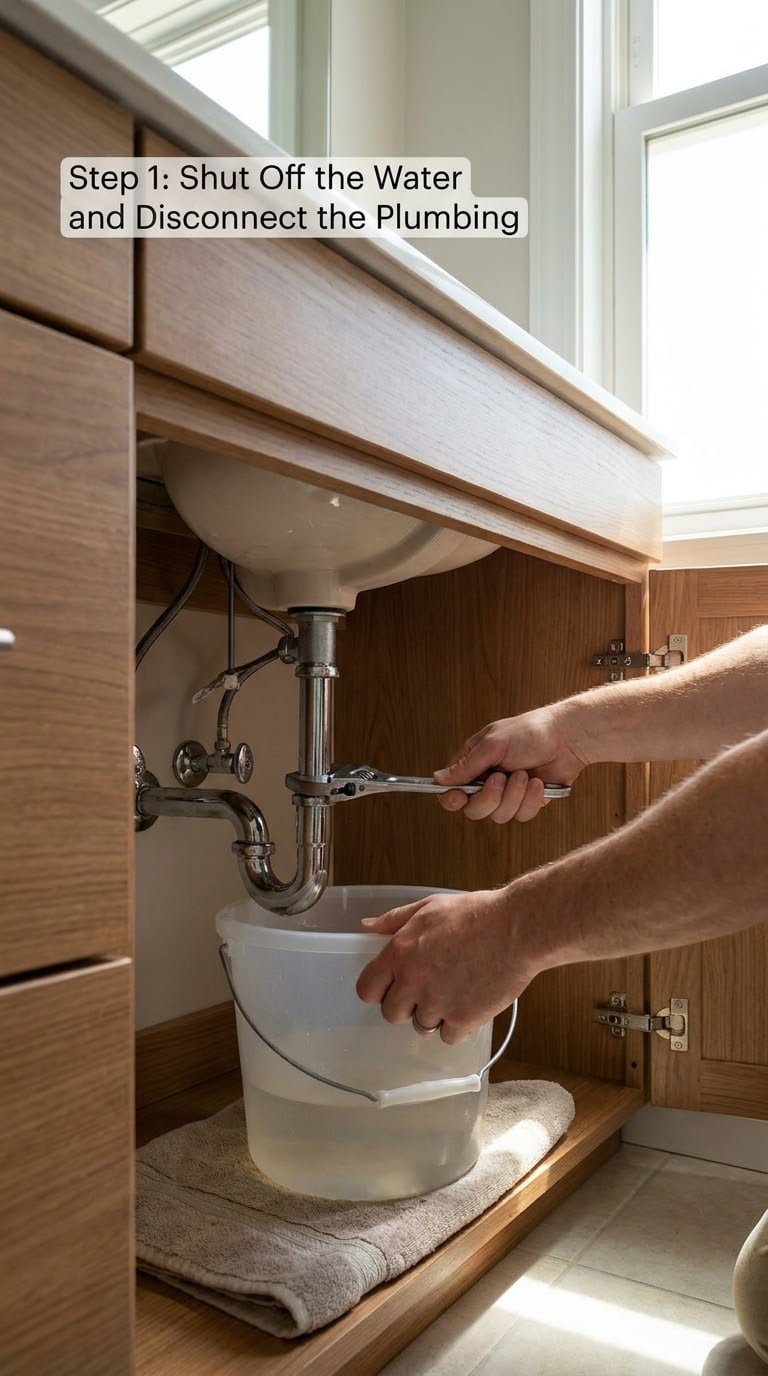
Close both angle stops clockwise, then open the faucet and confirm the water stops within a few seconds. Place the bucket under the P-trap and the towels under the supply connections.
Disconnect the supply lines at the angle stops with an adjustable wrench, then at the faucet tailpieces with a basin wrench. Label hot and cold with painter’s tape so you don’t cross them on the new install. Loosen the slip nuts on the P-trap by hand or with a wrench, and let the trap drain into the bucket. Pull the trap down and out, then stuff a rag into the open drain pipe to block sewer gas. The P-trap is the curved pipe under the sink; it holds a small amount of water that keeps odors from coming back up the drain.
Cap the open supply stubs with a rag and a rubber band if you won’t be reconnecting within the hour, so nothing drips while the vanity is out.
Step 2: Remove the Old Vanity
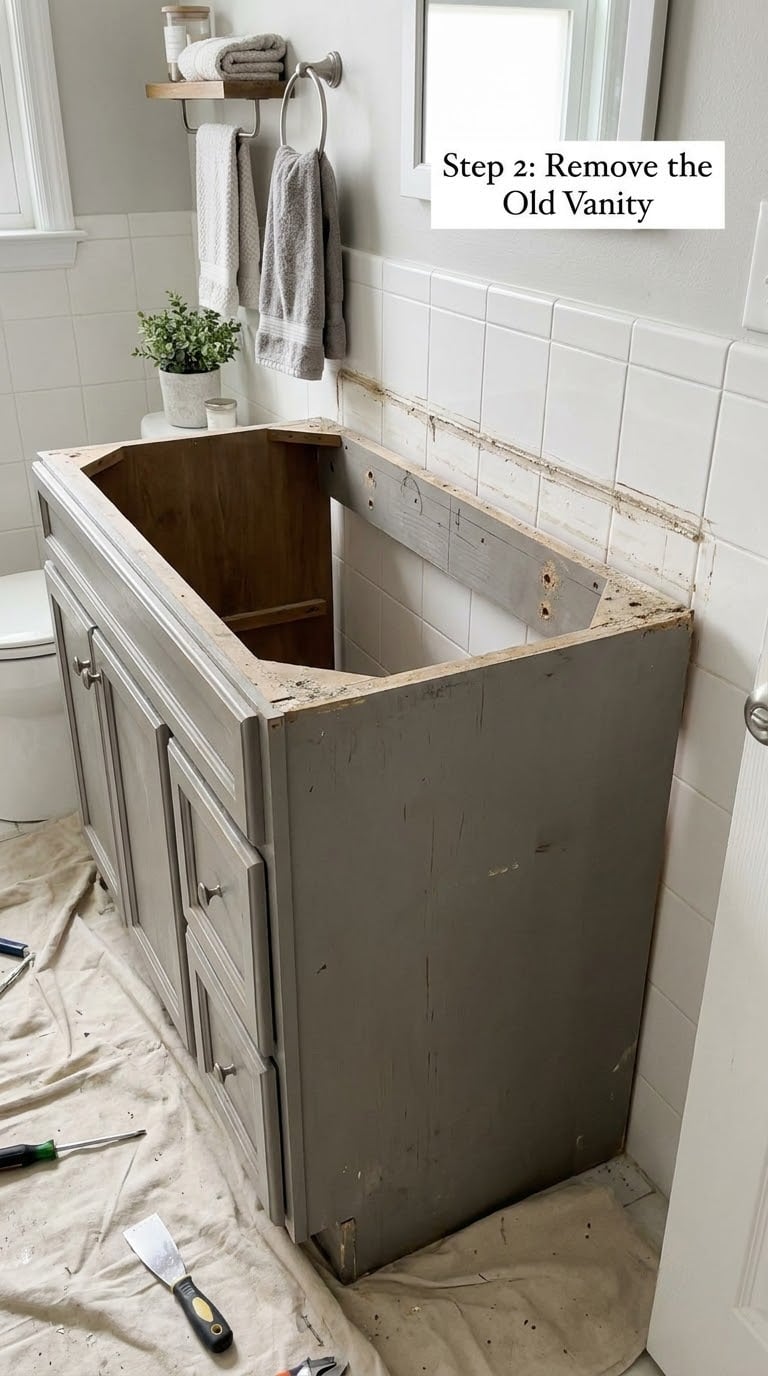
Open the cabinet doors and remove drawers, shelves, and any stored items. Look inside for screws that anchor the cabinet to the wall. Most are hidden behind the top back rail or through the side panels into studs. Pull them out with a drill/driver.
Score the caulk line along the back and side of the vanity where it meets the wall, using a fresh utility knife. Run the blade along the seam two or three times. Skipping this step usually tears the drywall paper when you pry. Score the paint along the top edge where the backsplash meets the wall too.
Work a pry bar behind the vanity base and pull it gently away from the wall. If it doesn’t move, look for an anchor screw you missed. A stuck vanity is almost always held by caulk, a hidden screw, or a drain collar that’s gripping the pipe. With the plumbing already disconnected, the cabinet should slide forward. Lift it out with a helper if it’s heavy, and set it on a drop cloth.
Step 3: Prep the Wall and Floor
Scrape old caulk and adhesive off the wall with a putty knife. Patch any anchor holes with spackle, let it dry per the label (usually 30-60 minutes), and sand smooth. Wipe the wall and floor with a damp cloth so the new cabinet sits flat.
Check the floor for level over a 24 inch span, both front-to-back and side-to-side. Most bathroom floors slope slightly toward the drain, and a vanity over 30 inches wide will show that slope if you don’t shim it. Note the high spot in the front and the low spot near the wall so you know where to shim.
If the new vanity has a separate backsplash, dry-fit it on the wall now to confirm the height works with your mirror and outlet locations.
Step 4: Set and Level the New Vanity
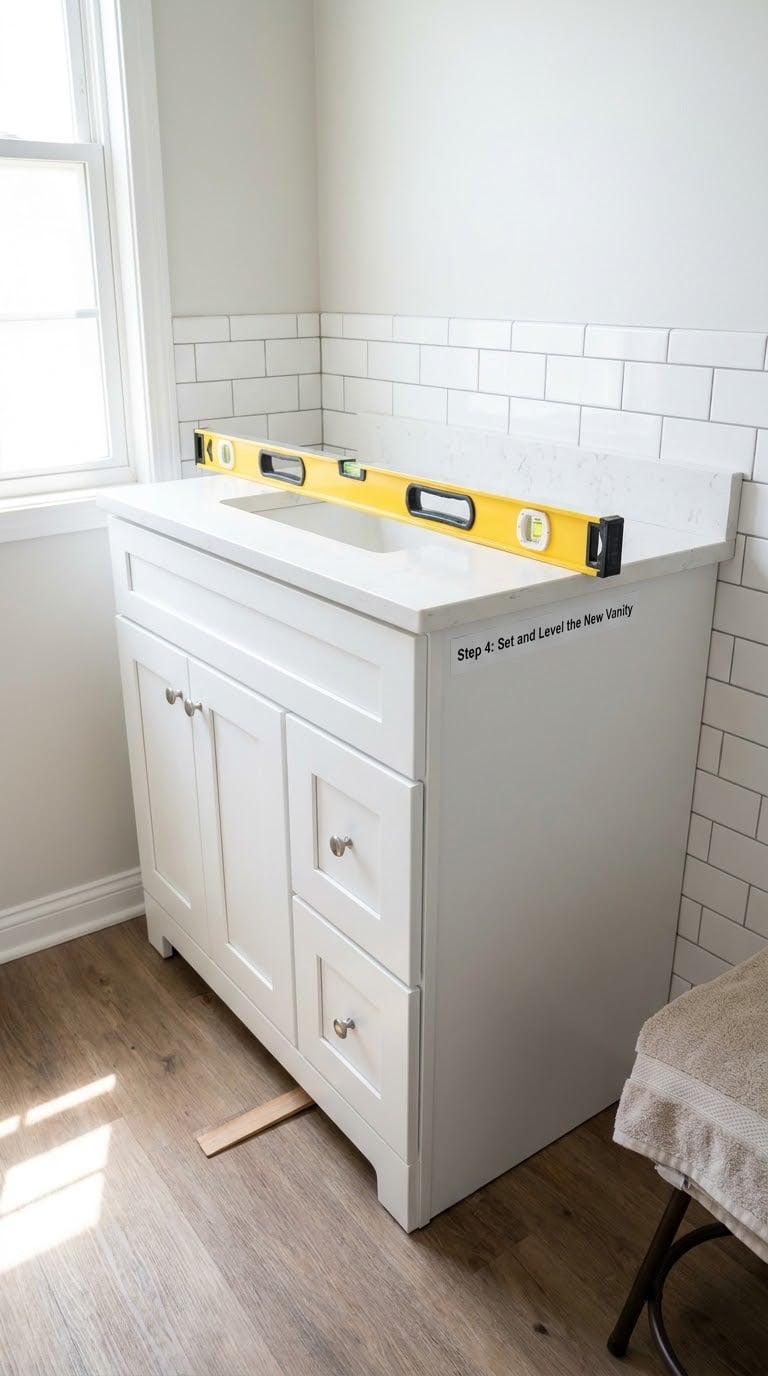
Dry-fit the cabinet by sliding it into position. Check that the supply stubs and drain pipe line up with the cutouts in the back. If the drain needs a small adjustment, mark the new hole location and cut it with a hole saw or jigsaw from inside the cabinet, where the cut edge will be hidden.
Place a 24 inch level across the top of the cabinet, both directions. Tap plastic shims under the base until the bubble is dead center in both readings. The cabinet should sit flat, not rock. Mark the stud locations on the back rail with a pencil so you know where to anchor.
Drill 3/16 inch pilot holes through the back rail into each stud, then drive 3 inch cabinet screws until the head is flush. If no stud lines up with a back rail point, slip a piece of 2×4 blocking behind the drywall, secured to two studs, and anchor into that. Anchoring into drywall alone will fail within a year. Recheck the level after each screw and adjust shims as needed.
Step 5: Reconnect Plumbing and Install the Top
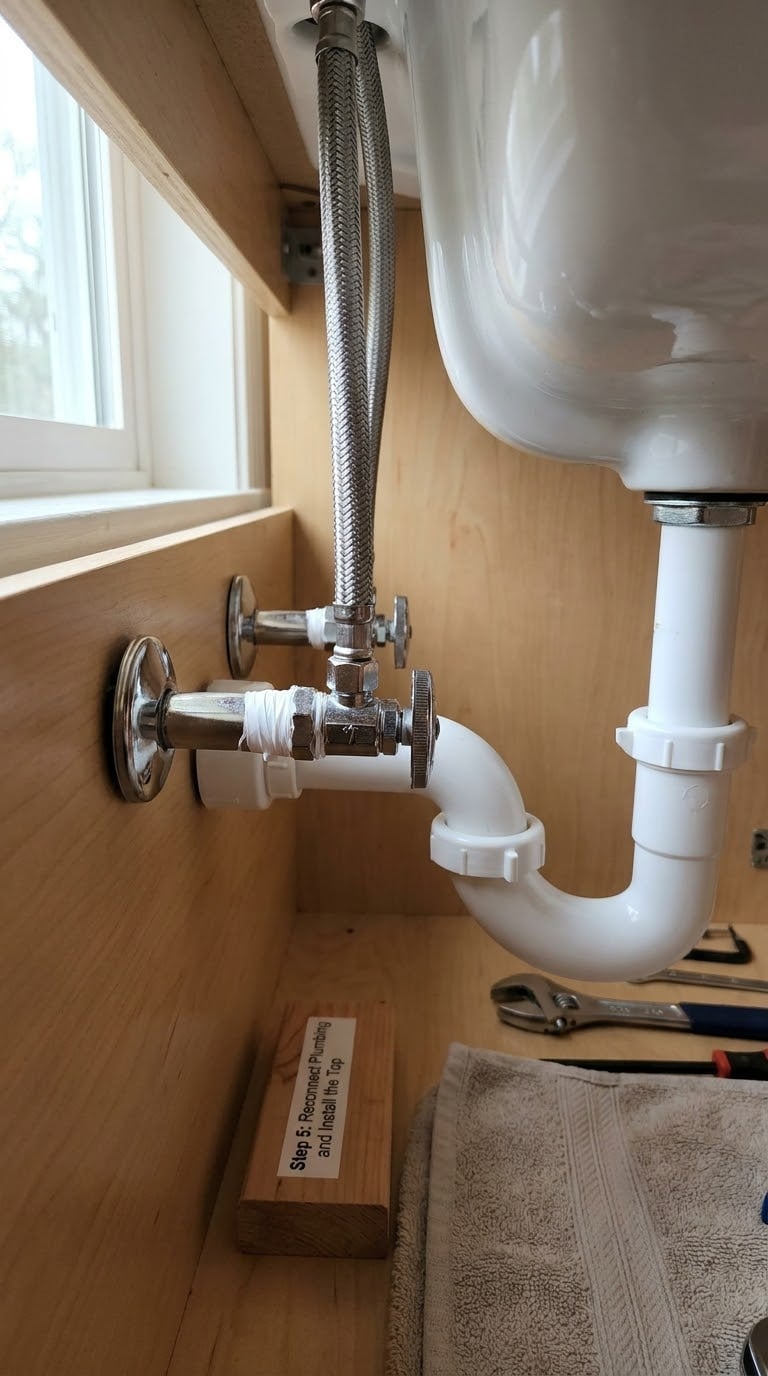
Wrap the supply stub threads with two wraps of plumber’s tape, then thread on new 3/8 inch braided supply lines. Hand-tighten at the angle stop, then add a quarter turn with a wrench. Don’t over-tighten; the rubber seal does the work and too much force cracks the fitting.
Reassemble the P-trap. If the old trap lines up, reuse it. If the new vanity sits at a different depth, swap in a new 1.5 inch slip-joint assembly and trim the tailpiece to length with a hacksaw. Hand-tighten the slip nuts, then a half turn with a wrench. The P-trap should slope slightly downhill toward the wall drain.
Set the sink top onto the cabinet. Some tops come with a bead of silicone pre-applied; if not, run a 1/4 inch bead of clear silicone along the top edge of the cabinet before setting the top. Press it down firmly and let it sit for five minutes. Apply a continuous bead of silicone along the back edge where the top meets the wall, and along the side seams if the top has a backsplash. Let the silicone cure for 24 hours before running water into the basin.
Step 6: Test for Leaks and Finish
Open both angle stops slowly, a quarter turn at a time, and watch the supply connections. Run the faucet for two minutes on both hot and cold, then hold a dry paper towel under each slip nut and supply fitting. Even a slow leak shows up as a wet spot on the paper.
Fill the basin and let it drain. That full-basin test pushes water through the trap faster than a running faucet, which is where most install leaks show up. If you see any drip, tighten that slip nut a quarter turn and test again.
Caulk the side seams where the top meets the wall. Install doors, drawer pulls, and a tip-out tray if your vanity came with one. Wipe the cabinet down, then run the faucet once more to confirm everything still holds.
Common Mistakes to Avoid
Anchoring into drywall only. Cabinet screws need a stud or solid blocking. Drywall anchors will eventually let go under the weight of a filled sink. Always find the stud with a stud finder and drive the screw into it.
Over-tightening supply lines. The rubber washer inside the compression fitting creates the seal. A quarter turn past hand-tight is plenty; a full extra turn can crack the ferrule and you’ll be back at the store.
Ignoring floor level. A vanity that looks fine on a short level can wobble when you load a 30 pound toolbox inside. Shim until it sits flat in both directions, then anchor.
Skipping the silicone back seal. Without a continuous bead along the back, water from a splash or a leak runs behind the vanity and into the wall. A 1/4 inch bead takes a minute and saves a drywall repair.
Reusing old angle stops that won’t fully close. If the original shutoff valves drip after closing, replace them while the plumbing is exposed. New stops cost a few dollars and turn a marginal valve into one you’ll trust for the next ten years.
When to Call a Pro
Replacing a vanity yourself is a reasonable weekend project. Some situations deserve a licensed plumber or electrician instead.
Call a plumber if the existing shutoff valves won’t hold water when closed, the drain needs to be relocated more than an inch, you see galvanized or corroded pipes when you disconnect the plumbing, or the supply lines need to be moved more than a few inches. A plumber can also handle a stubborn drain collar that’s cemented to the pipe.
Call a licensed electrician if you need a new outlet, the GFCI needs to be relocated, or you plan to add lighting that requires new wiring. Bathroom outlets and lighting near a sink are governed by code, and a small mistake around water is not the place to learn.
Call a carpenter or handyman if the wall studs are missing where you need them and you want the blocking done cleanly, or if the floor is significantly out of level and needs a plan beyond shims.
Maintenance
A new vanity holds up well with a small annual routine.
Re-caulk the seams where the top meets the wall every 12-18 months, or sooner if you see the silicone pulling away. Check the supply lines for corrosion or bulging once a year, especially at the connection to the angle stop. Tighten any loose hinge screws on the doors with a screwdriver. If the faucet base ever shows movement, snug the mounting nuts underneath before the seal fails.
Wipe standing water off the cabinet base after a shower. Bathroom humidity does most of its damage slowly, and a dry floor under the vanity goes a long way.
For a related project, our guide on how to replace a bathroom sink faucet picks up right where this one leaves off. If you’re also updating the lighting above the new vanity, the vanity light fixture installation walkthrough covers the electrical side safely. And if this project is part of a larger addition, our cost guide for adding a half bathroom breaks down the full budget.
Frequently Asked Questions
Do you need a permit to replace a bathroom vanity?
In most jurisdictions, a straight swap-out of an existing vanity in the same location does not require a permit. You only need one if you are moving the drain, relocating supply lines more than a few inches, or doing any new electrical work. Check with your local building department if your project includes any of those changes.
How long does it take to replace a bathroom vanity?
Plan on 4-6 hours for a first-time DIYer, including removal, installation, plumbing, and cleanup. Someone with plumbing experience can finish in 2-3 hours. Add another 24 hours before using the sink so the silicone can fully cure.
Can I replace a bathroom vanity without turning off the water?
No. The supply lines and P-trap must be disconnected, and any open valve or running faucet during that work will flood the floor. Always shut off both angle stops, open the faucet to release pressure, and confirm the water is off before you touch a wrench.
What size vanity will fit my bathroom?
Measure the width, depth, and height of the existing vanity, then subtract about half an inch in width and depth for clearance and shim space. Standard sizes are 24, 30, 36, 48, and 60 inches wide for single vanities, and 60 to 72 inches for doubles. Always check the rough-in plumbing height (usually 18-22 inches from the floor) against the new cabinet before buying.
Should I replace the vanity or just reface it?
Refacing makes sense when the cabinet box is solid, the doors and drawer fronts are the only dated parts, and you want a fresh look without touching the plumbing. Replacement is the better call if the cabinet has water damage, the layout needs to change, or the plumbing rough-in is wrong. Refacing saves a day of work; replacement gives you a fully new unit and usually a longer service life.
Start by measuring your space and the rough-in plumbing, then order the new vanity with the right top, faucet, and supply lines so everything is on hand when you shut the water off. The actual swap is a single afternoon: disconnect, remove, prep, set, level, anchor, reconnect, and test. Run the faucet for a few minutes and check every joint with a dry towel before you call it done. A clean, level install now means you won’t be thinking about the bathroom for another decade.
