
How to Fix a Sagging Gate: Easy DIY Repair (2026)
A sagging gate almost always fails the same way: the latch-side corner drops until the gap at the top is wider than the gap at the bottom. To fix a sagging gate, support the free end, shim or re-hang the top hinge so it carries the weight again, then add a diagonal tension member — a steel cable with a turnbuckle, or a wooden brace — so the sag cannot creep back.
Most gates I get asked about started as a fence line that got heavy with wet weather, or a gate a contractor hung on a post that was never deep enough. Either way, the fix is the same, and it takes an afternoon with basic tools.
Contents
Time: 1 to 3 hours for a hinge and latch fix, half a day for a full re-hang · Cost: low, a handful of hardware items (prices vary by region) · Difficulty: Moderate DIY · Skill level: Comfortable with a drill, a level and a tape measure.
Tools and Materials
Most of this job is holding a gate up and putting new screws into harder wood than the original. Gather everything first, because the moment the gate is supported you want both hands free.
Hand tools and safety gear
- Tape measure and a 4 ft level — for gap readings and checking whether the post is plumb
- Cordless drill/driver, plus a 1/4 in drill bit for pilot holes
- Socket wrench or ratchet with 7/16 in and 1/2 in sockets — gate hinge bolts are usually hex heads
- Phillips and Torx bits, and a flat screwdriver for slotted hardware
- Clamps (a bar clamp or two quick-grips), a wood chisel and a pry bar
- Speed square or straightedge for checking diagonals
- Work gloves and safety glasses — a gate under tension will move without warning
- A 2×4 offcut for propping, plus a second pair of hands for anything heavy
Materials
- Stainless steel or galvanized shims in 1/8 in and 3/16 in thicknesses, for packing the hinge leaf
- Exterior structural screws, 1/4 x 2-1/2 in or 3 in long, or 3/8 in lag bolts with washers for heavy gates
- Steel cable kit — 1/8 in aircraft cable, a hook-and-eye turnbuckle, a jaw-and-eye end, and two cable clamps — if you are adding an anti-sag support
- A diagonal brace board of exterior-rated timber, 2 x 4 in or similar, for the no-hardware fix
- Exterior sealant or end-grain sealer, plus exterior stain or paint to match
- Replacement latch, or a new gravity drop bolt if the old one is bent
- Hardwood dowels and wood glue if the hinge screw holes are chewed out and you plan to re-drill in fresh wood
Buy galvanized or stainless hardware rather than zinc-plated steel. A gate sits in rain and gets wet every time you open it, and zinc gives up in a year or two.
Before You Start
Put on glasses and gloves before anything else. Then look at the gate rather than touching it — a few minutes of diagnosis saves an afternoon of fitting hardware that will not solve your problem.
Work out whether it is wood or metal. A timber gate is a frame you can square. A steel or aluminium gate is a rigid frame that drops because a hinge or post moved, so the frame itself rarely needs straightening. Painted steel needs a grinder and welding if the frame is bent — put that one in the pro column.
Kill the power. If an opener is fitted, switch it off at the wall or the breaker and disconnect the actuator before you put a gate on a jack. This is the same advice as any automatic gate opener job — nobody wants to discover the safety beam mid-repair.
Check the post. Run the 4 ft level up both faces of each gate post and read the bubble. A post that leans out of plumb will pull the gate back out of square no matter what hardware you fit, and it is the single most common reason a contractor-installed gate sags again within a season.
Probe for rot. Push a screwdriver into the end grain of the stile where it meets the post and into the bottom rail. If it sinks in more than an inch (2.5 cm) or comes back damp and crumbly, the frame or post is structural and needs replacing, not bracing.
Finally, have someone with you and work in daylight. If the gate weighs more than roughly 150 lb (68 kg) — a wide timber or double-drive gate — do not wrestle it by hand. Use a purpose-built gate jack under the latch-side corner or borrow a lifting jack from a rental shop.
How to Fix a Sagging Gate: Step-by-Step Instructions
Step 1: Diagnose Why the Gate Is Sagging
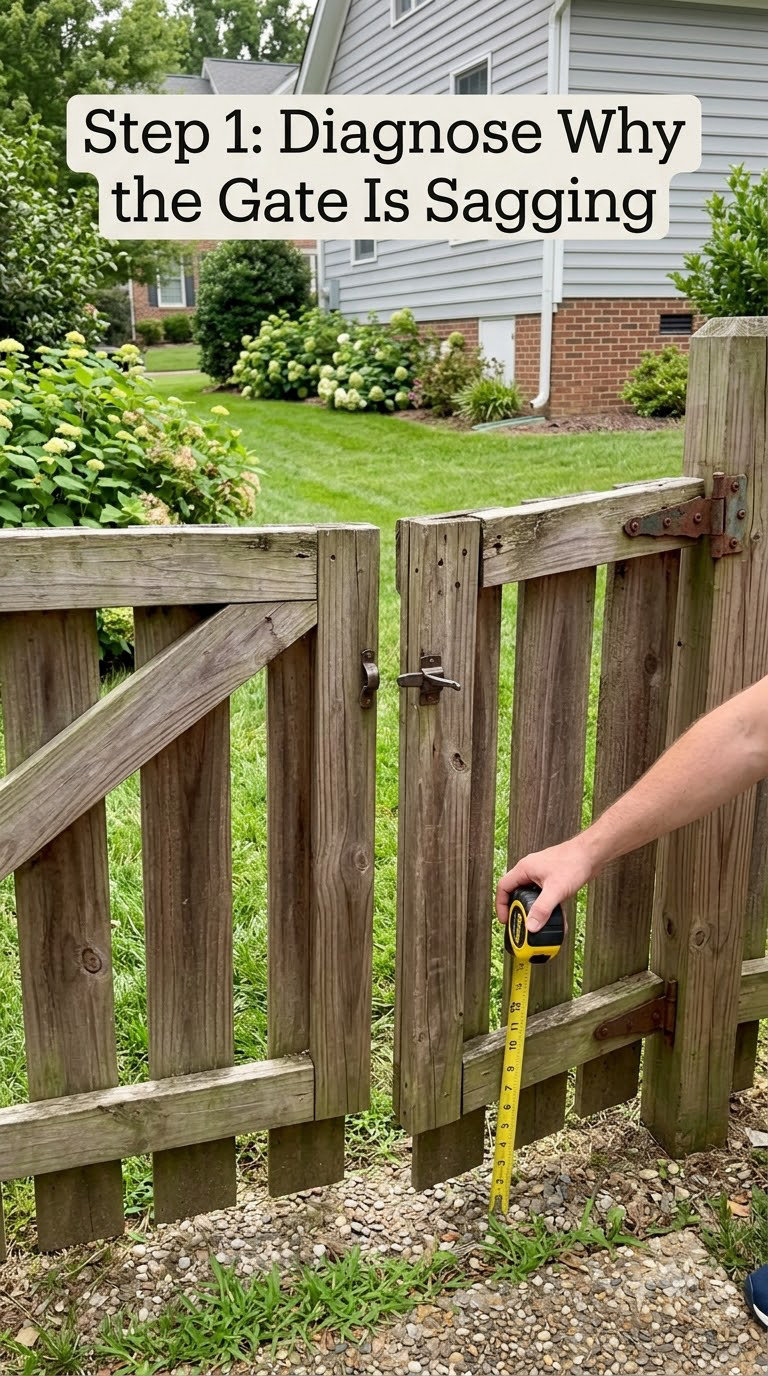
Measure the gap at the top of the opening and the gap at the bottom. Bigger at the top means the gate has dropped and rotated on its hinges. The old card trick still works as a quick check: a standard credit card is about 1/32 in thick, so if it slides through the gap freely, or not at all, you have a problem.
Then push up firmly under the latch-side corner. If the gate rises and the gap evens out, the hinge screws have let go or were placed too low and the weight is now shearing them. If the gate barely moves and the frame looks out of square, the leaf is twisted and needs bracing or re-hanging. If the post itself is out of plumb, no amount of hardware will hold it.
Measure both diagonals of the gate frame corner to corner. Equal diagonals mean a square frame. A longer bottom-hinge-side diagonal means the gate has racked, which is why it drags. Check hinge screws for movement, and look for swollen or delaminated wood around them.
Step 2: Support the Gate and Remove Hardware
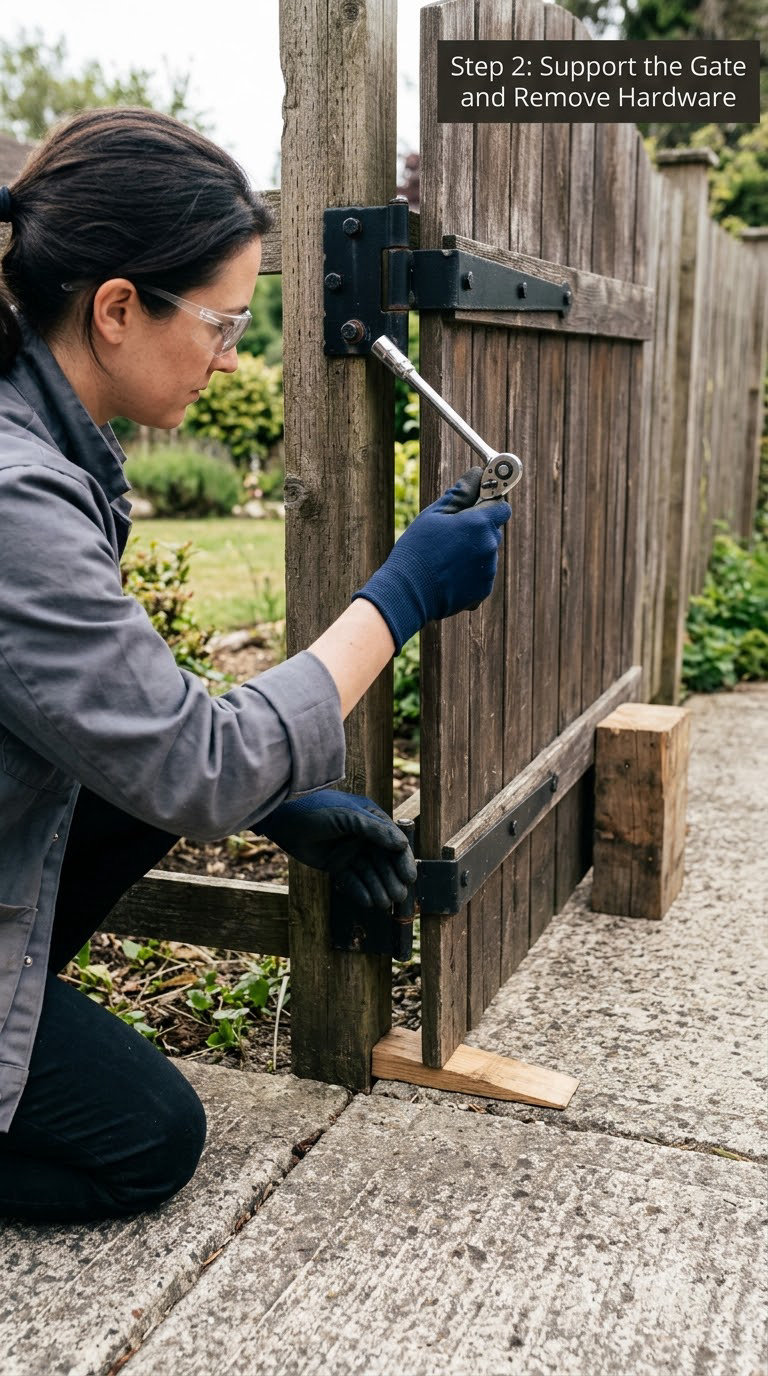
Wedge or jack the latch-side corner up until it sits very slightly higher than it needs to — about half an inch (12 mm) proud. Block it up high, then tension your fix to bring it back down. This is the trick experienced people on the r/FenceBuilding threads use, and skipping it leaves you with no slack for the turnbuckle to pull against.
Check the support takes the weight, not just rests on it. Then take the latch, the stop and the strike off the gate. Leave the hinges in place if the frame is square and the screws still bite; take them all off if you are re-hanging into fresh holes or the holes are chewed out.
Move a driveway vehicle, drop a tarp or cardboard under the work area, and keep the prop under the gate the whole time. A latch-side corner swinging down on fingers is the most common serious injury in this repair.
Step 3: Reattach or Replace the Hinges
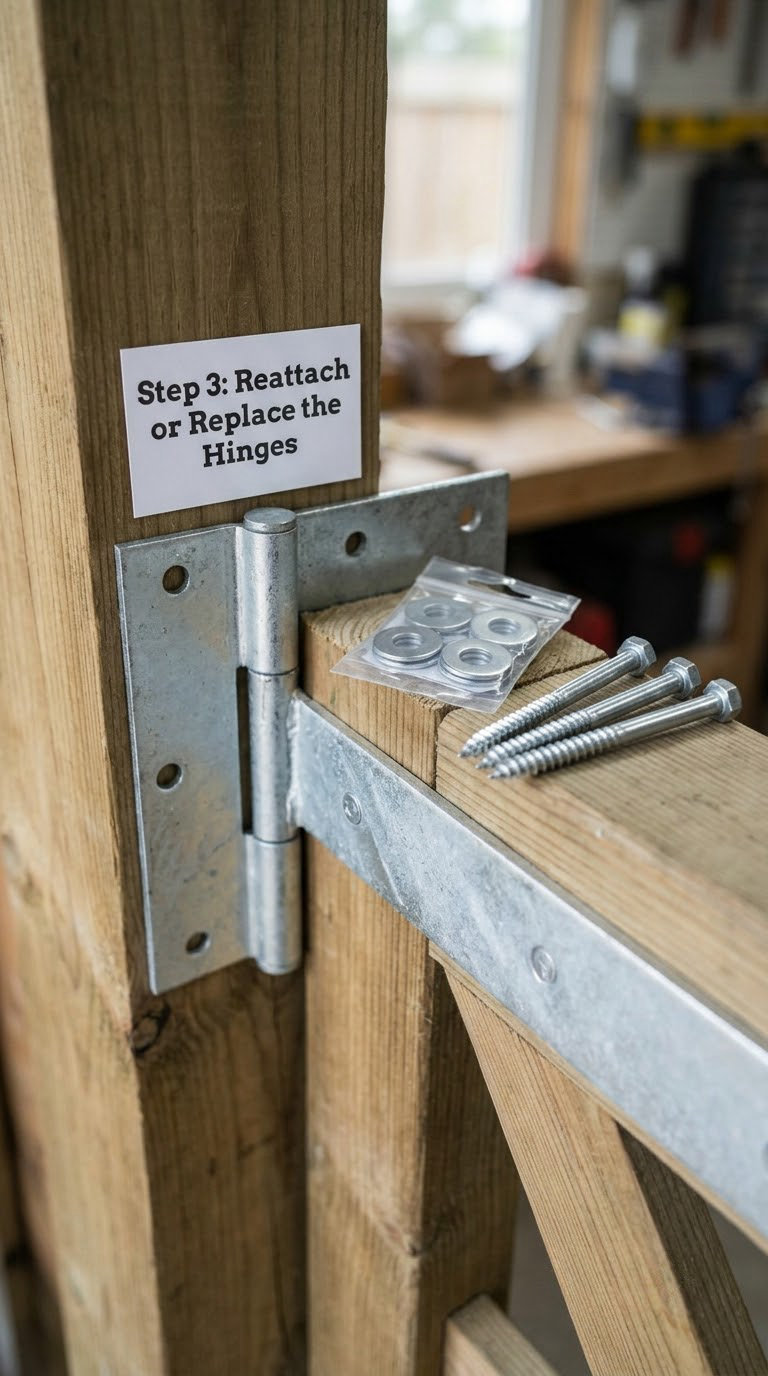
Remove the hinge leaves and pack the hinge-side leaf with stainless shims. Pack on the hinge side only, so the pin sits toward the outside face and the gate hangs plumb rather than pulled into the opening. Tighten a screw, check the gap, add another shim, repeat. Most gates need three or four shims.
Drive pilot holes before long screws. A 3 in screw into treated post timber has a real chance of splitting the post if you just power it in — back the drill off at low speed, or pre-drill with a bit a size smaller than the screw shank.
Use structural-grade screws, not the short 1 in drywall screws that came with the original hinge. Screw length is the single biggest factor in whether a gate keeps sagging: it needs to reach past the post into solid wood or concrete, not just bite the surface.
Shim the top hinge, never the bottom one. Adding a bottom shim forces the top corner further out of line and moves the problem rather than fixing it. And if a hinge is rusted, sprung or missing its pin, replace it with a load-rated strap hinge rather than trying to reuse it.
Step 4: Correct a Twisted or Uneven Gate Frame
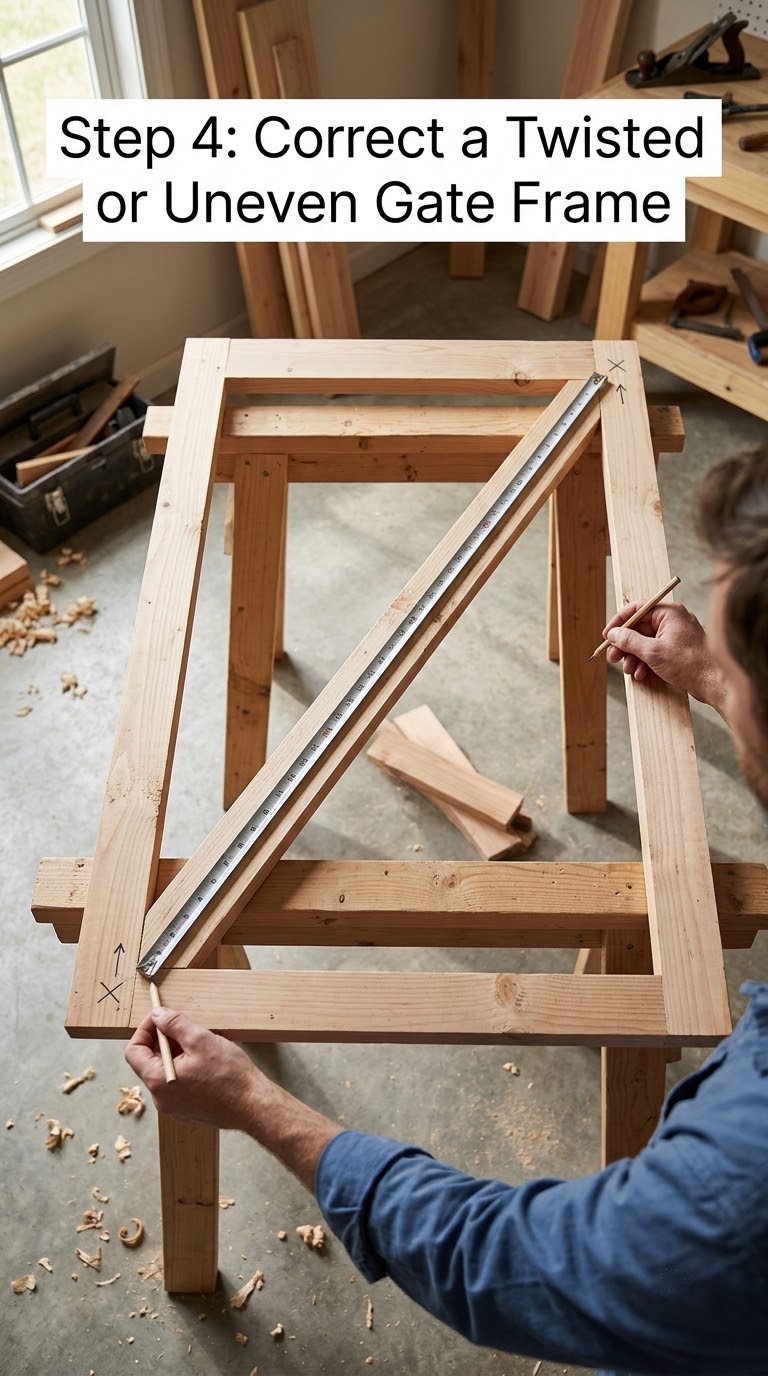
If the diagonals differ by more than about 1/4 in (6 mm), the frame is out of square. Take the gate off its hinges, lay it flat on sawhorses and measure again — a frame that measures square on the ground and square on the post usually means the post is the problem.
Mark the corner that sits low, then bring it back up gradually. Clamps and a block of hardwood let you draw the joint together over a few hours rather than in one violent pull. Reinforce the weakened joint with structural screws or carriage bolts through a small cleat once it is aligned.
Do not force a swollen or cupped board flat. Overnight it swells again and you will be back to the same gate next month. Replace the warped board and seal the end grain while you have it apart.
Step 5: Align the Latch and Close the Gate
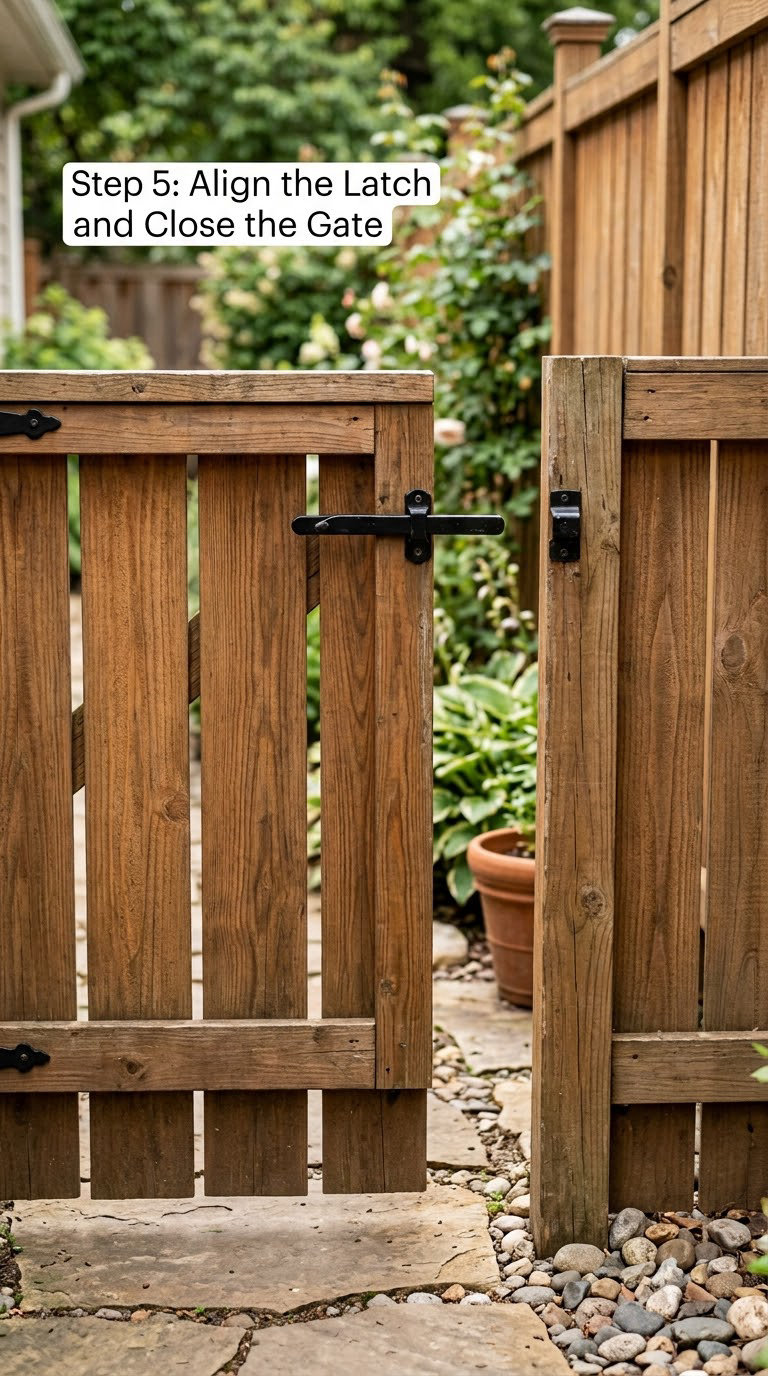
Set the gate back on its hinges with the latch-side corner held up on your prop, and eyeball the gap all the way round. You want an even reveal, about 1/8 in (3 mm), top to bottom, plus whatever ground clearance the gate needs — 1 to 2 in (2.5 to 5 cm) for a garden gate, more for a driveway one.
Fit the latch or stop and adjust the strike plate vertically until the bolt drops cleanly and the gate latches with one hand. If the gate swings past the stop, the frame is still out of square and you go back to Step 4 rather than bending the stop.
Then take the prop away and test it ten times. Open and close it a dozen times without touching the prop. If it binds, scrapes or needs a lift on every closing, something is still out of true.
Step 6: Finish and Prevent Future Sagging
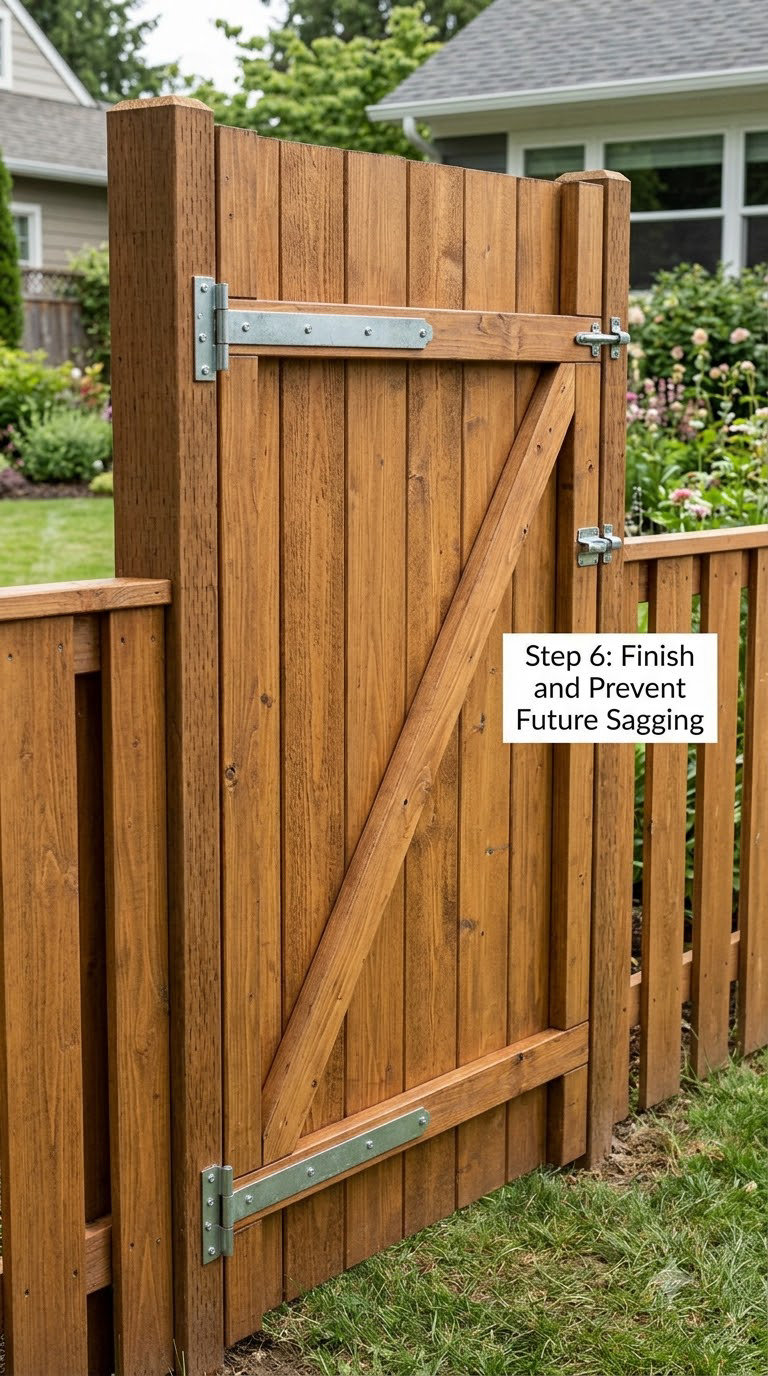
This is the step people skip and then wonder why the gate is sagging a year later. Seal all end grain and any bare cut edges with an exterior sealer, then stain or paint to match the fence. Two thin coats beat one thick one on end grain.
Check the gate weight against its hinges. Solid timber gates swell and get heavy across a wet winter, and a light-duty hinge on a heavy leaf will let go again. Wipe the steel on metal gates with a damp cloth, and touch up chips in the galvanising before rust starts under them.
Add the diagonal member while you are there. A cable with a turnbuckle runs from the top hinge corner down to the bottom swing corner and carries the load in tension, so the hinge screws stop taking the shear. A wooden brace bolted across the opposite diagonal does the same job with no metal parts at all. If the same gate keeps sagging anyway, the post is not big enough or deep enough — pack more concrete, or call in help.
Common Mistakes to Avoid
Short screws. A 1 in screw only grips the surface of the post. Use 2-1/2 in to 3 in structural screws or lag bolts and you fix most sag problems in one pass.
Shimming the bottom hinge. It pushes the top corner further out of alignment. Always pack the top hinge.
Running the cable on the wrong diagonal. The support goes from the top hinge corner to the bottom swing corner — the free corner. Opposite way round and it fights the swing instead of holding the gate up.
Attaching the cable with the turnbuckle already closed. Screw the turnbuckle fully open and extended before you attach either end of the cable, or you have almost no adjustment travel left and end up over-tensioning.
Over-tightening the turnbuckle. Overdo it and you bow the top rail instead of lifting the corner. Tighten a quarter turn at a time and watch the gap, not the cable tension.
Forcing a twisted frame. If the gate will not lift when you pry it, the leaf is warped or rotted, and a cable cannot fix that — it will just bend the rail. Re-hang or brace first.
Ignoring a post that is out of plumb. Check it before you buy anything. A leaning post pulls the gate back crooked every time the wind moves it.
Mismatched fasteners. Mixing bright zinc screws with stainless hardware in damp timber leads to staining and early failure. Pick one system and stick with it.
When to Call a Pro
Some jobs are outside the scope of a weekend and a set of hand tools. Bring in a contractor or a carpenter when you hit any of these.
- The post is cracked, leaning hard, or rotted below the soil line. Replacing a post means breaking concrete and re-setting it level, and an out-of-plumb post causes the sag you are trying to fix.
- The frame itself is rotted through, or the boards are cupped so badly they will not sit flat.
- Large wrought iron or steel gates over roughly 150 lb (68 kg), or any gate with bent steel that needs welding and grinding.
- Structural reinforcement on a gate that carries a second gate, a trellis, or a solar panel array.
- Powered gates and electric fencing. Leave actuator alignment, wiring and any energised fence to a licensed electrician, and keep that circuit de-energised while you work.
- Permits. Most minor gate repairs do not need one, but check with your local building department before you change fence height, swap a solid panel for a fence line, or move a post — those usually do.
If you are weighing an opener for a heavy gate rather than a repair, it helps to read up on smart gate openers for heavy driveway gates first. Many of those gates were never undersized — they were simply too heavy to hang hand-swinging.
Maintenance
Twice a year, in spring before the season starts and again in autumn, walk the gate with a tape measure and a card. Ten minutes is enough to catch the drift that becomes a repair.
Measure the top and bottom gaps and confirm they still match. Push up under the latch corner and see how far it travels. Check every hinge screw with a driver — a quarter turn back before it works loose is cheaper than replacing the gate. Look at the bottom rail and the end grain for rot or lifting paint, and reseal anything that has dried out.
On metal gates, wipe down the hardware and check the galvanising for chips. On cable-supported gates, check the turnbuckle lock nuts are still tight and look for fraying at the cable clamps. Keep mulch, leaves and grass back off the bottom rail so the gate can clear as the ground moves.
If the gap is creeping wider each year even after a repair, note it and watch the post. That pattern is post movement, not a hinge problem, and it will eventually need a proper footing.
Frequently Asked Questions
Can I fix a sagging gate without removing the hinges?
Yes, if the gate still swings and the frame is straight. Prop the latch-side corner up with a block, loosen the hinge screws, pack the top hinge leaf with stainless shims and drive longer structural screws into the post. An anti-sag cable with a turnbuckle also works in place, with no hinge removal at all. If the gate will not lift when you pry it, the leaf is warped or rotted and it has to come off.
Do anti-sag gate kits actually work?
They do, on most gates, and they are the cheapest fix available. A kit works when the gate frame is straight and the cable runs from the top hinge corner to the bottom swing corner. It fails when the cable runs the wrong way, when the turnbuckle was attached before being fully extended, or when the gate itself is warped or the post has settled. Tightening harder never solves those three.
Should I shim the top hinge or the bottom hinge?
The top hinge, always. The bottom hinge is already carrying the swing, and adding shims there pushes the top corner further out of line and moves the problem instead of solving it. Pack shims on the hinge side of the top hinge leaf so the pin sits toward the outside face and the gate hangs plumb. Check the gap after each shim and stop when top and bottom match.
How do I fix a metal gate that has dropped?
A metal gate is a rigid frame, so it rarely needs straightening. Diagnose the same way: is the top gap wider than the bottom, and does pushing up under the latch corner restore it? If it does, re-hang it with new load-rated strap hinges on long structural screws. If the steel itself is bent, that is a grinding and welding job rather than a hardware job, and worth handing to a fabricator.
How do I know if the fence post is the real problem?
Put a 4 ft level on two faces of the post and read the bubble. If it leans, or if the gate was already sagging within a few months of being installed, the footing is too shallow or the post is undersized. Another sign is a gap that creeps back wider every year even after you re-hang and brace the gate. That pattern means post movement, and no amount of cable or shims will hold it.
Conclusion
Support the gate first, then diagnose where the movement actually comes from: the hinge screws, a twisted frame, the latch alignment, or a post that has settled. Each one has a different fix, and the smallest compatible repair — shims and longer screws for a loose hinge, a cable or brace for a heavy leaf — is the one that lasts.
Make the smallest repair the diagnosis calls for, then test the gate a dozen times before you put the tools away. Check the same gap twice a year and most sagging gates never need touching again.
