How to Remove a Glued Bathroom Mirror Safely (October 2026)
Most builder-grade bathroom mirrors are not hung on clips. They are stuck to the wall with a thick bead of construction adhesive, sometimes along every edge and sometimes in fat dabs every 6 to 8 inches. That bond is what makes them feel solid for years, and it is also what makes removal feel scary. The good news is that figuring out how to remove a glued bathroom mirror is mostly a patience problem, not a strength problem. With painter’s tape, a hair dryer or heat gun, and a length of piano wire, a careful DIYer can usually get the glass off in one piece and the wall in good shape.
I have walked renters and homeowners through this job enough times to know the three failure points: skipping safety prep, prying from one corner, and overheating the glass. This guide walks through the two safest removal methods we recommend, the one we only use as a last resort, and how to clean construction adhesive off the wall so the next mirror (or fresh paint) goes on cleanly.
Contents
Time: 45 to 90 minutes for a standard mirror · Cost: minimal if you already own a hair dryer and putty knife · Difficulty: Moderate DIY · Skill level: Beginner to intermediate, with a helper for large mirrors
Tools and Materials
You do not need a lot for this job. Most of the supplies are things you probably have in a junk drawer, and the rest can be picked up in a single trip to the hardware store. We split the list into essentials and nice-to-haves so you can decide how far you want to go.
Essentials
- Painter’s tape (1 to 2 rolls, blue or green, 1.5 inch or 2 inch width)
- Safety glasses or goggles
- Cut-resistant or heavy leather gloves
- Hair dryer (everyday kind) or a heat gun on its lowest setting
- Length of steel piano wire, 22 to 24 gauge, about 3 feet longer than the mirror is wide
- Two wood dowels or sturdy dowel rods, about 12 inches long each, for handles
- Duct tape
- Drop cloth or old towel
- Putty knife or 6 inch drywall knife (plastic preferred for drywall, metal for tile)
- Citrus-based adhesive remover (a small can goes a long way)
- Clean rags and a spray bottle with warm water
Nice to have
- A second pair of hands (truly essential for mirrors larger than about 2 by 3 feet)
- Suction cup handle for lifting the mirror once the adhesive releases
- Shims (thin wood or plastic wedges) to hold the mirror off the wall as you cut
- Non-slip gloves for the helper who catches the glass
- Trash bin lined with a contractor bag for safe disposal of adhesive strips
Before You Start
Before you touch the glass, take ten minutes to set up the room and the mirror. A framed or taped mirror is far less likely to send shards across the bathroom if anything goes wrong. Reviewers on r/HomeImprovement consistently point to painter’s tape as the single cheapest insurance on this job.
Safety first
Put on your safety glasses and gloves before anything else. Bathroom mirrors are tempered in some homes and not in others, and you cannot tell the difference by looking. Tape the glass in an X pattern from corner to corner with painter’s tape, then add a few horizontal and vertical strips so the whole face is divided into roughly 6 inch squares. If the mirror does crack, the tape will hold most of the pieces in place instead of letting them drop into the tub or onto a tile floor.
Open a window or run the bathroom fan. If you are using a heat gun or strong adhesive remover, the fumes are mild but noticeable. Lay a drop cloth on the vanity, the floor, and inside the tub to catch any drips or falling adhesive.
Identify what you are dealing with
Run your fingers along the bottom edge. If you feel a small metal tab or a plastic clip at the corners, the mirror is mounted with clips and a dab of adhesive. You can usually unclip those and slide the mirror out with a helper. If there are no clips and the glass feels flush to the wall, it is glued with construction adhesive (often called mastic).
Older homes, especially anything built before the mid 1990s, may have mirrors installed with solvent-based mastic that can contain asbestos. If your home is that old and you are not sure, our team recommends having a small sample tested before you sand or scrape anything. For most modern homes, standard latex or silicone-based mirror adhesive is what you will find.
Prep the wall and vanity
Clear the counter, take down any sconces or light fixtures you can safely remove, and empty the medicine cabinet if the mirror is mounted above one. Tape over the faucet and the top of the vanity with painter’s tape to keep adhesive drips off the finish. If the mirror sits over a tile backsplash, tape the top row of tile too.
Anything bigger than about 2 by 3 feet is a two-person job. A standard 30 by 36 inch mirror is heavy enough to crack the glass if it tips while you are working, and a 48 inch or larger mirror can easily weigh 40 pounds. Do not try to muscle it solo.
Step-by-Step Instructions
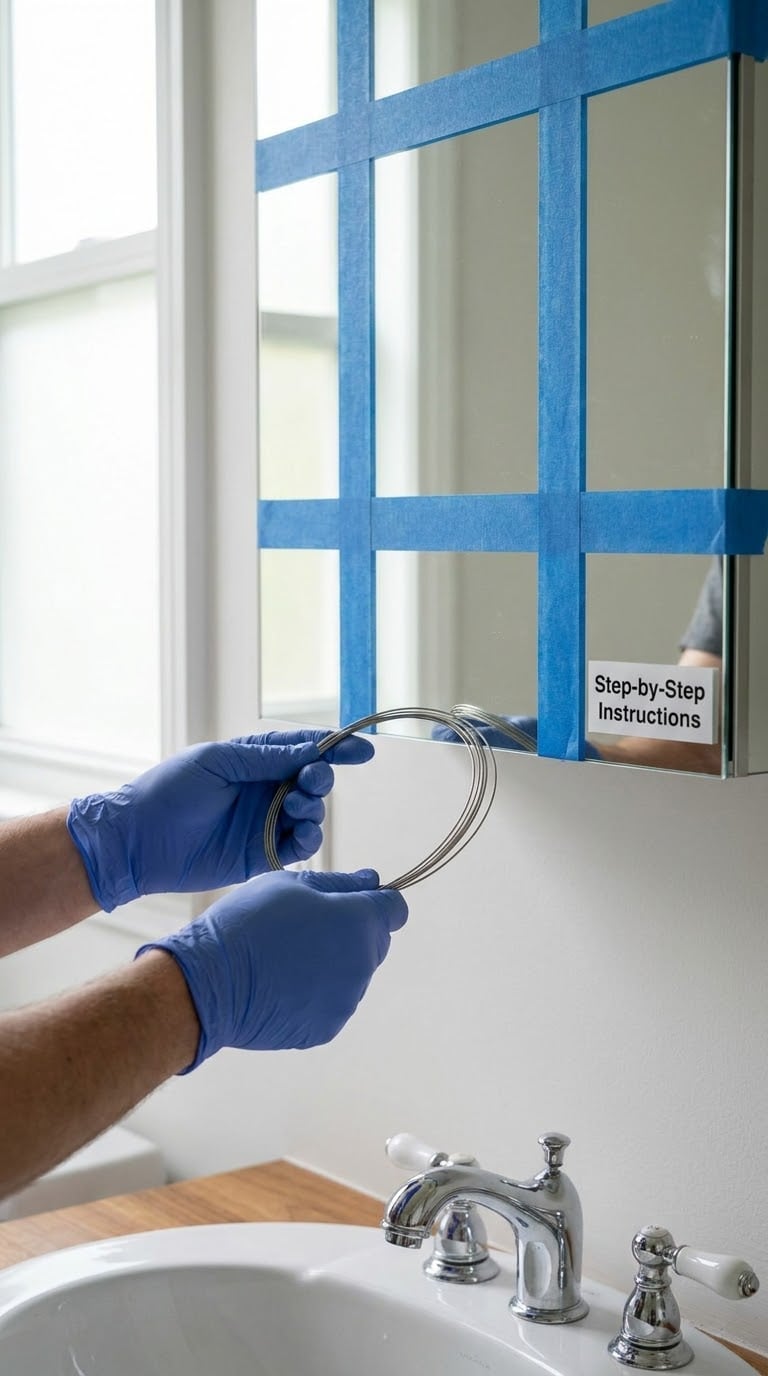
There are three common methods for this job, and we have used all three. The heat and wire method is the safest for both the glass and the wall. The heat gun method is for stubborn construction adhesive. The controlled break method is the last resort. Pick the one that matches your mirror and your patience level.
How to Remove a Glued Bathroom Mirror from Drywall Without Gouging
This is the method we try first. It works on roughly 8 out of 10 mirrors and leaves the wall in good enough shape to repaint or patch lightly.
Step 1: Tape the mirror face. Cover the glass with painter’s tape in a grid, as described above. The tape is cheap and gives you a real safety net.
Step 2: Warm the adhesive. Hold a hair dryer on its highest setting a few inches from one bottom corner of the mirror. Move it slowly in small circles for 2 to 3 minutes. The goal is to soften the adhesive, not to make the glass hot. If you have an infrared thermometer, the wall surface behind the mirror should reach about 100 to 120 degrees Fahrenheit. Do not press on the glass while it warms; let the heat do the work.
Step 3: Set up the wire. Cut a length of steel piano wire about 3 feet longer than the mirror is wide. Loop each end around a dowel to give yourself handles. Slide the wire behind the bottom edge of the mirror, working it up a few inches so you have a good grip on both ends.
Step 4: Cut through the adhesive. With your helper holding the mirror steady from the sides, pull the wire toward you in a slow, steady sawing motion. Keep the wire as close to the wall as possible and let it do the cutting. You will feel resistance drop as the wire passes through a soft spot in the adhesive. Work in 6 inch sections, warming each section with the hair dryer for another minute before you saw through it.
Step 5: Move up the sides. Once the bottom edge is free, repeat the process up each side. Slide shims under the bottom edge as you go to keep the mirror from settling back onto the wall and re-sticking.
Step 6: Support and release. When the mirror feels loose, have your helper support the full weight from the sides while you finish the last bits of adhesive. Lay the mirror face-up on a drop cloth on the floor, not on a hard tile, and peel any remaining tape off the wall.
How to Remove a Glued Bathroom Mirror with a Heat Gun or Soldering Iron
For mirrors set with very tenacious construction adhesive, a hair dryer may not get hot enough. A heat gun on low, or a soldering iron held against the adhesive line, can soften the bond in stubborn sections. This is the higher-risk method because too much heat will crack the glass.
Step 1: Use the heat gun on its lowest setting. Hold the nozzle at least 6 inches from the glass and keep it moving. Never hold a heat gun in one spot for more than 10 seconds. The glass should feel warm to the touch, not hot.
Step 2: Work in 6 inch sections. Heat one small section of adhesive at a time, then immediately cut through it with the piano wire. Move to the next 6 inch section and repeat. This is slower than the hair dryer method, but it gets through old latex or silicone-based adhesive that has been curing for 20 years.
Step 3: Try a soldering iron for thick beads. If the adhesive is in a thick rope along the edges, you can melt through it with a soldering iron held against the bead. Keep the iron away from the mirror backing and the drywall paper, and ventilate the room. This is messy and produces fumes, so it is the option we save for last.
Step 4: Stop if you see cracking. The second you see a hairline crack, stop heating, lower the mirror onto a drop cloth, and switch to the controlled break method below. Do not keep heating a cracked mirror.
How to Clean Construction Adhesive Off the Wall After Mirror Removal
Once the mirror is off, you will almost always see ridges or patches of old adhesive left on the wall. Skipping this step is one of the most common reasons new mirrors do not sit flat.
Step 1: Scrape off the bulk. Use a plastic putty knife to gently push off the thick ridges. Hold the blade nearly flat against the wall and let it do the work. A metal putty knife will cut into the drywall paper in a hurry, so start with plastic and only switch to metal on tile.
Step 2: Soften what is left. Apply a citrus-based adhesive remover to a rag and press it against the remaining residue for 5 to 10 minutes. Most hardware store brands will soften old latex adhesive without damaging the drywall paper underneath.
Step 3: Wipe and inspect. Wipe with a clean rag, then run your hand over the wall. It should feel smooth with no tacky spots. If you find any, repeat the remover step.
Step 4: Repair torn drywall paper. If the paper tore during scraping, let the wall dry for 24 hours, then apply a thin coat of joint compound with a 6 inch drywall knife. Let it dry, sand lightly, and prime before painting. For a renter-friendly touch-up, a spackling pen and a coat of matching paint usually hides small scuffs.
If the wall is tile rather than drywall, a plastic scraper and a citrus remover will clean up the same residue without the risk of gouging the grout. For tips on cleaning stubborn residue off tile, our guide on how to remove a shower head that is glued on covers similar solvent-safe techniques.
Common Mistakes to Avoid
Most of the broken mirrors and damaged walls we hear about come from the same handful of mistakes. Here is what to skip.
- Prying from one corner. Pulling at a single corner almost always cracks the glass or pulls the drywall paper off with the adhesive. Cut through the adhesive with wire instead.
- Using a metal scraper on drywall. A metal putty knife will cut the paper facing on drywall in one pass. Start with plastic, and only switch to metal on tile.
- Skipping painter’s tape. The tape grid takes 5 minutes and can save you an hour of picking glass out of a tile floor. Worth it every single time.
- Overheating the glass. A heat gun on high held in one spot will crack tempered glass and can even shatter it. Use the lowest setting, keep the nozzle moving, and never heat one spot for more than 10 seconds.
- Ignoring what is behind the wall. Some mirrors, especially in older homes, are mounted over outlet boxes or plumbing access panels. Knock on the wall and check for live wires before you start cutting.
- Rushing the adhesive cleanup. Skipping the citrus remover and trying to sand off old mastic will tear up the drywall. Soften it first, then scrape.
When to Call a Pro
Most homeowners can handle a standard 24 by 30 inch glued mirror. There are a few situations, though, where a glazier or handyman is the better call.
Mirrors larger than about 3 by 4 feet are awkward to handle even with two people, and the glass is heavy enough to cause real injury if it slips. If the mirror is custom-cut, has a built-in light or defogger, or is wired into a lighting circuit behind the wall, you are also dealing with electrical work that requires a licensed pro in most jurisdictions.
Homes built before 1980 may have used asbestos-based mirror mastic. If the adhesive is dark, brittle, and the home has not been remodeled, our team recommends a small sample tested by a local lab before you scrape or sand anything. A handyman who does not test for asbestos can stir up a real problem.
Finally, if you see any hairline cracks, chips at the edges, or silvering flaking off the back of the mirror, stop. The glass is already under stress and any attempt at removal is likely to shatter it. A glazier can take it down in a controlled way and dispose of the glass safely. For help choosing a replacement after the old one is down, our roundup of the best LED bathroom mirrors is a good starting point.
Maintenance
Once the wall is clean and dry, you have a few good options for putting a mirror back up. A French cleat is the sturdiest hanger for a heavier mirror and is hidden behind the frame. Plastic or metal mirror clips at the top and bottom are the simplest if the new mirror is the same size. A replacement mirror with a pre-attached Z-bar hanger is the easiest of all, since it hangs on two small brackets and you can level it without drilling into the wall.
If the wall needs more than a light patch, skim the whole area with joint compound, sand it smooth with 120 grit, and prime with a stain-blocking primer before painting or installing the new mirror. Glossy or semi-gloss paint holds up best in a bathroom. For a deeper clean of the surrounding tile and walls, our guide on how to remove mildew from bathroom walls walks through a bleach-free method that works on most painted and tiled surfaces.
Most importantly, do not leave a bare patch of drywall behind the old mirror for long. Bathroom humidity will find any exposed paper and cause it to bubble. Either prime and paint within a day or two, or hang the new mirror first and finish the wall behind it.
Frequently Asked Questions
Will removing a glued bathroom mirror damage the drywall behind it?
Minor scuffs are common and easy to patch, but significant drywall damage is not inevitable. Using a plastic putty knife, working in small sections, and softening the adhesive with heat or a citrus remover keeps the paper facing intact. If the paper does tear, a thin coat of joint compound and a sanding pass will usually restore the surface before you prime and paint.
What tool actually cuts through mirror adhesive without breaking the glass?
A length of steel piano wire, about 22 to 24 gauge, is the tool most contractors and reviewers recommend. Loop each end around a dowel for handles, slide the wire behind the mirror, and saw back and forth in slow, steady strokes while a helper steadies the glass. Dental floss works in a pinch on soft adhesive, but piano wire holds up better on thick construction mastic.
Can I use a heat gun to remove a bathroom mirror safely?
Yes, but only on the lowest setting and only if you keep the nozzle moving. Hold it at least 6 inches from the glass and never heat one spot for more than 10 seconds. A hair dryer is the safer choice for most mirrors and is what we recommend trying first. Stop immediately if you see any cracking, because the glass can shatter quickly once a crack starts.
How do I tell if my bathroom mirror is glued or clipped?
Run your fingers along the bottom edge and corners. If you feel small metal or plastic tabs holding the glass, the mirror is mounted with clips and can usually be lifted off once the clips are removed. If the glass sits flush to the wall with no visible hardware, it is glued on with construction adhesive. Tapping lightly on the surface also helps: clipped mirrors sound hollow, while glued mirrors sound dense and solid.
What should I do if the mirror cracks while I am removing it?
Stop moving and step back so the glass can settle. If the painter’s tape grid is in place, most of the shards will stay on the wall. Put on heavier gloves, lay a drop cloth on the floor beneath the mirror, and gently lower the glass flat. Wrap large pieces in a contractor bag or old towels before carrying them. For small shards, press a damp paper towel against the wall to pick up fines instead of wiping, which can spread slivers across the room.
That covers the full job: taping and warming the glass, working piano wire or dental floss through the adhesive, supporting the mirror as it comes free, and cleaning the wall so the next mirror sits flat. If you are renting, the plastic putty knife and citrus remover approach is usually enough to leave the wall in deposit-return condition. If you own the place, take the extra hour to patch and prime properly, and the new mirror will look like it has always been there.