How to Replace a Shower Head: Easy DIY Without Leaks (2026)
Replacing a shower head takes about 15 minutes for most beginners, and the whole job needs an adjustable wrench, a roll of thread seal tape, and a towel. Nearly every drip, weak spray, and tired-looking bathroom starts at the fitting on the end of the shower arm, not inside the wall. Here is the job from prep to leak test, including what to do when the old head refuses to move.
Time: 15 to 30 minutes for a straightforward swap, longer if the arm is seized · Cost: one replacement head and a roll of thread seal tape, prices vary by region · Difficulty: beginner · Skill level: no plumbing experience needed
Contents
If you live in a hard-water area, expect more mineral crust on the threads than most guides show. That crust is the single biggest reason a “simple” swap turns into an afternoon.
Tools and Materials
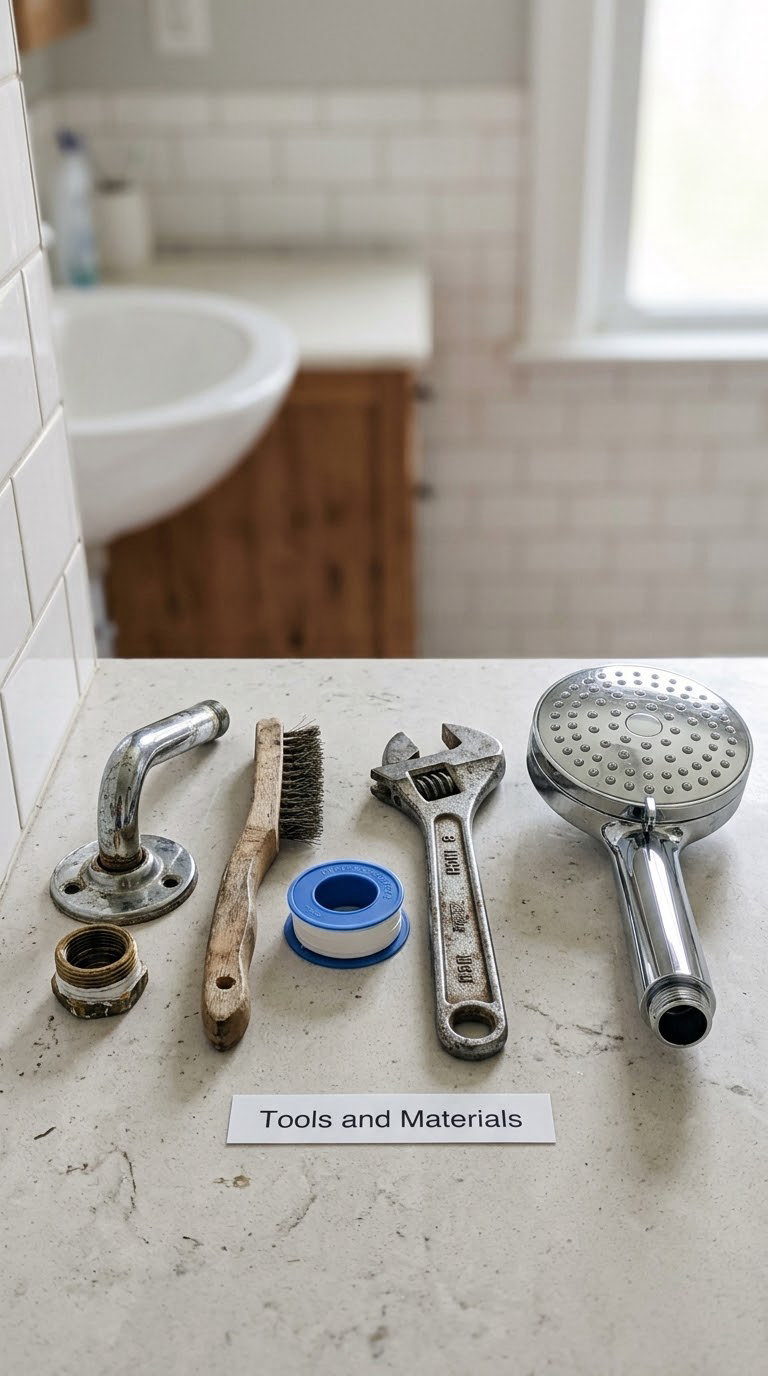
Everything for this job fits in one toolbox. Most of it you already own.
Tools
- Adjustable wrench or channel-lock pliers, 8 inch — sized to grip the 1/2-inch shower arm fitting without crushing it
- Second pair of pliers — optional, for holding the arm steady on stubborn fittings
- Old towel or drop cloth — one to protect the finish, one on the tub floor to catch tools
- Small wire brush or stiff toothbrush — for mineral deposits on the threads
- Safety glasses and rubber gloves — cheap, and the drain is right underneath
Materials
- New shower head — standard 1/2-inch NPT connection (the residential norm)
- Thread seal tape (plumber’s tape) — one roll, enough for a dozen swaps
- Rubber gasket or washer — if your new head seals with rubber instead of tape
- White vinegar and a rag or plastic bag — for soaking a crusty joint
- Penetrating oil — optional, for a fitting that has not moved in years
If the new head is a rainfall style, it may also need a separate arm or an adapter. Our guide to adding a rain shower head to an existing shower covers that conversion in detail.
Before You Start: Shut Off Water and Check the Fit
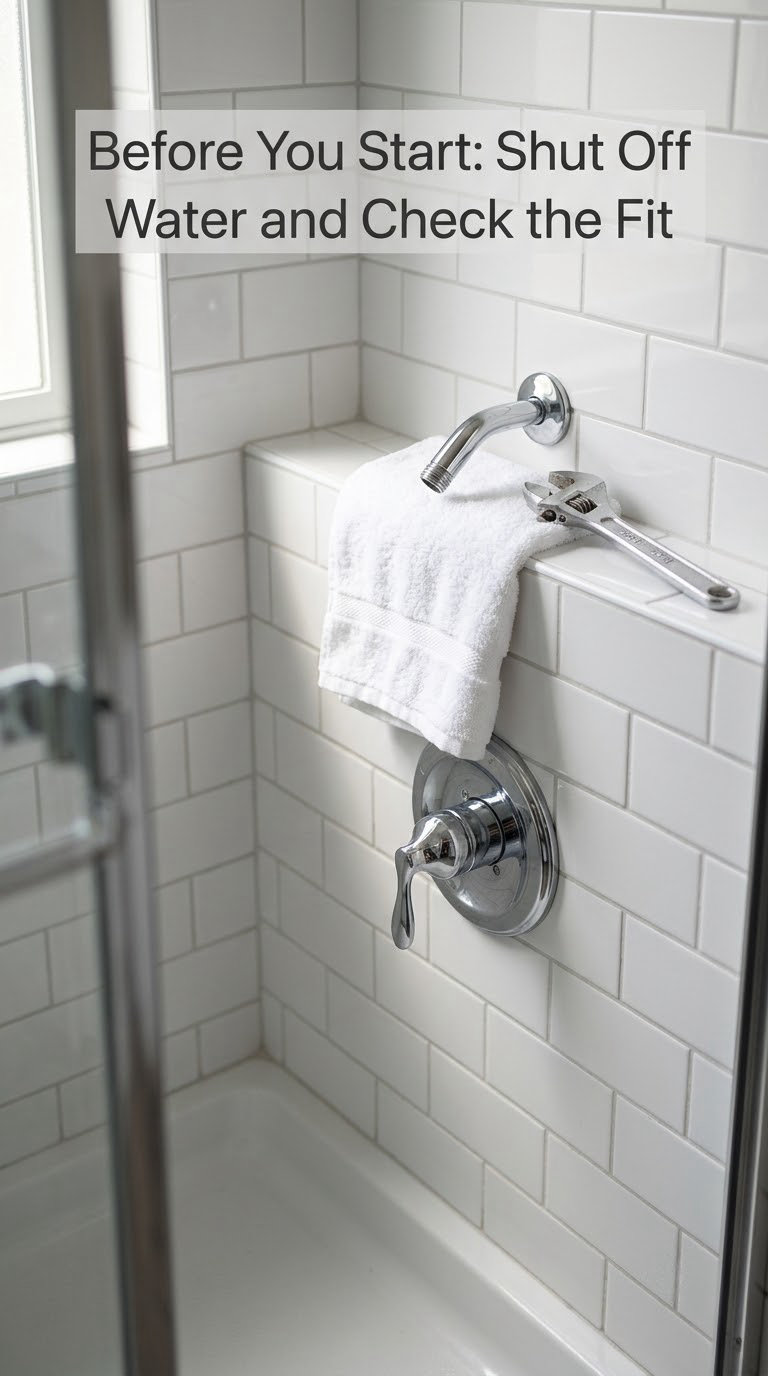
Turn the shower handle to the off position first. That stops water flow but leaves pressure in the lines, so if the shower has its own shutoff valves, close those too — they are usually behind the handle plate or in the nearest access opening.
You almost never need to shut off the home’s main supply for this job. If the shower has no accessible shutoff valves, set the handle to off, open the cold tap elsewhere in the house to bleed pressure, and work quickly with a bucket and towel under the arm.
Next, identify what you are dealing with. Nearly every residential shower arm is 1/2-inch NPT, a tapered pipe thread, which is why heads are so interchangeable. If the existing fitting is glued on, painted shut, or the arm is swollen and crumbly with corrosion, stop reading and call a plumber — that is a shower arm job, not a shower head job.
Lay a drop cloth in the tub. Dropping a wrench into a drain is the most common injury in this project, and several people tie their tools to a length of string or wedge them against the wall while working.
How to Replace a Shower Head Step by Step
How to Replace a Shower Head: Remove the Old Head
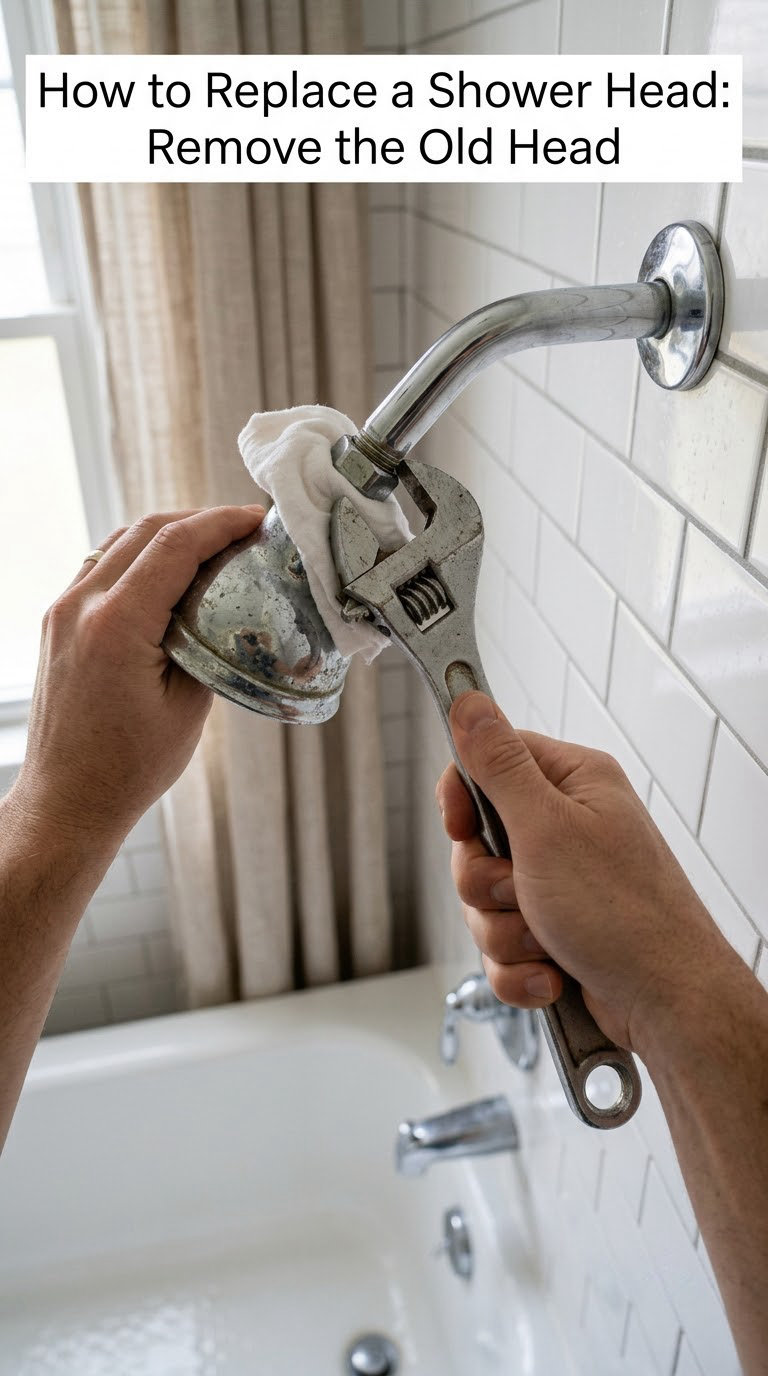
Shower heads do just unscrew. Turn the head counterclockwise as though you are loosening a jar lid, viewed from below and looking up at the arm. Start by hand, because most heads come free with no tool at all once the handle is off.
When it stops moving, wrap a towel around the joint and grip the head with the adjustable wrench. The cloth is not optional — a bare wrench leaves crescent marks in chrome and dulls brushed nickel permanently.
If it is truly stuck, work up a ladder rather than forcing it:
- Soak the joint — soak a rag in white vinegar, wrap it around the fitting, and leave it 30 to 60 minutes. The acid eats the limescale glue holding the threads together.
- Add mechanical grip — wrap a rubber band around the fitting over the tape, or jam a grooved shower-head wrench onto it. Both give teeth where smooth chrome has none.
- Work a penetrating oil — spray, wait 10 minutes, try again. It helps with old sealant and corrosion, though it is no substitute for real force.
- Escalate the tool — strap wrench next, then a pipe wrench for the last resort. A pipe wrench can gouge the finish, so protect it and use short bursts.
Hold the arm with one wrench while you turn the fitting with the other, and never turn the arm itself. If the arm starts to spin in the wall, you have hit the end of this job — the arm is held by an internal thread and needs a plumber. A seized handle or shower trim is a different part entirely and is covered in our guide to replacing a two-handle shower valve.
How to Replace a Shower Head: Clean and Inspect the Connection
The old head leaves behind a stack of old thread seal tape, sometimes ten or twelve layers of it, plus grey mineral crust. Pick off what you can with a fingernail or a plastic scraper, then scrub the threads with a wire brush dipped in vinegar.
Look at the arm now. Threads should be clean, straight, and evenly tapered. If they are ragged, flattened, or flake away in your hand, the arm is done and no amount of tape will make it hold. Run the threads with your fingertip; any sharpness or roughness is a red flag.
Check the rubber gasket seat inside the arm too, if there is one. A hardened or flattened gasket is a drip waiting to happen, and replacements are a few cents at any hardware counter.
How to Replace a Shower Head: Fit the Correct Adapter
Most replacements are a direct fit: 1/2-inch NPT male threads onto 1/2-inch NPT female, nothing else required. Check the listing before you buy, and match the finish to what is already in the bathroom so the old and new do not look like two fixtures fighting each other.
An adapter is needed when the connection is not standard: a 1/4-inch or 3/8-inch arm, an unusual thread standard, or a head with a hose permanently attached. Adapters screw onto the arm first, then the head screws onto the adapter. Buy one with a washer inside, and remember the thread direction stays the same: clockwise to tighten.
Changing fixture type needs its own parts. A handheld head screws directly onto the arm with nothing more, or onto the valve spout in older two-handle setups. A combo unit with a fixed head and handheld needs a slider bar and a diverter that routes water to either side, and the hose connects to the diverter rather than the arm.
If your water pressure is marginal, check the flow rate on the box before you buy. Low-flow heads at or under 2.5 gallons per minute can make a weak shower feel weaker, and our picks for the best shower heads for low pressure are worth a look before you commit.
How to Replace a Shower Head: Attach the New Head
Decide which seal your new head uses before you wrap anything. A head with a plain male thread connection and instructions that call for tape gets two or three wraps of thread seal tape, applied clockwise so the tape seats into the grooves rather than peeling back. Pull it taut as you wrap and tear it off cleanly.
A head with a rubber gasket inside the collar does not want tape. Tape on a gasket connection is a common cause of an immediate leak, because the gasket is designed to be the seal and the tape just gets in the way.
Screw the head on clockwise by hand until it is snug, then give it roughly a quarter turn more. That is the correct amount of torque for most residential fittings, because the threads themselves are designed to compress the seal. Do not lean on a wrench for the final tightening. Over-tightening crushes or dislodges the rubber gasket and the new head drips the same afternoon you installed it.
Hand-tightening-only designs go further: if the instructions say snug by hand, that means hand only.
How to Replace a Shower Head: Test for Leaks
Open the valve slowly, let the water run for a minute, then shut it off and wipe the arm and the joint completely dry. Wait five minutes with a paper towel under the connection. Where the water shows up tells you what went wrong, and it saves you from swapping the head twice.
| Where the water appears | What it means | What to do |
|---|---|---|
| Dripping at the joint between head and arm, only while running | Cross-thread, a missing gasket, or a loose fitting | Disassemble, clean both threads, reseat, hand-tighten plus a quarter turn |
| Dripping from the head face while running | Leaking spray ports, not a fitting problem | Clean or descale the face, or replace the head |
| Dripping from the spout or handle with the water off | Mixing valve cartridge, nothing to do with the head | Call a plumber for a cartridge replacement |
| Dripping at the joint even with water off | Water trapped above the head, a valve issue upstream | Call a plumber |
Never test a joint you have not fully tightened, and never test before the seal is seated. If a new connection drips, take it apart rather than stacking more tape on top of a bad fit — four wraps on a cross-threaded fitting only hides the problem until the tape fails.
Common Mistakes to Avoid
- Cross-threading — the head starts crooked and never seats. Back it out completely, restart clockwise, and make sure the head sits square on the arm before tightening.
- Over-tightening — hand tight plus a quarter turn is enough. Crushing the gasket is the most common reason a brand new head drips.
- Tape on a gasket connection — if the head has a rubber washer or O-ring, skip the tape entirely.
- Wrong adapter or wrong thread standard — forcing a mismatched fitting strips threads that you cannot easily replace.
- Forgetting the old gasket — check whether the new head includes a washer; many do not, and the old one is often rock hard.
- Bare wrench on a finished arm — always put a towel between the tool and the chrome. Marks there do not buff out.
- Testing too early — a half-finished joint that looks dry can weep once it is under pressure. Wait the full five minutes.
- Leaving old tape on the arm — layered tape and limescale prevent a clean thread from starting straight.
When to Call a Pro
Some jobs are genuinely beyond the scope of a shower head swap, and knowing the line saves a lot of damage.
- The arm turns or moves when you apply force, or the threads crumble into the wall
- The arm is corroded — green, flaky, or weeping at the wall escutcheon
- The valve itself drips or the handle does not fully shut off
- Unusual thread sizes or fittings you cannot identify, especially in homes built before 1980
- The plumbing is concealed and the arm has to come out of the wall
- Any electrical work near the wet area, including heated towel rails on the same circuit
Replacing a shower arm or a valve cartridge usually requires opening the wall in older homes and can involve permit and code requirements depending on your locality. A licensed plumber handles that in an afternoon; a weekend DIY can turn it into a re-tile.
Maintenance
A new head needs very little, and a few minutes twice a year keeps spray patterns even. Wipe the face plate with a soft cloth weekly, especially around the nozzles where product residue builds up.
Every few months, or whenever the spray weakens, soak the face in a bowl of white vinegar for 30 to 60 minutes, then scrub the nozzles with an old toothbrush. In hard-water areas, a diluted vinegar soak monthly keeps limescale from closing the ports.
If your head has a filter or a flow restrictor, check it on the same schedule. Our reviews of the best shower head filters explain which types need routine attention and which simply do not.
On handhelds, inspect the hose connections and the swivel joint for weeping, and check the arm threads annually for corrosion. If the joint ever needs tightening, take it apart first — tightening a dripping threaded joint in place is how a minor fix becomes a replacement job.
Frequently Asked Questions
Do I need plumber’s tape when replacing a shower head?
Use new thread seal tape only when the new shower head has a plain male-thread connection and its instructions call for tape. Many modern fixed and handheld shower heads use a rubber gasket inside the collar instead, and tape on a gasket connection causes an immediate leak. Wrap two or three turns clockwise, keep the tape taut, and tear it off cleanly.
What thread size does a shower arm use?
Most standard shower arms use 1/2-inch NPT threads, but the diameter alone does not guarantee a proper match. Confirm that the shower arm and replacement head are both standard residential fittings, and check the connection type listed by the manufacturer. Anything other than 1/2-inch NPT needs an adapter or a plumber.
Can I replace a shower head without turning off the main water?
You usually do not need to shut off the home’s main water, but you should close the shower’s local supply valves before removing the old head. If the shower lacks accessible shutoff valves, or if water still runs at the arm with the handle off, work with a bucket and a towel instead, and plan the swap for a low-use time of day.
Why is my new shower head leaking at the connection?
A leak usually means the joint was cross-threaded, the threads were not fully seated, an incorrect adapter was used, or a required gasket or seal is missing. Disassemble the connection, clean both threads, fit the correct seal, and hand-tighten plus a quarter turn. If water drips from the spout with the shower off, the problem is the valve cartridge, not the head.
What to Do First
Start by figuring out where the water actually appears. Turn the shower off, dry the arm and the joint, then check again in five minutes — that single test tells you whether the shower head is the problem or the valve behind it. If it is the head, the swap above takes about fifteen minutes and one roll of tape.