Unlock All Duckov Teleports Location (September 2026) Ultimate Guide
In Escape from Duckov, you can teleport between activated beacon locations using a Teleport Station in your bunker, reducing travel time from hours to seconds. To unlock teleportation, complete Basic Construction I-III quests, gather 500 currency, 2 Power Cords, and 1 Portable Hard Drive, then build the Teleport Station. Each beacon requires specific activation tasks: defeat Pato Chapo for Ground Zero, breach walls with explosives for Warehouse, and use dynamite for Farm Town’s two beacons. Teleportation costs 250 credits per use but saves significant time compared to manual travel.
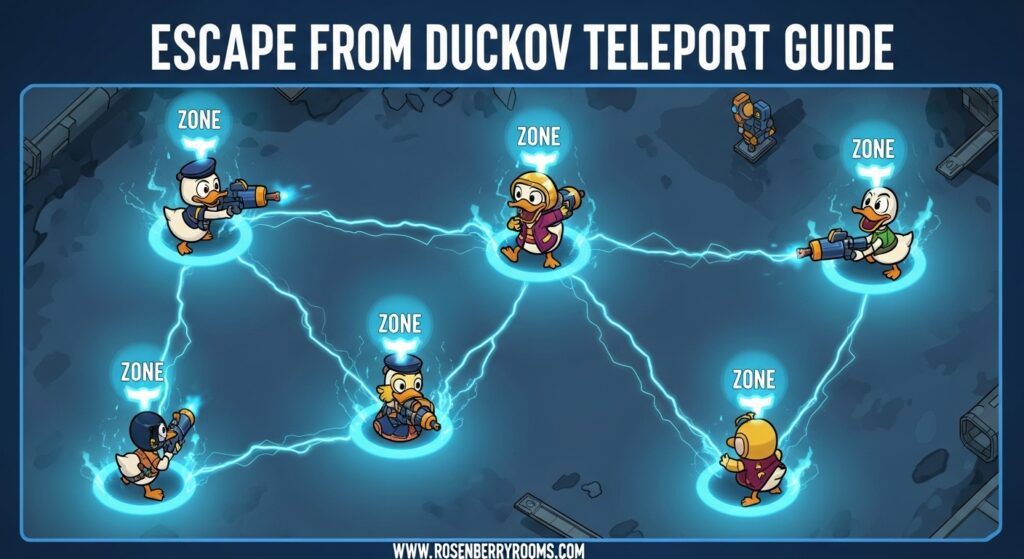
Quick Reference: Teleport System Overview
| Feature | Requirement | Cost | Notes |
|---|---|---|---|
| Teleport Station | Complete Basic Construction I-IV | 500 currency + materials | Built in bunker |
| Ground Zero Beacon | Defeat Pato Chapo + clear hostiles | 250 credits per teleport | Needs 2 wood planks for bridge |
| Warehouse Beacon | Breach cracked wall with explosives | 250 credits per teleport | Located near gas station |
| Farm Town Beacon 1 | 1 dynamite stick at gate | 250 credits per teleport | Southern location |
| Farm Town Beacon 2 | 2 dynamite sticks at rock pile | 250 credits per teleport | Northern location |
This comprehensive guide will walk you through every step of unlocking and using Escape from Duckov’s teleport system, saving you countless hours of travel time and making your duck protagonist’s journey much more efficient.
Contents
How to Unlock the Teleport System?
Step 1: Progress Through Main Quests
The teleport system isn’t available immediately when you start Escape from Duckov. You’ll need to progress through the game’s main questline to unlock this essential feature. Here’s exactly what you need to do:
Complete the Construction Quest Series:
- Basic Construction I: Your first introduction to building in the bunker
- Basic Construction II: Expands your building capabilities
- Basic Construction III: Advanced construction techniques
- Basic Construction IV: This is the key quest that unlocks the teleport station option
These quests are given by Jeff, who serves as your primary quest giver for construction-related tasks. Each quest builds upon the previous one, teaching you the game’s building mechanics while progressively unlocking more advanced features.
Step 2: Gather Required Materials
Once you receive the Basic Construction IV quest, you’ll need to collect specific materials before you can build the Teleport Station:
Required Materials:
- 500 currency: Can be earned by completing quests, selling loot, or defeating enemies
- 2 Power Cords: Found in electronics containers throughout the map or purchased from vendors
- 1 Portable Hard Drive: Can be scavenged from tech-related containers or bought from vendors
Pro Tip: Focus on looting electronics containers in the Warehouse area, as they have the highest drop rate for Power Cords and Portable Hard Drives. Sell any unwanted items to vendors to quickly accumulate the 500 currency needed.
Step 3: Build the Teleport Station
With all materials collected, head to your bunker’s construction panel to build the Teleport Station:
Building Process:
- Locate the Construction Panel: Usually found in the main area of your bunker
- Select Teleport Station: It should now appear in your buildable options after completing Basic Construction IV
- Choose a Clear Location: The Teleport Station needs space, so select an area not occupied by other structures
- Confirm Construction: The game will consume your materials and build the station
Important Note: Some players have reported issues where the Teleport Station doesn’t appear in the build menu. If this happens, ensure you’ve completed all previous construction quests and have the required materials in your inventory. You may also need to build a Computer Desk (Technical Center) first, as mentioned by players in the Steam community.
Understanding the Beacon System
Now that you have your Teleport Station built, you need to activate beacons throughout the world to create teleport destinations. Each beacon has specific activation requirements and serves as a fast travel point once activated.
How Beacons Work?
Beacon Basics:
- Each beacon must be discovered and activated manually before it becomes available for teleportation
- Once activated, beacons appear in your Teleport Station’s destination menu
- Teleportation to any activated beacon costs 250 credits
- You can teleport from any beacon location back to your bunker or to other activated beacons
Why Beacons Matter: The beacon system transforms Escape from Duckov from a time-consuming traversal game into an efficient looting and questing experience. Without teleportation, traveling between zones can take 10-15 minutes of real time and expose you to numerous enemy encounters. With teleportation, you can instantly move between key locations, making resource farming, quest completion, and exploration much more efficient.
Ground Zero Beacon: Your First Fast Travel Point
The Ground Zero beacon, also known as the Road Camp beacon, is typically the first teleport location players unlock. It’s located in the starting area and serves as a crucial early-game fast travel hub.
Location and Access
Finding the Ground Zero Beacon:
- Region: Ground Zero (starting area)
- Specific Location: North of your bunker, across a broken bridge
- Landmark: Look for the Road Camp area, which is a distinct campsite with structures and enemies
Bridge Repair Requirement: Before you can reach the beacon, you’ll need to repair the broken bridge leading to the Road Camp area:
- Required Materials: 2 wood planks
- How to Get Wood Planks: Can be found in construction sites, warehouses, or crafted if you have the necessary blueprints
- Repair Process: Interact with the broken bridge when you have the materials in your inventory
Activation Requirements
The Ground Zero beacon has the most complex activation requirements of all beacons, making it a significant early-game challenge:
Step-by-Step Activation:
- Reach the Road Camp Area: Cross the repaired bridge and enter the camp
- Locate Pato Chapo: This is a named boss enemy in the area
- Defeat Pato Chapo: He’s tougher than regular enemies, so come prepared with good weapons and healing items
- Clear Remaining Hostiles: After defeating the boss, eliminate all other enemies in the camp area
- Activate the Beacon: Once the area is clear, interact with the beacon structure to register it
Combat Tips for Pato Chapo:
- Pato Chapo has more health than regular enemies and may have special attack patterns
- Use cover effectively and focus on dodging while looking for openings
- Bring healing items and consider using explosives if available
- Clear out regular enemies first to avoid being overwhelmed during the boss fight
Strategic Value
Why Ground Zero Beacon Matters:
- Early-Game Hub: Serves as your primary fast travel point in the early game
- Resource Farming: The area has good loot opportunities for early-game gear and materials
- Quest Hub: Many early quests take place in or around the Ground Zero area
- Safe Extraction: Provides a reliable extraction point when you’re carrying valuable loot
Optimal Usage Patterns:
- Use the Ground Zero beacon as your base of operations for early-game exploration
- Teleport here to complete quests, then extract to save progress
- Farm resources in the area and use the beacon to quickly return to your bunker
- Keep this beacon active throughout the game for quick access to early-game areas
Warehouse Beacon: Gateway to Mid-Game Content
The Warehouse beacon represents your first step into mid-game content and unlocks access to more advanced areas, including Farm Town. This beacon is crucial for game progression and opens up new questlines and resource opportunities.
Location and Access
Finding the Warehouse Beacon:
- Region: Connected to Ground Zero, accessible through a breachable wall
- Specific Location: East of the main compound, beside a gas station
- Landmark: Look for the gas station and extraction point – the beacon is nearby
Access Requirements: Unlike the Ground Zero beacon, the Warehouse area requires explosives to access:
- Required Tool: Any explosive (grenades, dynamite, etc.)
- Access Point: A cracked wall in Ground Zero that leads to the Warehouse zone
- Alternative Methods: If you don’t have explosives, you may need to progress further in the main quest to obtain them
Activation Requirements
The Warehouse beacon has simpler activation requirements compared to Ground Zero, focusing more on access than combat:
Step-by-Step Activation:
- Breach the Cracked Wall: Use explosives to break through the wall separating Ground Zero from Warehouse
- Navigate to the Gas Station: The beacon is located near this prominent landmark
- Locate the Beacon Structure: It should be visible near the gas station and extraction point
- Interact to Activate: Simply approach and interact with the beacon to register it
Combat Considerations:
- While there may be enemies in the Warehouse area, you don’t need to clear all of them to activate the beacon
- Focus on reaching the beacon quickly, then deal with threats as needed
- The Warehouse area has stronger enemies than Ground Zero, so be prepared for tougher fights
Strategic Value
Why Warehouse Beacon Matters:
- Mid-Game Progression: Unlocks access to more advanced content and resources
- Crafting Stations: The Warehouse area introduces advanced crafting capabilities
- Farm Town Access: This beacon is the gateway to reaching Farm Town, the next major zone
- Better Loot: The area contains more valuable resources and equipment than Ground Zero
Advanced Strategies:
- Use the Warehouse beacon as your mid-game base for farming better equipment
- The area’s crafting stations make it ideal for upgrading gear between runs
- Keep this beacon active for quick access to mid-game content and resources
- Use the beacon to quickly reach the Farm Town transition point
Farm Town Beacons: Late-Game Fast Travel
Farm Town introduces two separate beacons, making it the most teleporter-friendly zone in the game. These beacons are crucial for late-game progression and provide access to the most valuable resources and endgame content.
Farm Town Overview
Zone Characteristics:
- Environment: Open fields with scattered scav camps and structures
- Difficulty: Late-game content with tougher enemies and better rewards
- Key Features: Two separate beacons, ferry access to Farm Dock, endgame preparation area
Access Requirements: To reach Farm Town, you’ll need:
- 2 Dynamite Sticks: Used to blow up the rock barrier near the Warehouse beacon
- Progression: Must have activated the Warehouse beacon first
- Preparation: Late-game equipment recommended due to increased enemy difficulty
Farm Town Beacon 1 (Southern)
Location and Access:
- Position: Southern part of Farm Town
- Landmark: Near a gated barrier
- Access Method: Requires 1 dynamite stick to breach the gate
Activation Requirements:
- Reach the Southern Gate: Navigate to the gated barrier in southern Farm Town
- Prepare Dynamite: Have 1 dynamite stick in your inventory
- Breach the Gate: Interact with the gate while holding dynamite to blow it open
- Activate Beacon: The beacon should be accessible after breaching the gate
Strategic Importance:
- Quick Farm Access: Provides immediate access to Farm Town’s southern resources
- Quest Hub: Many late-game quests are centered around the southern Farm Town area
- Extraction Point: Offers a reliable extraction point for valuable late-game loot
Farm Town Beacon 2 (Northern)
Location and Access:
- Position: Northern part of Farm Town
- Landmark: Near a rock pile blocking the northern farmland
- Access Method: Requires 2 dynamite sticks to clear the rock formation
Activation Requirements:
- Reach the Rock Pile: Navigate to the northern rock formation
- Prepare Dynamite: Have 2 dynamite sticks in your inventory
- Clear the Rock Pile: Interact with the rock pile while holding dynamite to detonate it
- Activate Beacon: The beacon becomes accessible after clearing the obstruction
Strategic Importance:
- Endgame Preparation: This area is crucial for preparing for the final zones
- Best Resources: Contains the most valuable resources and equipment in Farm Town
- Ferry Access: Provides quick access to the Farm Dock ferry system
Farm Town Strategy
Optimal Beacon Usage:
- Southern Beacon: Use for quick resource runs and quest completion in southern Farm Town
- Northern Beacon: Use for accessing the best loot and preparing for endgame content
- Combined Strategy: Teleport between both beacons to efficiently cover all of Farm Town
Resource Management:
- Farm Town requires significant dynamite usage, so keep a steady supply
- The area’s valuable resources justify the 250-credit teleport cost
- Consider setting up resource runs that end at extraction points near each beacon
Advanced Teleportation Strategies
Once you have multiple beacons activated, you can employ advanced strategies to maximize efficiency and minimize risk. These techniques will transform how you play Escape from Duckov.
The Teleport-Extract Loop
Basic Concept: The teleport-extract loop is the most efficient way to farm resources and complete quests in Escape from Duckov. Here’s how it works:
- Teleport to Target Beacon: Choose the beacon closest to your objective
- Complete Objective: Gather resources, complete quests, or defeat targets
- Move to Extraction Point: Navigate to the nearest extraction point
- Extract and Return: Extract back to your bunker, then teleport to the next location
Why This Works:
- Minimizes Travel Time: Eliminates long walks between objectives
- Reduces Risk: Less exposure to enemies means fewer chances of death
- Maximizes Efficiency: You can complete multiple objectives in a single session
- Preserves Resources: Less combat means fewer resources spent on healing and ammo
Zone Progression Strategy
Recommended Progression Path:
- Ground Zero: Activate beacon, complete early quests, gather basic resources
- Warehouse: Activate beacon, access crafting stations, prepare for Farm Town
- Farm Town (Southern): Activate first beacon, complete mid-game quests
- Farm Town (Northern): Activate second beacon, access best resources
- Farm Dock: Use ferry system for advanced content
- Teleporter Zone: Endgame content accessed through tech quests
Resource Allocation:
- Early Game: Focus on Ground Zone and Warehouse resources
- Mid Game: Balance between Warehouse and Farm Town (Southern)
- Late Game: Focus on Farm Town (Northern) and Farm Dock
- Endgame: Teleporter Zone and high-level content
Credit Management for Teleportation
Understanding the Economics:
- Teleport Cost: 250 credits per use
- Manual Travel Cost: Up to 5,000 credits in time, resources, and risk
- Return on Investment: Teleportation pays for itself quickly through time savings
Credit Management Strategies:
- Always Keep 500+ Credits: Ensures you can teleport when needed
- Prioritize High-Value Targets: Only teleport for objectives worth at least 500 credits
- Combine Objectives: Complete multiple objectives in one area before teleporting
- Sell Strategically: Sell low-value items to maintain teleportation funds
Troubleshooting Common Teleport Issues
Even with a comprehensive understanding of the teleport system, you may encounter issues. Here are solutions to common problems reported by players.
Teleport Station Not Appearing
Problem: The Teleport Station doesn’t show up in your build menu despite completing Basic Construction IV.
Solutions:
- Verify Quest Completion: Ensure you’ve completed all Basic Construction quests (I-IV)
- Check Materials: Confirm you have 500 currency, 2 Power Cords, and 1 Portable Hard Drive
- Build Computer Desk: Some players report needing a Computer Desk (Technical Center) first
- Restart Game: Sometimes a simple restart can resolve UI glitches
- Check for Updates: Ensure your game is updated to the latest version
Beacon Not Activating
Problem: You’ve reached a beacon location but can’t activate it.
Solutions:
- Complete Requirements: Verify you’ve met all activation requirements (defeated bosses, used explosives, etc.)
- Clear Area: Some beacons require clearing all enemies in the area first
- Check Inventory: Ensure you have required items (dynamite, etc.) in your inventory
- Restart Area: Leave the area and return to reset the beacon
- Progress Main Quest: Some beacons may require specific main quest progress
Insufficient Credits
Problem: You don’t have enough credits for teleportation.
Solutions:
- Sell Unwanted Items: Clear inventory space and sell unnecessary items
- Complete Money Quests: Focus on quests that offer high credit rewards
- Farm High-Value Areas: Target areas known for valuable loot
- Reduce Teleport Usage: Only teleport for high-value objectives
- Manual Travel: As a last resort, travel manually to save credits
Community Resources and Official Information
Staying connected with the Escape from Duckov community and official channels can provide you with the latest updates, strategies, and support. Here are the most valuable resources:
Official Channels
Official Twitter: @GameDuckov
- Follow for official announcements, updates, and development news
- The developers occasionally share sneak peeks of upcoming features
- Note: Much of the content is in Japanese, but important updates are often in English
Official Discord: Escape from Duckov Discord
- Join the official Discord server for real-time discussions with developers and players
- Get help from the community for technical issues and strategy advice
- Participate in community events and contests
- Access exclusive content and announcements
Steam Community: Escape from Duckov Steam Discussions
- Official forums for bug reports and technical support
- Player discussions and strategy sharing
- Developer responses to common issues
- Patch notes and update information
Community Resources
Reddit: r/EscapeFromDuckov
- Active community discussion and strategy sharing
- Player-created guides and tutorials
- News and updates from community sources
- AMAs with developers when available
Fan Wiki: Escape from Duckov Wiki
- Comprehensive database of game information
- Detailed maps and location guides
- Quest walkthroughs and item databases
- Regularly updated by community contributors
Content Creators: Various YouTube creators produce Escape from Duckov content
- Video guides for complex mechanics and boss fights
- Live streams of gameplay and strategy discussions
- Patch note analysis and meta discussions
- Community challenges and events
Why These Resources Matter?
Staying Updated:
- Escape from Duckov is still in development, with regular updates and new features
- Community resources often have the latest information before official channels
- Player discoveries can provide advantages in gameplay
Getting Help:
- Technical issues are often resolved faster through community channels
- Strategy discussions can improve your gameplay efficiency
- Shared experiences help avoid common pitfalls and mistakes
Contributing to the Community:
- Share your discoveries and strategies to help other players
- Report bugs and issues to help improve the game
- Participate in discussions to shape the game’s development
- Build connections with other players for cooperative play
Frequently Asked Questions
General Teleportation Questions
Q: How do I unlock the teleport system in Escape from Duckov? A: Complete Basic Construction I-III quests to trigger Basic Construction IV from Jeff. Gather 500 currency, 2 Power Cords, and 1 Portable Hard Drive, then build the Teleport Station in your bunker.
Q: How much does it cost to teleport between locations? A: Each teleportation costs 250 credits, regardless of the distance or destination. This is significantly cheaper than the 5,000-credit equivalent of manual travel time and risk.
Q: Can I teleport back to my bunker from any location? A: Yes, once you’ve activated at least one beacon, you can teleport from any beacon location back to your bunker or to other activated beacons.
Beacon-Specific Questions
Q: Where is the Ground Zero beacon located? A: The Ground Zero beacon (Road Camp) is located north of your bunker, across a broken bridge that requires 2 wood planks to repair. You must defeat Pato Chapo and clear all hostiles to activate it.
Q: How do I access the Warehouse beacon? A: Breach the cracked wall in Ground Zero using explosives (grenades or dynamite), then navigate to the gas station area where the beacon is located east of the main compound.
Q: Why are there two beacons in Farm Town? A: Farm Town has two separate beacons to provide better coverage of the large zone. The southern beacon requires 1 dynamite stick to access, while the northern beacon requires 2 dynamite sticks.
Technical and Progression Questions
Q: I completed Basic Construction IV but can’t build the Teleport Station. What should I do? A: Ensure you have all required materials (500 currency, 2 Power Cords, 1 Portable Hard Drive) in your inventory. Some players also report needing to build a Computer Desk (Technical Center) first.
Q: What’s the best order to activate beacons? A: Follow the natural progression: Ground Zero → Warehouse → Farm Town (Southern) → Farm Town (Northern). This follows the game’s difficulty curve and quest structure.
Q: How do I get dynamite for Farm Town beacons? A: Dynamite can be found in loot containers, purchased from vendors, or crafted if you have the necessary blueprints and workshop upgrades.
Strategy and Optimization Questions
Q: Is teleportation worth the 250-credit cost? A: Absolutely. Teleportation saves significant time and reduces risk, making it extremely cost-effective. The time saved can be used for more profitable activities.
Q: What’s the most efficient way to farm credits for teleportation? A: Focus on high-value loot areas, complete money-focused quests, and sell unnecessary items. The Warehouse and Farm Town areas typically offer the best credit-to-time ratios.
Q: Can I teleport while carrying valuable loot? A: Yes, teleportation works regardless of your inventory contents. In fact, it’s recommended to teleport back to your bunker when carrying valuable loot to minimize the risk of losing it.
Conclusion: Mastering Duckov’s Teleport Network
Mastering the teleport system in Escape from Duckov transforms the game from a challenging traversal experience into an efficient, strategic adventure. By following this comprehensive guide, you now have all the knowledge needed to unlock every beacon, optimize your travel routes, and maximize your gameplay efficiency.
Key Takeaways
Essential Steps:
- Progress Through Quests: Complete Basic Construction I-IV to unlock the Teleport Station
- Gather Materials: Collect 500 currency, 2 Power Cords, and 1 Portable Hard Drive
- Build Strategically: Place your Teleport Station in a convenient bunker location
- Activate All Beacons: Follow the specific requirements for each of the four beacon locations
- Use Efficiently: Implement the teleport-extract loop for optimal resource farming
Strategic Advantages:
- Time Savings: Reduce travel time from hours to minutes
- Risk Reduction: Minimize exposure to dangerous enemies and situations
- Resource Optimization: Focus on high-value activities rather than travel
- Progression Acceleration: Move through the game’s content more quickly
Next Steps in Your Duckov Journey
With the teleport system mastered, you’re ready to tackle Escape from Duckov’s more advanced content:
Immediate Goals:
- Complete All Beacon Activations: Ensure you have access to all four teleport locations
- Establish Resource Loops: Create efficient farming routes using the teleport system
- Progress Main Quest: Use your newfound mobility to advance through story content
- Prepare for Endgame: Farm the best resources and equipment for late-game challenges
Long-Term Objectives:
- Master All Zones: Become proficient in navigating every area of the game
- Optimize Your Build: Use your efficient travel to test different equipment and strategies
- Contribute to Community: Share your discoveries and help other players
- Stay Updated: Keep track of new content and features as the game develops
Final Tips for Success
Remember These Principles:
- Always Activate Beacons: Never leave a new area without activating its beacon
- Maintain Credit Buffer: Keep at least 500 credits available for emergency teleportation
- Plan Your Routes: Use the teleport system strategically rather than randomly
- Stay Connected: Engage with the community for the latest strategies and updates
The Journey Ahead: Escape from Duckov is a continuously evolving game with regular updates and new content. By mastering the teleport system now, you’ve established a strong foundation for all future content. Whether you’re farming resources, completing quests, or tackling endgame challenges, your efficient travel network will serve you well throughout your duck protagonist’s adventure.
Happy teleporting, and may your journey through Duckov be swift and prosperous!