The Forge Enemy Guide (September 2026) All 21 Enemies, Drops & Strategies
The Forge features 21 unique enemy types across four distinct regions, each with specific HP ranges (20-14,000), damage outputs (6-125), and valuable drops including essences, runes, and rare materials. This comprehensive guide covers every enemy’s stats, drop rates with exact percentages, optimal farming locations, and battle-tested strategies to defeat each foe efficiently.
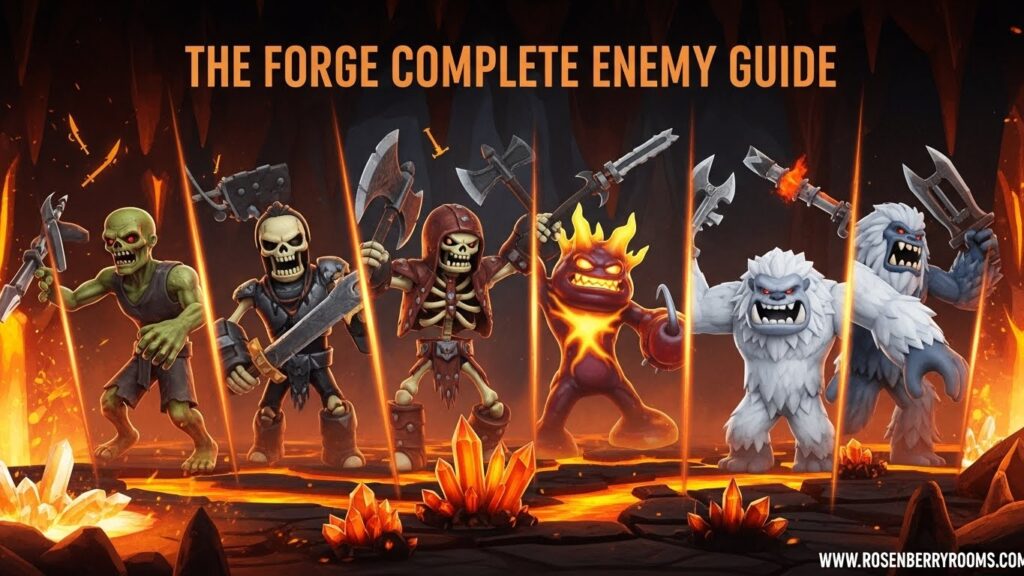
Quick Reference: Enemy Overview
| Region | Enemy Count | Hardest Enemy | Best Farming Target | Rarest Drop |
|---|---|---|---|---|
| Stonewake’s Cross | 4 | Brute Zombie | Elite Zombie | Large Essence (1/10) |
| Forgotten Kingdom | 9 | Reaper | Blazing Slime | Drain Edge (1/12) |
| Goblin Cave | 2 | Blazing Slime | Slime | Slimeite (1/6) |
| Frostspire Expanse | 6 | Yeti | Elite Orc | Epic Essence (1/5) |
Stonewake’s Cross: Starter Region Enemies
The beginner zone where you’ll master basic combat mechanics against slow but deadly zombie variants. Perfect for learning parry timing and essence farming fundamentals.
Contents
Zombie
- Health: 20-52 HP
- Damage: 6-11 DMG
- Level: 1-5
- Gold: $5-10
- Experience: 10-20
- Drops: Tiny Essence (1/3), Small Essence (1/3), Medium Essence (1/6)
- Strategy: Circle-strafe constantly, never let 3+ corner you in corridors. Practice your timing here—these are the perfect training dummies for learning attack patterns.
Delver Zombie
- Health: 40-175 HP
- Damage: 12-30 DMG
- Level: 1-10
- Gold: $10-20
- Experience: 20-40
- Drops: Tiny Essence (1/2), Small Essence (1/3), Medium Essence (1/6), Miner Shard (1/35)
- Strategy: These rush aggressively with pickaxe swings. Kite backwards and punish their whiffs. Always clear them before mining any ore node—they love to interrupt your farming.
Elite Zombie
- Health: 70-295 HP
- Damage: 20 DMG
- Level: 1-10
- Gold: $15-30
- Experience: 25-50
- Drops: Tiny Essence [Guaranteed], Small Essence (1/3), Medium Essence (1/4)
- Strategy: Don’t trade hits—their damage adds up fast. Bait their swing, sidestep, then punish. Their telegraphed attacks make them perfect parry practice.
Brute Zombie
- Health: 220-370+ HP
- Damage: 28-48 DMG
- Level: 5-10
- Gold: $32.5-45
- Experience: 43.33-60
- Drops: Medium Essence (1/3), Large Essence (1/10)
- Strategy: Your first real patience test. Use rocks and boulders to block their path, only attack after their massive swing misses. Two greedy trades can end your run instantly.
Forgotten Kingdom: Skeleton Zone
The mid-game area featuring fast skeletons and explosive threats. Enemy complexity increases dramatically here—perfect preparation for endgame content.
Bomber
- Health: 60-120 HP
- Damage: ~70 DMG
- Level: 1-5
- Gold: $50-100
- Experience: 20-40
- Drops: Medium Essence (1/4), Large Essence (1/8), Blast Chip (1/10), Miner Shard (1/15)
- Strategy: Hit twice, then immediately back off. Let them explode, then re-engage. Fighting in tight corridors is suicide—always create space before engaging.
Skeleton Rogue
- Health: 75-195 HP
- Damage: 7-76 DMG
- Level: 1-10
- Gold: $17.5-75
- Experience: 37.5-75
- Drops: Tiny Essence (1/2), Small Essence (1/4), Medium Essence (1/6), Boneite (1/8)
- Strategy: Stop fighting them like Zombies—they’re deceptively fast. If you can’t parry consistently, just kite and punish the end of their combo. Their damage spikes are deadly.
Axe Skeleton
- Health: 125-215 HP
- Damage: 15-38 DMG
- Level: 1-10
- Gold: $25-50
- Experience: 48.5-97
- Drops: Medium Essence (1/4), Large Essence (1/6), Boneite (1/6)
- Strategy: Block their axe swing, then counter during recovery. Their attacks are predictable but pack a punch—respect the wind-up animation.
Deathaxe Skeleton
- Health: 150-420 HP
- Damage: 35-91 DMG
- Level: 1-10
- Gold: $40-80
- Experience: 58.5-117
- Drops: Large Essence (1/5), Greater Essence (1/8), Epic Essence (1/15), Flame Spark (1/35), Dark Boneite
- Strategy: Your parry tutorial dummy. If you miss the parry, dodge immediately. Never try to DPS race early on—their heavy hits can chunk 50%+ of your health.
Elite Skeleton Rogue
- Health: 250-295 HP
- Damage: 45-114 DMG
- Level: 1-10
- Gold: $45-90
- Experience: 67.5-135
- Drops: Greater Essence (1/6), Epic Essence (1/15), Rage Mark (1/25), Dark Boneite (1/6)
- Strategy: Priority #1 in any group. Isolate behind terrain, burst with short combos. If you attempt a long animation, you WILL get hit mid-combo. Consider using Drain Edge rune for health steal.
Elite Deathaxe Skeleton
- Health: 300-570 HP
- Damage: 50-124 DMG
- Level: 1-10
- Gold: $60-120
- Experience: 90-180
- Drops: Greater Essence (1/6), Epic Essence (1/15), Flame Spark (1/25), Briar Notch (1/40), Dark Boneite (1/6)
- Strategy: Toughest enemy in this region. Requires full heavy armor and perfect timing. Reset fights often—don’t get greedy. One mistake can cost you the entire run.
Blight Pyromancer
- Health: 300-500 HP
- Damage: 45-70 DMG
- Level: 1-5
- Gold: $50-100
- Experience: 95-120
- Drops: Superior Essence (1/8), Epic Essence (1/12), Venom Crumb (1/25), Dark Boneite (1/15)
- Strategy: Break line-of-sight immediately, then rush them during their spell cooldown. Their ranged attacks and DoT effects make them dangerous in open areas.
Reaper
- Health: 340-1200+ HP
- Damage: 60-90 DMG
- Level: 12
- Gold: $55-90
- Experience: 80-120
- Drops: Superior Essence (1/4), Epic Essence (1/5), Flame Spark (1/5), Drain Edge (1/12), Dark Boneite (1/6)
- Strategy: Fight with a rhythm—bait attack, get 2-3 hits, disengage completely. Greed is instantly punished. This is essentially a mini-boss fight requiring extreme patience and perfect timing.
Goblin Cave: Side Area
A challenging optional area with high-HP slimes that drop valuable materials. Excellent for essence farming if you can handle the endurance fights.
Slime
- Health: 300-570 HP
- Damage: 20-30 DMG
- Level: 1-10
- Gold: $43-86
- Experience: 43-86
- Drops: Medium Essence (1/3), Greater Essence (1/10), Slimeite (1/6)
- Strategy: Endurance fight—never stop moving. Slimes win when they corner you. Keep constant pressure and stay mobile to avoid their reforming ability.
Blazing Slime
- Health: 600-870 HP
- Damage: 35-45 DMG
- Level: 1-10
- Gold: $65-130
- Experience: 110-225
- Drops: Superior Essence (1/4), Epic Essence (1/5), Flame Spark (1/2), Slimeite (1/6)
- Strategy: The floor is lava—literally. Avoid fire patches, use hit-and-run tactics. This is a prime farming target for Flame Spark runes (50% drop rate!) and Slimeite materials.
Frostspire Expanse & The Peak: Winter Regions
Endgame area featuring massive HP pools and devastating damage. Only attempt with fully enhanced gear and perfect combat mechanics.
Crystal Spider
- Health: 600-720 HP
- Damage: ~55 DMG
- Level: 1-5
- Gold: $80-160
- Experience: 125-250
- Drops: Small Essence (1/3), Medium Essence (1/4), Frost Speck (1/12)
- Strategy: They lunge unexpectedly—don’t stand still. Keep distance and punish after their lunge attack. Their burst damage can catch you off guard if you’re careless.
Diamond Spider
- Health: 1000-1300 HP
- Damage: ~70 DMG
- Level: 1-5
- Gold: $95-190
- Experience: 145-290
- Drops: Medium Essence (1/4), Large Essence (1/5), Frost Speck (1/12)
- Strategy: Near-impenetrable defenses. Patience is key—wait for openings, don’t force trades. Their heavy hits require perfect dodge timing.
Prismarine Spider
- Health: 7500-11500 HP
- Damage: ~90 DMG
- Level: 1-5
- Gold: $110-220
- Experience: 170-340
- Drops: Large Essence (1/3), Greater Essence (1/4), Epic Essence (1/5), Frost Speck (1/12)
- Strategy: Marathon fight requiring zero mistakes. Bait single attacks, get safe hits, reset immediately. This is a test of endurance, not speed.
Common Orc
- Health: 800-1000 HP
- Damage: ~85 DMG
- Level: 1-5
- Gold: $100-200
- Experience: 150-300
- Drops: Large Essence (1/4), Superior Essence (1/8), Rage Mark
- Strategy: Do NOT fight multiple orcs unless overgeared. That “I can tank it” mindset will get you killed. Bait their swing, punish during recovery.
Elite Orc
- Health: 2000-3200 HP
- Damage: ~100 DMG
- Level: 1-5
- Gold: $145-290
- Experience: 200-400
- Drops: Superior Essence (1/4), Greater Essence (1/8), Frost Speck
- Strategy: High-ranking warrior with refined attacks. Use terrain to reset fights, keep combos short. Their heavy armor means you need maximum damage output.
Crystal Golem
- Health: 3000-4000 HP
- Damage: 100-125 DMG
- Level: 1-5
- Gold: $150-300
- Experience: 225-450
- Drops: Superior Essence (1/4), Epic Essence (1/5)
- Strategy: Hit-and-run specialist. Punish recovery periods, never trade hits. Hits with avalanche force—respect every attack animation.
Yeti
- Health: 10000-14000 HP
- Damage: ~125 DMG
- Level: 1-5
- Gold: $180-360
- Experience: 250-500
- Drops: Greater Essence (1/3), Superior Essence (1/4), Epic Essence (1/5)
- Strategy: Legendary beast requiring absolute perfection. Your goal is “zero mistakes,” not “fast kill.” Bait one attack, get 1-2 safe hits, reset. This is the ultimate test of your combat mastery.
Advanced Combat Strategies
The 4 Unbreakable Rules of Combat
- Spacing Beats Damage: If you’re trading hits to deal damage, you’ll lose in later zones. Your position is your best defense.
- Bait, Avoid, Punish: Almost every enemy has a deadly attack followed by recovery. Trigger, avoid, then counter.
- Use Terrain as Shield: Rocks, boulders, and corners block enemy pathing and attacks. Use them to split groups and heal safely.
- Kill in Right Order: Burst Damage (Bombers) → Fast Attackers (Rogues) → Elite Mobs → Slow Tanks (Brutes, Slimes)
Weapon & Rune Optimization
Best Weapon Types:
- Fast swing rate weapons for combo potential
- Weapons crafted with Eye Ore, Emerald, Darkryte, or Demonite for special effects
- Consider Dragon Slayer or Skul Crusher for endgame content
Essential Runes:
- Drain Edge (Reaper drop): Health steal for survivability
- Flame Spark (Blazing Slime/Deathaxe): Fire damage bonus
- Rage Mark (Elite Skeleton/Orc): Damage amplification
- Rot Stitch/Ward Patch: Defensive options for tank builds
Race Selection for Combat
Optimal Races:
- Demon: Fire damage bonus for flame-based builds
- Angel: Enhanced defense for safer progression
- Use The Forge codes for free rerolls to get these combat-focused races
Farming Priority Guide
Early Game (Stonewake’s Cross)
Target: Elite Zombies Goal: Quick gold, essence for basic upgrades Strategy: Safe farming, learn combat mechanics
Mid Game (Forgotten Kingdom)
Target: Blazing Slimes (50% Flame Spark drop!) Goal: Superior/Epic essences, valuable runes Strategy: Hit-and-run, avoid fire zones
Late Game (Frostspire)
Target: Elite Orcs Goal: High-tier essences, rare materials Strategy: Perfect combat execution, terrain usage
Endgame Content
Target: Yeti farming groups Goal: Maximum essence generation Strategy: Coordinated team efforts, perfect timing
Troubleshooting: Common Death Causes
Fights Take Too Long?
Your gear is underpowered. Return to safer zones (Goblin Cave) and farm essences to enhance equipment before progressing.
Dying to Sudden Bursts?
You’re disrespecting Bombers or Rogue variants. Change approach: bait their big moves first, THEN attack.
Elites Feel Impossible?
Never fight elites with other mobs nearby. Use terrain to isolate, or leave and reset encounters entirely.
Can’t Parry Consistently?
Stop trying! Focus on dodging and kiting instead. Survival lets you learn patterns. Consider health-focused builds while learning.
Community Resources
Join the active community for real-time updates and help:
- Official Discord Server: Join 204,560+ members for live discussions, trading, and group farming
- Reddit Community: r/TheForgeRoblox for guides, memes, and developer announcements
- Instagram: @theforgeroblox for codes, sneak peeks, and updates
- Developer Twitter: @FireAtacck for direct communication with the game founder
These communities are invaluable for finding farming groups, learning new strategies, and staying updated with the latest changes.
FAQ Section
How many enemy types exist in The Forge?
There are exactly 21 unique enemy types across 4 regions, each with distinct attack patterns and drop tables.
Which enemy drops Drain Edge rune?
The Reaper is the only enemy that drops Drain Edge (1/12 chance), making it a valuable target for health-steal builds.
What’s the hardest enemy in the game?
The Yeti (10,000-14,000 HP, 125 DMG) and Elite Deathaxe Skeleton are considered the most challenging due to high damage output and complex attack patterns.
Where can I find Slimes for Slimeite farming?
Slimes and Blazing Slimes are located in the Goblin Cave, accessible through the Forgotten Kingdom. Blazing Slimes have a 50% Flame Spark drop rate.
What’s the best enemy for essence farming?
Blazing Slimes offer the best essence-to-difficulty ratio with Superior (1/4) and Epic (1/5) essence drops, plus valuable Flame Spark runes.
How do I increase my drop rates?
Higher level enemies have better drop chances. Elite variants consistently drop rarer materials. Consider using luck-boosting races or gear if available.
Should I focus on gold or essence farming?
Early game: Gold for basic equipment. Mid-to-late game: Essences for gear enhancement. Endgame: Balance both for optimal progression.
Expert Tips for Maximum Efficiency
- Always farm with purpose—don’t kill randomly. Target specific enemies for materials you need.
- Master one region completely before progressing. Each zone teaches essential combat mechanics.
- Join the Discord community for group farming—many high-end enemies are easier with coordinated teams.
- Save your best runes for endgame content. Don’t waste Drain Edge or Flame Spark on early-game enemies.
- Learn enemy audio cues—many attacks have distinct sound patterns that telegraph their moves.
- Practice parrying on Deathaxe Skeletons—they’re the perfect training dummies for timing.
- Always carry healing potions when progressing to new regions. The difficulty spike is significant.
- Check for daily codes on the official Instagram for free rerolls and boosts that make progression easier.
Final Words
Mastering The Forge’s combat system is about pattern recognition, patience, and strategic farming. Each enemy teaches valuable lessons that prepare you for the next challenge. Remember: progression isn’t about speed—it’s about sustainable advancement.
Bookmark this guide and check back regularly for updates. The Forge receives frequent balance changes, and new enemies may be added in future updates. Join the official Discord to stay informed about the latest changes and connect with experienced players.
Your journey from Stonewake’s Cross to the Frostspire Peak starts here. Forge your legend, one enemy at a time!