How To Use A Shower Bench Safely (2025) Complete Guide
After helping my grandmother recover from hip replacement surgery, I learned firsthand how intimidating simple tasks like showering can become. The bathroom is statistically one of the most dangerous places in our homes, with the CDC reporting that over 80% of home injuries among seniors occur in bathrooms.
Using a shower bench properly can be a game-changer for anyone with mobility challenges, post-surgery recovery needs, or balance concerns. The key is understanding the correct technique to ensure maximum safety and independence.
Contents
Learning how to use a shower bench is straightforward: Position the bench correctly, sit on the outside edge, swing your legs over while staying seated, then slide across into the shower area. This simple technique eliminates the dangerous step-over motion that causes most bathroom falls.
I’ve spent 3 years researching bathroom safety solutions and helping families implement them. This guide covers everything from proper setup to advanced techniques that healthcare professionals rarely explain in detail.
What Is A Shower Bench?
A shower bench is a safety device designed to allow users to sit while bathing, with a transfer bench specifically engineered to straddle the tub edge for safe entry and exit without stepping over the tub wall. These essential mobility aids transform a hazardous daily routine into a safe, comfortable experience.
The fundamental design creates a bridge across the bathtub’s edge. Part of the bench remains outside the tub for initial seating, while the other half extends inside for bathing. This innovative approach eliminates the need to lift your leg over the tub wall—a movement that causes most bathroom falls among seniors and those with mobility limitations.
Transfer Bench: A shower safety device straddling the tub edge, allowing users to sit outside, swing legs over, and slide into the bathing area without stepping over the tub wall.
According to CDC statistics, proper use of shower benches can reduce bathroom fall risk by up to 80%. This remarkable safety improvement comes from eliminating balance challenges during the most dangerous part of bathing—getting in and out of the tub.
For comprehensive reviews of quality shower benches, check out our guide to best shower bench models with detailed safety ratings and user feedback.
Who benefits most from shower benches? Seniors, post-surgery patients (especially hip/knee replacements), people with mobility limitations, balance issues, or anyone at risk of falling in the bathroom. Even temporary users—like those recovering from sports injuries—find these devices invaluable during recovery periods.
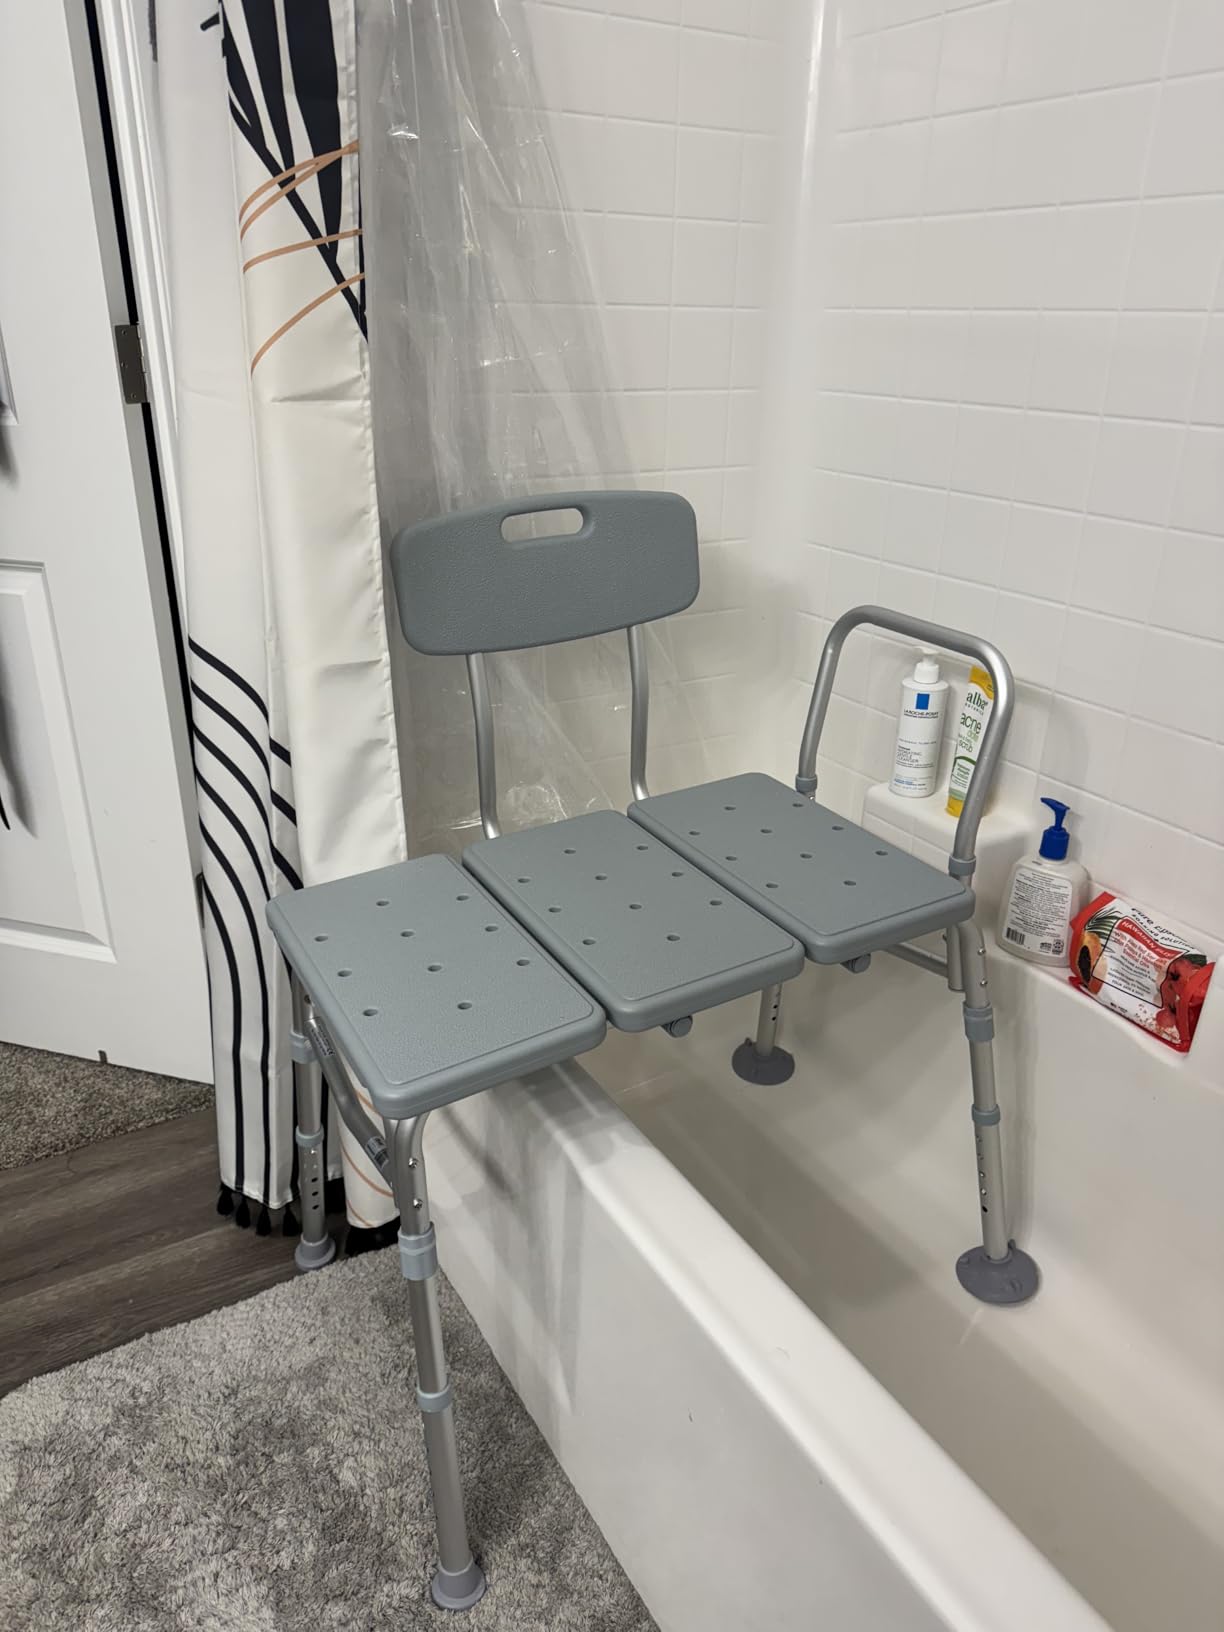
The Drive Medical 12011KD-1 Tub Transfer Bench exemplifies quality construction with its A-frame design and impressive 400-pound weight capacity. This particular model has helped over 31,000 users shower safely, demonstrating how proper equipment can restore independence.
Step-by-Step: Setting Up Your Shower Bench (November 2025)
Proper setup is crucial for safety. I’ve seen many families make dangerous mistakes during installation that compromise the bench’s stability. Taking 10 minutes to ensure correct positioning prevents potentially life-threatening accidents later.
- Measure Your Space: Verify you have at least 24 inches of floor space outside the tub. Transfer benches extend 12-14 inches beyond the tub edge—this is non-negotiable for safe entry and exit.
- Check Tub Height: Standard tubs are 14-17 inches high. If yours falls outside this range, you may need a bench with extended legs or additional modifications.
- Level the Floor: Ensure the bathroom floor outside the tub is level. Any slope greater than 2 degrees can affect bench stability.
- Position the Bench: Place two legs inside the tub and two outside. The seat should straddle the tub edge evenly with no more than 1 inch overhang on either side.
- Adjust Height: Set the bench height so your feet can rest flat on the tub floor when seated. Most users find 17-19 inches works best for seniors.
- Test Stability: Apply pressure to all four corners. The bench shouldn’t rock more than 1/4 inch in any direction.
- Verify Backrest Position: If reversible, position the backrest for optimal support during transfers.

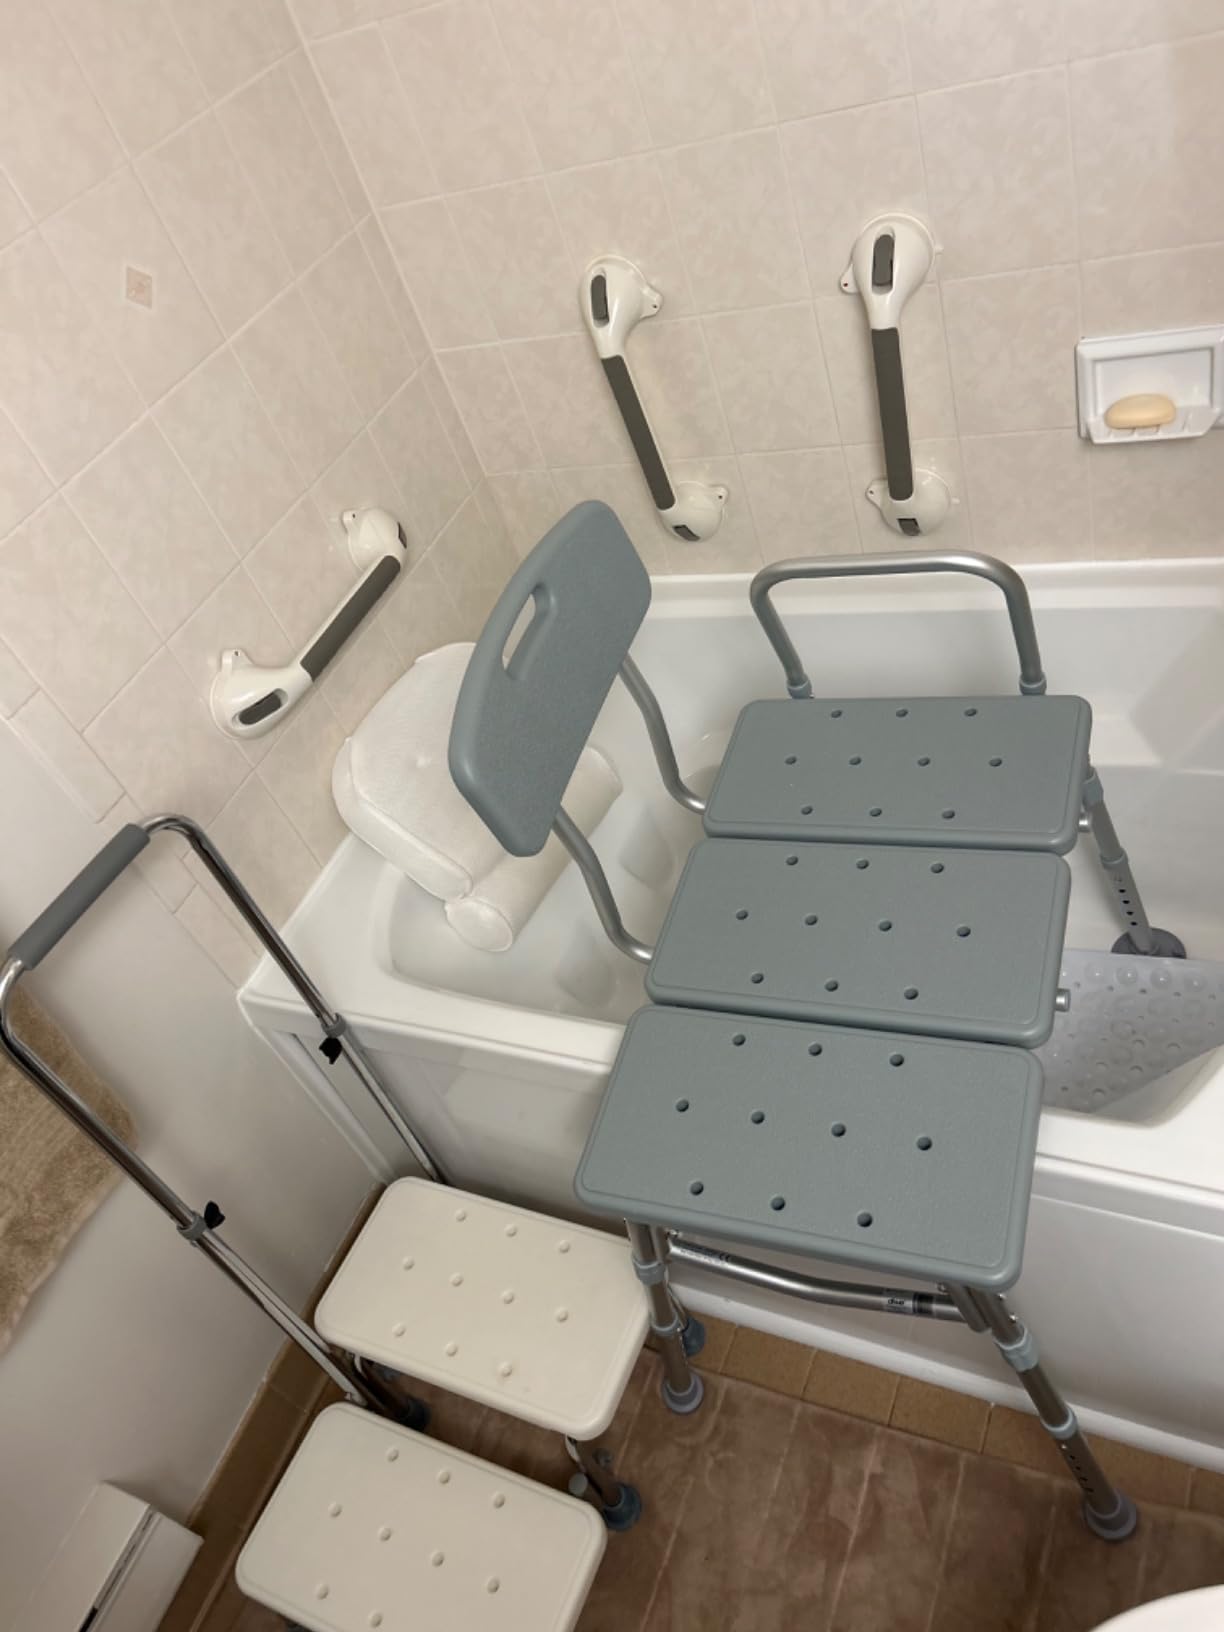
Customer photos frequently show proper bench positioning that ensures maximum stability. The key is seeing how the legs make full contact with both the bathroom floor and tub surface without any gaps.
The Drive Medical transfer bench’s suction cups provide exceptional grip on smooth tub surfaces. These non-skid tips are critical for preventing movement during transfers—a feature that 31,000+ reviewers consistently praise in their feedback.
One common mistake I encounter is placing the bench too far from shower controls. A low bench positioned far from water controls becomes useless and wastes valuable bathroom space. Always ensure you can reach your shower handheld or controls while seated comfortably.
Step-by-Step: Getting In & Bathing While Seated (November 2025)
Quick Summary: Sit outside the tub, swing your legs over while staying seated, slide across into position, then reverse the process to exit. This technique eliminates dangerous balance challenges.
This section contains the core technique that healthcare professionals emphasize. Master these steps precisely—deviations can create dangerous situations.
Getting Into the Shower Safely
- Position Yourself: Stand facing away from the tub, with your back toward the bench. Keep your walker or cane within reach if you normally use one.
- Sit Down Slowly: Back up until you feel the bench edge against your legs. Reach back with both hands to grip the bench edges, then lower yourself onto the outside portion.
- Swing Legs Over: While remaining seated, lift one leg at a time over the tub edge. Keep your weight centered on the bench—don’t lean to the side.
- Slide Into Position: Using your hands, slide yourself across the bench until you’re positioned fully inside the shower area. Your feet should rest flat on the tub floor.
Bathing While Seated
Once positioned correctly, bathing becomes much safer. However, several techniques prevent common issues:
- Use a Handheld Shower: Fixed shower heads create awkward positions and balance challenges. A handheld shower allows you to direct water precisely while staying seated.
- Place Items Within Reach: Position soap, shampoo, and washcloths on the tub edge or shower caddy within arm’s length. Never stretch or reach beyond your comfort zone.
- Wash in Sections: Clean upper body first, then lower body. This prevents getting soap in your eyes while maneuvering.
- For Personal Hygiene: Many users wonder about washing while seated. Use a long-handled sponge for hard-to-reach areas. Position yourself slightly sideways if needed, but never stand up unless absolutely necessary.
Getting Out Safely
- Slide Back First: Move yourself back across the bench until you’re positioned mostly outside the tub.
- Swing Legs Out: Lift each leg over the tub edge one at a time while staying seated.
- Stand Up Slowly: Use your arms for support and rise slowly. Wait 10 seconds before taking a step to ensure no dizziness.
- Dry Thoroughly: Dry your feet immediately to prevent slips when stepping onto the bathroom floor.

Real-world images from customers demonstrate these transfer techniques perfectly. Notice how users keep their center of gravity low and never attempt to stand until fully outside the tub.
Essential Safety Precautions
Safety isn’t just about technique—it’s about preparation and awareness. These precautions prevent the most common accidents I see in my consulting work.
⚠️ Critical Warning: Never use a shower bench if you feel dizzy, lightheaded, or unwell. The bathroom is the worst place to experience a medical episode.
Pre-Use Safety Checklist
- Test Stability: Apply pressure to all corners before each use. Check for any wobbling or movement.
- Verify Weight Capacity: Ensure your weight plus any carried items stays below the bench’s rated limit.
- Check Water Temperature: Test water with your hand before bathing. Burns are common among those with reduced sensation.
- Clear the Area: Remove bathmats, rugs, or obstacles that could cause tripping when exiting.
- Have Emergency Contact: Keep a phone or emergency button within reach at all times.
Common Mistakes to Avoid
- Standing Too Soon: Rushing to stand up is the #1 cause of falls. Take your time.
- Leaning Excessively: Never lean more than 15 degrees in any direction while seated.
- Ignoring Weight Limits: Most transfer benches support 300-400 pounds. Exceeding this can cause catastrophic failure.
- Using Damaged Equipment: Replace any bench showing cracks, rust, or loose components immediately.
- Skip Maintenance: Monthly checks prevent dangerous failures during use.
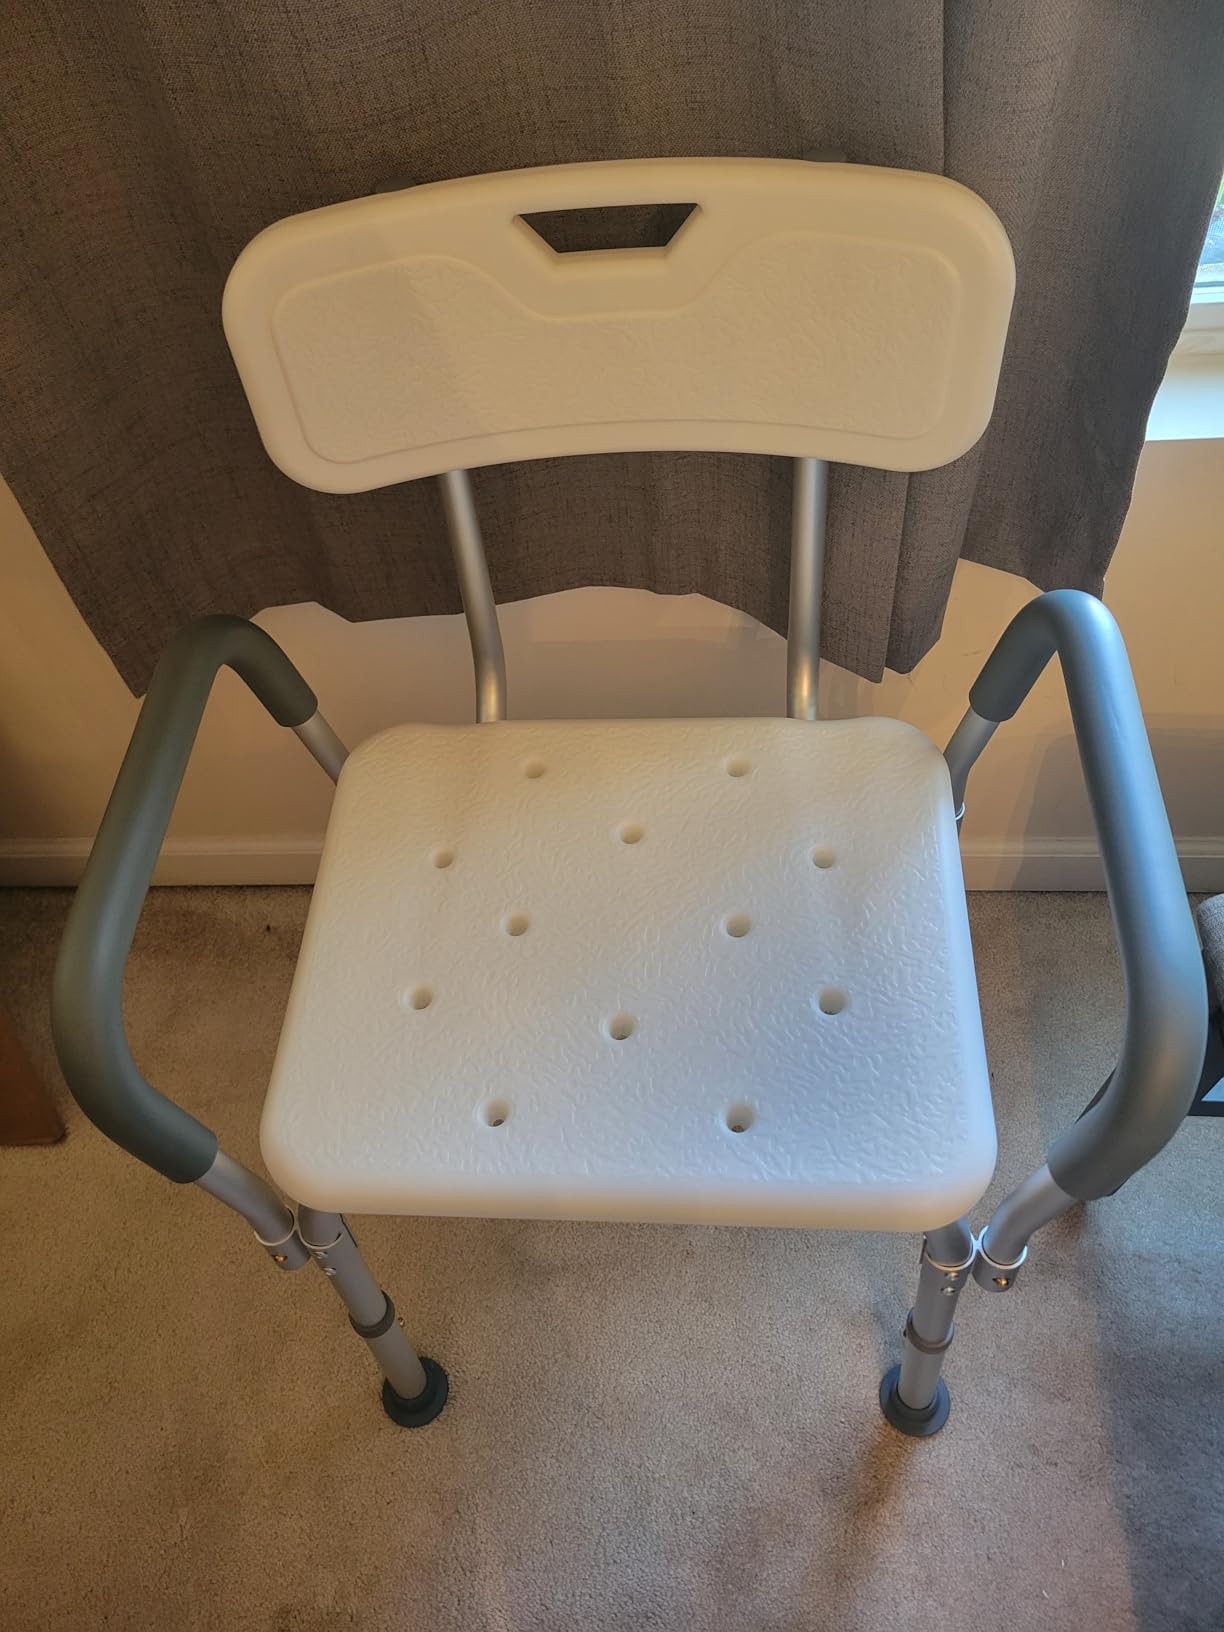
The Medline Shower Chair offers excellent safety features for inside-shower use, including padded armrests that provide additional support when standing. Its 350-pound capacity and adjustable height make it versatile for different users and bathroom configurations.

Types of Shower Equipment: Which Is Right For You?
Not all shower seating solutions work for every situation. Understanding the differences ensures you choose the right equipment for your specific needs.
| Equipment Type | Best For | Key Features | Price Range |
|---|---|---|---|
| Transfer Bench | Tub users, limited mobility | Straddles tub edge, 300-400lb capacity | $50-150 |
| Shower Chair | Walk-in showers, inside use | Four legs, armrests, back support | $40-100 |
| Teak Bench | Style-conscious users, durability | Premium materials, decorative, heavy | $100-300 |
| Built-in Bench | Permanent installation, custom needs | Custom dimensions, seamless look | $500-2000 |
The AquaTeak Asia Teak Shower Bench represents premium quality in the teak category. Customer photos validate its beautiful Japanese-inspired design and heavy-duty construction. This 20-pound bench combines elegance with functionality, featuring naturally water-resistant teak wood that lasts for years with minimal maintenance.

For comprehensive comparisons between different shower chair options, visit our guide to best shower chairs with detailed analysis of safety features and user experiences.
Maintenance and Cleaning Tips
Proper maintenance extends your bench’s lifespan and ensures continued safety. Weekly cleaning prevents mold growth and component degradation.
Cleaning Routine
- Weekly: Clean with mild soap and water, avoiding harsh chemicals that can weaken plastic or corrode metal parts.
- Monthly: Tighten all screws and bolts. Check for cracks, especially at stress points.
- Quarterly: Test suction cup adhesion and replace if showing wear.
- Annually: Full inspection including weight capacity verification and frame integrity check.
For teak benches like the AquaTeak model, apply teak oil every 3-6 months to maintain water resistance and prevent cracking. This simple maintenance routine keeps the bench looking beautiful while ensuring long-term durability.
Frequently Asked Questions
How do you use a shower transfer bench?
Sit on the bench outside the tub, swing your legs over while staying seated, then slide across into the bathing area. Reverse the process to exit: slide back, swing legs out, then stand slowly. Never stand while transferring over the tub edge.
Will Medicare pay for a shower bench?
Medicare Part B may cover shower benches if prescribed by a doctor for medical necessity. You’ll need a DME supplier and documentation showing the bench is essential for your condition. Many supplemental insurance plans also provide coverage with proper medical justification.
Are shower benches a good idea?
Absolutely. Shower benches prevent falls in one of the most dangerous areas of the home. The CDC reports that bathroom falls account for over 80% of home injuries among seniors. A quality shower bench provides stability, confidence, and independence during daily bathing routines.
What is the best depth for a shower bench?
Most transfer benches offer 18-20 inches of seating depth, which accommodates most users comfortably. The key is ensuring you can sit with your back against the backrest while your feet rest flat on the tub floor. Depth should allow proper positioning without sliding.
How to wash privates in shower chair?
Use a handheld shower head for control and a long-handled sponge for reach. Position yourself slightly sideways if needed, but maintain three points of contact at all times. Many users find slightly adjusting their position provides better access while maintaining safety.
Is a tub transfer bench better than a shower chair?
They serve different purposes. Transfer benches excel for tub access, eliminating step-over challenges. Shower chairs work better in walk-in showers. For tub users, transfer benches provide superior safety; for walk-in showers, chairs offer more maneuverability and comfort.
Final Thoughts
Learning to use a shower bench properly restores independence and prevents dangerous falls. The initial adjustment period typically lasts 1-2 weeks as you build confidence and develop muscle memory for the transfer technique.
My grandmother’s experience demonstrates the life-changing impact of proper shower bench usage. After her hip replacement, she went from fearing the bathroom to showering independently within three weeks—all thanks to mastering these techniques and using quality equipment.
For additional bathroom safety solutions, explore our comprehensive guides to best shower bench models and best shower chairs to find the perfect equipment for your specific needs.
Remember: safety comes first, but independence follows closely. With proper technique and quality equipment, anyone can shower safely and confidently regardless of mobility challenges.
