How to Fix Water Hammer: 7 Proven Methods for 2026
When you shut off a faucet and the pipes respond with a sharp, shuddering bang, that’s water hammer. It’s the sound of moving water slamming into a closed valve, and it can loosen joints, crack fittings, and slowly turn a quiet house into a percussion section. The good news: most of the time you can learn how to fix water hammer yourself in a single afternoon, and the methods below walk you through the seven fixes that actually work, ordered from the simplest to the most involved.
Time: 1 to 6 hours depending on the fix. Cost: A few dollars in tape and straps up to about sixty dollars for a pair of arrestors. Difficulty: Easy to Moderate DIY. Skill level: Comfortable with basic household tools and shutting off the main water valve.
Contents
Tools and Materials
You don’t need a plumber’s truck. For most homes, a small kit covers every fix in this guide.
Tools
- Adjustable wrench (8 inch jaw)
- Pipe wrench (12 inch)
- Tubing cutter (for copper or PEX)
- Drill with 1/8 inch and 1/4 inch bits
- Screwdriver set (flat and Phillips)
- Measuring tape and pencil
- Bucket and old towels
Materials
- Water hammer arrestors, sized to your pipe (1/2 inch for most fixtures, 3/4 inch for the main). One per noisy valve is a safe starting order.
- Pipe strap or cushion clamps (plastic or rubber-lined metal), 1/2 inch and 3/4 inch
- PTFE (Teflon) tape, 1/2 inch width
- Short lengths of PEX or copper, plus push-fit or compression couplings, in case you need to cut into a supply line
- Air chamber fittings, if you’re recharging old-style capped risers
- Replacement Teflon washers for older washing machine valves
- A pressure gauge with a hose-thread adapter (to read your home’s static pressure)
Before You Start
Water work and electricity don’t mix, and a slip with a wrench can turn a small project into a wet ceiling. Take ten minutes to set up before you touch a pipe.
Safety gear. Safety glasses are non-negotiable. A face shield is smart if you’ll be cutting pipe overhead. Keep a pair of rubber gloves nearby for handling the wet supply lines. If your work area is within a few feet of any wiring or a light fixture, kill the breaker to that circuit before you start.
Prep. Locate the main shutoff valve. In most homes it’s where the water line enters, often in a basement, crawl space, or utility closet near the front of the house. Open the highest faucet in the house and the lowest one (an outdoor spigot works) to drain the lines once the main is off. Test that the main actually shut off by trying a kitchen faucet before you go further.
Permits. Most jurisdictions treat installing or replacing a water hammer arrestor as ordinary plumbing repair and don’t require a permit. Cutting into supply lines, replacing a pressure-reducing valve, or moving the main shutoff can trigger one, especially if the work happens inside a wall. When in doubt, call your local building department. The fix for a leaking water line walks through similar code considerations if you want a primer.
Step-by-Step Instructions
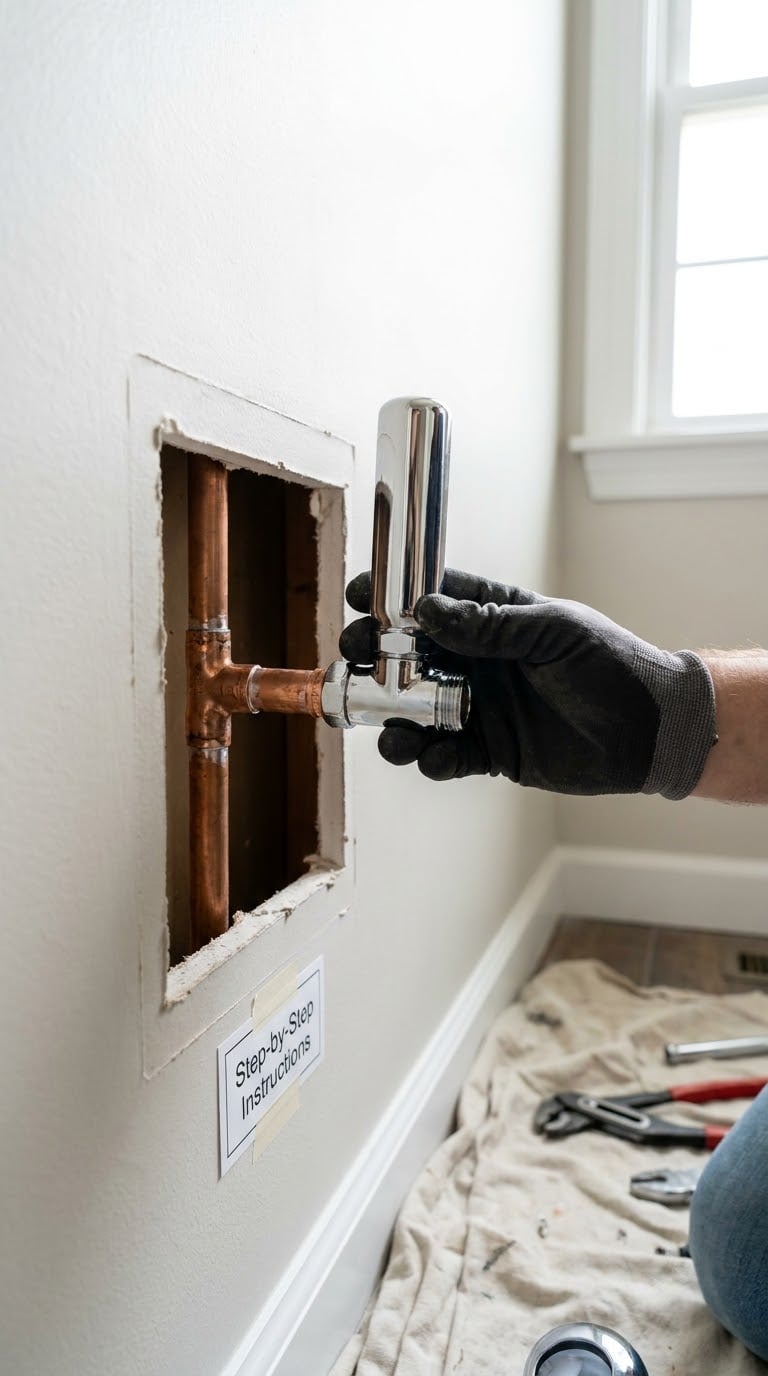
Work through these seven fixes in order. Most houses with a single noisy valve only need the first two or three, and you’ll know within a minute of testing whether the noise is gone.
Step 1: Diagnose Where the Hammer Happens
The banging is telling you exactly which valve is the culprit, and a one-minute listen usually pinpoints it. Have a helper turn faucets on and off, one at a time, while you stand near the pipes (under sinks, behind the washing machine, near the water heater). The valve that triggers the loudest bang is the one to fix. Appliance-specific valves cause the most complaints: washing machine solenoid valves, dishwasher fill valves, and toilet fill valves top the list. If the bang is in the wall and you can’t localize it, the culprit is usually the nearest upstream valve.
Step 2: Drain and Recharge Air Chambers
Older homes have capped vertical pipes near valves, called air chambers, that absorb the pressure wave. Over time they fill with water. Draining the system refills them with air. Turn off the main, open every faucet in the house, then flush every toilet. Wait until the flow stops completely. Close the lowest faucet first, then close the rest working upward, and finally turn the main back on. The hammering at a single fixture often disappears in 15 to 30 minutes of total work. The air chambers will hold their charge for a few years before you need to repeat this.
Step 3: Secure Loose Pipes with Straps
Pipes that aren’t anchored rattle against studs and joists every time the pressure wave passes, which is what makes a small surge sound like a sledgehammer. With the water off, slip a rubber-lined pipe strap or cushion clamp around the pipe within 6 inches of each valve and at every 4 to 6 feet along horizontal runs. Drill a pilot hole, drive the screw into the stud, and snug the strap. Don’t overtighten, since you want the pipe held but not pinched. A shower pan repair uses similar strap principles if you’d like another example of pipe support.
Step 4: Lower the Water Pressure
Excessive static pressure is one of the most common reasons water hammer starts suddenly, and it often follows a municipal water system change or the installation of a new fixture. Screw a pressure gauge onto an outdoor spigot, make sure no water is running, and read the pressure. A healthy home sits between 40 and 65 psi, with 80 psi as the upper limit most plumbing code allows. If you’re above 80 psi, install or adjust a pressure-reducing valve (PRV) on the main line to bring it down. PRVs have an adjustment screw on top, and quarter turns of the screw move pressure by roughly 10 psi. Test again after each adjustment.
Step 5: Install a Water Hammer Arrestor
An arrestor is a sealed, piston-style shock absorber that screws onto the supply line right before the offending valve. It’s the most permanent fix for a stubborn case. Turn off the local supply, drain the line by opening the fixture, and tee the arrestor into the hot or cold line 6 to 12 inches upstream of the valve. Push-fit arrestors (like the SharkBite-style) need no solder and take about 10 minutes per fixture. Most homes need just one or two arrestors to silence the worst offenders. If your home draws from a well and runs at lower pressure overall, the shallow well pump guide covers related pressure considerations.
Step 6: Add or Repair a Pressure-Reducing Valve
If the gauge still reads above 80 psi after step 4, or if your home has no PRV at all, installing one is the long-term answer. Mount the PRV on the main line just past the shutoff and before the first branch. Use a unions on either side so the valve can be removed for service without cutting pipe. Sediment builds up in PRVs over time, so flush the line before installation and plan to service or replace the valve every 7 to 12 years. Homes with chronic high pressure benefit from a pressure-relief valve downstream as a backup.
Step 7: Replace Worn Washing Machine Shutoff Valves
Old washing machine hoses connect to valves that close with a partial turn, and the partial turn is exactly what causes the surge. If your washer still has a rubber hose and a saddle-style or multi-turn valve, swap both for a quarter-turn ball valve and a braided stainless steel hose. With the main off and the washer valves closed, disconnect the hoses, wrap the new valve threads with PTFE tape, and reinstall. Turn the main back on slowly and check for leaks before you push the washer back against the wall. If you’re also seeing mineral staining on nearby fixtures, the hard water spot guide walks through cleanup that won’t damage finishes.
Common Mistakes to Avoid
Most failed water hammer fixes come down to skipping a step. Run through this list before you call the job done.
- Skipping diagnosis. Treating every pipe at once burns hours and parts. Listen for the loudest valve first.
- Not opening the highest faucet. Air chambers can only refill if air can reach them. The highest open tap is the one that lets the system vent.
- Over-tightening pipe straps. A crushed copper or PEX line restricts flow and creates a new banging point downstream. Snug, not strangled.
- Setting pressure too low. Below 40 psi makes showers and dishwashers miserable. Drop pressure only as far as the gauge needs to land in the 50 to 65 psi sweet spot.
- Undersizing the arrestor. A 1/2 inch arrestor on a 3/4 inch main won’t absorb much. Match the arrestor to the line.
- Forgetting to support the arrestor itself. An arrestor is heavier than a cap. Strap it to the stud or it’ll rattle inside the wall.
- Using rubber washing machine hoses as a “fix”. Rubber hoses are a leak risk, not a hammer cure. Use braided steel and a quarter-turn valve instead.
When to Call a Pro
A licensed plumber earns their fee when the hammer points to something bigger than a single valve. Call one if the banging is coming from the main service line between the meter and your house, or if your static pressure stays above 80 psi even after a PRV is installed. Galvanized steel pipe replacement, any work that requires opening a permit, and any hammering you can hear inside a finished ceiling also belong on a pro’s workbench. If you spot a leak at a joint, a wet spot on a ceiling, or staining near a fixture, stop and call before the water does the next renovation for you. Electric water heater elements and any wiring within reach of standing water are off-limits for DIY. Electric hot water tank work follows the same rule: when electricity and water share a space, hand the job to a licensed pro.
Maintenance
Water hammer is one of the few plumbing problems you can prevent almost entirely with a few habits. Keep the static pressure between 50 and 65 psi by checking the gauge once a year. Exercise the main shutoff twice a year, fully open and fully closed, so the valve doesn’t seize the next time you need it in a hurry. Drain the air chambers every couple of years, or sooner if the banging returns after step 2. Replace washing machine hoses every five years, and any time you upgrade an appliance, re-secure the supply line with a strap before you push it back. Small habits save a ceiling.
Frequently Asked Questions
What causes water hammer in pipes?
Water hammer happens when fast-moving water is forced to stop suddenly, usually when a faucet, washing machine, or dishwasher valve closes. The pressure wave that results slams against the closed valve and rattles the pipe walls, which is the bang you hear.
Will a water hammer arrestor stop the banging for good?
A properly sized arrestor installed at the offending valve stops the surge at that fixture for many years. Arrestors are sealed piston units that don’t need recharging, unlike older air chambers, so once it’s in place you can expect quiet pipes.
How much does it cost to fix water hammer?
Simple fixes like draining the system or adding pipe straps cost almost nothing. A single water hammer arrestor is inexpensive on its own, and a pair covers most homes. A pressure-reducing valve plus professional installation lands higher, and replacing old galvanized supply lines is the most involved job of the group.
Can I fix water hammer without turning off the water?
Draining the system to recharge air chambers and any work that involves cutting into a supply line requires the main water to be off. Securing a loose strap or tightening a visible valve can be done with the water on, but most of the reliable fixes need a drained line.
Is water hammer dangerous or just noisy?
The noise is a symptom, not the problem. Repeated pressure spikes loosen joints, fatigue solder, and can crack fittings inside walls. Over years that turns a small banging issue into a leak, which is why it pays to address the cause sooner rather than later.
Start with the diagnosis, then drain the system and see if the noise goes away. Half the houses with a new hammer problem are silent again in under an hour, and the rest are a Saturday afternoon and a couple of arrestors away from quiet pipes.