Dead Rails Frankenstein Class (September 2026 Guide)
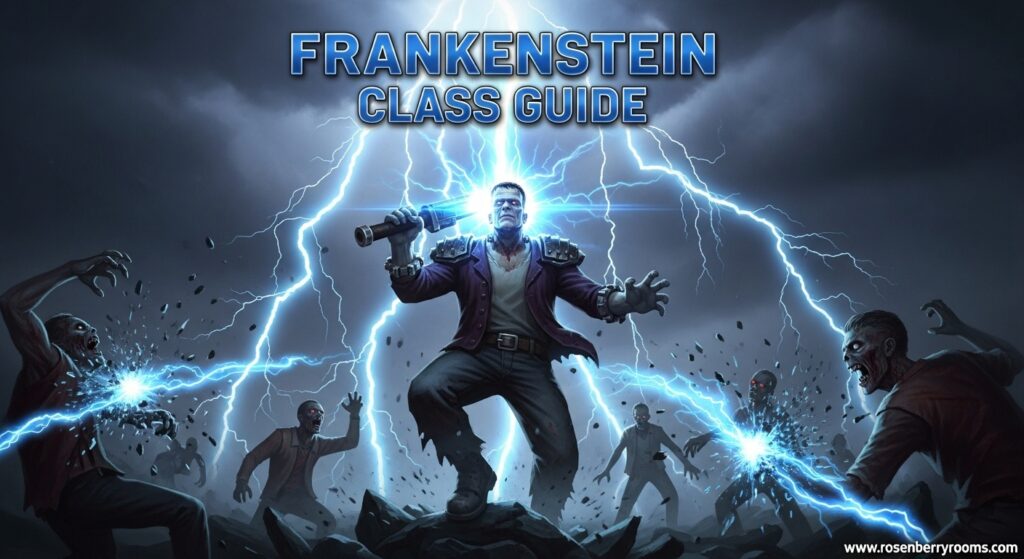
The Dead Rails Frankenstein Class is a game-changing Halloween class that automatically revives you upon death with a powerful lightning strike, making it essential for solo runs. This 100 Bond class provides a second chance at survival while clearing nearby enemies and dropping your inventory safely in a crate.
Quick Reference: Frankenstein Class Overview
| Feature | Details |
|---|---|
| Cost | 100 Bonds |
| Starting Equipment | 1x Shovel |
| Special Ability | Auto-revive on death (once per game) |
| Lightning Effect | Clears nearby enemies upon revival |
| Inventory Protection | Items drop in safe crate when revived |
| Best For | Solo play, panic situations, beginner safety |
What Makes the Frankenstein Class Special?
The Frankenstein class stands out as one of the most unique ability classes in Dead Rails, introduced during the Halloween update alongside the Ghost class. Unlike other classes that provide starting equipment or passive bonuses, Frankenstein offers something far more valuable: a second chance at life.
Contents
When you die while playing as the Frankenstein class, you’re automatically struck by lightning and revived instantly. This isn’t just a simple revive mechanic—it’s a game-changing ability that can turn certain defeat into victory. The lightning strike that accompanies your revival isn’t just for show; it actively clears all nearby enemies, giving you breathing room and potentially saving you from overwhelming situations.
Class Cost and Availability
Investment Required: 100 Bonds from the Tailor shop in the Lobby
The Frankenstein class is one of the more expensive classes in Dead Rails, costing 100 Bonds. This places it in the higher tier of class investments, alongside classes like the Ironclad. However, many players consider this investment worthwhile, especially for those who frequently play solo or want an extra layer of security during challenging runs.
Starting Equipment and Basic Stats
Initial Loadout:
- 1x Shovel – Basic melee weapon for starting defense
- No special armor or items – Unlike some classes, Frankenstein starts minimal
Key Features:
- Helmet Compatible – Can wear helmets (crucial for survival)
- Standard Movement Speed – No movement penalties or bonuses
- Normal Health Pool – Standard starting health like other classes
Deep Dive: The Revive Mechanic
How the Auto-Revive Works?
The Frankenstein class’s signature ability triggers automatically when you die. Here’s exactly what happens:
- Death Trigger: When your health reaches zero, instead of respawning normally, the Frankenstein ability activates
- Lightning Strike: A massive lightning bolt strikes your character’s position
- Enemy Clear: All enemies within range of the lightning strike are damaged or killed
- Instant Revival: You’re immediately revived with partial health
- Inventory Protection: All your items and sack contents are safely dropped into a nearby crate
- One-Time Use: This ability can only be used once per game run
Strategic Benefits of the Lightning Strike
The lightning effect isn’t just visual flair—it serves several strategic purposes:
- Area Clear: Perfect for when you’re overwhelmed by zombie hordes
- Breathing Room: Gives you precious seconds to reorient and plan your next move
- Electrocutioner Synergy: Can recharge the Electrocutioner weapon if dropped before death
- Lightning Rod Interaction: Can be redirected to nearby Lightning Rods for strategic base defense
Pros and Cons Analysis
✅ Advantages
Ultimate Safety Net
- The free revive is essentially a “get out of jail free” card
- Perfect for solo players who don’t have teammates to revive them
- Allows for more aggressive play since you have a backup plan
Enemy Control
- Lightning strike clears nearby enemies upon revival
- Can turn overwhelming situations into manageable ones
- Provides automatic crowd control in panic situations
Inventory Protection
- Items drop safely in a crate rather than being lost
- You can recover your gear after revival
- Prevents total loss of valuable equipment and resources
Solo Play Excellence
- Makes solo runs significantly more viable
- Reduces the penalty for playing without a team
- Gives solo players a fighting chance against tough encounters
❌ Disadvantages
High Cost
- 100 Bonds is a significant investment
- May not be worth it for experienced players who rarely die
- Could be spent on other useful classes or equipment
One-Time Use
- Once used, you’re just a basic class with no special abilities
- No passive benefits when alive or after using the revive
- Can be wasted if you die to something trivial
Automatic Activation
- No control over when the revive triggers
- Might activate at inconvenient times
- Can’t save it for “perfect” moments
Limited Strategic Depth
- No other special abilities or mechanics
- Relies entirely on the single revive mechanic
- Less versatile than classes with multiple abilities
Advanced Strategies and Techniques
1. Strategic Death Management
Save Your Revive for Critical Moments
- Avoid unnecessary risks early in your run
- The revive is most valuable during boss fights or overwhelming zombie hordes
- Consider playing more conservatively until you reach challenging content
Intentional Death Scenarios Sometimes, it can be strategic to intentionally trigger your revive:
- When completely overwhelmed by enemies
- To clear a room full of dangerous zombies
- To recharge an Electrocutioner weapon
- When you need to create a distraction or escape route
2. Inventory Management Before Death
Prepare for the Inevitable
- Keep essential items easily accessible in your inventory
- Consider dropping valuable items before intentionally dying
- Position yourself near safe areas when death seems likely
Post-Revival Recovery
- Quickly locate your inventory crate after revival
- Prioritize picking up weapons and healing items
- Use the cleared area to safely reorganize your equipment
3. Team Play Considerations
Communicate with Your Team
- Let teammates know you’re playing Frankenstein
- Coordinate strategies around your revive ability
- Use your revive as a team resource rather than just personal insurance
Support Role Potential
- Position yourself to maximize the lightning strike’s area effect
- Use your revive to save team members by clearing enemies around them
- Consider sacrificing yourself strategically to help the team
Solo Play Optimization
Why Frankenstein Excels Solo?
The Frankenstein class is particularly powerful for solo players because:
- No Revive Dependency: You don’t need teammates to help you when downed
- Self-Contained Safety: Your revive ability is always available when needed
- Resource Efficiency: Less need to stockpile healing items “just in case”
- Confidence Boost: Allows for bolder play knowing you have a backup plan
Solo Run Strategy
Early Game (0-5,000m)
- Play conservatively to preserve your revive
- Focus on gathering resources and basic equipment
- Avoid unnecessary conflicts with large zombie groups
Mid Game (5,000-15,000m)
- Start taking more calculated risks
- Use your revive if you encounter a particularly tough situation
- Begin optimizing your loadout for late-game challenges
Late Game (15,000m+)
- Your revive becomes an emergency tool for critical moments
- Use it strategically during boss fights or overwhelming encounters
- Consider saving it for the final stretch if you’re confident in your skills
Comparison with Other Classes
Frankenstein vs. Doctor Class
| Aspect | Frankenstein | Doctor |
|---|---|---|
| Revive Method | Automatic on death | Manual with 50% health cost |
| Uses | Once per game | Unlimited (with health) |
| Team Utility | Low (self-focused) | High (can revive others) |
| Cost | 100 Bonds | 15 Bonds |
| Best For | Solo play, safety | Team support, healing |
Frankenstein vs. Ironclad Class
| Aspect | Frankenstein | Ironclad |
|---|---|---|
| Defense Type | Reactive (after death) | Proactive (armor) |
| Movement Speed | Normal | -10% penalty |
| Cost | 100 Bonds | 100 Bonds |
| Late Game Value | Decreases after use | Decreases as armor becomes common |
| Play Style | Aggressive with safety net | Tanky, defensive |
Common Mistakes to Avoid
1. Wasting Your Revive Early
Problem: Using your revive on minor deaths early in the game
Solution: Save your revive for critical moments when it can make the biggest difference
2. Playing Too Recklessly
Problem: Assuming the revive makes you invincible
Solution: Remember it’s a one-time use—play smart even with the safety net
3. Poor Positioning
Problem: Dying in dangerous locations where you can’t recover your items
Solution: Try to die in relatively safe areas where you can retrieve your inventory crate
4. Ignoring Helmet Benefits
Problem: Not utilizing the helmet compatibility feature
Solution: Always wear a helmet when available for extra protection
Advanced Tips from Expert Players
Lightning Rod Strategies
Strategic Placement
- Place Lightning Rods near your train or base before intentionally dying
- The lightning can be redirected to power up defenses
- Creates automated protection systems
Electrocutioner Synergy
- Drop your Electrocutioner before triggering death
- The lightning strike will recharge it completely
- Essentially gives you a free weapon recharge
Speed Running Applications
Calculated Deaths
- Intentional deaths can clear areas faster than fighting
- Use the revive as a tactical area-clearing tool
- Combine with speed-oriented equipment for record times
Resource Management
- Less need for healing items means more inventory space
- Can carry more offensive tools and resources
- Optimizes inventory efficiency for speed runs
Community Resources and Official Links
Official Dead Rails Resources
- Official Discord: Join the Dead Rails Discord – Real-time discussions and developer updates
- Official Twitter: @Dead_Rails – Latest announcements and patch notes
- Roblox Game Page: Dead Rails on Roblox – Official game page and updates
Community Resources
- Dead Rails Wiki: Fandom Wiki – Comprehensive game information
- Reddit Community: r/DeadRailsRoblox – Player discussions and strategies
Why These Resources Matter?
- Official Discord: Get real-time help from experienced players and direct developer communication
- Wiki: Stay updated with the most accurate and detailed game information
- Reddit: Discover community-tested strategies and meta discussions
- Twitter: Never miss important updates or patch notes
Frequently Asked Questions
Q: Is the Frankenstein class worth the 100 Bond cost?
A: For solo players and beginners, absolutely. The safety net and enemy-clearing lightning strike provide immense value. For experienced players who rarely die, it might be less cost-effective.
Q: Can I use the revive ability more than once per game?
A: No, the Frankenstein’s revive ability is strictly a one-time use per game run. After using it, you function as a basic class with no special abilities.
Q: Does the lightning strike damage all enemies equally?
A: The lightning strike damages most enemies in the area, but some boss-level or special enemies may take reduced damage or be immune. It’s most effective against standard zombies and weaker enemies.
Q: What happens to my items when I revive?
A: All your inventory and sack contents are safely dropped into a nearby crate. You can recover these items after revival, preventing total loss of equipment.
Q: Can I control when the revive triggers?
A: No, the revive triggers automatically upon death. You cannot choose to save it or activate it manually—it’s a passive ability that works exactly once.
Q: Is Frankenstein good for team play?
A: While primarily designed for solo play, Frankenstein can be useful in teams. The lightning strike can help clear enemies around teammates, and the self-revive reduces the burden on team support classes.
Q: How does Frankenstein compare to the Ghost class?
A: Frankenstein focuses on survival and enemy clearing through revive mechanics, while Ghost offers stealth and bullet dodge capabilities. They serve different playstyles—Frankenstein for aggressive safety, Ghost for stealthy avoidance.
Q: Can the lightning strike be used strategically with other game mechanics?
A: Yes! The lightning can recharge Electrocutioner weapons, be redirected by Lightning Rods for base defense, and can be used as an area-clearing tool when intentionally triggered.
Final Thoughts and Recommendations
The Frankenstein class represents one of the most interesting design choices in Dead Rails, offering a unique blend of risk management and offensive capability. While the 100 Bond cost might seem steep, the value provided by the guaranteed revive and enemy-clearing lightning strike cannot be overstated, especially for players who frequently venture into solo runs or challenging content.
Who Should Play Frankenstein:
- Solo players looking for extra security
- Beginners who want a safety net while learning
- Players who enjoy high-risk, high-reward gameplay
- Those who frequently die to overwhelming zombie hordes
Who Might Skip Frankenstein:
- Experienced players who rarely die
- Team players who prefer support classes
- Players on a tight Bond budget
- Those who prefer classes with multiple active abilities
The Frankenstein class shines brightest when used as intended—as a strategic tool that turns certain death into a tactical advantage. By understanding its strengths, limitations, and optimal use cases, you can transform this Halloween class into one of the most powerful tools in your Dead Rails arsenal.
Remember to bookmark this guide and check back regularly for updates, as Dead Rails continues to evolve with new patches and balance changes. The Frankenstein class may receive adjustments in future updates, so staying informed will help you maintain your competitive edge.
Happy railroading, and may your lightning strikes always clear the path to victory! ⚡