Arc Raiders Eyes In The Sky Quest Guide (September 2026)
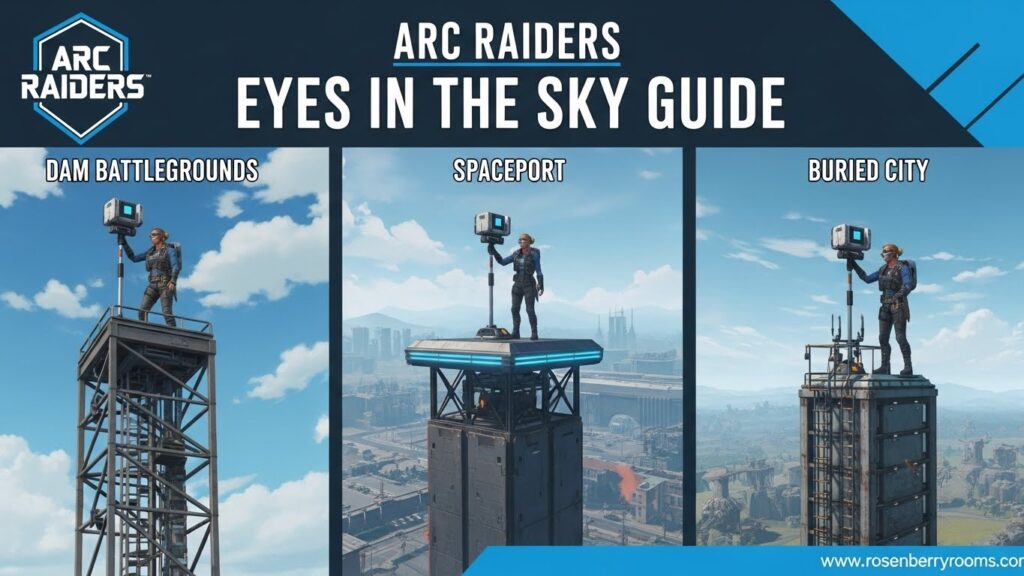
The Eyes In The Sky quest in Arc Raiders requires placing three LiDAR Scanners at the highest points of Dam Battlegrounds, Spaceport, and Buried City maps. You’ll need to navigate dangerous PVP hotspots, clear turret enemies, and use ziplines strategically to complete Shani’s surveillance mission. This comprehensive guide covers exact locations, step-by-step navigation, safety strategies, and expert tips to finish the quest efficiently.
Quick Reference
| Location | Installation Point | Required Equipment | Difficulty | Key Hazards |
|---|---|---|---|---|
| Dam Battlegrounds | Control Tower Roof | None | Hard | PVP players, turret enemies |
| Spaceport | Communications Tower | None | Easy | Exposed climbing, snipers |
| Buried City | Galleria Sign | Zipline (essential) | Medium | Precise jumping, ARCs |
Quest Overview and Preparation
The Eyes In The Sky quest represents one of Arc Raiders’ more elaborate early-game missions, requiring strategic planning across three distinct maps. Shani tasks you with deploying LiDAR Scanners to establish surveillance on ARC activities, placing you in some of the most contested locations across the Rust Belt.
Contents
Quest Rewards: Upon completion, you’ll receive 3x Tagging Grenades, 1x Vita Spray, and 5x Yellow Light Sticks – valuable items that significantly enhance your early-game capabilities, particularly the Vita Spray which offers superior healing compared to basic bandages.
Required Equipment: While the first two objectives can be completed with minimal gear, the Buried City location absolutely requires a zipline. Shani provides one at quest start, but bringing extras in your Safe Pocket is wise since zipline placement can be finicky.
Loadout Recommendations: Consider using a free loadout for Dam Battlegrounds and Spaceport objectives since extraction isn’t required. For Buried City, bring a budget build with Ferro armor protection against ARC threats. Always carry extra healing items and ammunition.
Dam Battlegrounds: Control Tower Installation
The Control Tower represents the most challenging objective in the Eyes In The Sky quest. Located in the center of Dam Battlegrounds, this red loot building attracts constant PVP activity and houses dangerous turret defenses.
Navigation Strategies
Primary Route (South Approach):
- Enter from the southern side of the Control Tower
- Locate exterior stairs and climb three flights to the main floor
- Proceed through the long outdoor hallway to the breachable door
- Clear any turrets above before ascending the zipline
- Navigate through corridors to the roof access stairs
Alternative Route (Red Lakes Elevator):
- Use the entrance near the Red Lakes elevator
- Breach the door at the tower’s base
- Navigate through the elevator shaft area
- Eliminate turret enemies before using the zipline
- Follow corridors to reach the roof access point
Combat and Safety Considerations
The Control Tower frequently hosts players attempting to access key rooms, making PVP encounters almost guaranteed. Before ascending any ziplines, thoroughly scan for turret enemies along the walls above – these can eliminate you instantly during transit.
Expert Tips:
- Call out “friendly, just questing” if you encounter other players to de-escalate tensions
- Watch for traps at zipline landing points, particularly near key room entrances
- Consider bringing smoke grenades to cover your movements during high-traffic periods
- Time your approach during off-peak hours to reduce PVP encounters
Installation Process
Once on the roof, locate the tripod in the east corner (some sources report left edge – verify both locations). The interaction prompt appears when close enough. After placing the scanner, immediately prepare for extraction or descent, as players often wait at the bottom expecting you to carry valuable loot.
Spaceport: Communications Tower Installation
The Spaceport objective offers the most straightforward installation process, though environmental hazards and exposure create unique challenges. This location requires completing 12 matches to unlock access to the Spaceport map.
Location and Access
The Communications Tower stands prominently on the eastern side of Spaceport, identifiable by its large metal structure and distinctive ladder system. This area sees less player traffic than other objectives, making it relatively safer for quest completion.
Installation Procedure
- Navigate to the eastern side of Spaceport
- Locate the Communications Tower beside Container Storage
- Hop the fence surrounding the tower base
- Climb the ladder attached to the tower structure
- Follow the walkway to the right to find the installation tripod
- Place the LiDAR Scanner and prepare for extraction
Safety Considerations
While easier than other objectives, the Communications Tower leaves you completely exposed during ascent. Snipers and long-range players frequently monitor this tower. If engaged, remember you can quickly slide down the ladder by pressing the Sprint button to escape dangerous situations.
Pro Strategies:
- Approach from cover and scan surrounding areas before climbing
- Consider night-time approaches for reduced visibility
- Bring counter-sniper equipment if expecting long-range engagements
- Have an extraction point planned before beginning the climb
Buried City: Galleria Sign Installation
The final objective requires precise zipline usage and careful navigation, making it the most technically challenging despite having fewer enemy threats. The Galleria building’s distinctive architecture and the need for accurate zipline placement test your movement skills.
Preparation and Equipment
Essential Items:
- Zipline (minimum 1, recommended 2-3 for backup)
- Safe Pocket storage for ziplines to prevent loss on death
- Healing items for potential fall damage
- Light sources for visibility in dark areas
Navigation to Galleria
The Galleria sits between Space Travel building and Dune’s End on the eastern side of Buried City. Look for the building with a large pillar featuring a distinctive symbol resembling a “Q” above it.
Access Routes:
- Interior Approach: Navigate through Galleria interior to roof access
- Southern Approach: Climb square structures south of Galleria, cross makeshift bridge to rooftop
Zipline Installation and Execution
This step requires precision and practice:
- Position yourself on the Galleria rooftop
- Move to the southeast corner near the distinctive pillar
- Cross using wooden planks jutting from the structure
- Aim your zipline at the upper portion of the Galleria sign (NOT the protective railing)
- Execute the zipline, preparing to jump slightly to land correctly on the platform
- Place the final LiDAR Scanner on the tripod
Critical Technical Notes:
- Placing the zipline too low (on railings) causes you to fall rather than reach the platform
- You may need to jump mid-transit to avoid overshooting the platform
- Fall damage can be substantial if you miss the landing
- A weapon case frequently spawns on this platform – check for valuable loot
Advanced Techniques
Zipline Mastery:
- Practice zipline placement in safe areas before attempting the objective
- The zipline arc matters – higher placement generally provides better approach angles
- Consider the wind direction and how it affects your trajectory
- Have backup ziplines ready in case of misplacement
Movement Optimization:
- Learn the exact jump timing for successful platform landings
- Practice the rooftop crossing routes to minimize exposure time
- Master the quick-draw mechanics for potential threats during installation
General Quest Strategies and Meta Analysis
Optimal Quest Order
While sources vary on required sequence, the recommended order based on difficulty and risk is:
- Dam Battlegrounds (Hardest First): Complete while motivation is high and PVP skills are fresh
- Spaceport (Easiest): Use as a recovery objective after challenging Dam Battlegrounds
- Buried City (Technical Final): Requires focused execution, best saved for last
Risk Management
PVP Mitigation:
- Choose off-peak hours for high-traffic areas like Control Tower
- Use free loadouts to minimize loss potential
- Establish friendly communication when encountering other players
- Have multiple escape routes planned for each location
Environmental Hazards:
- Always clear turret enemies before using ziplines or elevators
- Watch for trap placements at common transit points
- Prepare for fall damage during Buried City zipline usage
- Monitor ARC patrol patterns in each area
Efficiency Optimization
Time-Saving Techniques:
- Pre-position ziplines in safe areas for practice
- Learn the fastest routes to each objective
- Coordinate with squad members for security and efficiency
- Stack this quest with other objectives in the same areas when possible
Resource Management:
- Preserve ziplines for critical jumps only
- Use healing items strategically rather than reactively
- Maintain ammunition reserves for unexpected engagements
- Keep extraction points accessible for quick escapes
Community Resources and Official Channels
Official Resources
- Official Discord: discord.gg/arcraiders – Real-time community discussions and developer updates
- Official Website: arcraiders.com – Latest news, patch notes, and announcements
- Embark Studios Twitter: @EmbarkStudios – Developer updates and community highlights
- ARC Raiders Twitter: @ARCRaidersGame – Game-specific news and tips
Community Hubs
- Reddit Community: reddit.com/r/ArcRaiders – Player discussions, strategies, and troubleshooting
- Guides Subreddit: reddit.com/r/ArcRaidersGuides – Dedicated guide sharing and optimization
- ARC Raiders Wiki: arcraiders.wiki – Comprehensive game information and reference materials
Additional Learning Resources
For players seeking to improve their overall Arc Raiders experience, check out our Arc Raiders System Requirements Guide to ensure optimal performance, and visit our gaming section for more comprehensive guides and tips.
Frequently Asked Questions
Quest Requirements and Mechanics
Q: Do I need to carry LiDAR Scanner items for this quest?
A: No, the quest provides the LiDAR Scanners automatically. You only need to reach the installation points and interact with the tripods.
Q: Can I complete the objectives in any order?
A: While some sources suggest specific orders, you generally have flexibility. However, completing Dam Battlegrounds first is recommended as it’s the most challenging.
Q: Do I need to extract after each objective?
A: No, extraction isn’t required for individual objectives. You can return to base normally after each installation.
Technical and Equipment Questions
Q: What happens if I die during the quest?
A: You’ll lose any equipment not in your Safe Pocket. Quest progress is saved, so you can resume from the next objective.
Q: Can I buy additional ziplines if I lose the one Shani provides?
A: Yes, ziplines can be purchased or looted from various sources. Always keep extras in your Safe Pocket.
Q: Are there specific times when these locations are less dangerous?
A: Early morning hours and weekdays typically see less PVP activity. Monitor server populations for optimal timing.
Troubleshooting and Common Issues
Q: My zipline keeps missing the Galleria platform. What am I doing wrong?
A: Aim higher on the sign structure, not the railings. Practice in safe areas first, and consider jumping slightly during transit.
Q: The Control Tower turrets keep killing me on the zipline. Any solutions?
A: Clear all visible turrets before ascending. Use long-range weapons or grenades to eliminate them safely.
Q: Other players keep attacking me at these locations. How can I complete the quest peacefully?
A: Use voice/text chat to announce you’re questing, approach during off-peak hours, or bring squadmates for security.
Reward and Progression Questions
Q: Are the quest rewards worth the effort?
A: Absolutely. The Vita Spray provides superior healing, and Tagging Grenades offer significant tactical advantages in early-game content.
Q: Does this quest unlock any follow-up content?
A: Yes, completing Eyes In The Sky opens up additional surveillance and reconnaissance quests from Shani.
Q: Can I repeat this quest for additional rewards?
A: No, this is a one-time completion quest, but the skills learned apply to many other high-location objectives.
Conclusion and Next Steps
The Eyes In The Sky quest serves as a comprehensive introduction to Arc Raiders’ vertical gameplay mechanics and high-stakes navigation. Mastering these objectives prepares you for more advanced reconnaissance missions and improves your overall map awareness.
Key Takeaways:
- Prioritize safety and preparation over speed, especially at Control Tower
- Practice zipline mechanics in safe environments before critical attempts
- Leverage community resources for real-time updates on server conditions
- Maintain flexible loadouts to adapt to unexpected PVP encounters
Continued Improvement: After completing Eyes In The Sky, consider advancing to more complex quests like Straight Record, which builds on the navigation skills learned here. Regular practice with zipline usage and vertical traversal will significantly improve your overall Arc Raiders performance.
Stay updated with the latest Arc Raiders developments and community strategies through official channels. The meta evolves regularly, and maintaining awareness of new tactics and location changes will keep you ahead of the competition.
Bookmark this guide for quick reference during your quest progression, and share it with squad members to coordinate your Eyes In The Sky completion strategies. The Rust Belt awaits – good luck, Raiders!