All Bee Swarm Simulator Amulets Ultimate Stats Guide (September 2026)
Amulets in Bee Swarm Simulator are powerful accessory items that grant permanent passive buffs to players and their bees, significantly impacting your progression and honey production potential. There are 7 different amulet types available: King Beetle, Star (5 tiers), Ant (5 tiers), Moon, Shell (5 tiers), Stick Bug (4 tiers), and Cog (5 tiers). Each amulet provides unique bonuses ranging from increased capacity and convert rate to field-specific pollen boosts and special abilities. This comprehensive guide covers every amulet type, their requirements, stats, and optimal strategies for maximizing your gameplay in September 2026.
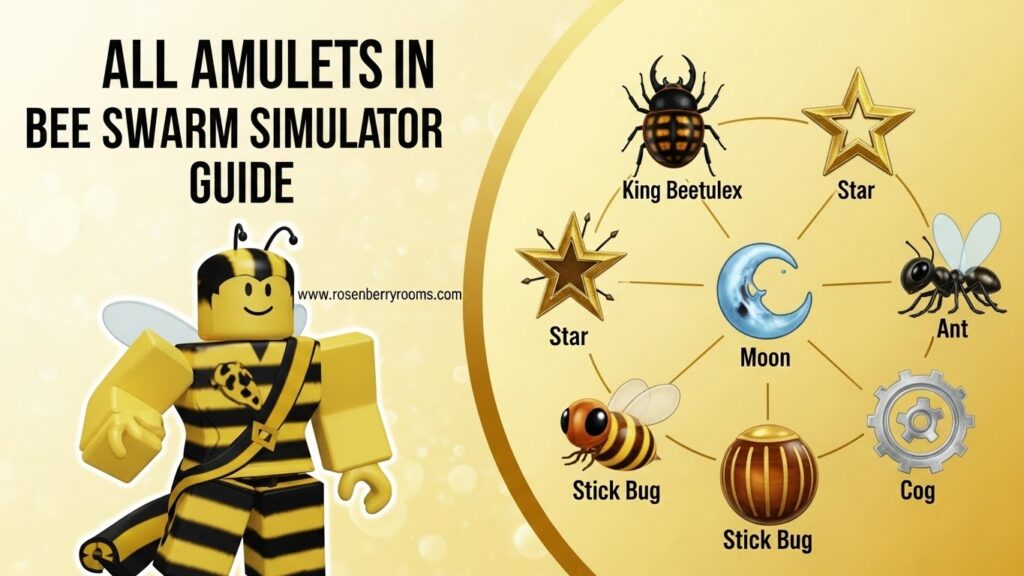
Quick Reference: All Amulet Types Overview
| Amulet Type | Source | Tiers | Key Benefits |
|---|---|---|---|
| King Beetle | King Beetle (1/7 chance) | 1 | Convert Rate, Field Pollen, Bee Attack |
| Star | Star Hall (purchase) | 5 | Capacity, Multiple Stats, Special Passives |
| Ant | Ant Challenge | 5 | Convert Rate, Critical Stats, Pollen |
| Moon | Moon Charm Generator | 1 | Capacity, Ticket Chance, Movement |
| Shell | Stump Snail | 5 | Goo, Defense, Field Pollen |
| Stick Bug | Stick Bug Challenge | 4 | Monster Respawn, Attack, Bond |
| Cog | Robo Bear Challenge | 5 | Bee Attack, Special Pollen Types |
Understanding Amulet Mechanics
Before diving into specific amulets, it’s crucial to understand the core mechanics that govern how these powerful items work in Bee Swarm Simulator.
Contents
How Amulets Work?
Amulets are accessory items that provide permanent passive buffs to the player and their bees. Unlike beequips that are worn by individual bees, amulets grant player-wide benefits that affect your entire hive and gameplay. Players can wear multiple amulet types simultaneously—one of each type—with each amulet appearing visually on your avatar at different positions depending on how many types you have equipped.
Key Amulet Systems
Replacement System: When obtaining a new amulet, players choose to keep their old amulet or replace it with the new one. This decision cannot be reversed, though other rewards are received regardless of choice. Always carefully consider your options before replacing an existing amulet!
Multiple Types: You can wear one amulet of each type simultaneously, allowing for powerful combinations of buffs across different categories.
Tier System: Most amulets have multiple tiers (typically Bronze, Silver, Gold, Diamond, Supreme), with higher tiers providing more and better buffs. The quality of randomly generated stats improves based on various factors like challenge scores or number of defeats.
Random Stats: Amulet buffs are randomly generated within specific ranges, meaning even amulets of the same tier can have different stat combinations and values.
King Beetle Amulet
The King Beetle Amulet is one of the earliest amulets players can obtain, making it an excellent starting point for building your amulet collection.
How to Obtain?
The King Beetle Amulet has a 1/7 chance of dropping upon defeating the King Beetle in the King Beetle Lair. Importantly, Loot Luck does not affect the probability or stats of this amulet. The quality of the amulet improves with consecutive defeats (up to 100 defeats), though improvement isn’t guaranteed each time.
Stats and Benefits
| Stat Type | Range | Notes |
|---|---|---|
| Convert Rate | +25% to +100% | Guaranteed |
| Bee Attack | +1 (possible) | General or color-specific |
| Field Pollen | +20% to +100% | Two of: Bamboo, Mushroom, Blue Flower, Clover, Strawberry |
Visual Position: If you have three or more amulet types, the King Beetle Amulet appears above your right shoulder. With two types, it’s above your left shoulder, and if it’s your only amulet, it appears above your head.
Strategy Tips
- Early Game Priority: This should be one of your first amulet goals due to its accessibility
- Farm Efficiency: Focus on defeating King Beetle repeatedly to improve amulet quality
- Stat Priority: Aim for high Convert Rate percentages and field pollen bonuses that match your preferred farming areas
Star Amulets
Star Amulets are among the most powerful and versatile amulets in the game, offering massive capacity bonuses and unique passive abilities at higher tiers.
Requirements and Tiers
| Tier | Gifted Bees Required | Cost | Special Features |
|---|---|---|---|
| Bronze | 5 types | 25M honey | x1.25 Capacity |
| Silver | 10 types | 50M honey | x1.5 Capacity |
| Gold | 20 types | 250M honey | x1.75 Capacity |
| Diamond | 30 types | 1B honey | x2 Capacity, passive chance |
| Supreme | 40 types | 10B honey | x2.5 Capacity, guaranteed passives |
Supreme Star Amulet Passives
The Supreme Star Amulet always has at least one passive ability, with a chance for double passives. Each passive grants a permanent x1.25 Capacity boost:
Guiding Star: Every 250th Boost Token summons a Guiding Star for 10 minutes, providing x2.5 Pollen/Capacity/Convert Rate for the owner and x1.25 for others. Pollinates 15 flowers every 15 seconds (+1 per gifted type).
Star Shower: Every 40th Boost/Mark Token causes 10 shooting stars to fall, collecting/converting pollen. Catching stars grants Inspire and converts pollen equal to 1M +200% Convert Total.
Gummy Star: 2% chance per gumdrop to summon Gummy Star (auto at 75 gumdrops). Grants x2 White Field Capacity and +10% Goo Conversion for 45 seconds.
Pop Star: Every 30th Boost Token summons Pop Star for 45 seconds (+10% Instant Blue Conversion, x2 Blue Pollen). Popping bubbles grows the star and extends Bubble Bloat.
Scorching Star: Every 30th Boost Token summons Scorching Star for 45 seconds (+50% Instant Flame Conversion, +5 Conversion Links, x2 Red Pollen/Convert Rate).
Star Saw: Every 3rd Stinger is free and summons Star Saw for 30 seconds. Circles around player, damaging enemies and gathering/converting pollen.
Strategy Tips
- Endgame Goal: Supreme Star Amulets are essential for endgame progression
- Passive Priority: Guiding Star and Star Shower are generally considered the most valuable passives
- Investment Strategy: Save honey for Star Amulet upgrades as they provide the best long-term value
Ant Amulets
Ant Amulets are obtained through the Ant Challenge and provide excellent Convert Rate bonuses, making them valuable for players focused on honey production.
Requirements by Score
| Tier | Score Required | Key Benefits |
|---|---|---|
| Bronze | 0-24 points | +15% to +35% Convert Rate |
| Silver | 25-49 points | +40% to +60% Convert Rate |
| Gold | 50-99 points | +60% to +80% Convert Rate |
| Diamond | 100-149 points | +80% to +90% Convert Rate |
| Supreme | 150+ points | +90% to +110% Convert Rate |
Stat Breakdown
Higher-tier Ant Amulets offer additional benefits:
- Critical Chance and Power: Available from Silver tier and above
- Bee Attack: Possible from Gold tier
- Movement Speed: Higher tiers can increase your movement speed
- Pollen Bonuses: White, Red, and Blue pollen bonuses scale with tier
Strategy Tips
- Challenge Optimization: Focus on achieving high scores in Ant Challenge for better amulet tiers
- Convert Rate Focus: These amulets are perfect for players prioritizing honey production
- Score Scaling: Supreme Ant Amulet stats continue improving up to 400 score points
Moon Amulet
The Moon Amulet is unique in that it doesn’t have a traditional tier system but instead improves with each generation.
How to Obtain
Created by spending 100 Moon Charms at the Moon Amulet Generator. Each generation increases the capacity bonus by 25,000 up to a maximum of 250,000 capacity.
Key Stats
| Stat | Range | Chance |
|---|---|---|
| Capacity | +25,000 to +250,000 | Guaranteed (progressive) |
| Ticket Chance | +1% to +5% | 1% chance |
| Movement Collection | +1 to +3 | 2% chance |
| Various Pollen Bonuses | Multiple options | Guaranteed one |
| Special Stats | Bond, Conversion, etc. | Guaranteed one |
Strategy Tips
- Moon Charm Farming: Focus on collecting Moon Charms from nighttime activities and special events
- Progressive Improvement: Each generation makes the amulet better, so consistency is key
- Ticket Focus: The Ticket Chance bonus, while rare, can be incredibly valuable for long-term progression
Shell Amulets
Shell Amulets are obtained by defeating the Stump Snail and are the only amulets that boost Goo and Defense.
Requirements by Defeats
| Tier | Defeats Required | Key Benefits |
|---|---|---|
| Bronze | 1 defeat | +1% to +2% Goo |
| Silver | 1 defeat | +2% to +4% Goo |
| Gold | 5 defeats | +5% to +8% Goo |
| Diamond | 7 defeats | +8% to +10% Goo |
| Supreme | 15 defeats | +11% to +15% Goo |
Unique Features
Goo Bonuses: Shell Amulets are the only source of Goo percentage increases, making them essential for players focusing on Goo-based strategies.
Defense Stats: Only Shell Amulets provide Defense bonuses, helping you survive longer in combat situations.
Field Specialization: All Shell Amulets include guaranteed Stump Field Pollen bonuses, plus additional field-specific bonuses.
Strategy Tips
- Snail Farming: The Stump Snail has a long respawn time, so plan your farming schedule accordingly
- Goo Focus: These amulets are perfect for players using Goo-heavy strategies or wanting to boost their Goo collection
- Defense Building: The Defense bonuses can be crucial for surviving tougher challenges
Stick Bug Amulets
Stick Bug Amulets are unique in that they can reduce monster respawn time, making them valuable for efficient mob farming.
Requirements
| Tier | Score Requirement | Stick Bug Level |
|---|---|---|
| Bronze | 1M score | Level 5 |
| Silver | 8M score | Level 8 |
| Gold | 20M score | Level 11 |
| Diamond | 50M score | Level 13 |
Special Features
Monster Respawn Time: Stick Bug Amulets are the only source of -% Monster Respawn Time stats, making them essential for efficient mob farming.
Bond From Battle: Higher tiers can increase Bond gained from battles, helping you level up your bees faster.
Attack Bonuses: These amulets can provide both general Bee Attack and color-specific attack bonuses.
Strategy Tips
- Challenge Mastery: Focus on improving your Stick Bug Challenge skills to reach higher score thresholds
- Mob Farming: The respawn time reduction makes these amulets perfect for players who farm mobs frequently
- Bond Optimization: The Bond From Battle bonuses can significantly speed up bee progression
Cog Amulets
Cog Amulets are obtained from the Robo Bear Challenge and offer unique bonuses not found on other amulets.
Requirements by Round
| Tier | Round Requirement | Special Unlocks |
|---|---|---|
| Bronze | Round 5+ | Basic bonuses |
| Silver | Round 10+ | Improved stats |
| Gold | Round 15+ | Glitched Drive access |
| Diamond | Round 20+ | Digital Bee access |
| Supreme | Round 25 | Robo Cub skin |
Unique Features
Special Pollen Types: Cog Amulets are the only source of Flame Pollen, Bubble Pollen, Event Bee Pollen, and Mark Ability Pollen bonuses.
Nectar Bonuses: Only Cog Amulets can boost Nectar collection.
Super-Crit Power: Exclusive Super-Crit Power bonuses are available on higher-tier Cog Amulets.
Shop Unlocks: Higher tiers unlock access to special items like Glitched Drives and the Digital Bee.
Strategy Tips
- Robo Bear Challenge: Focus on progressing through the Robo Bear Challenge to unlock higher-tier amulets
- Cog Collection: Collect more cogs during challenges to improve average stats
- Specialization: These amulets are perfect for players using specialized pollen types or wanting access to exclusive content
Amulet Progression Strategy
Understanding which amulets to prioritize and when can significantly impact your progression speed in Bee Swarm Simulator.
Early Game (Starting Out)
- King Beetle Amulet: Your first priority due to accessibility
- Bronze Star Amulet: Save honey for this as soon as you have 5 gifted bee types
- Bronze Ant Amulet: Participate in Ant Challenge regularly
- Bronze Shell Amulet: Start working on Stump Snail defeats
Mid Game (Established Players)
- Silver/Gold Star Amulet: Continue upgrading Star Amulets as priority
- Silver/Gold Ant Amulet: Improve Ant Challenge scores
- Moon Amulet: Start generating Moon Amulets for capacity bonuses
- Bronze Stick Bug Amulet: Begin Stick Bug Challenge progression
Late Game (Advanced Players)
- Supreme Star Amulet: The ultimate goal for most players
- Diamond/Supreme Cog Amulet: Essential for endgame content
- Diamond/Supreme Shell Amulet: Maximize Goo and Defense
- Diamond Stick Bug Amulet: Optimize mob farming efficiency
Hive Color Considerations
Your hive color should influence your amulet stat priorities:
Red Hive
- Priority Stats: Red Pollen, Red Bee Attack, Convert Rate
- Recommended Amulets: Star Amulet with Red passives, Ant Amulet for Convert Rate
Blue Hive
- Priority Stats: Blue Pollen, Blue Bee Attack, Bee Ability Rate (BAR)
- Recommended Amulets: Star Amulet with Blue passives, Cog Amulet for Bubble Pollen
White Hive
- Priority Stats: White Pollen, Convert Rate, Capacity
- Recommended Amulets: Moon Amulet, Star Amulet with White passives
Common Mistakes to Avoid
- Replacing Amulets Too Quickly: Always carefully consider whether new amulet stats are worth replacing your existing ones
- Ignoring Challenge Scores: Higher scores in Ant and Stick Bug challenges directly correlate with better amulet quality
- Neglecting Gifted Bees: Star Amulet progression depends entirely on discovering gifted bee types
- Forgetting About Synergy: Consider how different amulets work together for optimal results
Community Resources
Join these communities to stay updated on the latest amulet strategies and game changes:
- Official Discord: Join the official Bee Swarm Simulator Discord for real-time discussions and developer updates
- Reddit Community: /r/BeeSwarmSimulator for player strategies and experiences
- Official Wiki: Bee Swarm Simulator Fandom Wiki for detailed reference information
Frequently Asked Questions
What’s the best amulet in Bee Swarm Simulator?
The Supreme Star Amulet is generally considered the best amulet due to its massive capacity bonus and powerful passive abilities. However, the “best” amulet depends on your specific goals and hive composition.
How many amulets can you wear at once?
You can wear one amulet of each type simultaneously, meaning you can equip up to 7 amulets at once (King Beetle, Star, Ant, Moon, Shell, Stick Bug, and Cog).
Can you get amulets back after replacing them?
No, amulet replacement is permanent. Once you replace an amulet, you cannot get the old one back, so choose carefully!
Do amulets work in all situations?
Yes, amulets provide permanent passive buffs that work continuously, unlike temporary boosts or abilities that need to be activated.
What’s the fastest way to get good amulets?
Focus on high scores in challenges (Ant Challenge, Stick Bug Challenge, Robo Bear Challenge) and consistently defeating mobs (King Beetle, Stump Snail) for better amulet quality.
Are Supreme Amulets worth the cost?
For endgame players, Supreme Amulets are absolutely worth the investment due to their superior stats and unique abilities that significantly impact progression.