All Beequip in Bee Swarm Simulator Guide & What They Do (September 2026)
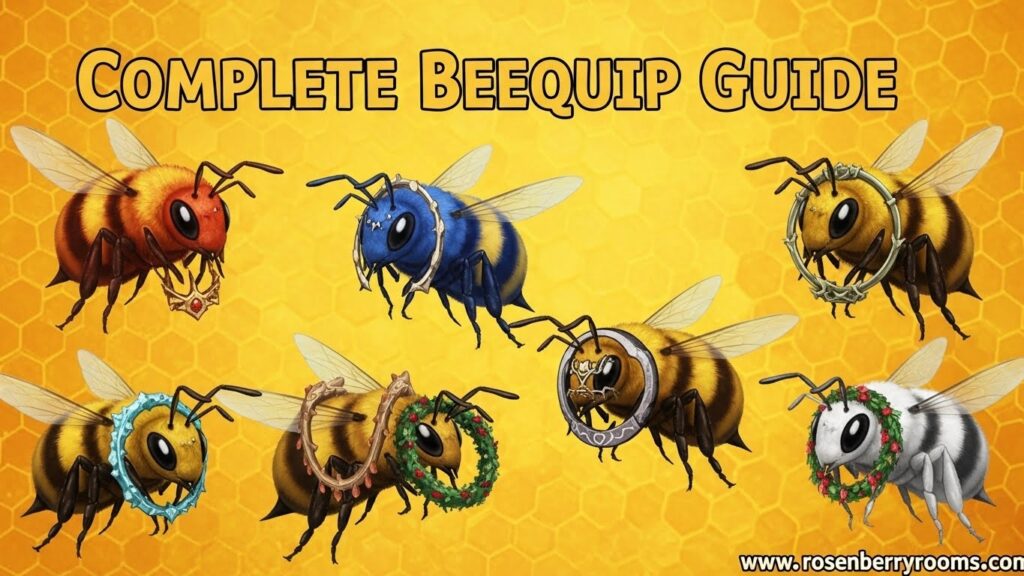
Beequips are special equipment items in Bee Swarm Simulator that bees can wear to enhance their individual stats and provide powerful hive-wide bonuses. With over 40 different beequips available, each offering unique stat boosts like increased gather amount, convert rate, attack power, and ability rate, understanding how to obtain, upgrade, and optimize these items is essential for maximizing your hive’s performance in honey farming, combat, and field efficiency.
Quick Reference: Beequip Overview
| Aspect | Details |
|---|---|
| Total Beequips | 40+ (Non-event + Beesmas) |
| Max Waxes Per Beequip | 5 |
| Potential Range | 0-5 stars |
| Storage System | Case (15 slots) + Storage (100 slots) |
| Main Sources | Planters, Dapper Bear’s Shop, Events |
What Are Beequips in Bee Swarm Simulator?
Beequips are wearable items that fundamentally transform how your bees perform and how your entire hive operates. When equipped to a bee, they provide two types of benefits: individual bee stat boosts and hive-wide bonuses that affect all your bees simultaneously. This dual-effect system makes beequips one of the most powerful progression systems in the game.
Contents
Core Beequip Mechanics
Every beequip follows these essential rules:
- Level Requirement: The bee must meet or exceed the beequip’s level requirement
- Color Restriction: Some beequips only work on red, blue, or colorless bees
- Equip Limit: Each beequip type has a maximum number allowed per hive
- Bee Restrictions: Certain beequips only work on specific bee types, rarities, or gifted bees
- Potential System: 0-5 star rating that affects base stats and upgrade quality
- Wax Upgrades: Can be enhanced using Soft Wax, Hard Wax, Caustic Wax, or Swirled Wax
Complete Beequip List and Rankings 2026
Based on community consensus and effectiveness analysis, here’s the comprehensive tier list of all beequips:
S-Tier Beequips (Essential for Endgame)
Puppy Antlers: Exclusive to Puppy Bee, provides x1.1 capacity boost and chance to spawn Gingerbread Bear. Essential for capacity-focused builds.
Festive Wreath: Festive Bee exclusive that provides ticket bonuses and honey generation. The Festive Marks ability enables 100% bomb conversion, crucial for red hives to prevent bag overflow.
Lump of Coal: High-risk, high-reward beequip that massively boosts bomb pollen but comes with heavy penalties. Best for specialized glass cannon builds.
A-Tier Beequips (Highly Recommended)
Snow Tiara: Excellent for blue and white hives due to massive capacity bonuses. Less useful for red hives but still valuable overall.
Beesmas Tree Hat: Provides critical chance and ability pollen boosts that work on any bee. The convert rate at hive bonus particularly benefits blue hives.
Toy Horn: The Melody ability can free up 2 hive slots by replacing Music Bees. While not S-tier due to limited ability pollen potential, still highly valuable for slot efficiency.
B-Tier Beequips (Solid Choices)
Icicles: Provides excellent attack bonuses (up to +12% with waxes). Most hives only need one, typically for Vicious Bee placement.
Paper Angel: White hive focused with gather and token-based support abilities. Reliable but not game-changing.
Snowglobe (Post-Beesmas): After Beesmas ends, this becomes valuable as the only source of the Cool Breeze buff.
Non-Event Beequips: Complete Breakdown
These beequips are available year-round through planters, challenges, or Dapper Bear’s shop:
Convert-Focused Beequips
Thimble (Level 3, Any Color, Limit 3)
- Stats: +Convert Amount, +%Convert Amount, Hive +%Convert Rate
- Best For: Early to mid-game conversion optimization
- How to Get: Dapper Bear’s Shop, Planters
Beret (Level 11, Blue Only, Limit 2)
- Stats: +Convert Amount, +%Convert Amount, Hive +Capacity
- Best For: Blue hives needing capacity and conversion
- How to Get: Blue Clay Planter, Planter Of Plenty
Attack-Focused Beequips
Thumbtack (Level 6, Red Only, Limit 2)
- Stats: +Gather Amount, +%Critical Power, +%Bee Attack
- Best For: Red hive combat builds
- How to Get: Red Clay/Heat-Treated Planter, Stick Bug Challenge
Demon Talisman (Level 13, Red Only, Limit 1, Requires Demon Bee with Mutation)
- Stats: +%Bee Attack (50-95%), +%Gather Amount (50-160%), +%Ability Pollen (50-160%)
- Best For: Endgame red hives with Demon Bees
- How to Get: Dapper Bear’s Shop, Heat-Treated/Pesticide Planter
Utility and Support Beequips
Charm Bracelet (Level 12, Legendary Only, Limit 1)
- Stats: +%Convert Amount, +%Critical Chance, +%Loot Luck, Hive +%Honey At Hive
- Best For: Legendary bee focused hives
- How to Get: Petal Planter (very rare), Dapper Bear’s Shop
Paperclip (Level 7, Rare/Epic Only, Limit 2)
- Stats: +%Bee Ability Rate, +%Ability Pollen, Hive +%Token Lifespan
- Best For: Ability-focused builds
- How to Get: Petal Planter, Blue Clay Planter
Beesmas Beequips: Seasonal Powerhouses
These beequips are only obtainable during Beesmas events but remain usable year-round:
Top-Tier Beesmas Beequips
Elf Cap: Convert rate and hive honey bonuses make this valuable for all hive types.
Single Mitten: Bomb pollen and capacity increases, though considered lower-tier due to limited utility.
Warm Scarf: Energy and field capacity boost, useful for extended farming sessions.
Peppermint Antennas: Ability rate and movement speed support, excellent for active players.
Beesmas Top: Critical chance and ability rate boost, solid all-around performer.
Specialized Beesmas Beequips
Pinecone: Pine Tree Forest pollen and capacity bonuses, field-specific utility.
Icicles: Blue Bomb and monster respawn bonuses, excellent for blue hives.
Snow Tiara: High-end blue and white hive beequip with massive capacity bonuses.
Reindeer Antlers: Puppy Bee exclusive support beequip with unique gingerbread mechanics.
Beequip Storage and Management System
Understanding the storage system is crucial for efficient beequip management:
Beequip Case
- Starting capacity: 5 slots
- Maximum capacity: 15 slots
- How to expand: Complete Dapper Bear’s quests and Bee Bear’s Beesmas 2020 quests
- Function: Only beequips in the case can be equipped to bees
Beequip Storage
- Starting capacity: 10 slots
- Maximum capacity: 100 slots (costs 123,500 tickets total)
- Location: Near Dandelion Field or Public Sticker Board in Hive Hub
- Function: Long-term storage, but beequips here cannot be equipped
Inbox System
- Capacity: 25 most recent beequips
- Time Limit: 48 hours before automatic deletion
- Purpose: Temporary holding area when case and storage are full
Wax Upgrade System: Complete Guide
Waxes are essential for maximizing beequip potential. Each beequip can receive up to 5 waxes, and strategic waxing can dramatically improve performance.
Wax Types and Effects
Soft Wax (Upgrade Value: 1)
- Success Rate: 100%
- Effect: Guaranteed small stat improvement
- Best For: Safe, reliable upgrades
- How to Get: Crafting, sticker rewards, quests
Hard Wax (Upgrade Value: 2)
- Success Rate: 50%
- Effect: Medium stat improvement
- Best For: Balanced risk/reward upgrades
- How to Get: Craft with 3 Soft Waxes, 33 Bitterberries, 33 Royal Jellies
Caustic Wax (Upgrade Value: 4)
- Success Rate: Low chance, destroys beequip if failed
- Effect: Major stat improvement, unlocks special stats
- Best For: High-risk, high-reward optimization
- How to Get: Rare drops, advanced crafting
Debug Wax (Upgrade Value: 4)
- Success Rate: 100%
- Effect: 4 upgrade rolls, quest exclusive
- Best For: Guaranteed major improvements
- How to Get: Quest rewards only
Swirled Wax (Upgrade Value: 0)
- Effect: Rerolls base stats only
- Best For: Fixing poor stat distributions
- How to Get: Craft with 3 Hard Waxes, 6 Purple Potions, 3,333 Royal Jellies
Wax Strategy Guide
- Early Game: Use Soft Wax for guaranteed improvements
- Mid Game: Start incorporating Hard Wax for better returns
- Late Game: Use Caustic Wax on duplicate beequips for maximum potential
- Stat Fixing: Use Swirled Wax when base stats are unfavorable
Advanced Beequip Strategies
Hive Color Optimization
Red Hives: Focus on attack, bomb pollen, and instant conversion beequips
- Top choices: Demon Talisman, Thumbtack, Festive Wreath
- Strategy: Maximize combat and red field efficiency
Blue Hives: Prioritize capacity, conversion, and blue field bonuses
- Top choices: Snow Tiara, Beret, Icicles
- Strategy: Build massive capacity for extended farming
White Hives: Balance gather amount, ability rate, and white field bonuses
- Top choices: Paper Angel, Charm Bracelet, Warm Scarf
- Strategy: Optimize for consistent honey production
Bee Type Synergies
Gifted Bees: Use beequips that specifically boost gifted bee stats
- Pink Shades: Massive super-crit bonuses for gifted common/rare bees
- Smiley Sticker: Energy and mark duration improvements
Legendary Bees: Charm Bracelet is essential for legendary-focused hives
- Provides loot luck and convert rate bonuses
- Synergizes with legendary bee abilities
Mutation Bees: Certain beequips require specific mutations
- Bubble Light: Requires energy mutation
- Demon Talisman: Requires Demon Bee with mutation
How to Obtain Every Beequip?
Primary Sources
Planters: Most common source, especially in Dandelion Field
- Higher tier planters = better beequip drop rates
- Petal Planter has highest chance for rare beequips
Dapper Bear’s Shop: Reliable source for basic beequips
- Stock rotates regularly
- Prices vary by beequip rarity
Challenges and Events: Limited-time sources for exclusive beequips
- Stick Bug Challenge: Attack-focused beequips
- Ant Challenge: Utility and support beequips
Farming Strategies
- Mass Planter Farming: Fill multiple fields with high-tier planters
- Challenge Completion: Regularly complete all available challenges
- Event Participation: Don’t miss limited-time Beesmas and special events
- Trading: Engage with community for rare beequip trades
Common Mistakes to Avoid
- Wasting Waxes: Don’t use high-value waxes on low-potential beequips
- Poor Storage Management: Regularly organize your beequip case and storage
- Ignoring Color Synergy: Using red-focused beequips on blue hives
- Neglecting Bee Requirements: Trying to equip beequips on incompatible bees
- Overlooking Hive Bonuses: Focusing only on individual bee stats
Community Resources and Official Channels
Official Sources
- Discord Server: discord.gg/bee (970,000+ members)
- Developer Twitter: @OnettDev for official announcements
- Official Website: beeswarm.com for news and updates
Community Resources
- Bee Swarm Simulator Wiki: Comprehensive game knowledge base
- Reddit Community: r/BeeSwarmSimulator for player discussions
- Trading Communities: Various Discord servers for beequip trading
Why These Resources Matter?
The official Discord provides real-time updates and direct developer interaction. Reddit communities offer player-tested strategies and troubleshooting help. The wiki serves as the most comprehensive reference for detailed mechanics and data.
Frequently Asked Questions
What is the maximum number of beequips I can have equipped?
Each beequip type has its own equip limit, ranging from 1-3 per hive. The total varies based on which beequips you choose to use.
Can I remove waxes from beequips?
Yes, using Turpentine will remove all waxes from a beequip, resetting it to its original base stats.
Do Beesmas beequips disappear after the event?
No, once obtained during Beesmas, these beequips remain usable year-round, though they can only be obtained during the event.
What’s the best beequip for beginners?
Thimble and Sweatband are excellent starting beequips due to their availability and useful conversion/energy bonuses.
How do I increase my beequip case slots?
Complete Dapper Bear’s quests and Bee Bear’s Beesmas quests to expand from 5 to 15 maximum slots.
Is it worth using Caustic Wax?
Only on duplicate beequips or when you’re willing to risk losing them for potential massive upgrades.
Expert Tips for Maximum Beequip Efficiency
- Plan Your Hive Strategy: Choose beequips that complement your hive color and bee composition
- Prioritize High-Potential Drops: Always check potential before investing waxes
- Balance Individual vs Hive Bonuses: Some beequips offer better hive-wide effects than individual stats
- Stay Updated: Follow official channels for new beequip releases and balance changes
- Engage with Community: Learn from experienced players and stay current with meta strategies
This comprehensive guide covers everything you need to know about beequips in Bee Swarm Simulator. From basic mechanics to advanced optimization strategies, you now have the knowledge to build the most powerful hive possible. Remember that the meta evolves with updates, so stay connected with the community and official sources for the latest beequip strategies and discoveries.
Bookmark this guide and check back regularly for updates as new beequips are released and balance changes occur. Your journey to bee swarm mastery starts with proper beequip optimization!